Five inches square, that's some beef. You won't have to worry about it moving around. Sorry to here of all your interruptions. I thought you forgot us. Keep us posted.


 Member
Five inches square, that's some beef. You won't have to worry about it moving around. Sorry to here of all your interruptions. I thought you forgot us. Keep us posted.
Member
Hey - is that a Walker-Turner DP I spy in the tail-end view of your bench? I believe I own the same model. They're about as heavy as your bench will be, aren't they?
[OP]
Member
Yup -- that's a Walker-Turner 900 series drill press. I also have a Walker-Turner 16" bandsaw. They are just great.
Member
B.O.R.G. - Big Orange Retail GiantOriginally Posted by Walter Lay

 Member
I can see I need to build a better woodworking bench and I like what your doing here.
I have a question. Wouldn't it be easier to cut peg holes in the timbers before they are glued together? I'm not even sure that's the right name for them. Peg holes, as inn square holes you slip a peg into on the bench and then put pegs in holes on the moving part of the vice in order to hold large and odd shaped parts.
I also do some black smith work and on the anvil, it's called a "hardy hole". Used to hold jigs and gimmicks commonly called hardies.
Christopher
 In Memoriam

they called Mortices and Auxilary Anvil Tools.
Jr.
Hand tools are very modern- they are all cordless
NORMAL is just a setting on the washing machine.
Be who you are and say what you feel... because those that matter... don't mind...and those that mind...don't matter!
By Hammer and Hand All Arts Do Stand
In Memoriam
The little round hole is a Pritchell Hole, A Pritchell is the tool used to make or refine the oblong nail holes in a Horse Shoe. Auxiliary tools that go in the Hardy Hole are referred to as Bottom Tools, and their other half with handles held by the Smith are called Top Tools. JSUWK
Hand tools are very modern- they are all cordless
NORMAL is just a setting on the washing machine.
Be who you are and say what you feel... because those that matter... don't mind...and those that mind...don't matter!
By Hammer and Hand All Arts Do Stand
[OP]
Member
I think you mean bench dog holes? Anyway, yes, it would have been easier to cut them in the edge of one of the timbers before gluing them up. However, I'm building a Roubo style bench, which doesn't have a tail vice. It uses holdfasts and plane stops for work holding instead, so I don't need the bench dogs.
If I decide to retrofit a tail vice, I could always just drill 3/4" holes and use round bench dogs instead of the square ones.
Member
Thanks, Harry. Yeah, the Pritchell Hole. I couldn't think of that word. I only been workin' the anvil for just a few years. Tuning up to make me some slicks and gouges.
Wilbur, Now you say it, bench dog holes is exactly what I meant. I've heard the term bench dogs before. Thanks for making the penny drop.
I'll be interested to see how you use your bench.
Christopher
[OP]
Member
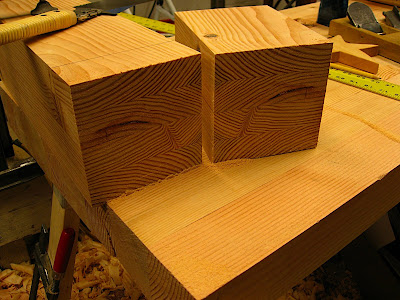
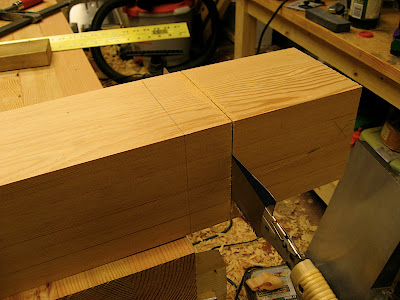
I got the legs cut down to size last night. I took some photos showing how I did this, because it shows why I like using Japanese saws so much.
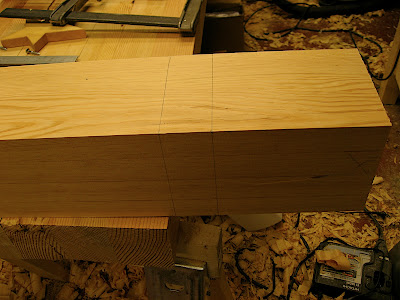
These legs are about 5-1/4" square, and I'm using a 270 mm single edged Japanese saw with a disposable blade. This saw is probably a bit too small for this type of cut, but it was the biggest one I had.
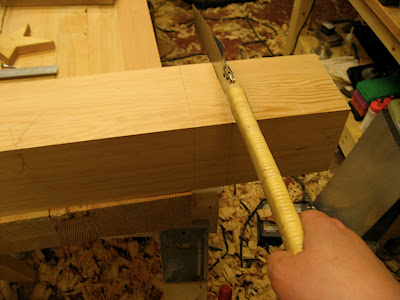
First, mark the lines for the cut.
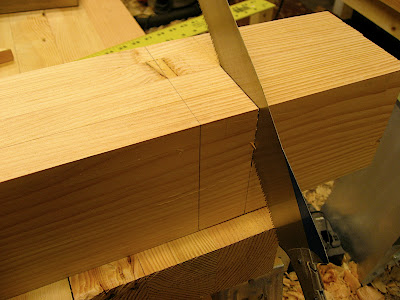
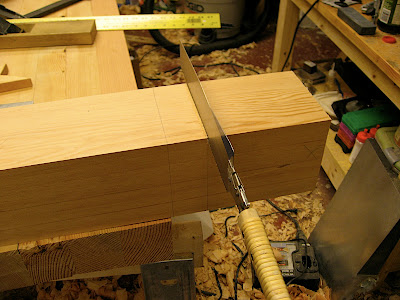
There are two ways that I've made this cut. The first way is to make a cut, going around the leg as you go. I start the cut on the near corner of the leg, and saw, trying to hit both lines at once.
When I get about halfway down, I rotate the leg so that the part I was cutting is away from me. Then I saw along the top line, using the kerf as a guide.
Sawing straight across is very easy, as the pull cut action automatically tenses the blade. Some people complain that the pull cut also throws sawdust on the line, obscuring it. This is true, but once the cut is started, I am no longer looking at where the saw is cutting. Instead, I'm looking at where I want to end up. Remember, the pull action will keep the saw straight.
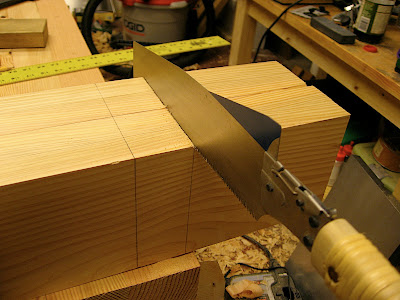
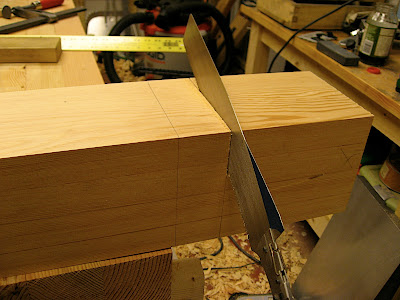
Then, I angle down the front of the leg. Again, I am looking at where I want the cut to end.
I continue this around the leg, and eventually you finish cutting through the middle.
The advantage of this method is that you can completely support the piece on the table, since you aren't cutting straight through the piece. Instead, you're going around the perimeter, eventually cutting through the middle. The downside is that if you look closely at the cut surface, you can see that you came at different angles, and it's hard to leave a perfectly smooth cut surface. Since this will eventually be tenons, I don't really care.
I have to split this post into two parts, due to the number of pictures.
[OP]
Member
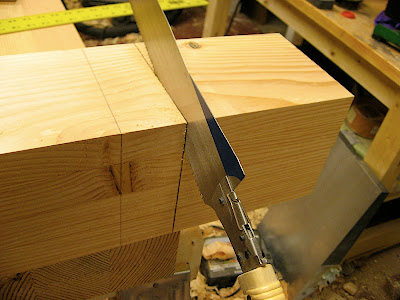
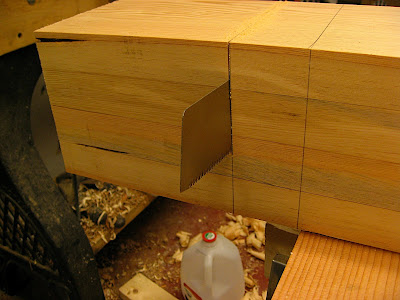
The second way is the one that I use more often. Here I start at the far side of the line, and saw across the top.
Then, I continue down the side, eventually cutting all the way through.
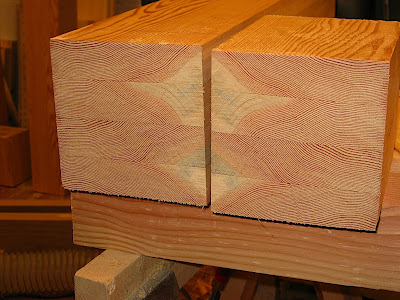
Again, I'm just looking at where the cut will end, not where the saw is actually cutting. Since the saw is under tension while cutting, it's easy to follow a straight line. Here's the back side of this cut. I didn't look at this side at all until I took this picture.
Not bad, if I do say so myself. Eventually you'll cut all the way through.
The advantage with this technique is that the sawn surface is smoother, since you're coming at it from one direction. The downside is that it takes a little practice to get the technique down. Also, since you're going straight through, the cutoff needs to be supported as you get to the end of the cut, which was a little difficult due to the size of the cutoff. But once you have the technique down, it's like riding a bike. And just to be clear, I don't think I have any particular talent at sawing. I do think using a Japanese saw is this easy.
Besides, my understanding that the real way to do this is to start at the top near corner and cut straight through. I'm not that good.
Next is cutting the tenons.
 Member
I will bet you are glad you didn't have 8 legs to cut! Your posts on this project are interesting - keep them coming. And good luck in your progress.
Doug, the "Wood Loon"
Acton, MA
72, slow road cyclist, woodworking dabbler, tool junkie , and bonsai enthusiast.
Now, if I could just stay focused longer than a few weeks...
[OP]
Member
To paraphrase the Thing, it's mortising time!
So my modifications to Chris Schwarz's Roubo bench plans included making a bunch of 1" wide mortises for the stretchers, and to set the legs into the top. After trying a few different methods, I thought I'd show how I wound up making these things.
The mortises for the leg stretchers are going to be 1" wide by 3-1/4" long by 2-1/8" deep. To make a mortise 1" wide, you need a 1" mortise chisel. Here it is, next to my normal sized 1/4" mortise chisel.

Now that's a mortise chisel!
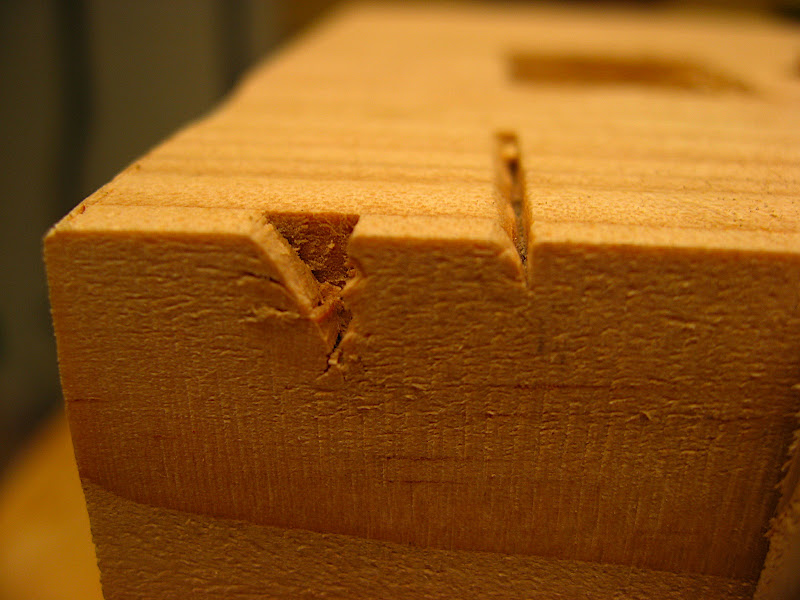
Now, I've been chopping 1/4" mortises by hand without much problem, and I thought it was pretty quick work. To my surprise, after making some practice runs, it seemed that my 1" mortise chisel was cutting much more slowly. I couldn't figure out why that would be so -- after all, bigger is better, right? It took me a while, but I finally realized that since this chisel is 4 times as wide, the force from the hammer is going to be spread out over a wider area, leading to less penetration. Here's a little experiment I did to prove this to myself. I took a piece of wood, and made a mortise chop with each chisel, with the same number of hammer blows. Then I sawed the cuts in half to get a look at the cross section. You can clearly see that the wide chisel won't penetrate to the same depth as the narrower chisel.
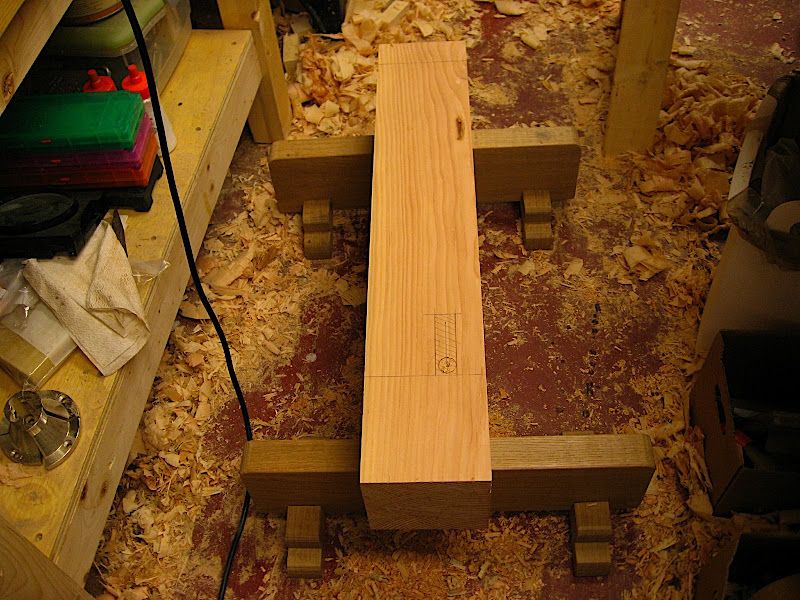
So now I had some perspective on how my big mortise chisel was going to perform, and learned to have some patience. Here's the layout.
And here's my secret weapon for making mortises.
This is a pair of low horses. By putting the workpiece on these, I can sit and chop the mortises. Since I'm sitting on the workpiece, I can straddle it, which means that I don't have to twist my body and strain my lower back leaning over a workbench, and making sure that the chisel is straight is easy. Also, sitting on the workpiece makes the ergonomics of pounding with a hammer much better.
(Splitting this post in two because of the silly 10 image limit.)
[OP]
Member
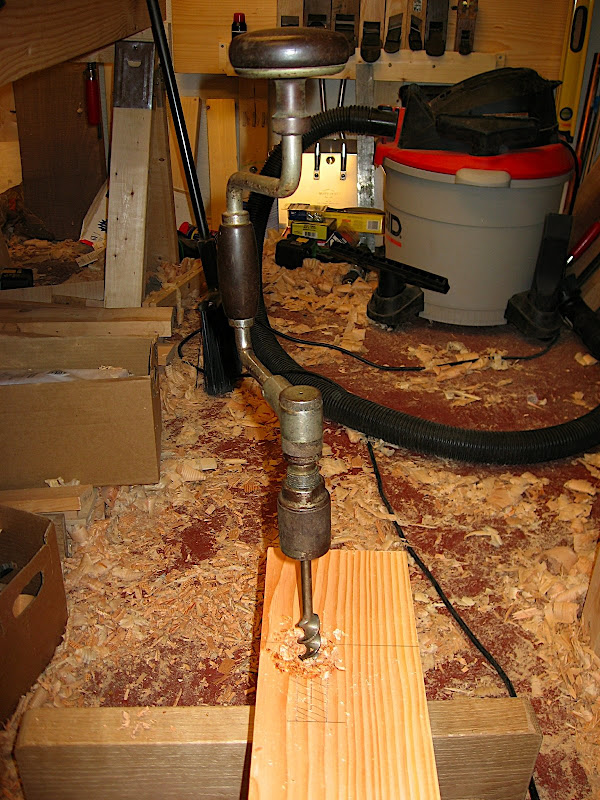
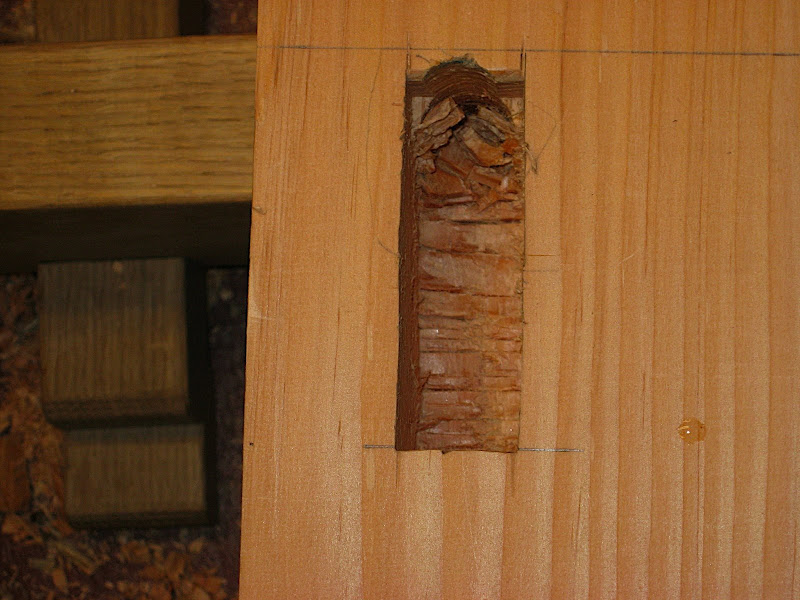
The first thing I do is drill a hole towards one end of the mortise. The line in the middle of the mortise is centered, to help me with locating the drill bit. I made a mark on the drill bit so that I knew when I had drilled a hole 2-1/8" deep or so.
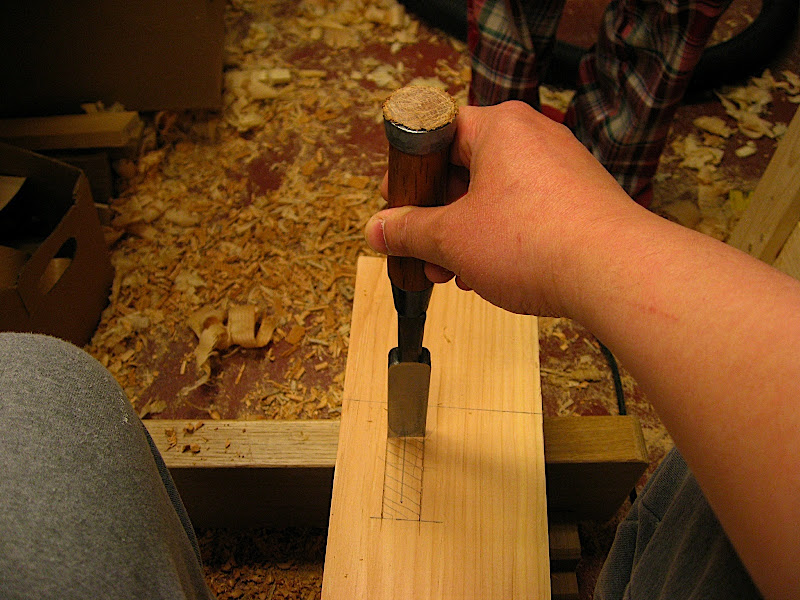
Then I start chopping. As I mentioned above, sitting on the workpiece with the mortise between my legs makes holding the chisel straight very easy.
The hole I drilled gives the chopped waste a place to go. The first few chops are mainly to get the walls of the mortise straight. Here's what it looks like after the first few chops.
Note the fancy mortising hammer!
The bevel of the chisel is facing the drill hole. I tend to do 8-10 hammer blows, and then wiggle the mortise chisel to break the chips free, then hit the chisel again 8-10 times. I'm not really pounding away with the hammer. My guess is that I'm hitting the chisel with about 75% of the force that I would use if I was hammering a nail. You don't need the hammer blow to be forceful -- if there is an issue with penetration, sharpening the chisel is better. What you want is the hammer blow to be controlled, because at this point it's more important to make sure that the walls of the mortise are straight.
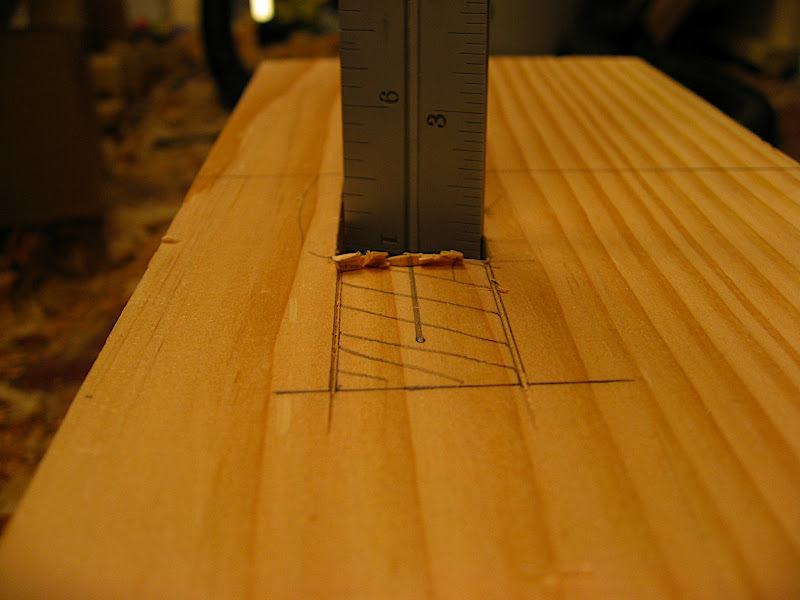
At some point it will get difficult, since even though I have a drill hole that the waste can go into, it's not completely the width of the chisel, so then I stop. As I work back along the mortise, I start the next set of chops about 1/8" back.
And this is where I'm at after 4 minutes of chopping. It may not be completely clear from the photo, but I'm already 1" down.
Now, I'll go back over the section I've worked on, and chop down until I'm at the depth that I want. This takes about 4 minutes as well.
At this point, I have a decently sized section of mortise cut down to full depth. This makes chopping the rest of the mortise really easy. I move back about 1/8" at a time. Again, I do 8-10 hammer blows, then wiggle the chisel to break the chips, chopping all the way down. I used a Sharpie to mark on the side of the chisel so that I know when I've hit bottom. Here you can really whale away on the hammering, since the walls of the mortise are already established. I keep going until I hit the end of the mortise. This takes me about 5 minutes.
Then it's just a matter of cleaning up the other end. Here I'll reverse the chisel so that the bevel is facing me. A little more work, and I'm done.
Total time, about 15 minutes. Not bad, I'd say. My first mortise took me about half an hour. I'm definitely getting faster with practice.
Now, I'm sure that using a mortising machine would be faster, but there isn't a 1" wide mortising bit that I know of. So with a mortising machine I'd have to make one run along one side of the mortise, and another along the other side, and then waste out the middle. Over the several mortises that I need to make for this workbench, I'm sure some amount of error will creep up. This way I know all my mortises are the same width as my chisel. In addition, I have to make mortises in the underside of my workbench top, and there's no way I'm getting the benchtop in a mortising machine.
One thing is for sure -- next time I make some more normal sized 1/4" wide mortises, it's going to go a lot faster.
Hope that was entertaining!
Contributor
Wilbur:
Thank you for the thread, I am getting ready to start my own adaptation of the Roubo, and I learn a lot from these types of threads. I do have a question:
I know Schwarz recomends SYP for a bench, but neither the Lowes nor the HD in my area carries any. But my HD does have Douglas Fir. I have read conflicting opinions on using Douglas Fir for a top. What persuaded you to use Douglas Fir?
I know Scwarz seems to think it will work fine, so maybe that should be enough. He has spent a lot more time thinking about this subject than I have,
 Posting Permissions

 Reply With Quote