Posts us a picture of your "cabinet"......Since the cabinet is heavy, you might be better off making it free standing with maybe some short legs.....?Originally Posted by Karen Wagner


 Member
Posts us a picture of your "cabinet"......Since the cabinet is heavy, you might be better off making it free standing with maybe some short legs.....?
.
.
.
Women are like phones. They love to be held and talked to, but if you press the wrong buttons you'll get disconnected!
* * * *
Life is one fool thing after another whereas love is two fool things after each other
Member
I thought doing a quick shop tour / introduction thread would be a good way to say Hi to the fine folks here, then I see shops like this. You folks must own brooms or something...
Member
Can't wait until we start the construction on the inside of our shop building, it's gonna be sweet. Don't worry, when the time comes I will create a thread and post pictures so you gentleman and ladies can gawk at them just like I like to come on here and do!
Last edited by David Weiser; 03-09-2009 at 11:37 PM.
Member
Okay, sorry about the old pics. I have so much more going on in my shop right now I am afraid to whip the camera out in there for fear of me finding another project I need to do, like finish the projects I have and do some cleaning!
Once you see the pics, a lot of you guys will recognize my shop, and know who I am elsewhere. (I did not want to use my real name on a forum, but oh well...)
My new to me Ryobi BT3100 table saw...
The wide table kit and shop built legs...
My shop built tall router accessory fence.
The Wet / Dry vac dust collection system / Thien Cyclone and stacker.
The Ryobi planer with shop built in feed / out feed tables.
My modded HF band saw. This thing has Accura Micro Adjustable Roller Bearing blade guides, a Harbor Freight riser block kit, Craftsman Professional fence (mounted rearward to clear the miter slot and not in this pic), Timberwolf blades, and soon to have upgraded dust collection, and a Grizzly GO555 tension release with Cobra Coil. (Cheap, and free for those parts, a friend couldn't figure out how to get his saw apart to put the cobra coil on...)
My workbench, and wall storage...
My Ridgid Oscillating sander...
Since these pics have been taken, the old grinder has been replaced with a new Ryobi with a light, and actual tool rests, a woodworking vise was put in the bench, and a Harbor Freight 2HP Dust collector, a Wynn 35A filter, and a mess of hose, and 4" S&D pipe and fittings have made their way into my shop... Likewise so has a LARGE volume of fencing material, a mostly finished Kitty condo, 4 various stages of comletion step stools, and a what was I thinking project that can best be described as an odd shaped box. (Dovetail practice gone really wrong in pine.)
Also for those that recall my old router cart with the wolfcraft table from elsewhere, that is living on in a friend's garage taht is slowly turning into a workshop as well... The only thing I miss about that table was the miter slot for hanging a featherboard off of...
I have some big plans for the shop. The largest of those plans is to build a dedicated building, and move the shop out there. Due to the size of my lot, and the fact I still want a back yard, The largest I can go is 12x20... But finances, and agreement with the HOA and all will prove out as to what I end up with...
[OP]
Member
My shop floor is concrete slab with sawdust. Just started adding shavings as well thanks to a Low Angle Jack purchase.
BTW - clean tables are gone already - cleaning planes and old C-clamps up, Jet slow sharpening, and building a bookcase.
Made 2 5/8" crown moulding for the first time this week on the Jet 13" P/M.
Glad its my shop I am responsible for - I only have to make me happy.
 Member
Hi Mike
WOW ! What a shop, I'm a bit green. I am preparing to build a version of Norm's (New Yankee) Miter Bench and Storage system. I too own a Hitachi miter saw (12" duel compound slider) I could use some direction concerning the dimensions of the bench top and the area that the saw sits in. What are you doing for dust collection? Is the space behind the bench fence open to the floor or does the bench top extend to the wall? Are you still able to extend the flip fences? If you could provide a few additional pic's that would be great. I haven't had much opportunity to use the saw yet beyond a few test cuts, I am interested in your thoughts pro and con. Thanks in advance for any assistance you are willing to provide.
[OP]
Member
Hi Nick!
Man, what a difference in even how my shop has changed since Feb! Most noteably was the edition of a new laguna BIG shaper and the build out of a knock down paint booth for spraying nitro pre cat lacquer. i also doubled my Jorgensen parallel clamps as a guy was moving and I bought 18 more so now need space for a lot of Tradesman F clamps. Going to do the second row hinge design I believe - copy some ideas I have seen here for clamp racks while incorporating the shopnotes design I have now. The jorgys were so cheap I could not pass them up but I really am not using any individual clamp as much because I use the JLT clamp rack whenever possible. It is too handy to just set up and use. All panel glue ups go in it and the pneumatic flatner makes each glue up about perfect. Only slight clean up is necesaary for glue squeeze out.
The lack of inclusion of dust collection on the Hitachi saw station really is a kind of a sore spot on its design. The back does go to the floor. The width of the table top I made (where the saw sits on) to fit the stand I had, really no magic there. Also the width of the saw tables (wheer the wood sits)were set by the width of the melamine I bought from Menards and by the requirements of the Kreg fence design. I built it as large as the melamine pieces would allow. The opening is just the width of the saw. I will add a hood of some kind for DC.
I will most likely copy some of the other designs I have seen here using hinged Melamine to create a box that has doors that open/close to allow bevel and miter positions of the saw. It will have a DC hose/pipe at the bottom of some kind with an attachment at one of the ends of the stand.
Here is how I did it.
I had a table top, I set the saw on it, built the side tables (make sure the height is perfect for the bed of the saw) specific to the Kreg extension neds and the height of teh saw for the table beds, set them next to the saw, aligned everything perfectly with a straight edge, clamped the saw in place, marked the table for drilling mounting holes for the saw, drilled them (moved saw and tables first), mounted saw with bolts, checked alignment again and placed tables again using straight edge, mount side tables with screws.
So far I have not added the table extensions as I use my second saw for and super long cuts that are needed. It is on a Bosch T4b mobile stand. They could be easily made by making them slip into the open ended box ends of the tables.
Shop has a bit of dust red oak in it right now. DC for the new shaper needs improved. Raising panels in one pass is dust chip intensive and my 4" neck down from 120mm is not working so well for that. Most other shaping activities like cope and sticking the DC works well. That and using the chop saws!
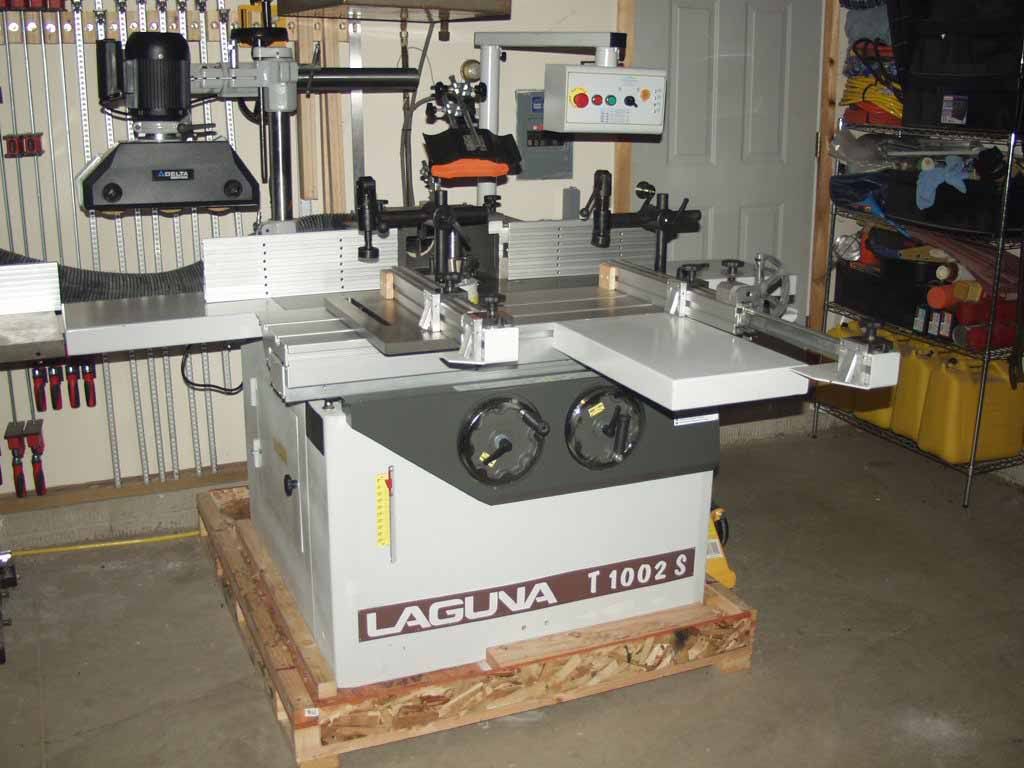
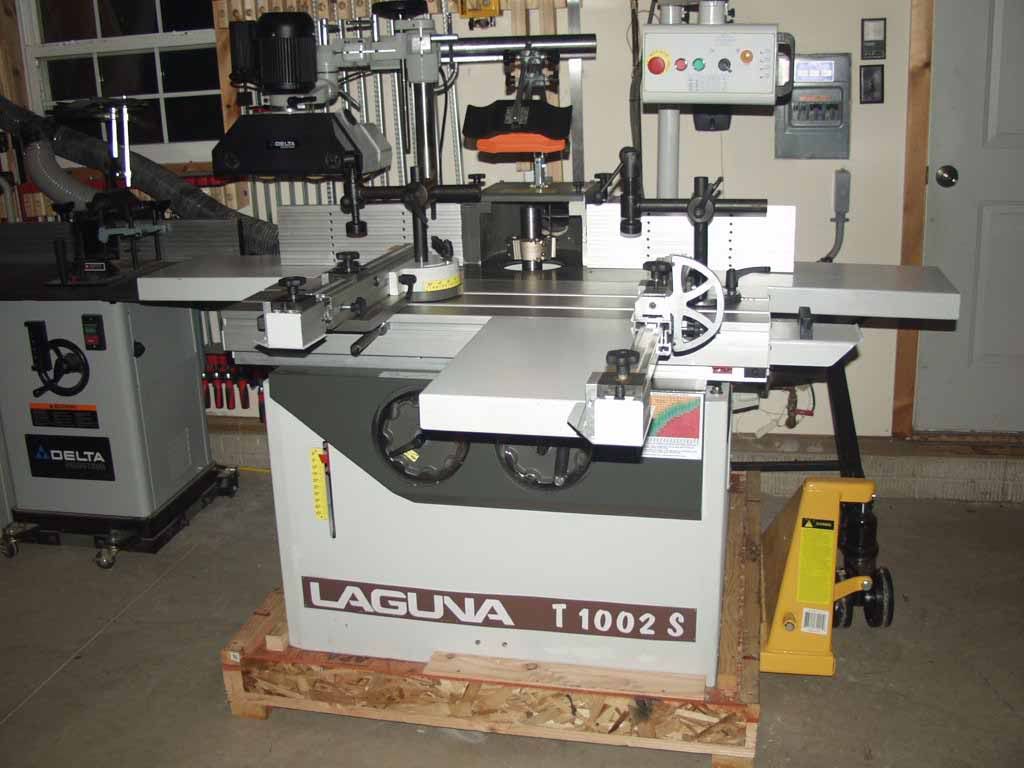
Here is the new shaper. Might be one of my top three favorite machines I have ever used!!!
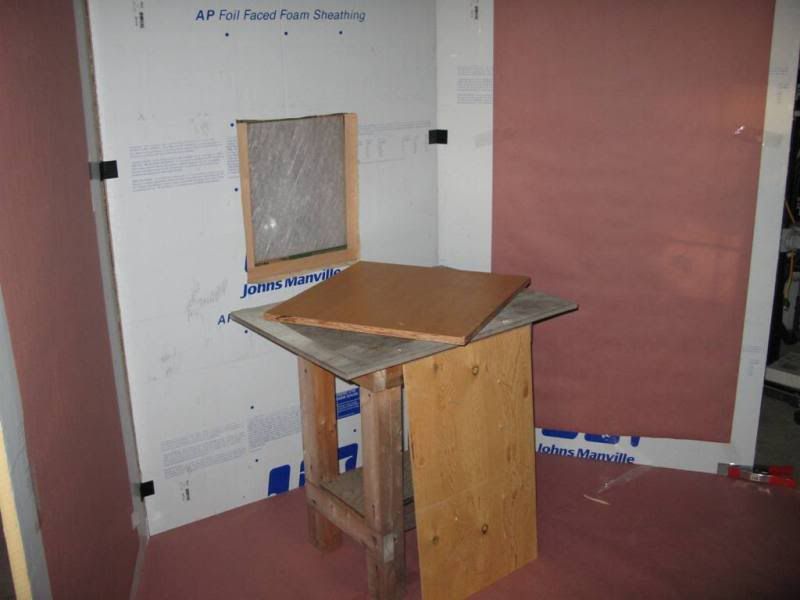
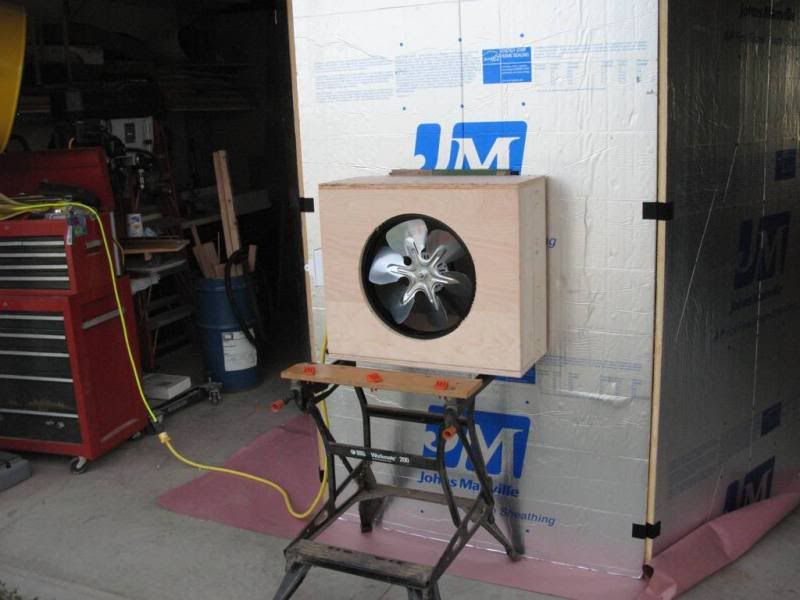
Here is the spray booth which worked SWEEEEET on spraying the last bookcase I made. I will use it on the headboard I am making right now as well.
Last edited by Mike Heidrick; 09-24-2009 at 5:01 AM.
Glad its my shop I am responsible for - I only have to make me happy.
 Friend of The Creek
Mike,
The shaper is terrific - congratulations!
And you did a wonderful job with the spray booth. It looks very similar to mine, right down to the Velcro "hinges". Is the little table in the booth a turntable? I cannot tell from the photo A turntable makes it very easy to keep the work piece between you and the exhaust fan; You simply turn the piece, instead of relocating your body every time. And the best thing is you can make one in no time, using a heavy-duty lazy susan.
Enjoy using both for a long, long time!!!
.
Last edited by Al Navas; 09-24-2009 at 8:25 AM.
 Posting Permissions

 Reply With Quote