Results 1 to 13 of 13

Thread: making a block plane, what angle?

  1. #1
    Join Date
    Jun 2007
    Location
    Winnipeg Manitoba Canada
    Posts
    276

    making a block plane, what angle?

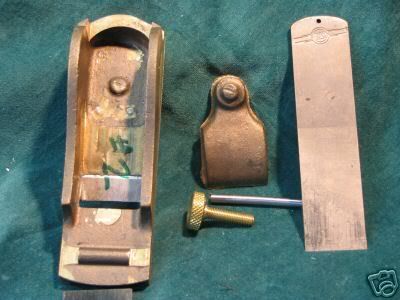
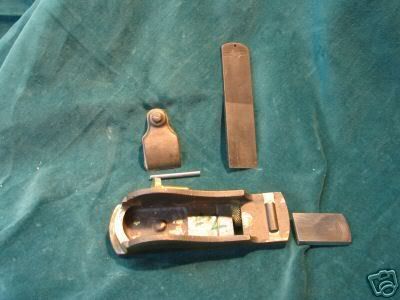
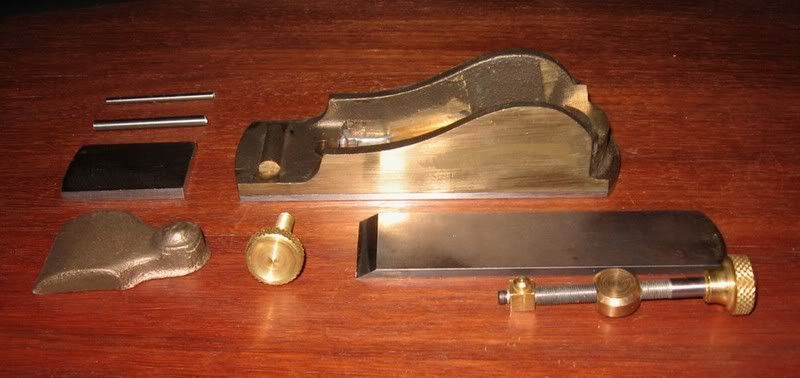
    I have collected a 1/4" thick mild steel for the sole, 1/8th" brass(of unknown type, which I will anneal) for the sides.
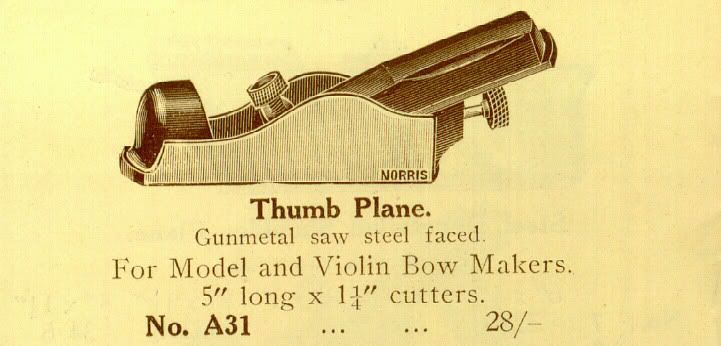
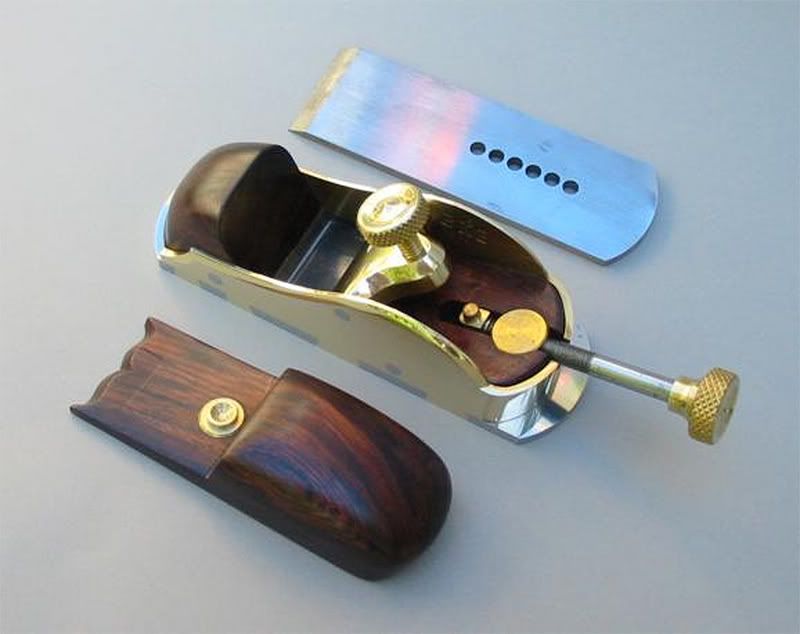
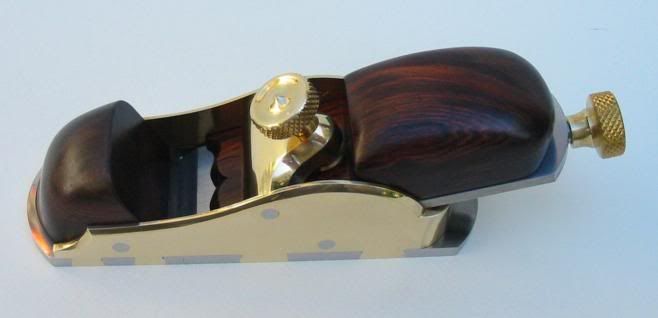
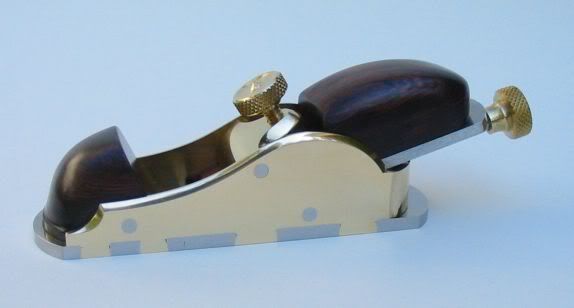
    I was thinking I would try to make a block plane, starting small. I settled on something 5 3/4" long 2" wide.
    I am pulling a number out of the air here would a blade angle, bevel down, of 35 degrees sound like a good thing?
    Cheers Ron.

  2. #2
    A bevel down blade angle of 35 degrees would be the equivalent of a low angle bevel up block plane with a 10 degree bed and a 25 degree bevel on the iron so yes, 35 degrees would be a good angle. My wooden strike block plane is bevel down with a 35 degree bed and it works very well, especially on end grain.

    One word of caution though, if you do decide to go bevel down, don't lower the bed any more than 35 degrees. You need an adequate clearance angle so with a 35 degree bed, you'll likely need to have a 25 degree bevel on your iron. I originally had only a 5 degree clearance angle on my bevel down strike block (35 degree bed, 30 degree bevel angle) and it worked but not well. When I decreased the bevel angle to 25 degrees it worked much better so I'd recommend keeping the bed at 35 degres and the bevel angle at 25 degrees.

  3. #3
    Join Date
    Apr 2006
    Location
    Escondido, CA
    Posts
    6,224
    Low angle is better for end grain. High angle is better for complex figured grain. When you make 3, you could do 35 /45 / 55.
    Veni Vidi Vendi Vente! I came, I saw, I bought a large coffee!

  4. #4
    Join Date
    Jun 2007
    Location
    Winnipeg Manitoba Canada
    Posts
    276
    Yes, Thank you Brian and Bob. I will get hacksawing at the basics and do a practice dovetail to see how it comes out.
    Cheers Ron.

  5. #5
    Join Date
    Feb 2004
    Location
    Perth, Australia
    Posts
    9,491
    Hi Ron

    If this is to be a LA block plane, you have much more to gain by making it bevel up rather than bevel down. Since the blade will be bevelled at 25 degrees, there is no advantage of the BD over the BU design. On the other hand, a BU block plane can use a couple of blades, one LA and the other HA, and you have two planes for the price of one. The other advantage is that a BU plane is easier to push with its lower centre of gravity.

    Regards from Perth

    Derek

  6. #6
    Join Date
    Sep 2008
    Location
    Near Augusta,GA
    Posts
    52
    I hope you update this thread offten, I plan to follow this closely.

  7. #7
    Join Date
    Jun 2007
    Location
    Winnipeg Manitoba Canada
    Posts
    276
    Derek, this is not something I thought about, but seems like a good idea. Do you have a angle you would shoot for. A low angle would change my original drawing though but I am aways from cutting any brass and steel. A LA would require something on top of the blade for my hand to sit on while using the plane. With my 35 degree drawing I have the blade support block shaped for grasping.

    Clay, I have cut a test dovetail, and will pien it. if it works out I will use the right angle test piece to make a 15 degrees dovetail guide for the plane dovetails, if this makes any sense. I will post a photo of the finished test dovetail.
    Cheers Ron.

  8. #8
    Join Date
    Sep 2008
    Location
    Raleigh, NC
    Posts
    2,854
    Ron - With respect to making a dovetailed infill plane, one consideration when deciding whether to make it BU or BD is the difficulty of making it. A bevel up plane is considerably more difficult, because the mouth opening is very small (at least if you want a tight mouth on the finished plane). You can do it with a very small drill bit and swiss needle files, or alternatively you can make the sole in two pieces and tongue and groove them together (as Wayne Anderson does).

    My thought is that you might choose a bevel down design for your first one, as with a reasonably thick blade (3/16"), you've got a fairly large mouth opening to work with.
    Last edited by David Keller NC; 03-19-2009 at 11:59 AM.

  9. #9
    Join Date
    Feb 2004
    Location
    Perth, Australia
    Posts
    9,491
    Quote Originally Posted by Ron Petley View Post
    Derek, this is not something I thought about, but seems like a good idea. Do you have a angle you would shoot for. A low angle would change my original drawing though but I am aways from cutting any brass and steel. A LA would require something on top of the blade for my hand to sit on while using the plane. With my 35 degree drawing I have the blade support block shaped for grasping.
    Hi Ron

    Having built both BU and BD planes, I do not see a BU being any more difficult.

    This is a plane by Brian Buckner. I am making one like it.


    I would aim for a bed of 12-15 degrees.

    If the mouth is daunting, then add an adjustable mouth. Mine will have one. I can send you pictures of the metal work if you need.

    Another way to close up the mouth is to add the rear infill later. You can adjust that until the mouth is tight. I did that on this BU smoother based on a Stanley #3 ..


    Regards from Perth

    Derek

  10. #10
    Ron,

    Here is a sketchup shot of a rabbeting block plane that I am making. I'm not the greatest at sketchup, but it really helps in getting the angles right and visualizing the final result. It has a 12 degree bed and skewed blade. I am in the hacksaw the rough shape stage right now. If I were making a traditional block, I would use a tongue and groove joint at the mouth. There is a great tutorial on Bill Carter's website for making this joint. Please keep us updated on your progress and good luck.

    James
    Attached Images Attached Images

  11. #11
    Join Date
    Jun 2007
    Location
    Winnipeg Manitoba Canada
    Posts
    276
    Derek & James:
    Thanks for the photos and sketch, I t gives me a better understanding now I can see the idea.
    I will re draw, it is only pencil and paper for me, neanderCAD, but I do have a nice old Staedtler eraser 
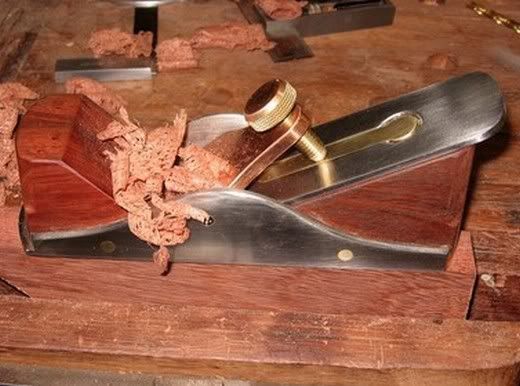
and shoot for the 12-15 degrees, stick with the original length. I have 01 steel for the blade I will make myself, 3/8ths and 1/4" I have both.
    I do not think I am quite ready for the tongue and groove mouth just yet, I will go with the one piece sole.
    Derek, it would be great if you could send me a mouth cutting photo, I have a good number of files, but not a number of good files, that would be my neander milling set up.
    I also like the idea with your #3 I have a non Stanley that could be improved from the same treatment, and the idea is sound to set the blade to the mouth.
    Thank you all for this help, without it I would be making dust in the dark up here in the frozen north.
    Cheers Ron. Derek Mookie1@autobahn.mb.ca

  12. #12
    Join Date
    Feb 2004
    Location
    Perth, Australia
    Posts
    9,491
    Hi Ron

    Since others may also be interested in this block plane design, I will post some pictures here.

    This is the original Norris #31 Thumb Plane:


    I won a casting of a St James Bay version on eBay a few years ago, and put it aside. I will get to this around mid year.

    Note this will have an adjustable mouth:


    Hope this helps.

    Regards from Perth

    Derek

  13. #13
    Join Date
    Jun 2007
    Location
    Winnipeg Manitoba Canada
    Posts
    276
    Derek:
    Thanks for posting the photos, nice looking plane by the way.
    Here is my test double dovetail, with 1/8th inch brass and 1/4 inch steel.
    I made the test piece into a dovetail jig so it could be used for something, it is made for a 15 degrees angle, which is what I used for the test.
    I got a little out of whack on the bottom of the steel side but with another file guide I can reduce this error, at least that would be on the bottom side of the plane.
    The brass and steel seemed to move into place, but I can see the need for a solid fixture when pounding this all together. It might be a little trickier doing more than one me thinks. Of course it had to have that one missed hammer blow to show it was hand made, a little leather protector should help this.
    Cheers Ron.
    P1013648.jpg

Posting Permissions

  • You may not post new threads
  • You may not post replies
  • You may not post attachments
  • You may not edit your posts
  •