I really think you have to worries. The acetone evaporates so quickly it will hardly effect it. I believe your thinking is correct and that a soaking is what would be required to delaminate the work.


 Member
I really think you have to worries. The acetone evaporates so quickly it will hardly effect it. I believe your thinking is correct and that a soaking is what would be required to delaminate the work.
 [OP]
Member
[OP]
Member
I tried Leo's suggestion of using a thin coat of clear, sanding, then applying the dye. It worked quite well! I was able to wipe the dye/alcohol on and I had total control over the coverage. I also added a few more drops of dye to my mixture so fewer passes would be needed. And, I am more than pleased with the depth of the grain. Thanks Leo!!! And everyone else who replied. This forum is such a great resource!
Peace,
Mark
Member
It's almost like I've done this before
Member
This might be really obvious . . . are you rubbing down the edge of the tape with your fingernail or a bone folding point? This is the secret of getting a good edge when masking on canvas with oil paint.
Member
Dyes will get soaked up by the grain of the wood and follow the grain structure.
Oil and latex paints will only lay on the surface and will not soak into the grain.
[OP]
Member
Hi Tim.Originally Posted by "Tim Quinn"

I was rubbing it down with a small block of wood with a tiny round over...it was down as tight as I knew how to get it.
Peace,
Mark
[OP]
Member
Yes, and thanks for sharing with the class.
Peace,
Mark
[OP]
Member
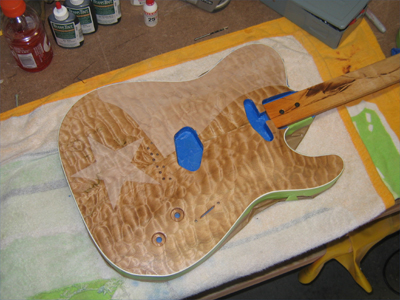
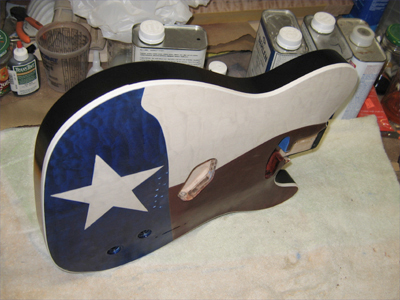
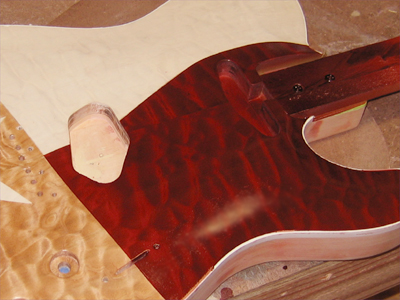
Hello all. This is a repeat post from another forum but I wanted to share the results with those who helped me out over here in the Project Finishing Forum.
You can see the whole process here:
http://www.crenshawweb.com/texastele/ttp14.htm
I took Leo's advice and, except for the white areas which I bleached, used a thin coat of lacquer to stop any bleeding under the masking...it worked beautifully!
I ended up spraying the dyes in lacquer and I am thrilled with the results. The figure really shines thru!
These shots are with wet sanded color coats...no top coats yet.
Thanks again to Leo and others who helped with this project!
Peace,
Mark
Last edited by Mark Crenshaw; 08-25-2009 at 12:36 PM.
 Member

Mark, looks great. Can we get a closeup pic of the intersections where the dyed areas meet? I want to see how crisp the lines are as I wanted to do this before but always shied away from it due to the bleed-through.
Thanks in advance for your time.
[OP]
Member
Hi Larry. Thanks!
These are as tight as I have on the site right now...I can post something tonight when I get home. The lines are every bit as clean as I had hoped for. I'm really pleased with the outcome.
There are lots of pics at the link in my earlier post if that helps any for now.
Peace,
Mark
Member
Glad I could help, and glad you were able to make it work for you.
[OP]
Member
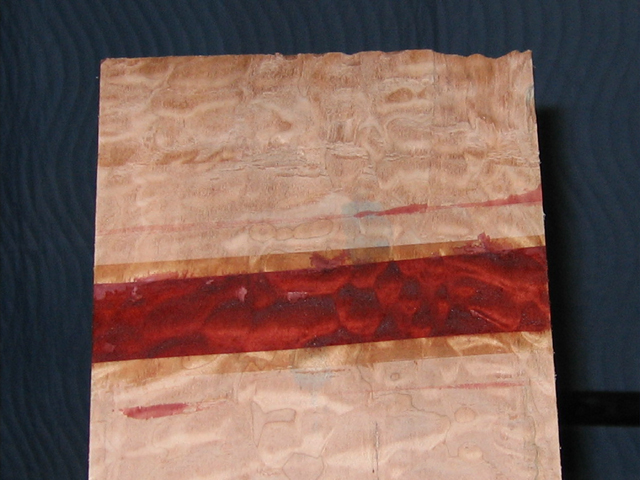
Here's a tight shot of the line between the red and white. I haven't finished level sanding yet so the edges are off a bit in height and my masking could have been a bit better but you can see how the bleeding was controlled. I think additional sanding will help but, looking at it this closely, I'm not so sure I like it now.
Peace,
Mark
Member
Thanks for the tight shot Mark. That is indeed pretty good control of the bleeding. I am going to have to give this a shot for future projects.
 Posting Permissions

 Reply With Quote