Results 1 to 6 of 6

Thread: Disc and Drum Sander Station finished!

  1. #1
    Join Date
    Jun 2009
    Location
    Western Maryland
    Posts
    5,548

    Disc and Drum Sander Station finished!

    Well, as some of you may know, I upgraded my band saw recently. This left me with 2 motors (the orginal 3/4 HP motor from the BS and a second one, a 1.5 HP that had gotten damaged...cosmetically...in shipping but was otherwise perfect...long story...but the bottom line was that I had two motors). I was going to sell them, but realized that I still had two pieces of equipment I needed for my shop...a 12" disc sander, and a drum sander. So I decided to use the motors to build a sanding station for the disc and drum sanders.

    To be honest, I don't know how much (if any) money I saved, but I DID get just what I wanted in likely less space than "bought" units.

    I got the 12" disc from Ebay (about $35 with shipping) and the drum sander attachment on Ebay ($46). Of course there was plywood (already had that) and hardware...dust collection hose and fittings...stuff to make the disc sander table...bolts, yada, yada, yada. So again, I don't know how much money is actually IN this thing, but I can tell you there is a LOT of time in it. It may not be pretty, but there was a LOT of thought into it. The dust collection hoses were going to be run internally, but externally won out, partly for ease of initial installation, but also in case they ever (for whatever reason) needed to be accessed.

    The drum sander is run by the old 3/4 HP BS motor that is run on 110. The disc is run on the 1.5 HP Leeson motor that is wired for 220. When I realized that I only had one 220 plug on this wall...to the right of the entryway (bad shop design, I know) I had to do some creative thinking. So as not to ever have an electrical inspector ever accuse me of putting in a new outlet in/on the building without permission, I decided to put an outlet on a machine. That plug goes to the wall, power is fed from the plug to the switch, and from the switch to the motor. My band saw goes into the plug on the side of the unit.

    The disc sander table is not adjustable. Honestly, in the 5 years I worked in a professional shop, I never had the need to adjust the table. So instead of spending a whole lot of time thinking up yet another thing to design, I simply made it a flat stationary table.

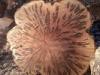
    Here are some photos:

    First pic is of entire unit. Second and third are of the drum sander. Fourth shows the disc sander. Fifth shows the back...showing the motors with the trap door to get to "innards" like bolts and switches etc.

    Oh, dimensions of box are roughly 48" H X 18" D X 24" W. The disc table is 16" X 12".

    And of course, questions and comments are welcome (don't be too hard on me ).
    Attached Images Attached Images
    I drink, therefore I am.

  2. #2
    Join Date
    Jun 2009
    Location
    Western Maryland
    Posts
    5,548
    Here are some more pics. These are of the way I made the dust port for the disc sander.

    Note that the positioning of the dust port is on the side of the sander in the final installation, but when I was putting it together, it was designed to be pulled towards the front...last minute change...long story, better application this way.
    Attached Images Attached Images
    I drink, therefore I am.

  3. #3
    Nice! I'm planning on building a disc station soon, too, so this is some good inspiration.

    One thing I notice: How are you planning on using the spindle? The way it appears to stick out of the cabinet, you don't have a perpendicular base to rest the work on (if you were smoothing out a bandsawn curve or something). Maybe you could build a flat surface a few inches off the side of the cabinet, below the spindle. Then you'd have a 90* reference and still have easy access to change the spindle. Just a thought...

    Also - do you really need permission where you are to install an outlet?

  4. #4
    Join Date
    Feb 2003
    Location
    In the foothills of the Sandia Mountains
    Posts
    16,644
    That looks great Mike, there’s nothing more fun than making tools for the shop that you will actually use. I have only one suggestion; put some protection like Trimlok around the drum sander intake to protect your hands, just in case you ever get a snag.
    Please help support the Creek.


    "It's paradoxical that the idea of living a long life appeals to everyone, but the idea of getting old doesn't appeal to anyone."
    Andy Rooney


  5. #5
    Join Date
    Jun 2009
    Location
    Western Maryland
    Posts
    5,548
    Dan, thanks. This drum is kinda like a pneumatic, but is foam instead. I use drum sanders for free form sanding (one of my favorite things to make is wooden putters...hence my avitar). And YES, if you so much as want to add an outlet in a building/home whatever, you have to get an electrical permit (at least in our area you do).

    Bruce, great idea. I did sand the edges of the metal duct to take the edge off, but you are right, if I ever had my hand slammed down on it, I might get cut. I'll work on some sort of trim around it...even if it is a wood "frame"...or maybe liquid tape (that can be brushed on in layers...like onions and Ogres...and parfaits! Everybody likes parfaits. )
    I drink, therefore I am.

  6. #6
    Quote Originally Posted by Mike Cruz View Post
    Dan, thanks. This drum is kinda like a pneumatic, but is foam instead. I use drum sanders for free form sanding (one of my favorite things to make is wooden putters...hence my avitar).
    Ah! I see... I was thinking more like an oscillating spindle sander drum, but now I understand.

Posting Permissions

  • You may not post new threads
  • You may not post replies
  • You may not post attachments
  • You may not edit your posts
  •