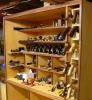

One of the common boring tools is the auger. Though they may look a lot alike on first glance, there are a lot of differences involved. After all, there were a lot of different trades that needed to put holes in wood. Very often, there were different needs among the different trades. Cabinet makers would want a clean hole of a precise size. A carpenter might not care about the size as much as being able to make a hole quickly in a cramped place. Another trade might want to be able to bore into wet wood and so on. The particular trades that the bits were made for decades ago is likely long separated from the twisted and tarnished pieces of steel we find today at yard sales, flea markets and through auctions on line.
Lead Screw & Caliper.jpg
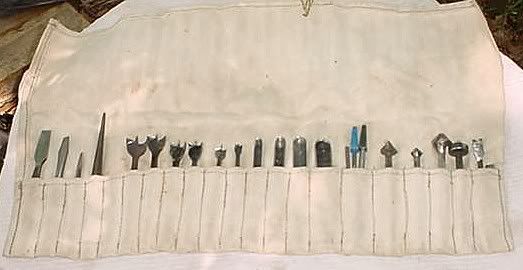
Here is a group of #8 auger bits. They are numbered in 1/16 inch increments. Most standard sets start at 4 and run through 16. Larger bits are common. Smaller bits are scarce. In the picture wire has been wrapped around the lead screw to show the single and double threading of the lead screws.
Notice also some of the spirals are double helix and some are single. The single helixes do not clog with waste removal, the double helix will track truer in a hole.
Here is a close up of the single and double lead screws.
Single & Double.jpg
With larger bits, it is often a good idea to drill a small pilot hole to prevent splitting the piece being bored. In this case, a #18 bit is being used in pine. The hole is started and when the lead screw breaks through the far side, the bit is backed out and the hole is finished from the far side.
First Cut.jpg
Notice the shavings coming off the bit. They should be even from each side of the bit. These are a little thick due to the bit being dull. If shavings are coming off only one lip, it means it is cutting first. Some metal will have to be removed from it to get the other lip to touch at the same time. If the two lips are performing equally, then when sharpening, make sure to remove the same amount of material from each.
An auger file is also known as a safety file. Two of the opposing surfaces will cut and the edges are smooth. When sharpening the lip edge on the bit, only file on the top side and be careful not to damage the lead screw.
The Lip.jpg
When sharpening the spurs, only file on the inside. Remove as little material as possible from the leading edge and the area that touches the wood first when boring. Removing metal from the outside will alter the diameter when starting a hole and the rest of the bit will bind in the under sized hole.
The Spurs.jpg
After the bit has been sharpened, the shavings will look a little thiner and cutting will be easier.
Sharp Cut.jpg
If one bores through a piece without stopping to finish from the far side, then the hole will "blow out" when the bit exits the wood. The first hole is a bit rough from the dullness of the bit. The second hole is sharp, but the "blow out" from the third hole did extend to the second hole.
1st, 2nd & Blowout.jpg
As far as all the different styles of auger bit, my knowledge is limited. Some work slower and do not eject the waste as fast. The ones with more aggressive lead screws will go through the wood faster and need to have more space between the spirals to move the shavings.
Hope this helps in the understanding of making holes.
jim

 Reply With Quote


 Jr.
Jr.