Page 1 of 3 123 LastLast
Results 1 to 15 of 32

Thread: Joe Woodworker Vacuum Veneer Press

  1. #1

    Joe Woodworker Vacuum Veneer Press

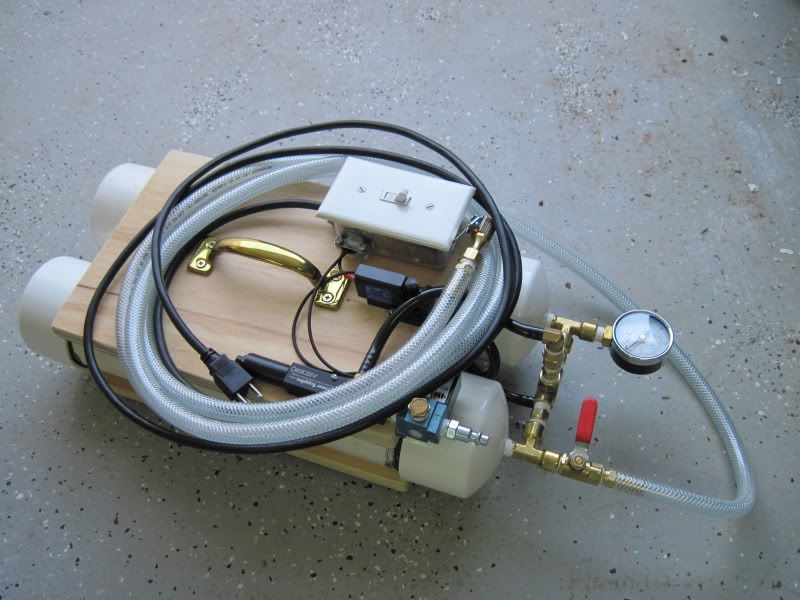
    I know a lot of members here have equipment from Joe Woodworker and are familiar with the information on his site. I just ordered a V2+pro system and thought others might be interested in a build along thread. Anyone else who has built one or is in the process feel free to join in and show pictures, otherwise this might be a really short thread! Most report that the actual build only took 2-3 hours.

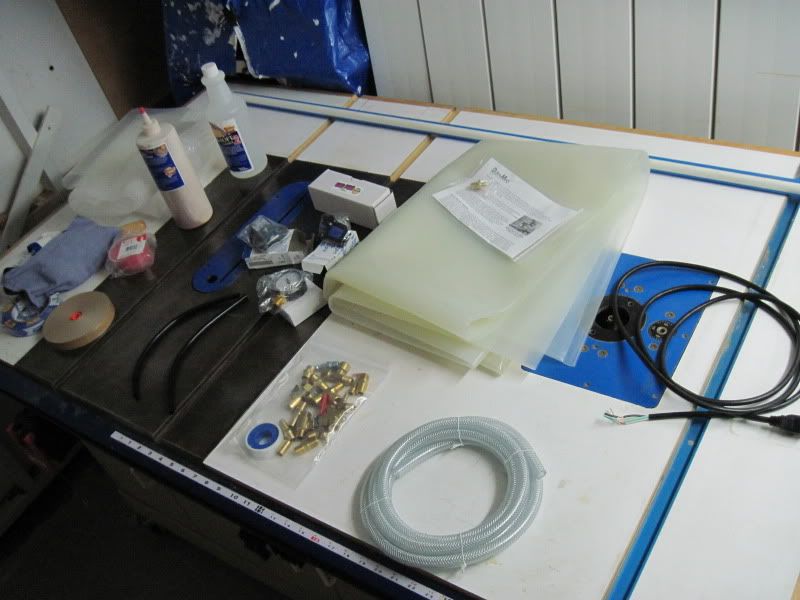
    Joe is in Maryland and I ordered the day of the big snowstorm, my shipment is a little delayed according to UPS. Since I'm eager to get started I went shopping for some of the extra supplies needed for the build. The hardest part to track down was the 3" PVC. I called a few plumbing supply houses and everyone had 20' lengths for $2.20/ft. Home Depot had one piece jammed at the back of the rack and when I asked was told they just found it in the remodel. Since it wasn't in the system they ended up charging me $5. for the whole 20'! So if anyone is in the area and needs some PVC for this project, I have plenty left over.

    I thought I had the1/4" NPT tap but it isn't in my set so back to the hardware store one more time.

  2. #2
    I built two from Joe's kits, one with a pump from him and one with a pump I got on eBay. I'll be happy to post pictures if that's what you want - but they're pictures of the completed system and not progress pictures.

    Joe has pictures of a bunch of completed systems on his web site if you want some more ideas.

    Also, I think Joe recommends 4" schedule 40 pipe, not 3".

    Mike

    [Attached are pictures of my portable system. I just bought a dolly from the borg and used 1/2" plywood as a frame. If I was to do it over, I'd put the tanks vertical instead of horizontal.]
    Attached Images Attached Images
    Last edited by Mike Henderson; 02-11-2010 at 10:05 PM.
    Go into the world and do well. But more importantly, go into the world and do good.

  3. #3
    As Mike says, "...Also, I think Joe recommends 4" schedule 40 pipe, not 3"..." But with 3" pipe, you can compensate by using longer sections of pipe for your "tanks". A 4" X 15" section of pipe has a volume of approximately 188.5 cubic inches. A 3" X 26" pipe is approximately 183 cubic inches. But keep in mind that the volume of the tanks is not critical. They are there to provide a "buffer", in effect a way to "store" vacuum which will allow the pump to cycle on and off as needed. Also, with tanks, if you run the pump for a bit to draw the air out of the chambers there is some vacuum available to pull the bag down quicker than it would if you just started the pump after sealing the bag. This can be very helpful in many situations. If you can deal with a larger unit, bigger tanks are better because you can "store" more vacuum which will allow the pump more downtime. Of course, with bigger tanks, you have to run the pump longer initially to draw the air from the tanks. In a perfect world, you would be able to shut the pump down after drawing a vacuum. But in reality, a "perfect" vacuum is not possible and there will always be miniscule leaks that will allow the vacuum to dissipate. So you need the tanks to compensate. Without tanks, you would need to have the pump run continuously to maintain the vacuum.
    David DeCristoforo

  4. #4
    Nice system Mike, I knew you'd have something to add to this thread.

    I'm building the venturi system and the instructions call for 3". If it turns out to not be enough (the system would cycle more often?) I could always add a third reservoir. I considered a storage tank from HF but I want to keep the unit small for storage.

    I've seen some of the examples on Joe's site but it's not the same as the interaction we get here.

  5. #5
    Join Date
    May 2008
    Location
    near San Diego: unincorporated section of county
    Posts
    764
    Here's mine built in 2006 from a kit from Joe. It's made with 4" pipes. Works pretty well.

    James
    Attached Images Attached Images

  6. #6
    Join Date
    Jul 2006
    Location
    NW Arkansas
    Posts
    72
    I have one of Joe's systems and it has been a very useful addition to my shop. The one alteration I made to the pump plan was to make the carrier a bit oversize to provide some additional protection to the connections on the end of the "Bomb" as my kids call it, the tanks are painted bright red. Those fittings are just threaded into PVC, which so far has held, but in my situation, I can see where a baseball, or speeding bicycle comes through my garage and "detonates the bomb" putting me out of commission. So depending on your situation, a bit of "protection" may be warranted. I used one of the rebuild pumps and sourced all the other parts at the BORG. I use it often and have the UltraMax bags, they make life easy.

    (Edit - I really like the pump that James built, I should have been more innovative in my design, it looks like it should provide great protection to the fittings )
    Last edited by Tim Johnson; 02-11-2010 at 11:35 PM.

  7. #7
    Join Date
    Apr 2008
    Location
    Virginia
    Posts
    3,178
    I used a vacuum pump all by itself and it worked fine; what's the advantage to this piping reservoir system?

  8. #8
    Join Date
    Nov 2005
    Location
    International Falls, MN
    Posts
    766
    I just finished the V2 premium kit.

    I haven't had too much oppertunity to try it yet but managed to try a little veneer job in the bag.

    Quinn

  9. #9
    Quote Originally Posted by Frank Drew View Post
    I used a vacuum pump all by itself and it worked fine; what's the advantage to this piping reservoir system?
    So you don't have to continuously run your pump. It'll cycle the pump while maintaining vacuum.

    Quinn,
    What size compressor and bag do you have? That was the big question for me as I felt I was borderline between the +pro and Premium upgrade options. I opted for the +pro and a 4x4 30mil Poly bag. I was torn to spend a little extra and get the 4x8 but space is a big consideration for me. That dinning room table I have in mind will probably not be one piece anyway.

    I know many think just get the bigger bag and keep the extra rolled up.
    Last edited by Richard Dragin; 02-12-2010 at 11:11 AM.

  10. #10
    Join Date
    Jan 2008
    Location
    Western Nebraska
    Posts
    4,680
    Here is a photo of my pump built with stuff from Joe. If I where to do it over, I'd make the top tube a bit smaller diameter, so it's easier to carry. It's 2" now.

    Frank, the tanks work like an air compressor tank does. They make the pump cycle a lot less often. The small tank (handle) on mine is an unloader tank. It allows the pump to start with no vacuum on it, which is required on that Gast pump.


  11. #11
    Clean set up Steve. I bet a guy could make a nice Sleigh Bed with that. How many PM's has that picture (of your bed) generated?

  12. #12
    Join Date
    Jan 2008
    Location
    Western Nebraska
    Posts
    4,680
    Quote Originally Posted by Richard Dragin View Post
    Clean set up Steve. I bet a guy could make a nice Sleigh Bed with that. How many PM's has that picture (of your bed) generated?
    LOL! I've had a few PM's about it. Kind of fun to have one of those projects floating around that gets questions and comments. Lets me relive the fun of building it. I've been toying with the idea of a bigger version one of these days...

  13. #13
    Snowmageddon '10 delayed the shipment but it finally arrived. Here's everything I ordered...4x4 30mm poly bag, Joe's Veneer starter kit, Vac Pro+ kit.....

    This is a venturi system which runs off of compressed air instead of a pump. I have a 5 cfm at 90 psi compressor so this was the system that spec'd out for me.


    Here is the manifold section all tightened up.


    Here it is in position relative to the reservoirs. I used primer with the PVC glue, I used to repair pools for a living and the primer makes a difference. I made them a tad longer than the instructions called for.


    Here is the top with everything mounted and just the wiring to go. On the right is the venturi which is the heart of the system. Attached to the venturi is the MAC valve which electronically controls the air from the compressor. The black thing in the center is the Vacuum switch which controls the MAC valve.


    All done! I added some rubber feet on the bottom but over all it's just like the instructions called for. I didn't see any reason to reinvent the wheel. I just wanna do some veneering.


    I tested the system (without the bag) and here is the gauge after 5 minutes.


    An easy fun project and having built it I understand how it works a lot better. The only variation from the plans to the kit was the plans call for soldering and the kit comes with crimp connectors, actually an improvement. Tomorrow I'll hook up the bag to test the whole system.

    So far I'm very pleased with everything but the real test is when I start the actual veneering. Other than the delay caused by the snow dealing with Joe has been as easy as it should be.

  14. #14
    Join Date
    Apr 2003
    Location
    southern nj
    Posts
    50

    joe woodworker vacuum veneer press

    I am having trouble logging into his site.
    He is requesting a unsecured connection for
    my user name and password.
    I do not know what tnat means.
    Thank you for your help Peter

  15. #15
    You should send him an e-mail, he'll respond within a day. You don't have to log in to view the site, only for ordering.

Posting Permissions

  • You may not post new threads
  • You may not post replies
  • You may not post attachments
  • You may not edit your posts
  •