Page 4 of 6 FirstFirst 123456 LastLast
Results 46 to 60 of 82

Thread: Bonnet Top High boy Tutorial

  1. #46
    Astounding, Dave. What I would do to have 1% of your talent...
    Thank you for taking the time to write this up - as others have said, you make it look so easy and present it such a clear manner. If you ever wrote a book like this, I'd buy it in a heartbeat. Your writing has that simple clarity that makes it look so easy.

  2. #47
    Join Date
    Sep 2009
    Location
    Bel Air, MD
    Posts
    111
    Now we will move onto the drawers and finish up with the carving. The first thing to do for the drawers is to mill and cut all the drawer fronts to size. For this piece I mill the drawer fronts to 7/8” This is to allow for the carving to be done later. The drawers will all get a 3/16” round over on all sides and a rabbet on three sides (top and both sides). You should have 1/8” clearance total on the sides and top so the drawers slide easily. The sides will be cut based on the size of the drawer front. The back will be cut to width based on the front but the height will be Ύ” less than the sides to allow for the bottom to slide in. All the sides are milled to 1/2” thick


    Now I will go over how I cut my drawer dovetails. There are tons of ways to do this but this is the way that has worked the best for me. I use a combination of hand tools and power tools to make the process go as quickly as possible while still maintaining the hand cut period look.

    First I will start out with the tools you will need. You are going to need a marking gauge (I like a wheel style), a dovetail or Japanese saw, a dovetail layout tool (mine is a shop made 12 deg), a small square , a sharp pencil, a mallet and some sharp chisels. You will not need every size chisel known to man. I rarely use anything other than a 1/4” and a 5/8”. I do like to have a paring chisel though because Japanese chisels can do a number on your hand if you are paring with one all day a fishtail chisel will also make cleaning the tail sockets easier but isn't a "have to have tool".


    I layout my pins on my drawer back using the drawer sides as a guide for the pin depth. I then cut the drawer back pins with a dovetail saw. I then move to the drill press and using a forstner bit hog out the bulk of the waste. Two things you will need to ensure here are that your score line is deep and that you have a backer board behind the drawer back to keep the bottom from blowing out. You will also not want to get too close to the score line or you may still end up with blowout on the back.


    Once the bulk of the waste is hogged out the cleanup is done with chisels and a mallet.


    I then move to the drawer front. The process is basically the same. The one thing I will point out is the overcut. This is seen in most period pieces. If you look at just about any antique the dovetails are almost always overcut to make clean up easier.


    Once the drawer front and back are cleaned up they are used to make the pattern for cutting your tails. I mark the back tails first. I do this because it is easy to tell where the top of the drawer is after this is marked. It just makes it a little less likely that you will make a mistake. If you mark the front first it is a good idea to mark the top of the drawer so you don’t get it turned around when marking the back. I just use a sharp pencil to mark the tails.


    Diamanwoodcrafters

  3. #48
    Join Date
    Sep 2009
    Location
    Bel Air, MD
    Posts
    111
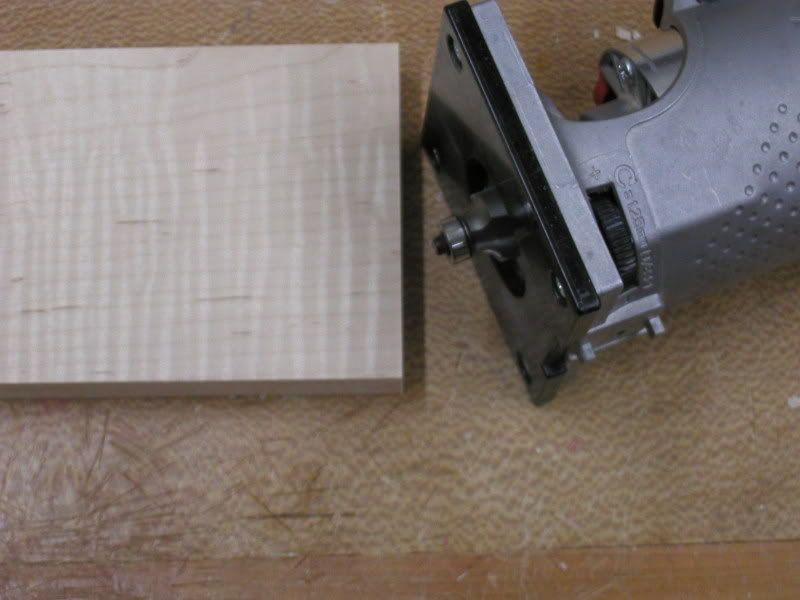
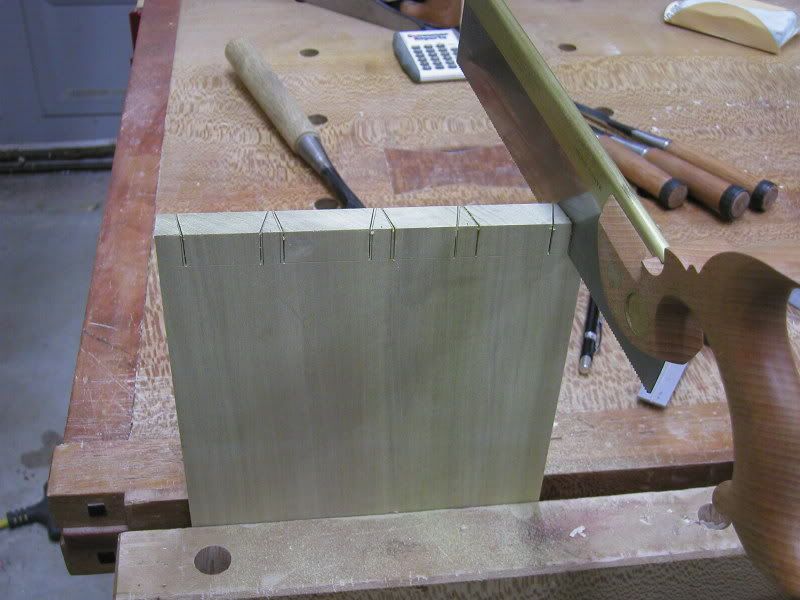
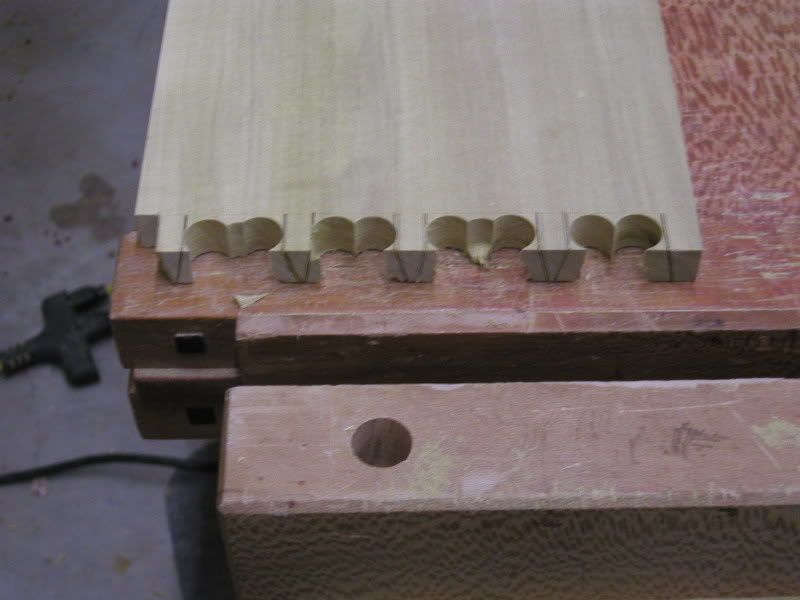
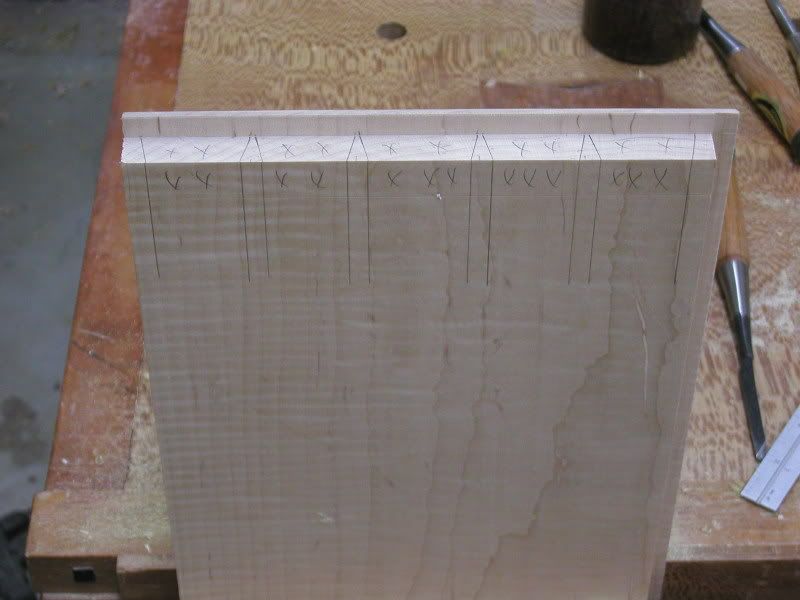
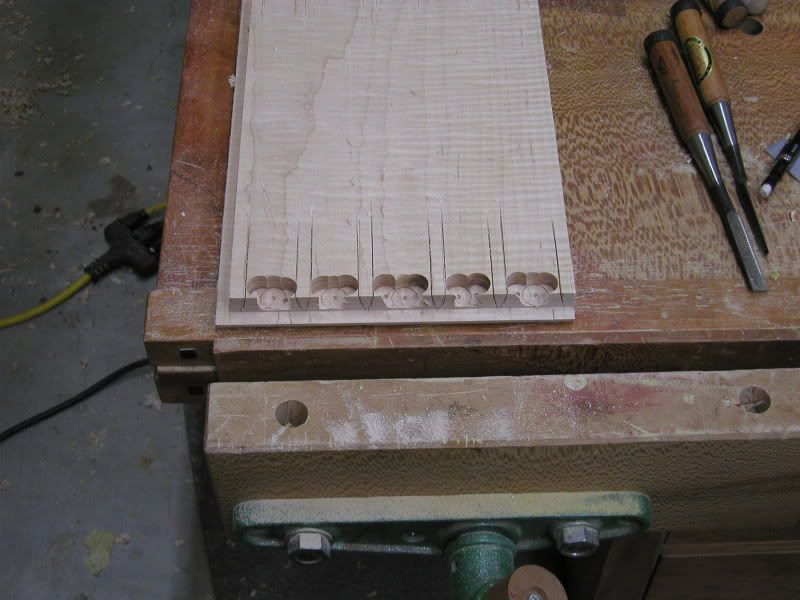
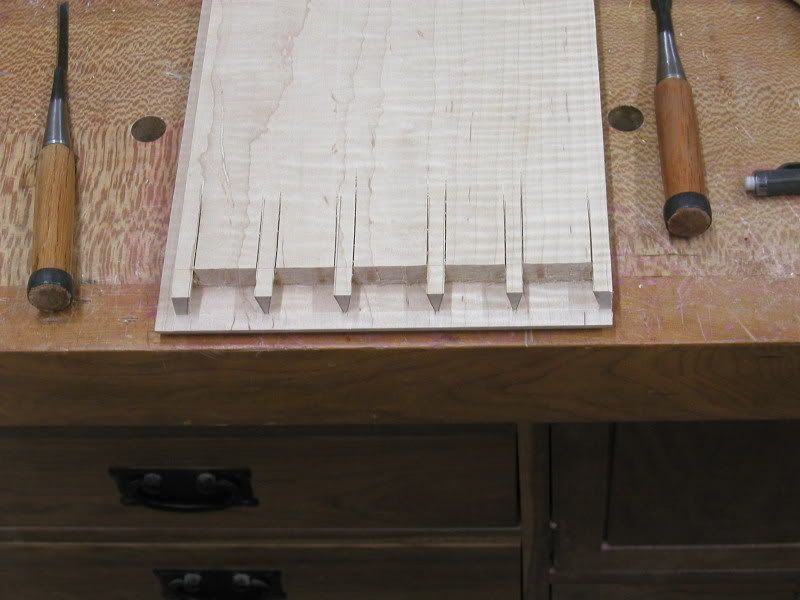
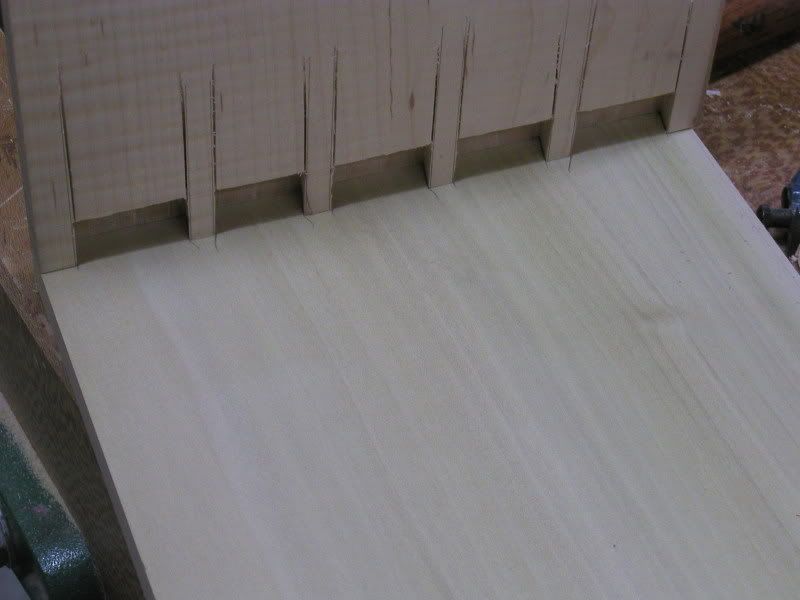
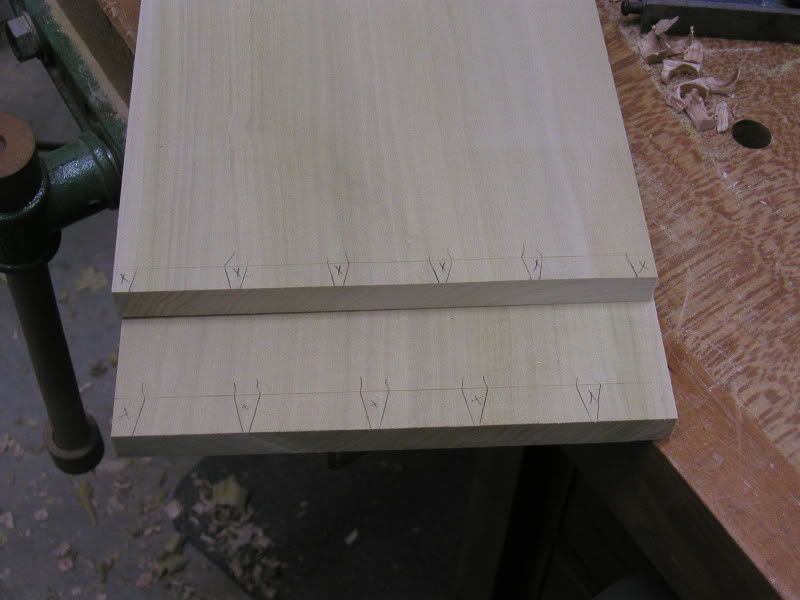
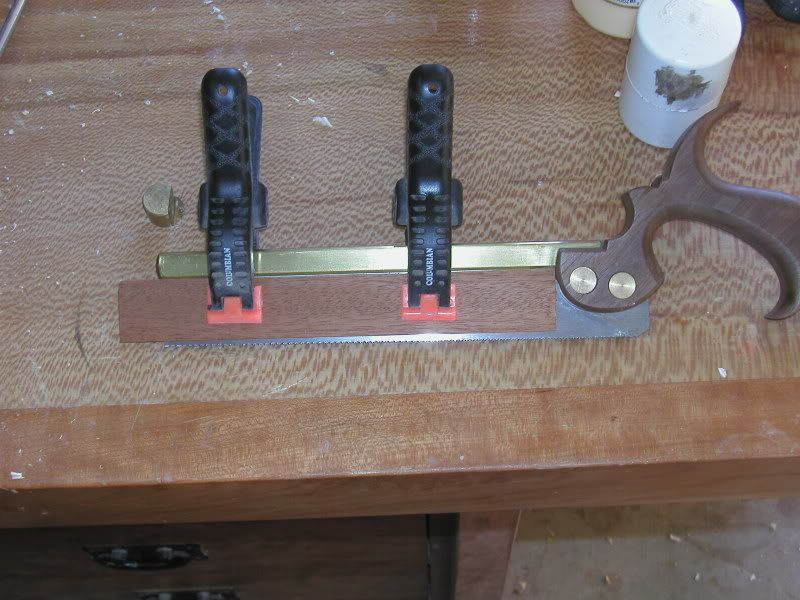
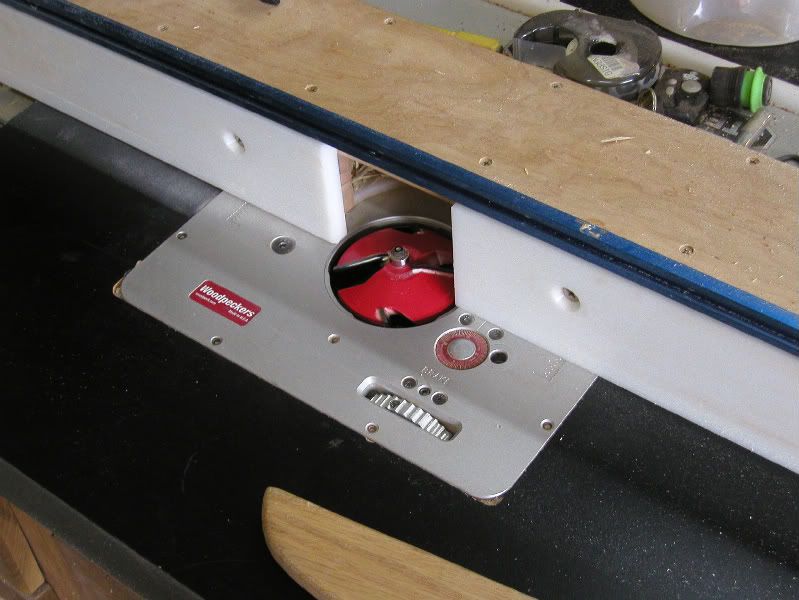
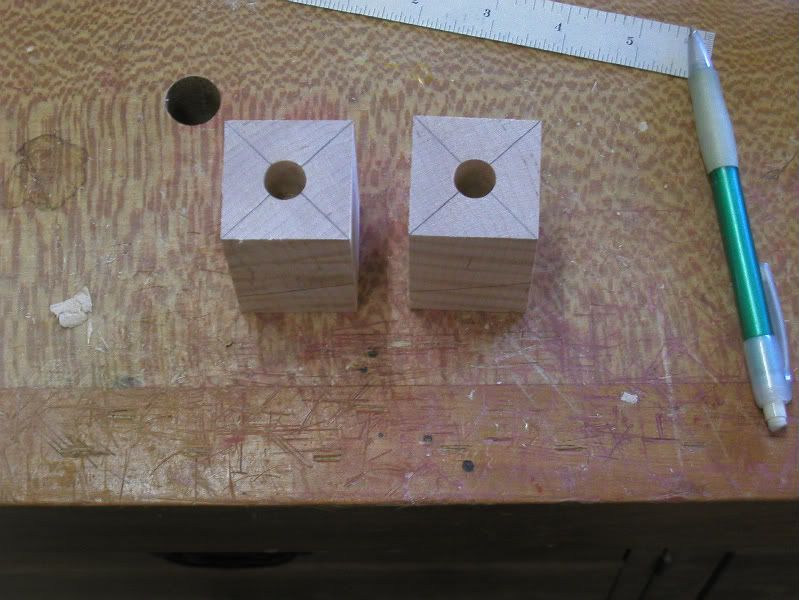
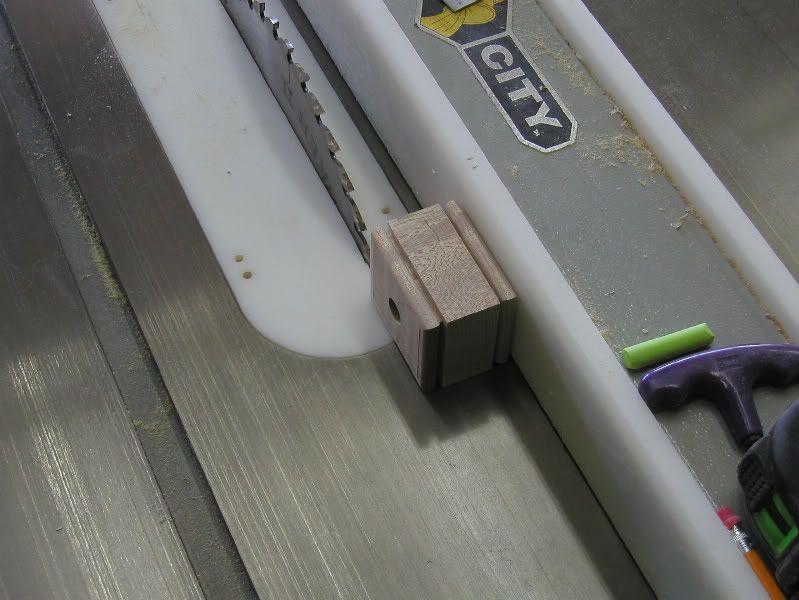
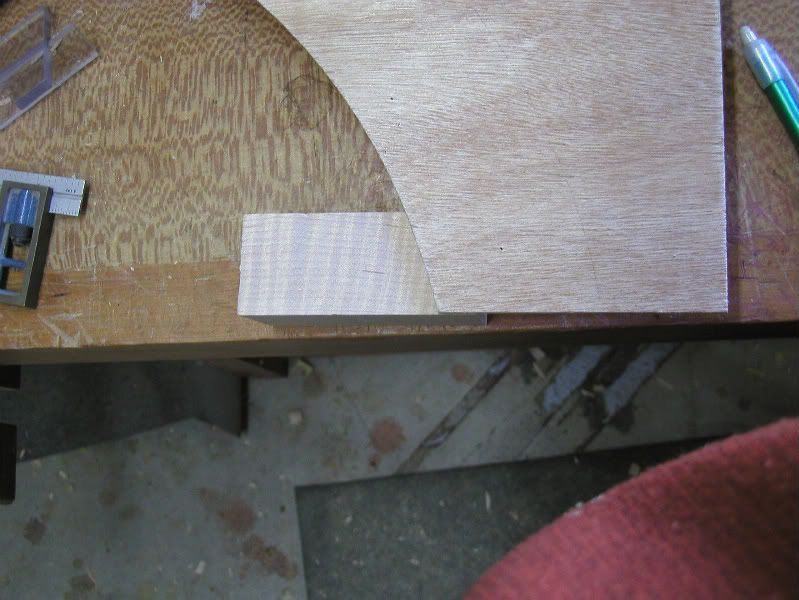
    Once the front and back are marked I like to use the bandsaw to cut out the pin sockets. A hand saw can be used also but the bandsaw is much faster for several reasons. The bandsaw has a much larger kerf so less waste is left in the pin sockets. This makes for much easier clean up since a hand saw has a much smaller kerf. Using the bandsaw also keeps you from extending the marks across the end of the board since the saw is already at 90 deg to the work piece. This may not seem like much but when you are cutting hundreds of dovetails it really adds up and can save you hours.


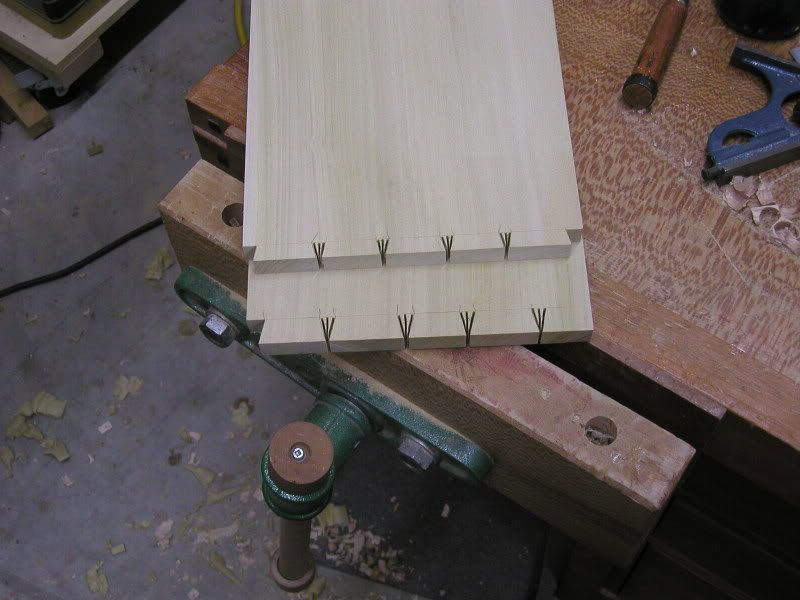
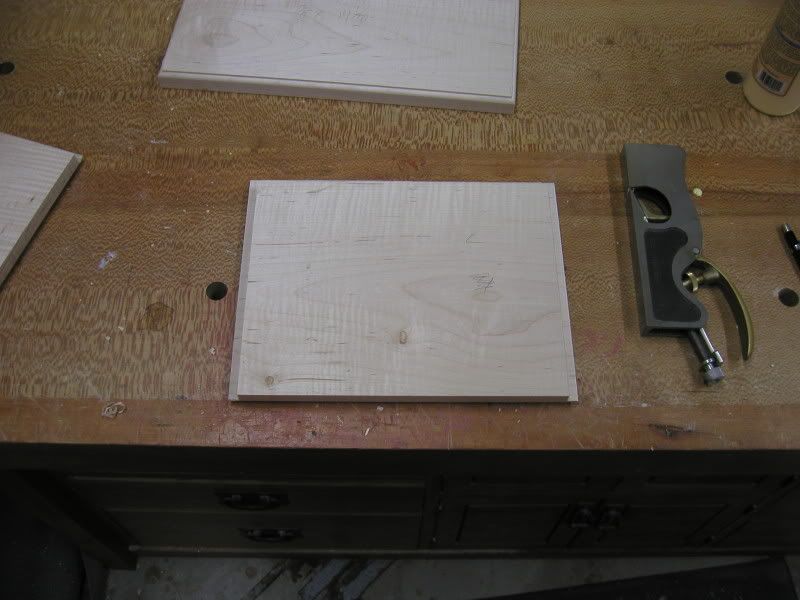
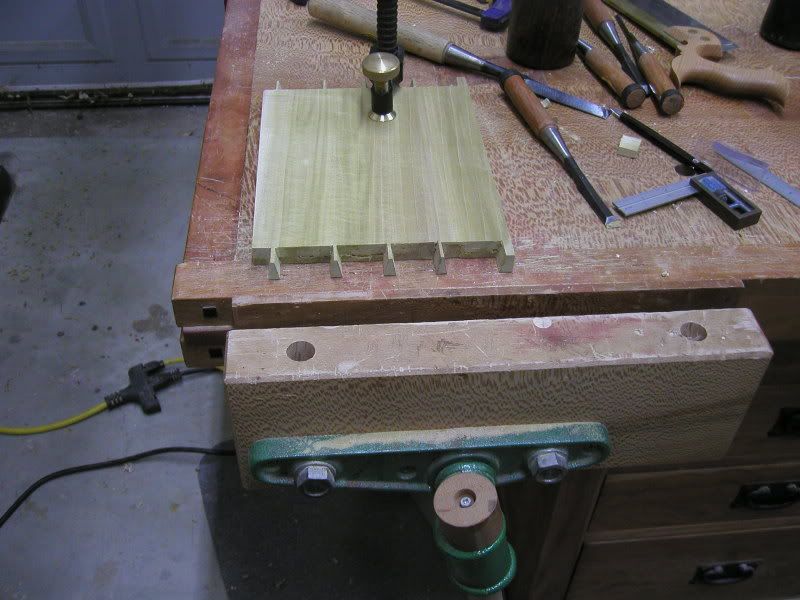
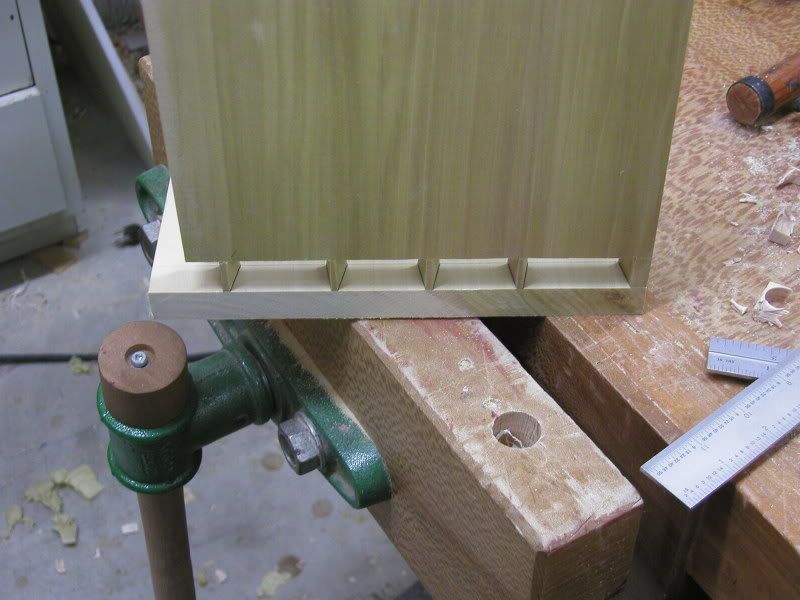
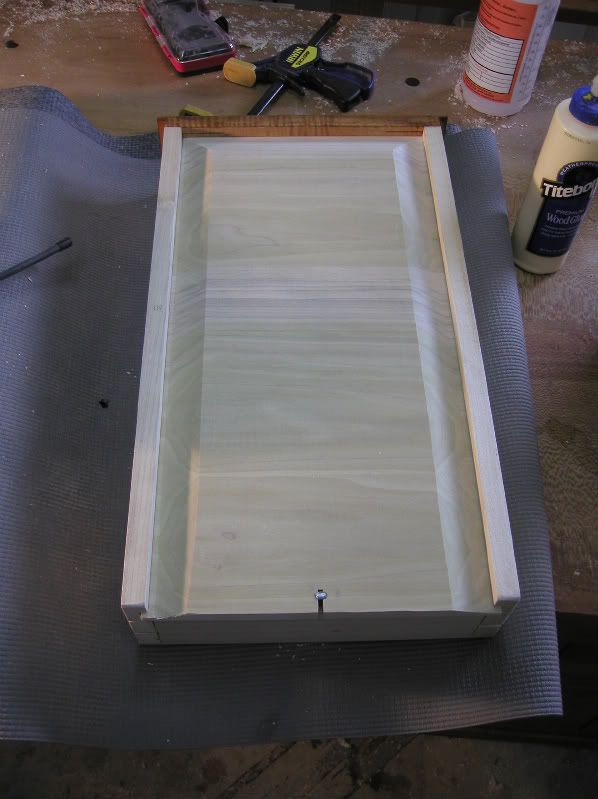
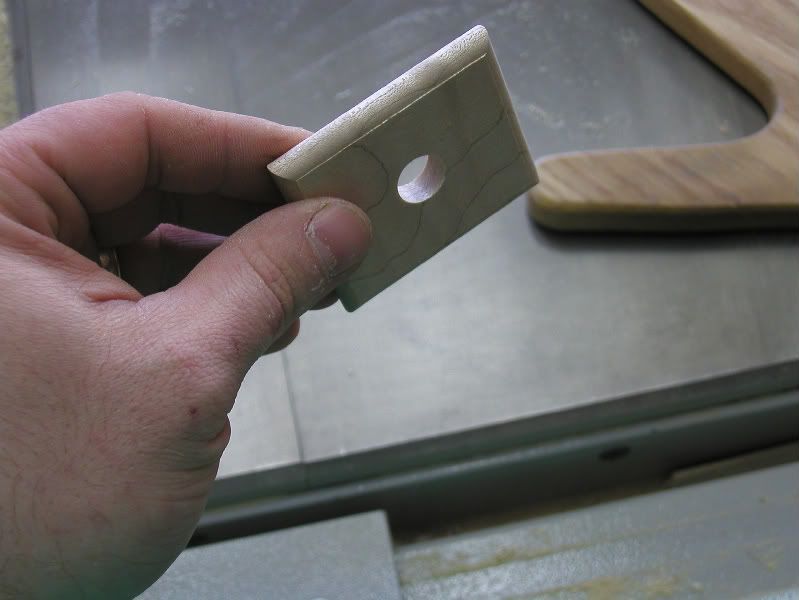
    Now all that is left to do before glue up is to cut the dado that the drawer bottom will slide into. Once the drawer is glued up and square go back and trim the dovetails flush with a hand plane and it’s time to make the bottom. This drawer is just dry fit and still needs to be glued up and cleaned up.
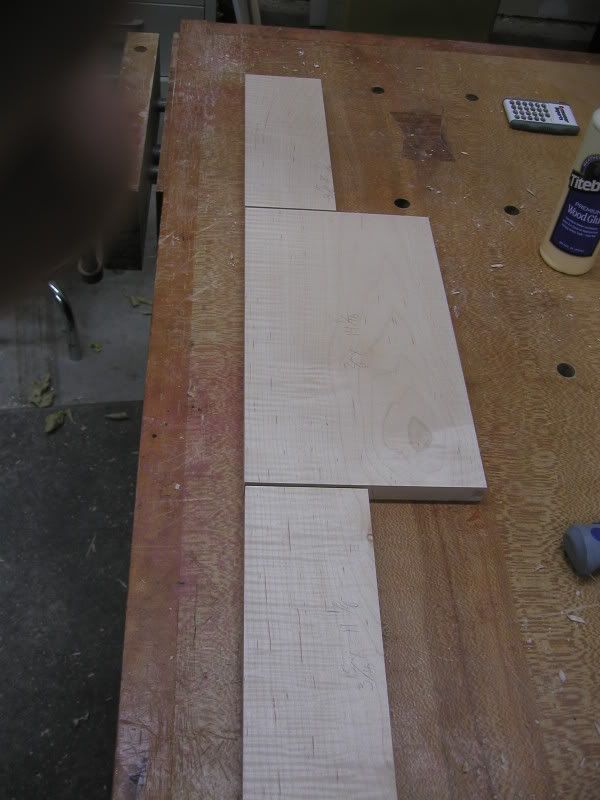
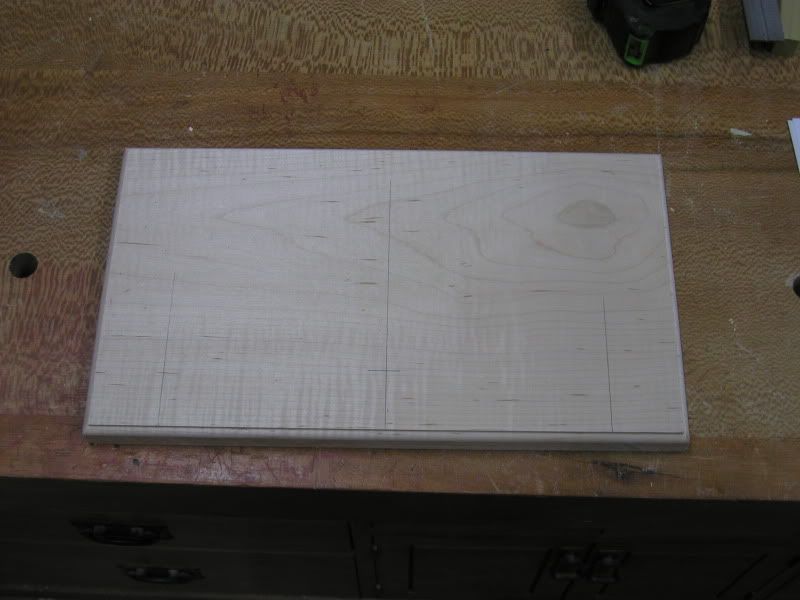
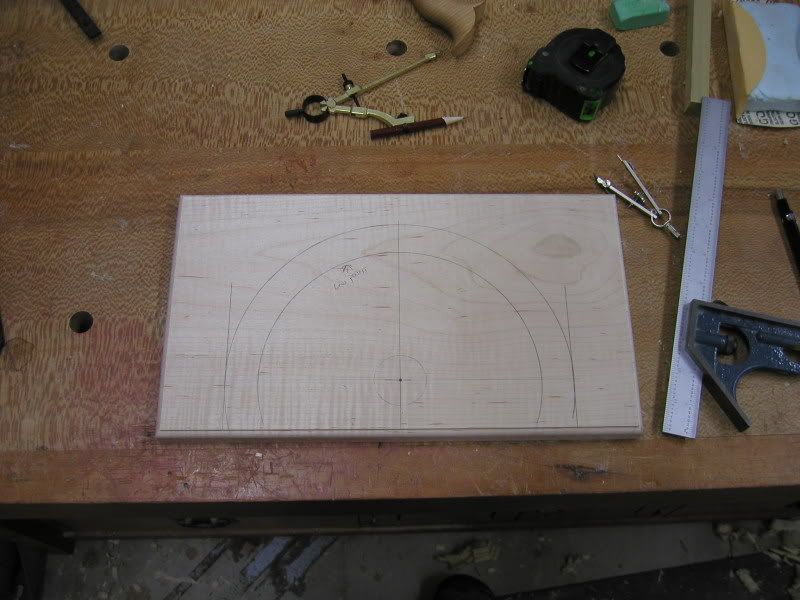


    The bottom is made from a 5/8” thick solid wood panel. It is chamfered on three sides to slide into the Ό” dados that were cut into the drawer. I will cover the drawer bottomas a little later in the build.
    Diamanwoodcrafters

  4. #49
    Join Date
    Sep 2009
    Location
    Bel Air, MD
    Posts
    111
    Now I will move onto the carving. This is one of the most basic carvings out there so don’t be intimidated by it. This is very simple and requires minimal tools.

    I will start out by covering the carving tools you will need. There are many different good quality tools out there so I will just give you the basic profile and size you will need. For starters you will need a V grooving tool. Second you will need a large gouge something like a #2 or #3/20 for removing the bulk of the material. You will also need a small back bent gouge and a chisel (3/4” will be good).

    Here is how I layout the fan. The size of the fan is based on the original I am working from. I blew it to full size using a photo program and got the large dimension. From there I wing it using basic drafting tools. You can see in the photos the sequence I use to layout the fan.


    The bottom fan actually extends down into the apron. Later I will show you how I remove the material from the apron to make this blend together. For the top fan the drawer front it set in place and marked to get the depth of the bottom of the fan.


    Once you have the fan drawn on the drawer it is time to start removing material. I start by establishing the depth at the lowest point on the shell. I do this either with the drill press or with a 1/8” drill bit and a stop. I drill holes around the shell to the maximum depth that the fan will be carved to. I then move to the bottom. I have found that this step is easiest to do using a router. I hog the bulk of the material out using a ½” straight bit and clean it up with a chisel. These two steps are interchangeable as you will see in the photos.


    I then move to the fan and start removing the bulk of the material from the fan. I define the boundary for the center and remove out from there working my way down to the bottom of the holes I drilled. The key to carving tiger maple is to pay close attention to the grain direction and keep super sharp tools. If the tool will not pop the hair off your arm any longer it needs sharpened. If you get an area that is particularly difficult you can wet the wood a little and that will help.


    Once the rough shape is formed you will need to smooth the area out. It is best to do this using a scraper. If you chose to use sand paper make sure the blow the piece off using compressed air. If ant grit is left it will destroy the edge on your carving tools and you will spend more time sharpening than carving.

    Diamanwoodcrafters

  5. #50
    Join Date
    Sep 2009
    Location
    Bel Air, MD
    Posts
    111
    Now use the layout lines from earlier and redefine the rays. Use the v tool to carve out the divisions. Once all the divisions are carved go back with the back bent gouge and round the edges of each division.


    Use the v tool once again to define the outer edge of the fan. Then carve the concave portion at the end of each blade of the fan using a large gouge (I used a #5/18). Finally blend the edges of the bottom of the fan using a gouge and clean everything up using files, scrapers and sand paper.


    Diamanwoodcrafters

  6. #51
    Join Date
    Sep 2009
    Location
    Bel Air, MD
    Posts
    111
    Now we will move onto the finials. This starts out as just basic spindle turning and finishes up with a little carving. There are tons of patters available online or from books to use. I took a basic design and tweaked it until it looked like the photo I was working from.

    You will want to start by making a story stick from your drawing.

    This starts with a 2 Ύ” square piece of stock. Make sure you gave plenty of extra length and turn the piece round. Once the piece if round use your story stick to turn the divisions of the spindle to diameter using a caliper.


    Once all the divisions are defined start roughing the spindle out. I use a gouge for all my concave areas and a skew for all the convex areas. Everything here is done by eye with the divisions you already defined with the calipers to guide you. Make sure you leave a large chunk at the tail end of the piece. This will be used later to mark the swirl pattern. I also use a ½” wrench to turn the tenon to size so I know it is exact.


    ]

    Sand everything smooth and use this as a guide to turn the two remaining finials.


    Now it is time to start marking for the carving. Use the center lines to break the spindle into four segments. I can cut a small saw kerf at the end of each line to lock the piece in place. I typically just push my tool rest against it to hold it and draw a division line using the tool rest as a guide.


    Once the flame part is broke down into for equal segments it will need to be divided by the number of times the flame spirals.


    When that is done use a piece of cardboard or plastic to lay out the spirals for the flame.


    Take a hand saw and clamp a depth stop on it and cut at the center of each division to get the depth for the spirals.


    Use a carving gouge (I use a #8-10) to remove the bulk of the material the use rasps, files and sand paper to smooth the spirals out.


    Nothing high tech here


    Trim the base and top off with a saw and use a gouge to cut the final to a point at the top. Once again use the files and sand paper to extend the spirals to the top.


    Turn the drop finials in the same manner.
    Next will be the finishing touches and the actual finishing
    Diamanwoodcrafters

  7. #52
    Join Date
    Sep 2009
    Location
    Bel Air, MD
    Posts
    111
    Diamanwoodcrafters

  8. #53
    Join Date
    Jan 2006
    Location
    Grand Forks, ND
    Posts
    2,336
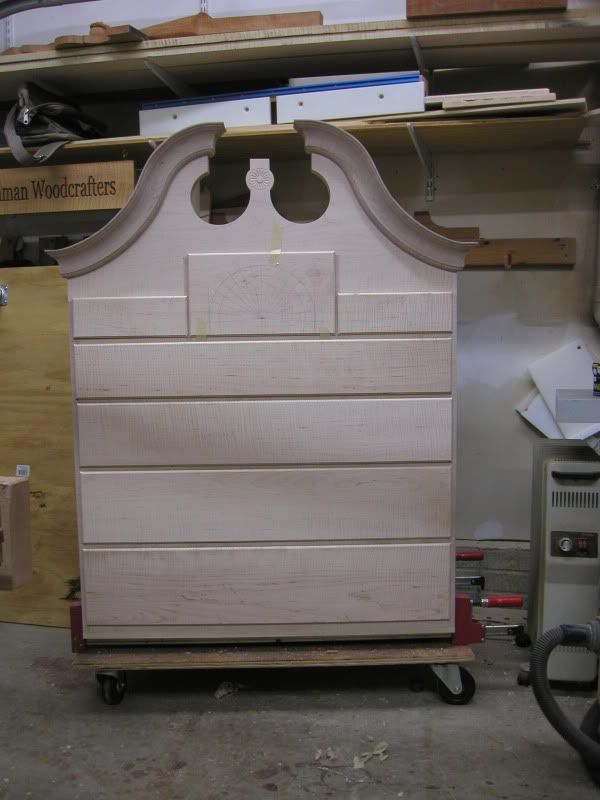
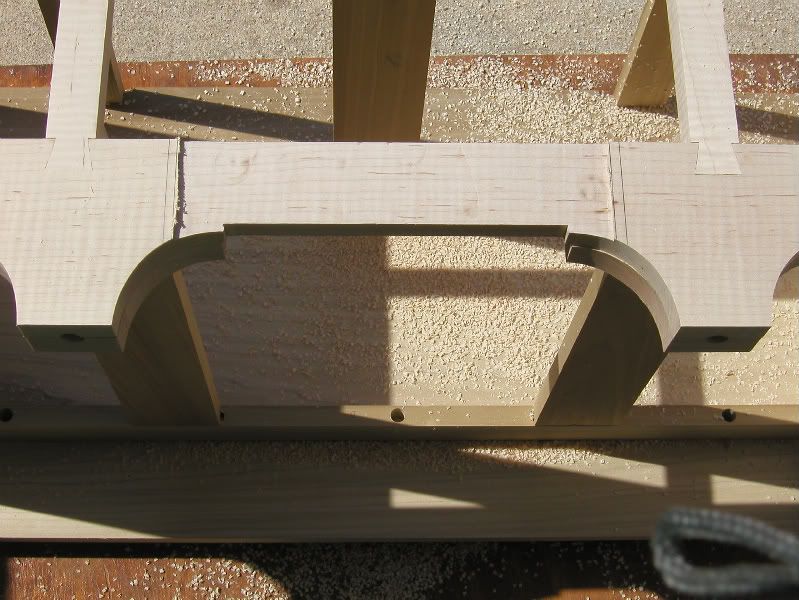
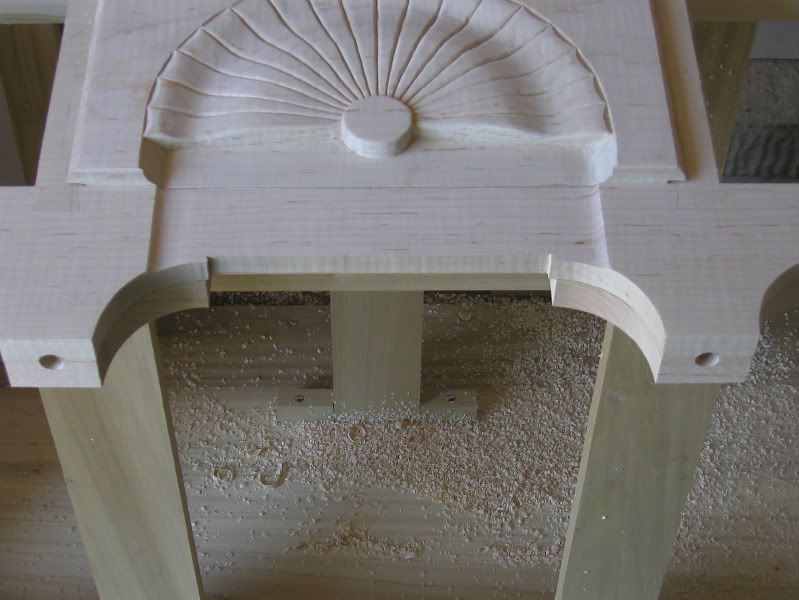
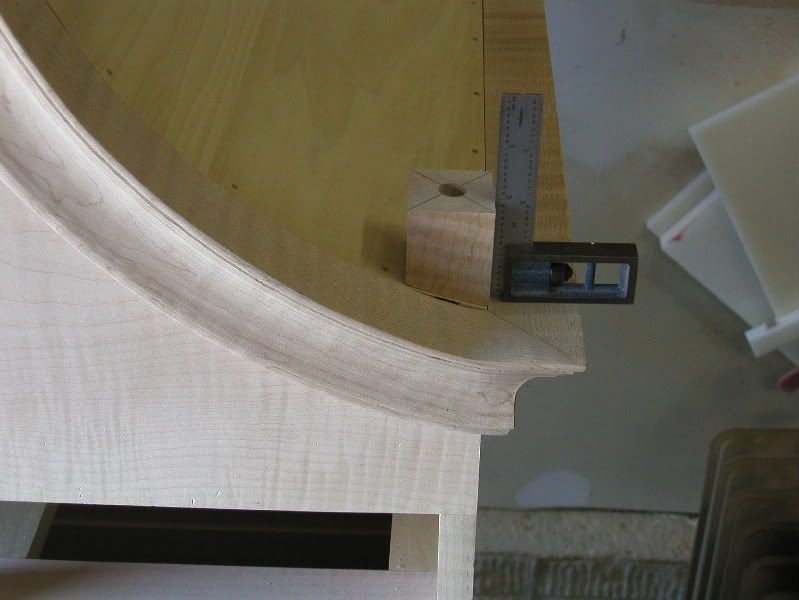
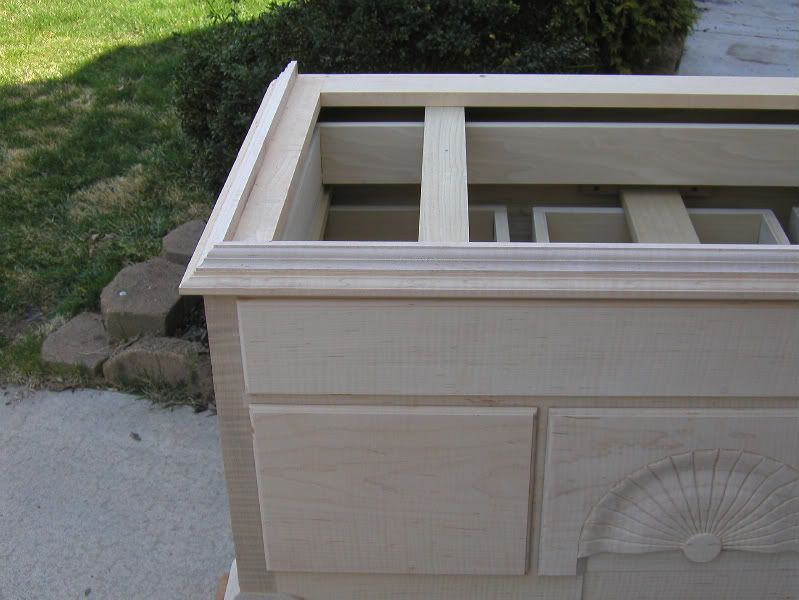
    Dave this is such a great thread, thanks again for taking the time, the center portion of the gooseneck molding, are those both small mitred returns or did you profile the end of the molding?

  9. #54
    Join Date
    Sep 2009
    Location
    Bel Air, MD
    Posts
    111
    They are small mitered returns. The just extend to the back of the blocking added in one of the previous steps.
    Diamanwoodcrafters

  10. #55
    Great stuff, Dave. Thank you for taking the time to put this together.

  11. #56
    Join Date
    Apr 2008
    Location
    Edmonton, Canada
    Posts
    2,479
    I enjoy watching it! and have bookmarked it just in case I dare to build one of these. Thanks for the step-by-step photos!

  12. #57
    Join Date
    Sep 2009
    Location
    Bel Air, MD
    Posts
    111
    Hey guys, I have one or two more posts to go to finish everything up. As soon as I have time to get all the photo links in I will get the rest up. It has been a little crazy trying to make a few deadlines the last few days so I am falling a little behind.
    Diamanwoodcrafters

  13. #58
    Join Date
    Jan 2010
    Location
    LA & SC neither one is Cali
    Posts
    9,447
    You have my complete RESPECT!!! The tutorial is great. The piece is beyond great.

  14. #59
    Join Date
    Sep 2009
    Location
    Bel Air, MD
    Posts
    111
    First I will go over how I make the drawer bottoms. I like to put the drawer bottoms in after I dye the drawer fronts. I do this because no mater how hard I try I always end up getting some dye on the drawers. Having the bottoms off makes it easier to clean the dye off.

    I cut all my drawer bottoms to size and use a panel raiser to bevel the edges. The bottoms only get beveled on three sides. This step can also be done on the table saw by tilting the blade to 15 degrees.


    Once the bevel is complete a saw cut needs to be added to the back of the drawer to allow a slot for expansion and contraction. The slot will need to be the thickness of the back of the drawer and the width of the TS blade.


    Slide the bottom into the drawer and secure it with a reproduction nail. Glue the bottom into the drawer front so the movement happens at the back.


    Add a little wax to the bottoms of the sides so the drawers slide easily. I like to use paraffin or a product called slideze (sp)


    For the bottom drawer you will need to remove some material from the apron. This is done with a router and carving gouges using the drawer to define the right and left borders and depth of cut


    Hog out the bulk of the waste with a router.


    Finish the clean up with some gouges and scrapers.

    Diamanwoodcrafters

  15. #60
    Join Date
    Sep 2009
    Location
    Bel Air, MD
    Posts
    111
    Now the blocking and holes for the finals.

    Here are the blocks with the holes for the finials


    The top beading is made using a Ό” beading bit.


    The blocks will need to be cut to match the profile of the top. Once again use the template for the scroll board to get the profile and clean it up using hand tools.


    You will need to clamp these up in a vice and clean them up with a hand plane to remove any shoulder.


    Now you will need to drill the holes for the center finial and the two drop finials. I like to use a black with a ½” hole drilled at the drill press as a guide to make sure the hole is drilled in the proper orientation.


    Finials in place


    The last thing before the finish is the waist molding. This needs to have about a 1/32” gap around the top to allow the top to slide on and off easily.


    Diamanwoodcrafters

Posting Permissions

  • You may not post new threads
  • You may not post replies
  • You may not post attachments
  • You may not edit your posts
  •