Results 1 to 8 of 8

Thread: Shop Tour, New DC system

  1. #1
    Join Date
    May 2005
    Location
    Highland MI
    Posts
    4,523
    Blog Entries
    11

    Shop Tour, New DC system

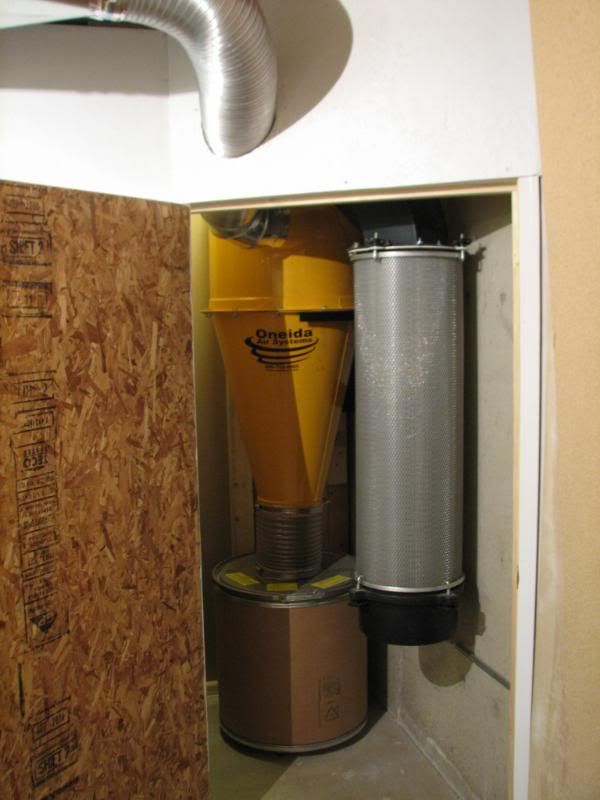
    Well, I finally finished my dust collection system, except for the still-on-order Shark Guard. Thought I would post a few pics while it is still somewhat organized before I start my next project.

    If you would like to browse the whole album at Photobucket, here is the link:
    http://smg.photobucket.com/albums/v152/ ... an%202011/

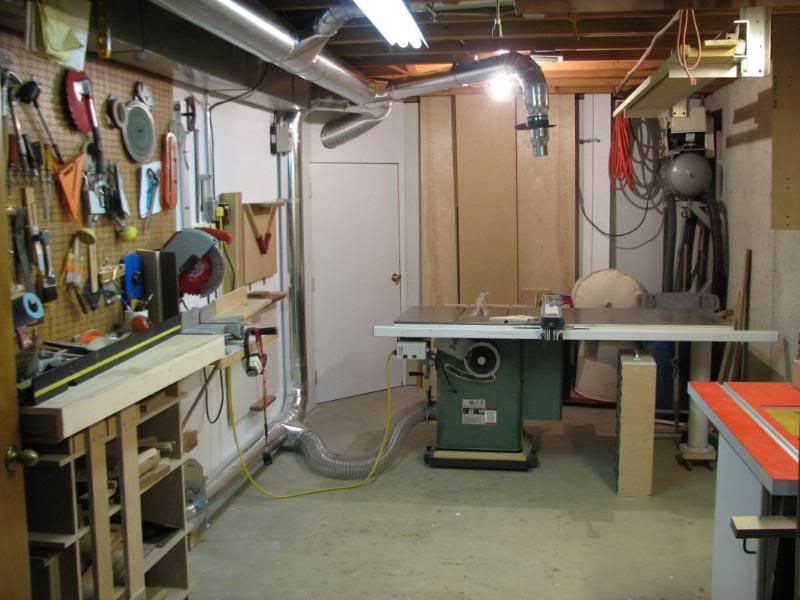
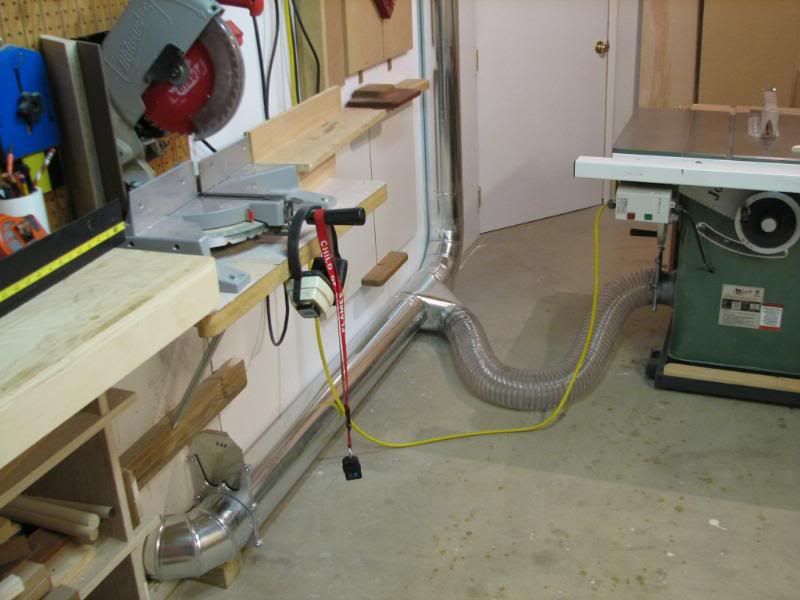
    Here is an overall shot which shows how chopped up my 350 square foot basement shop really is (36" door to move out the bigger projects which can then exit my walkout doorwall):


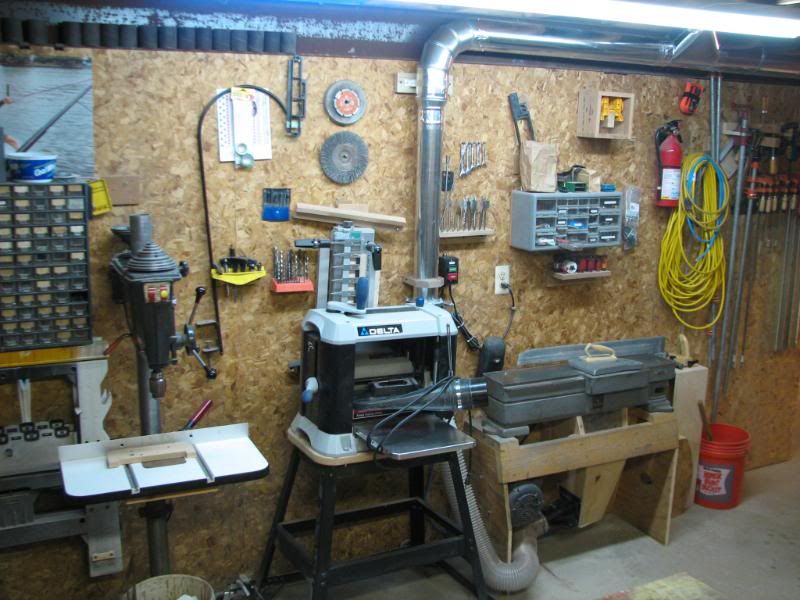
    Here is an overall shot of my "new" shop area, carved out of my unfinished basement about 12 years ago, showing the 10" Milwaukee miter saw, the Grizzly 1027 TS with HTC base and HTC fence and my 1 hp Craftsman compressor, wall mounted, with the router table on the right (note the unique monopod support for the TS extension table):


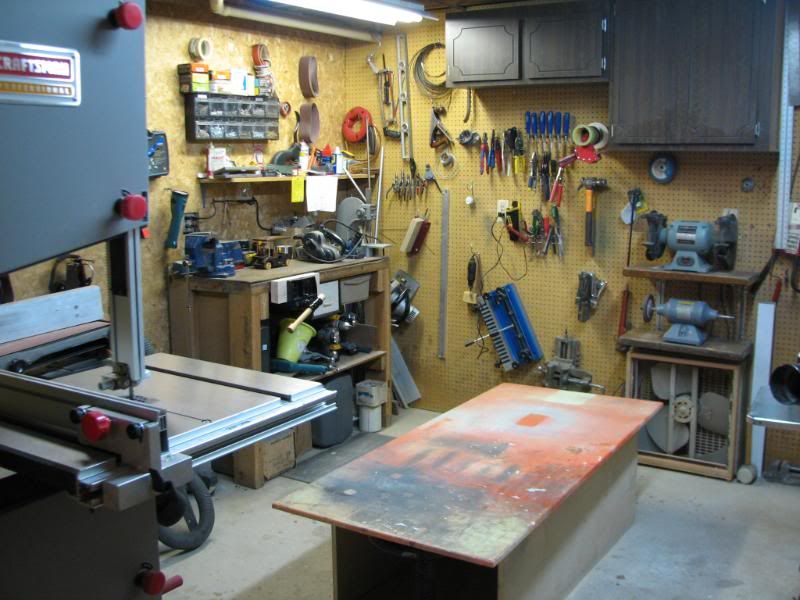
    This original shop area came into being nearly 35 years ago when I had the house built. This is my only workbench (a dinky 22"x44") built from 2.25" laminated roof decking. It is also the only place I currently have for my new Jorgensen vise. Also it shows my stacked 8" Delta grinder and 6" Baldor buffer fitted with a rubber Cratex wheel for deburring which worked great on the cut ends of the 26 ga steel duct. Cabinets were salvaged from my kitchen remodel 15 years ago:


    Another view of the old shop showing the 14" Craftsman Pro BS, my 3 hp Kalamazoo chop saw, the minimill with a power feed and my old Craftsman 6" belt sander, upgraded with a 1 hp TEFC motor. Above the saw is the lumber storage unit, I don't need much more as Armstrong Millworks is only 10 minutes away and they have a wonderful stash of most hardwoods.


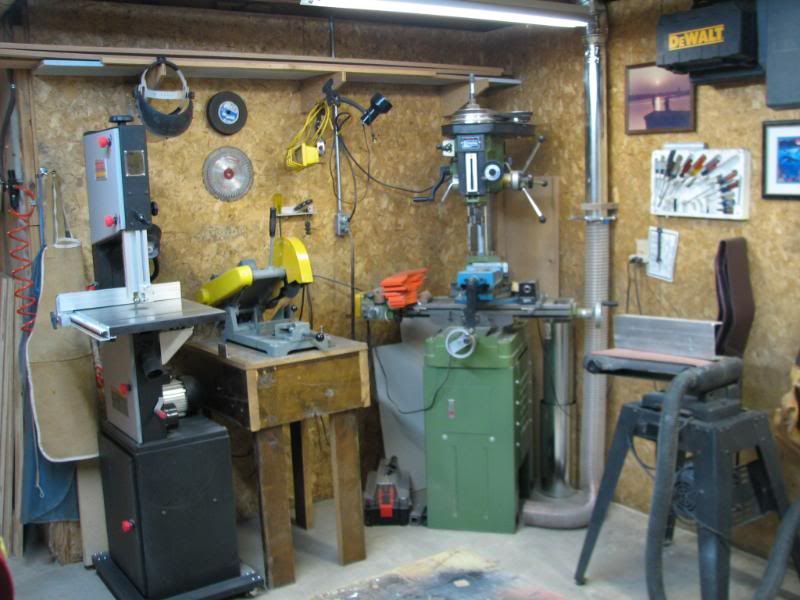
    Here is a third shot of another wall in the old shop showing my Craftsman drill press, the Delta 22-580 planer and my old free Craftsman (by King-Seeley) 6" jointer. The large photo above the storage unit barely shows my son, Jason, barefooting on our Hang-On! ski boom. Over 15 years we cranked out 2500 of them in this shop. Except for lathe work and anodizing, we did all of the work in my basement, including finishing them with a belt sander while they were spinning. We had about a dozen custom aluminum extrusions made. Aluminum dust everywhere, I am still knocking it down from the pipes an wires between the joists.
    Last edited by Ole Anderson; 02-07-2011 at 1:18 PM.

  2. #2
    Join Date
    May 2005
    Location
    Highland MI
    Posts
    4,523
    Blog Entries
    11
    Contuing the tour.

    Here is a shot of the router table, with a Woodpecker plunge lift with a big green Hatachi M12V router and a Freud fence/dust catcher. I have the 2.5" flex from the Freud collecter routed back into the cabinet which acts as a plenum, then the 4" flex catches everything as it is connected to the central DC system via a blast gate. The top of the router table hinges up to get easier router access. The steel four drawer file cabinet finds plans and instruction manuals in the top drawer along with gloves, dust masks and other stuff, with the bottom 3 drawers reserved for paint. Each drawer can fit 5 one gallon paint cans.


    I have the 2 hp Oneida Dust Gorilla housed in a sound deadened (or soon to be) closet carved out of a 9 sf bump-out at the foot of my stairs in the semi finished portion of the basement. The 3'x6' door is two layers of 1/2" OSB sandwiching 1/2" drywall. Insulation is 3.5" rockwool "Safe and Sound". The air outlets between two joists back into the shop. I was just not able to get a straight run into the DC so I used a 45 degree bend and 7" flex pipe to get the odd angle and height difference made up. Not perfect but it will have to do.


    The 4" drops originate as a 5" horizontal run, a 5" sweep ell, a 5"x4" reducer, a 4" blast gate and 4" flex. I used a circle cutter to form a 4" hole in a piece of 5/4 Trex, then mounted it with pocket screws to the wall. For this one, I first had to mount a piece of ply to the 10" poured concrete wall. I had 2 of these 4" blast gates on hand so I reused them, new ones are aluminum commercial grade.


    I ran 6" 26 ga duct along the floor to pick up my miter saw and TS bottom collector, it then runs vertically to join the 7" main. The miter saw blows into the stud cavity. That not only gave me a vertical duct, it also gave me an additional 4" of set-back for the saw. A 5" flex attached to blast gate and a 5" Penn State bellmouth allows the TS to be pulled back 3 feet to allow rips on full 8' long lumber. Oh, and the red lanyard keeps track of that tiny $70 Oneida remote starter
    Last edited by Ole Anderson; 02-07-2011 at 10:47 AM.

  3. #3
    Join Date
    Nov 2008
    Location
    Wilmington Island, Ga
    Posts
    654
    Stud cavity duct, genius idea!

    I'm sure you installed blocking and sealant to prevent sucking the entire cavity right?

    Your shop looks like a blast to work in. I can see it's been well loved.

    Thanks for sharing
    Husband to 1, father to 9
    2 girls and 7 boys (in that order)
    Life Is Full Of Blessings
    The Lord is my Rock and my Refuge.

  4. #4
    Join Date
    May 2005
    Location
    Highland MI
    Posts
    4,523
    Blog Entries
    11
    I'm sure you installed blocking and sealant to prevent sucking the entire cavity right?
    Yes I blocked to cavity above the cutout, no sealant though as there is such a large opening below the blocking, there is no suction left at the top of the cavity. The blocking is quite tight anyway.

  5. #5
    Join Date
    Nov 2008
    Location
    Wilmington Island, Ga
    Posts
    654
    I figured ya did.

    Sweet set up though, I like the whole thinking out side the box (or wall).
    Husband to 1, father to 9
    2 girls and 7 boys (in that order)
    Life Is Full Of Blessings
    The Lord is my Rock and my Refuge.

  6. #6
    Join Date
    May 2005
    Location
    Highland MI
    Posts
    4,523
    Blog Entries
    11
    Thought I would add a few pics after I finished the over blade collection on my TS and added rock wool sound insulation to the closet (see YouTube video), and also a shot of the 5" bellmouth and gate on the TS bottom collection port:

    http://www.youtube.com/watch?v=8X8qwMqm3Ek
    Attached Images Attached Images

  7. #7
    Very nice shop Ole. Seems very efficient with an astonishing lack of clutter.

  8. #8
    Join Date
    Apr 2010
    Location
    Nashville, TN
    Posts
    1,544
    Ole,
    I'm a big fan of your TS dust collection set up. The bellmouth and BG setup looks very professional.

    Mike

Posting Permissions

  • You may not post new threads
  • You may not post replies
  • You may not post attachments
  • You may not edit your posts
  •