I need a lumber rack. If you guys built one please show a pic or three. If you bought one it would be much appreciated to know where and if your happy with it.
I have looked at McMaster Carr, Lee Valley, and Fastenal.
Thanks everyone, Terry


 [OP]
Member
[OP]
Member
I need a lumber rack. If you guys built one please show a pic or three. If you bought one it would be much appreciated to know where and if your happy with it.
I have looked at McMaster Carr, Lee Valley, and Fastenal.
Thanks everyone, Terry
 Member
If you use the search up in the right corner, on LUMBER RACK, there are various threads and pics.
Also, check Rockler, Grizzy, etc...
Heres a couple.
http://www.sawmillcreek.org/showthre...ht=lumber+rack
http://www.sawmillcreek.org/showthre...ht=lumber+rack
Last edited by Dave Wagner; 01-22-2012 at 1:29 PM.
Dave W. -
Restoring an 1890 Victorian
Cuba, NY
[OP]
Member
Thanks Dave. One more question, How much spacing is recommended between uprights? If I mounted one to the wall i was going to put one on every stud.
I went with every stud, some folks go every 4 feet. Your needs will vary depending on the lengths of lumber you stock and if this will be a working rack that you get to often, or a long term rack for longer lumber.Originally Posted by Terry Starch

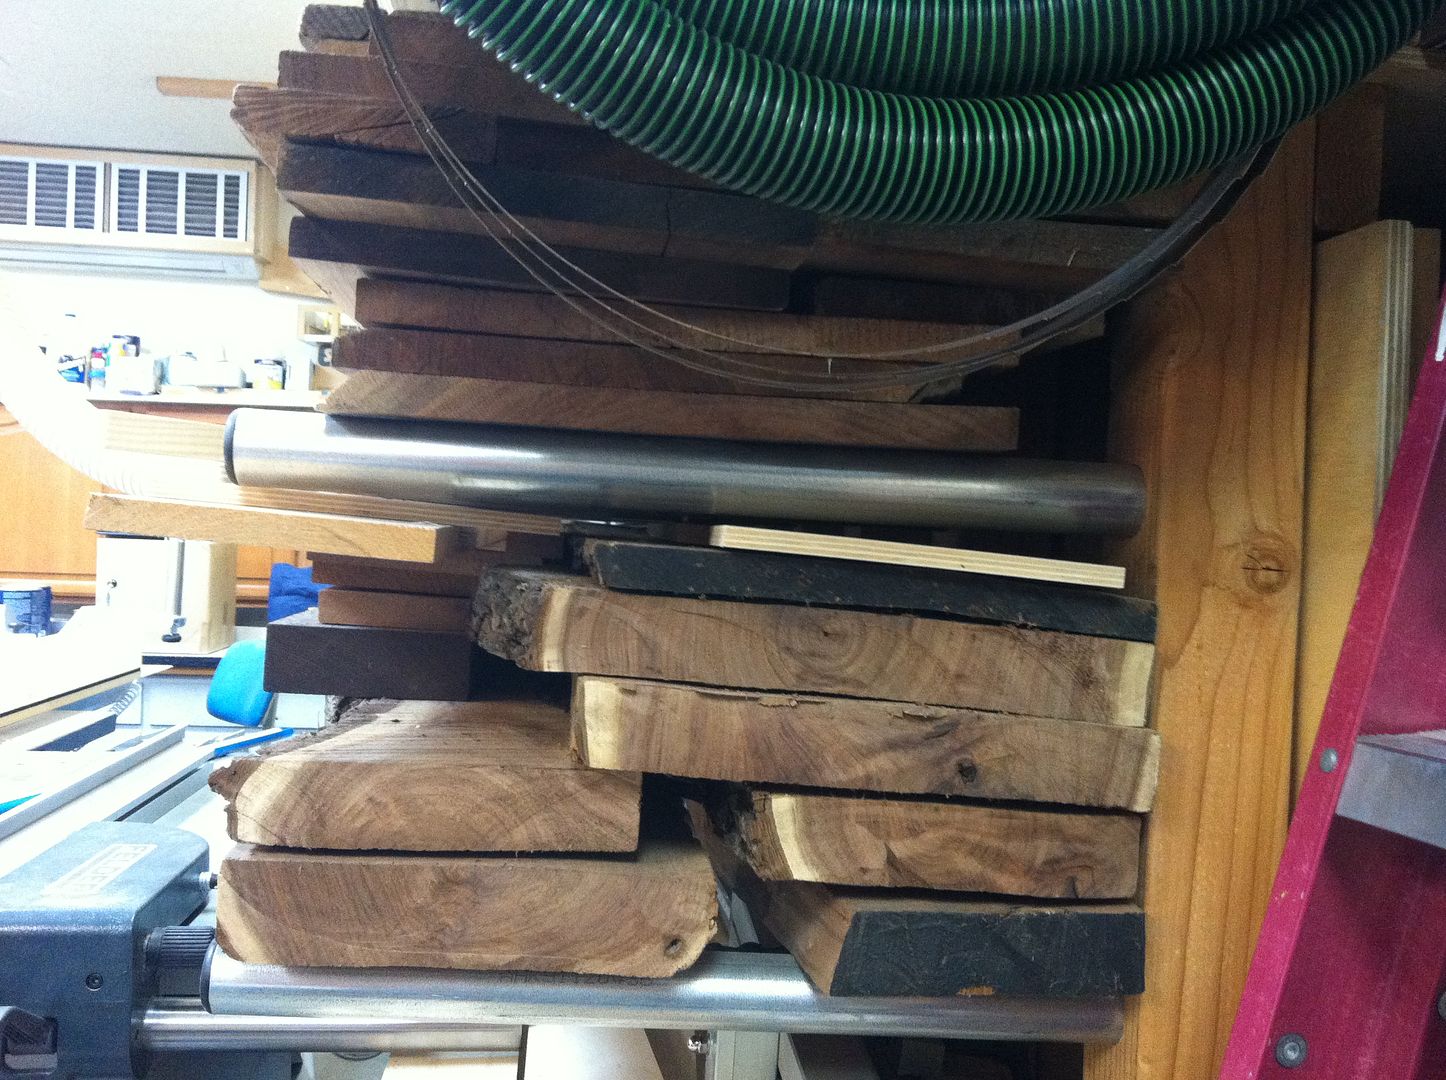
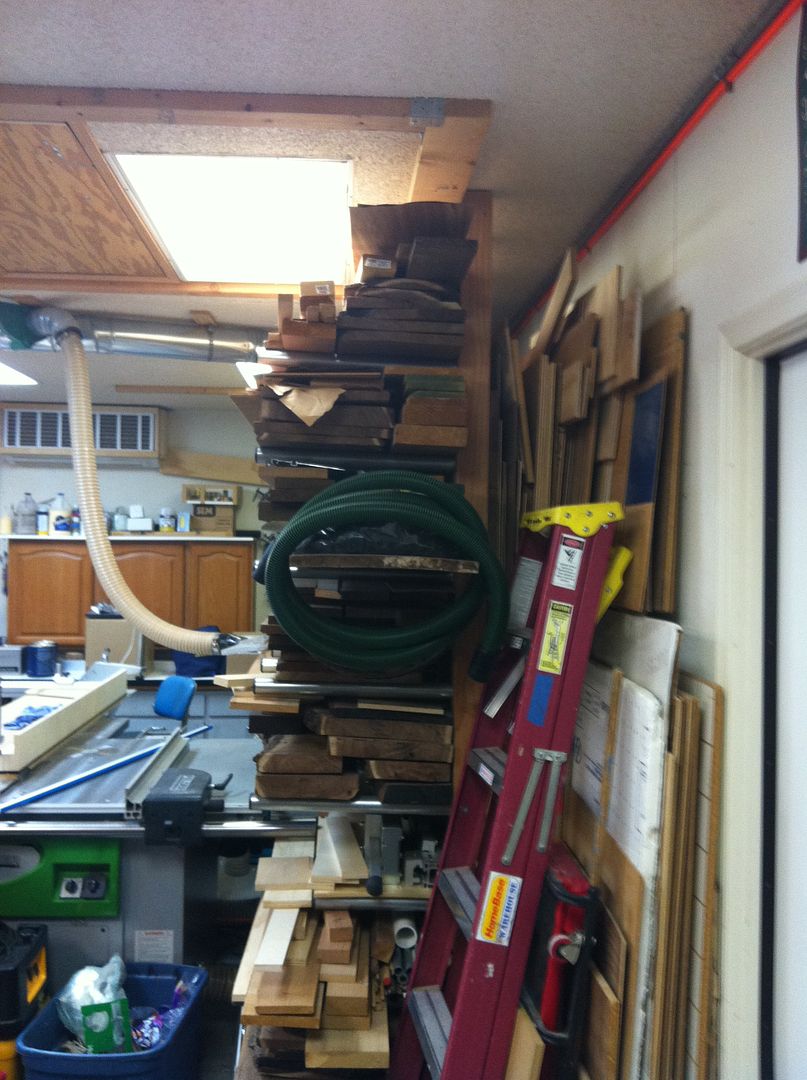
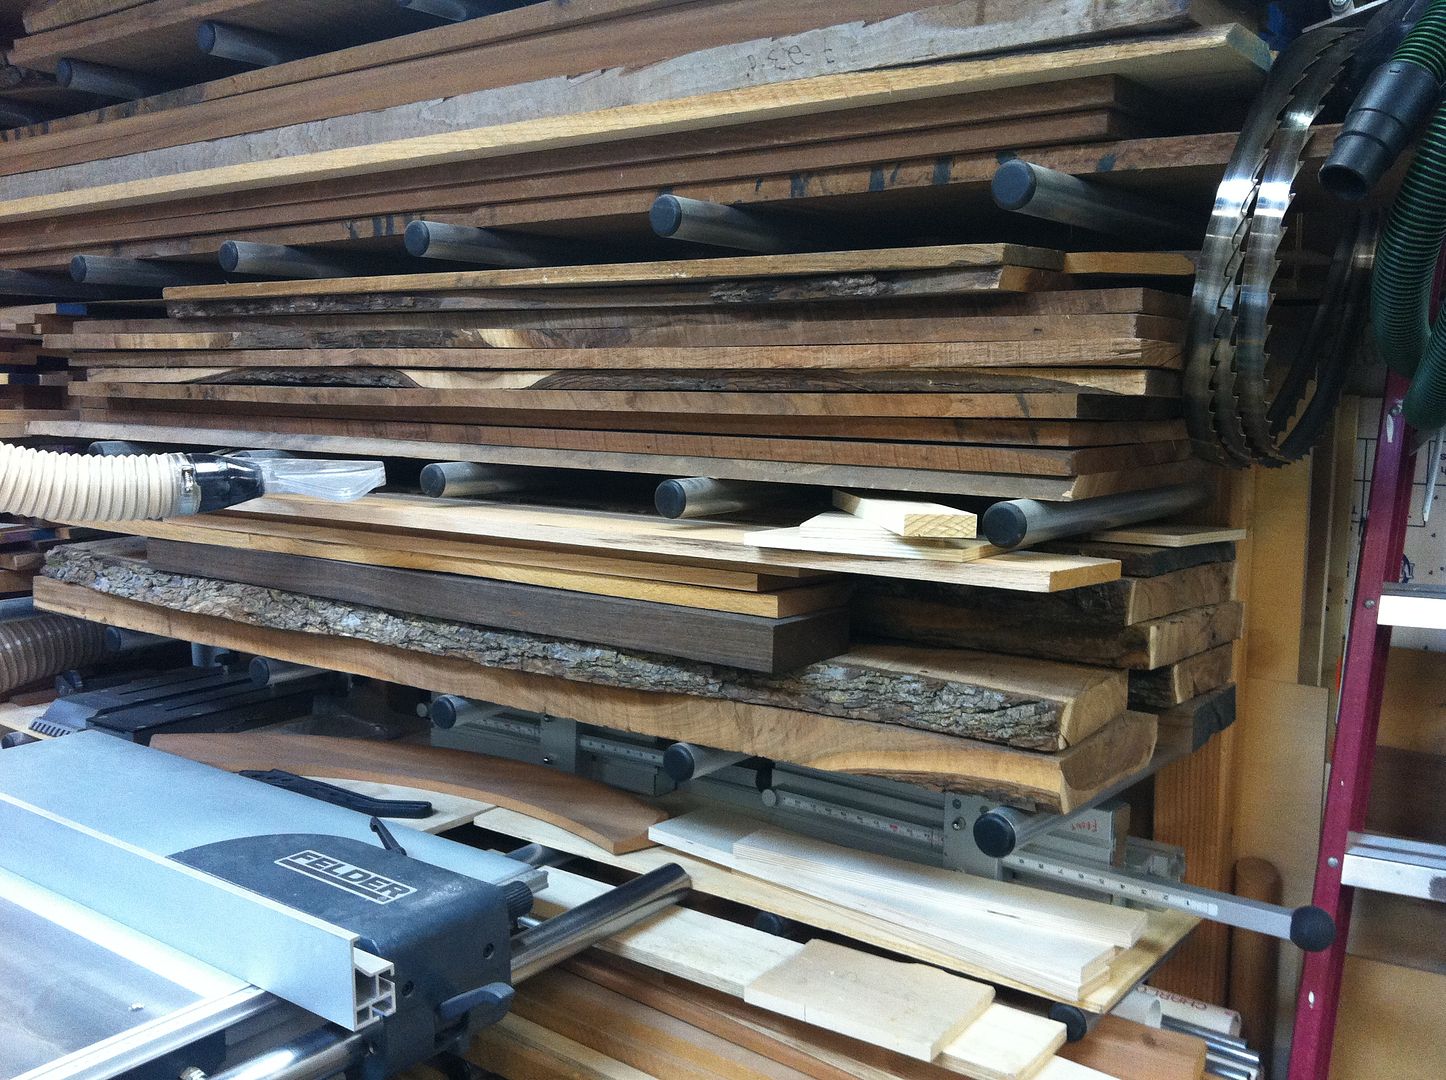
Things I have learned as I morphed through various lumber racks:Shop Tour 2011-10-19 add-on (2).jpgShop Tour 2011-10-19 add-on (1).jpg
- Your verticals will never be perfect for all boards. Some board will be just enough too short to be well supported on both ends. The narrower the spacing the less unsupported stock that has to hang out in space.
- The height between horizontal arms should allow 6" of lumber to be stacked and no more. This way when the piece you need that is on the bottom (it always is) you don't have to remove half your lumber pile to get at it.
- Pre-make a boat-load of stickers and put them in a coffee can near the rack. Make twice as many as you think you could ever use; that way you will only have to re-make another batch once or twice.
- Make your stickers square so that they can be laid anyway that they land. The effect of oddball sized stickers is magnified as you stack and things get ugly fast.
- Make some quickie overflow racks. Put any extra influx of lumber on these or lean then against the wall. Do not stack them on top of your existing boards "just for now" . . . see step 2.
I have a rack (parts purchased at Lowe's, Lee Valley sells them also) along sixteen feet of wall that occupies the top two feet of that wall. Below is are all manner of shop items, tools and so forth. I was unwilling to dedicate a section of wall floor to ceiling.
Shop Tour 2011-10-19 (26).jpg
I also have a three or so foot wide vertical lumber area where boards stand on end,
Shop Tour 2011-10-19 (3).jpg
a four foot wide by two foot deep cutoff bin for things up to four feet long or so,
Shop Tour 2011-10-19 (28).jpg
a cubby under the outfeed table of the tablesaw for items two feet and shorter and a smaller cubby on the wall for odd small pieces that can be used for details and accents
Shop Tour 2011-10-19 (35).jpg and another area for "lesser" scraps, stove kindling and so forth. I'm sure others can add to this.
Shop Tour 2011-10-19 (45).jpgAttachment 220699
Last edited by glenn bradley; 01-22-2012 at 3:41 PM.
"A hen is only an egg's way of making another egg".
Samuel Butler
I have a system like this one and it works very well. This one is sold by Lee Valley, but may be available from others as well.84k4106s2.jpgpbr001_dims.jpg
Lee Schierer
USNA '71
Go Navy!
My advice, comments and suggestions are free, but it costs money to run the site. If you found something of value here please give a little something back by becoming a contributor! Please Contribute
Member
I would think if your studs are 16" on Center, maybe every other one. so 32" or 48" depending on how wide you want to go.
Dave W. -
Restoring an 1890 Victorian
Cuba, NY
 Member
I have been using an adjustable shelf bracket with wall standards system similar to what Lee shows above and in photo # 3 posted by Glenn. They are spaced 48" apart, lagged to studs with 3.5" x 5/16" lags and they don't flinch fully loaded. My walls are now covered with 1/2" advantech but when I had these shelf standards mounted on drywall I simply backed each of the standards with a 1x3 to keep the drywall from crushing.
Member
Also, do a Google Image Search, a lot of neat ideas...
https://www.google.com/search?hl=en&...CeLl0QGM3KnoCw
Dave W. -
Restoring an 1890 Victorian
Cuba, NY
Member
I built mine out of plywood. It has been doing a great job for me. Here are a few pictures that show some of the details and it hanging on the wall loaded down. The pics showing details are of a piece I had to cut off the bottom of each segment because I failed to account for the wall and the cinder block foundation not meeting to make a flat face <g>.
P1020903.JPGP1020902.JPGP1020904.JPG
Member
It's an issue rapidly moving up my job list - i've no proper storage yet. The shop is small at about 25x20 ft and space is tight - lots of the wall area in particular is accounted for.
I've built a sheet storage rack that stands two stacks of 8x4s on end lying against two slightly outwards sloped 4ft wide ladder like frames facing each other and about 36in apart which has a small footprint and works well - you can flip sheets from one side to the other to get at one that's buried. It just needs care not to hit a light or something when moving sheets in and out. Some crash bars are needed....
The usual racking systems (which comprise verticals with attached horizontal support arms - normally bought metal items or the plywood equivalent) are fine if you have lots of empty wall, but it gets a bit more complicated when it involves sneaking maybe only one or two levels of storage in high up. The bought heavy duty variety run into quite significant money pretty quickly too - especially if you go for a close rack spacing.
I'm more interested in some sort of stand alone cantilevered horizontal arm with a mounting flange or whatever that could be screwed directly to a wall - it'd save the cost of the verticals and be more flexible in layout terms. A bought metal one would be handy, but a DIY version would be even better. The thinking at this stage is two ply arms bolted and glued up over a ply spacer with holes drilled edgewise through it for fixings - maybe those self tapping fixings for masonry since my walls are concrete block.
Per Glenn's line of of thought (racks/bins for differing sizes of pieces) but taking it a bit further - i'd like to be able to build up a little stock of wood so that it has time to condition. The loft above is probably my only real option for that. Which means that viewed from that level it becomes a case of looking at material flow from wood inwards to the loft, down to trolley(s) in readiness for machining, to trolleys as work in progress, and to finishing and assembly - with offcuts peeling off to bins like Glenns and eventually down to bits for firewood.
That's just the way i'm thinking....
ian
Contributor
How about a mobile lumber rack:
http://www.bt3central.com/showthread.php?t=36230
Tim
Member
I built a horizontal rack. I went every other stud. You can have it if you are anywhere near me. The board I want is always on the bottom. And I don't even know it is there until I take all the other lumber off cause I can't see it!!
My next rack will be vertical.
Salem
See step 2.
"A hen is only an egg's way of making another egg".
Samuel Butler
 Contributor
I had a space problem in as most of us do. I ended up building a cantilever rack with 4 by 4 posts and steel conduit. I can't take credit for the design, I found it on a forum. I put a 4 by 4 post every 16" for 12 feet. The conduit is 1 3/4" size. I drilled holes in the 4 by 4s at about a 5 degree angle from 90 so the bars would tilt up a bit. Also, I put the rack away from the wall so I can use the space behind for sheet goods. I put long cleats on the ceiling to support the tops of the 4 by 4s, and there is a T base at the bottom of each. Stupidly I didn't take pics as I built it. It is crazy strong. When I built it I jumped repeatedly on the top of a bar to test and I weight 230 lbs. Also, I found online some plastic plugs sized to fit the ends of the conduit, just to finish it off.
Member
I'll be contrary here. IF you have the headroom- forget a horizontal rack and go vertical with wood stacked "soldier style" edges towards the wall. Benefits:
- Requires almost no structure
- Easy and quick to build
- The floor supports the weight
- Easier AND SAFER to load and unload (no step stools required to reach high boards). Safety chains recommended however.
- Can easily examine both sides of all boards
- Any board can be selected- no re-stacking needed to get "the" board at the bottom of a stack
- Doesn't take any more space, actually less, than a horizontal rack
No warping if wood is 20% MC or less. A few average woodworkers do it that way- Sam Maloof, David Marks, Lon Schleining, many Woodcraft stores, etc.

Last edited by Alan Schaffter; 01-23-2012 at 5:42 PM.
 Posting Permissions

 Reply With Quote