Results 1 to 15 of 15

Thread: Bench build update

  1. #1
    Join Date
    Feb 2004
    Location
    Perth, Australia
    Posts
    9,492

    Bench build update

    Here is a progress report.


    It is now two weeks since I began working on the bench. I suspect that my plans to finish it the first weekend were a touch optimistic


    What has been frustrating has been the feeling that I get two paces forward, and then move back one. This is in part due to using Jarrah I have salvaged over the years - all needs to be laminated. For example, the stretchers are three layers each to reach the desired 2" thickness ..


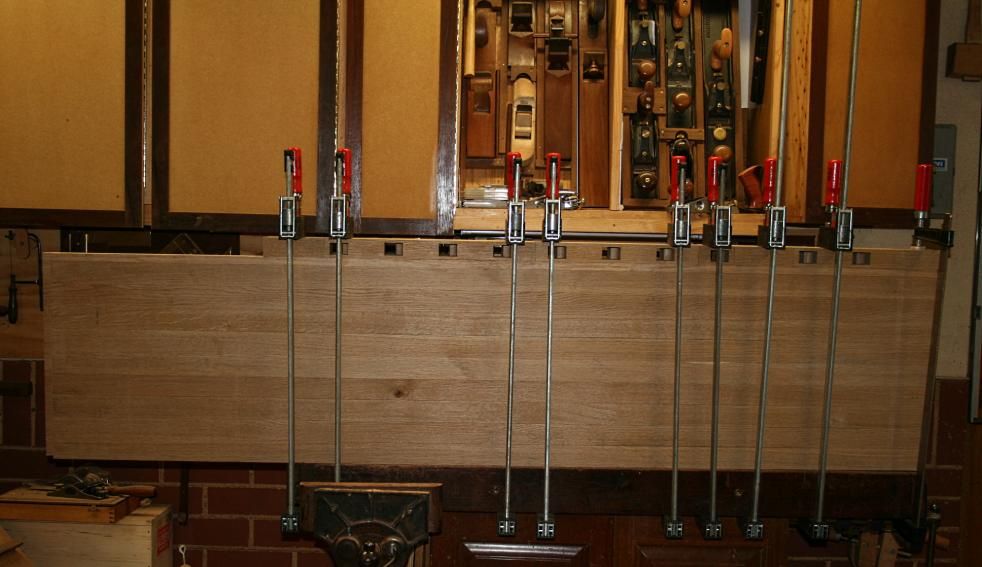
    I am beginning to see a light at the end of the tunnel, however. The top is nearing completion, and all the pieces for the base are essentially ready to go. I have estimated the final weight of the bench, and was shocked to discover that it will end up 182kg or 400 lbs.


    Much of the time to date has been determining how to fit the Benchcraft tail vise (wagon vise). The first issue was that the oak benchtop's final thickness is 3 1/2" (rather then the 4" ideal for which the BC was designed). This is not a big deal as it just requires spacers to align with the 4" end cap (all in the instructions).


    The second issue was to decide how far out to place the dog holes - in a continuous, unbroken line outside the legs, or broken by the legs but close to the edge of the bench? I decided to go for the latter. The bench dogs are 2" from the edge of the bench, each 3" apart, except for the area of the legs, where they are 6" apart. I also decided not to include a planing stop. Either I will use the first bench dog, or I will use a jig that uses the bench dog and a holddown.


    (the bench dog strips were shown in the previous report)


    So the order today was (1) form the tenon for the end cap, as this forms part of the tail vise screw installation, (2) rout out the mortice for the screw, and then (3) glue in the bench dogs.


    I have watched a few videos on various blogs of the end cap tenon being formed with a circular saw and a power router. I took a slightly different route.


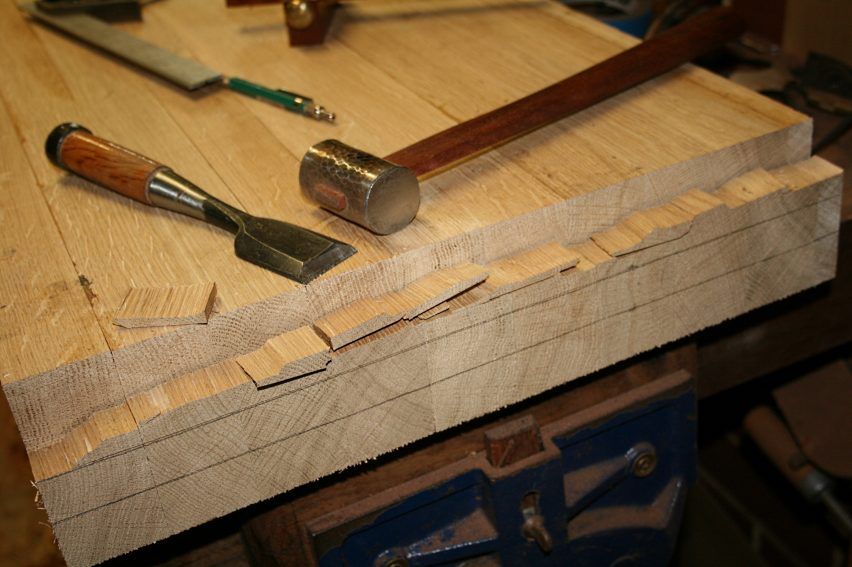
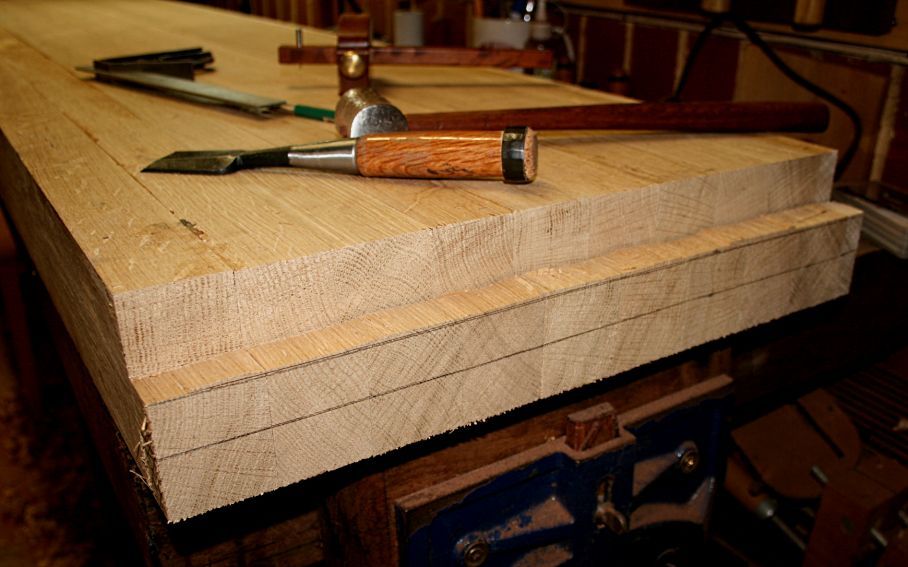
    Firstly, I sawed the shoulders of the tenon on a sliding tablesaw ...


    Then used a wide chisel to split the waste off ...


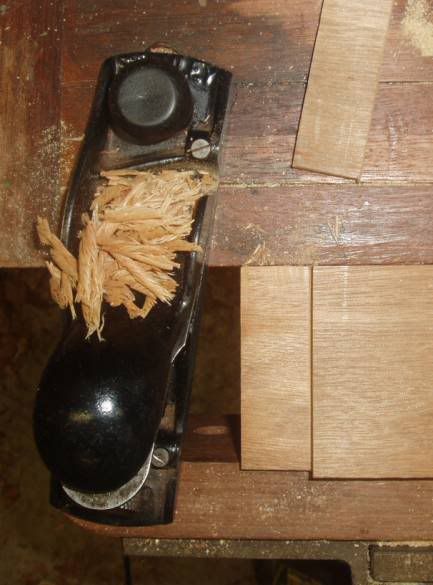
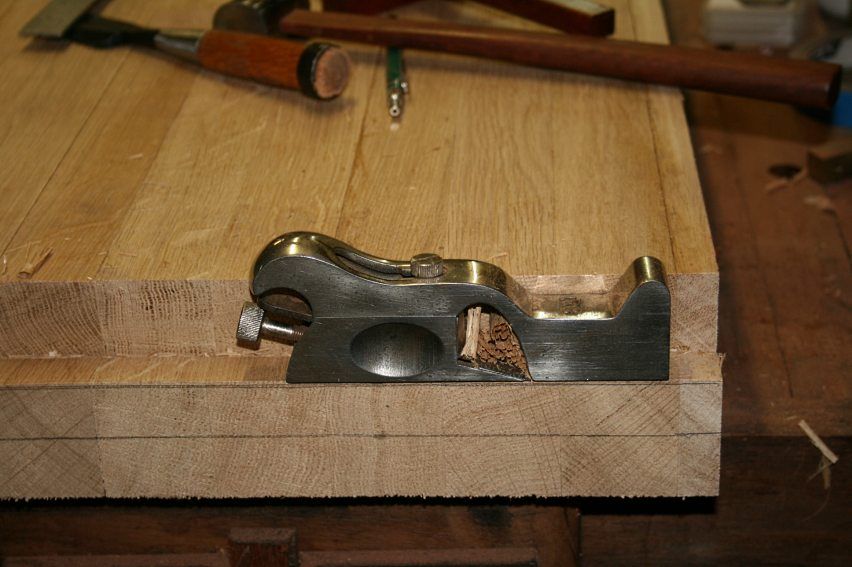
    The first side I used my old Stanley #93 (perfect for a 1" deep tenon), as it could adjust from thick to fine shavings.


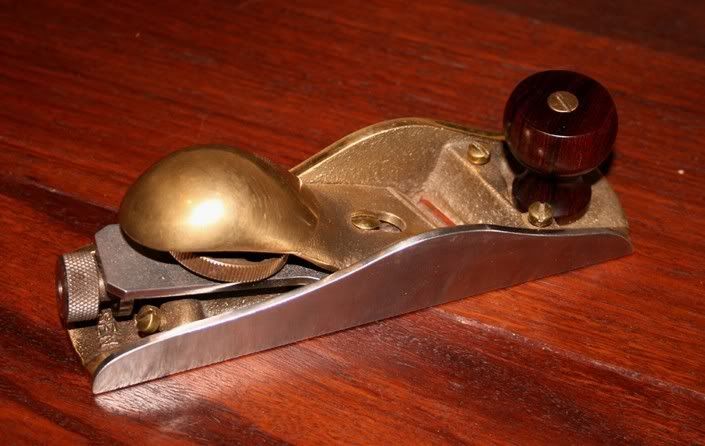
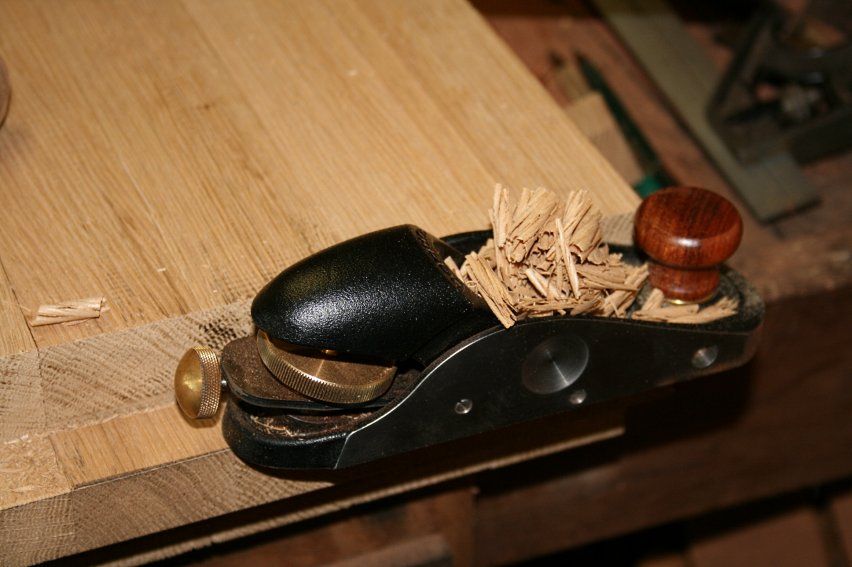
    On the other side I used a Veritas skew block plane. This was a better choice.


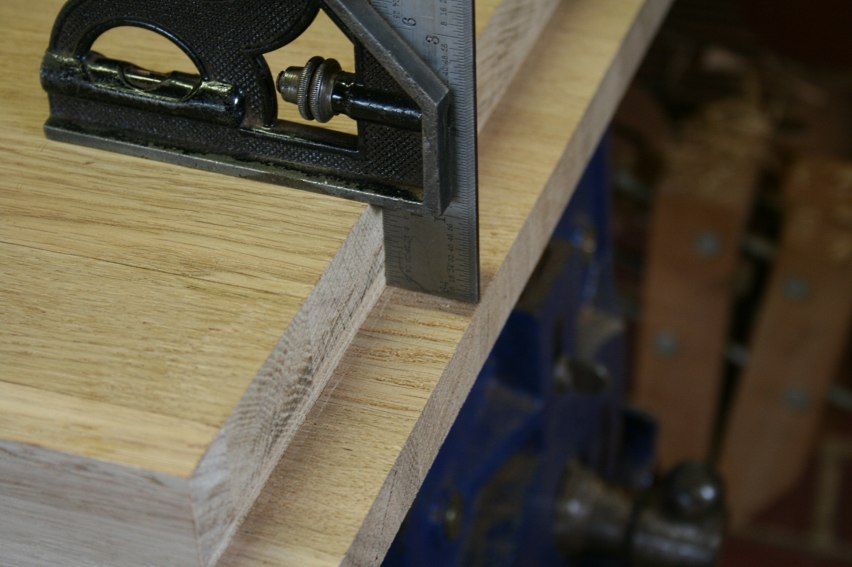
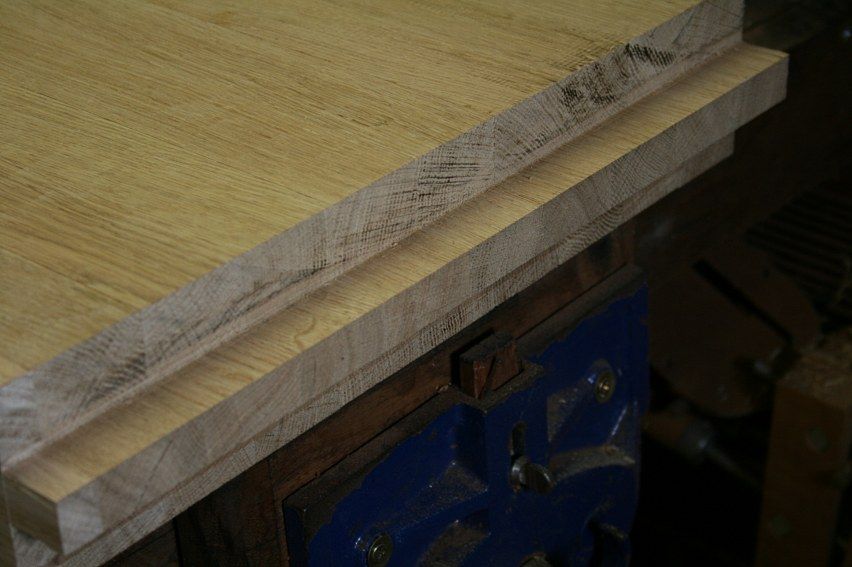
    Having then routed the slot for the tail vise screw, I was finally able to glue on the dog hole strips.


    The side piece and end cap are both loose (they will later be dovetailed together) ...


    Regards from Perth


    Derek

  2. #2
    Join Date
    Dec 2010
    Location
    Burlington, Vermont
    Posts
    2,443
    Looking really great, Derek. What's the size on this top again?

  3. #3
    Join Date
    Feb 2004
    Location
    Perth, Australia
    Posts
    9,492
    Hi Joshua

    It is 75" long, 22" wide and 3 1/2" thick. European Oak.

    Total weight (including the tail vise) for the top is around 100 kg (or 220 lbs).

    Regards from Perth

    Derek

  4. #4
    Join Date
    Jun 2009
    Location
    Salt Lake City
    Posts
    1,506
    Is there going to be a vise on that end with the tongue?

    I ask because I am trying to plan how I want to mount my veritas twin-screw that I am using as an end vise.

  5. #5
    Join Date
    Feb 2004
    Location
    Perth, Australia
    Posts
    9,492
    Hi Zack

    That is the end cap for the Benchcraft tail vise. It is almost ready for fitting - just the end cap to drill.

    Regards from Perth

    Derek

  6. #6
    Join Date
    Feb 2004
    Location
    Marietta GA
    Posts
    1,120
    It's looking prettttttty !

    You are going to be so spoiled !

  7. #7
    Join Date
    Jun 2009
    Location
    Salt Lake City
    Posts
    1,506
    Sorry. You said that and I didn't read it.

    Will there be an end cap on the other end?

    Why a tongue instead of a sliding DT? Simplicity?

  8. #8
    Thanks for the update Derek. Minutes ago I just posted a thread requesting opinions on a large shoulder vs. a skew rabbet block, then I saw your bench update. Would you favor the skew block now in any relative situation trimming a tenon? I won't be using a shoulder to clean up a dado and I already have a medium shoulder. I've read many of your reviews, they've been of great help as I am new to hand tools. Thanks and keep them coming!

  9. #9
    Join Date
    Feb 2004
    Location
    Perth, Australia
    Posts
    9,492
    Quote Originally Posted by Zach England View Post
    Sorry. You said that and I didn't read it.

    Will there be an end cap on the other end?

    Why a tongue instead of a sliding DT? Simplicity?

    Hi Zach

    It was not possible to use a sliding dovetail as the mortice in the cap does not stretch across its whole length (it cannot as the side pieces will be dovetailed at the ends to the end cap). Even if it were possible, it would be too weak to use - I plan to pin the end cap (through the tenon). I am wondering oif i can get away without having to also bolt the end cap tp the bench. Will the combination of dovetailed sides and pined mortice-and-tenon be sufficient to withstand the pressure from the vise?

    Regards from Perth

    Derek

  10. #10
    Join Date
    Jun 2009
    Location
    Salt Lake City
    Posts
    1,506
    Quote Originally Posted by Derek Cohen View Post
    Hi Zach

    It was not possible to use a sliding dovetail as the mortice in the cap does not stretch across its whole length (it cannot as the side pieces will be dovetailed at the ends to the end cap). Even if it were possible, it would be too weak to use - I plan to pin the end cap (through the tenon). I am wondering oif i can get away without having to also bolt the end cap tp the bench. Will the combination of dovetailed sides and pined mortice-and-tenon be sufficient to withstand the pressure from the vise?

    Regards from Perth

    Derek
    When you say "pin" M/T are you referring to dowels? Do those go through from the top or the bottom?

    It seems to me that the bolts would not really add much strength after the joinery.

  11. #11
    Join Date
    Feb 2004
    Location
    Perth, Australia
    Posts
    9,492
    Quote Originally Posted by Zach England View Post
    When you say "pin" M/T are you referring to dowels? Do those go through from the top or the bottom?

    It seems to me that the bolts would not really add much strength after the joinery.
    The wooden dowels (pins) go through the tenon from the lower side of the end cap.

    Regards from Perth

    Derek

  12. #12
    Join Date
    Feb 2004
    Location
    Perth, Australia
    Posts
    9,492
    Quote Originally Posted by Joey Chavez View Post
    Thanks for the update Derek. Minutes ago I just posted a thread requesting opinions on a large shoulder vs. a skew rabbet block, then I saw your bench update. Would you favor the skew block now in any relative situation trimming a tenon? I won't be using a shoulder to clean up a dado and I already have a medium shoulder. I've read many of your reviews, they've been of great help as I am new to hand tools. Thanks and keep them coming!
    Hi Joey

    Keep in mind the choice I made in tools was for a specific task. The Veritas is designed to work across the grain. The Stanley is designed to work end grain. The Veritas can take a thicker shaving and and do this with less hassles in adjusting the mouth and blade.

    Regards from Perth


    Derek

  13. #13
    Join Date
    May 2008
    Location
    MA
    Posts
    2,258
    Hi Derek,

    That skew block looks like the right hand model? Looks like you took the guide off and are running it on the right side of the board.

    I was torn on this vs the left hand model ( was imagining the right hand model would work better for jobs clamped on the front of the bench (running parallel to the bench front)). But thought I would use on the right end of a workpiece more often, so I just received the left hand sbp.

    Care to offer a quick comment on which you use more often?

  14. #14
    Join Date
    Feb 2004
    Location
    Perth, Australia
    Posts
    9,492
    That Veritas skew block plane is actually the left hand model, if you consider that the original Stanley #140 was a right hand model (The board is clamped in the face vise, with the tenon facing the left ..).


    Here is the first LN #140 made, based on the Stanley (I restored this fro a rusted hunk with the help of Tom LN) ..


    I have both the right and left models of the Veritas. The left hand is easier to use for a right hander if you work on the right side of the bench, which is more intuitive at times.

    Regards from Perth

    Derek

  15. #15
    Join Date
    Feb 2011
    Location
    Carlsbad, CA
    Posts
    2,230
    Blog Entries
    2
    Derek, thanks for your bench building thread.

    As with all your posts, I particularly enjoy your pictures/descriptions of how you use various hand tools to execute joinery and other key tasks. Your description of the tools you use and how they work is incredibly helpful and informative for me and I always learn a lot from your posts.

    I really appreciate you taking the time to share your expertise and very much look forward to seeing your continued progress on the bench.

    All the best, Mike.

Posting Permissions

  • You may not post new threads
  • You may not post replies
  • You may not post attachments
  • You may not edit your posts
  •