Page 2 of 4 FirstFirst 1234 LastLast
Results 16 to 30 of 56

Thread: Let's build a Tele....well, almost...

  1. #16
    Join Date
    Apr 2009
    Location
    Connecticut
    Posts
    6,670

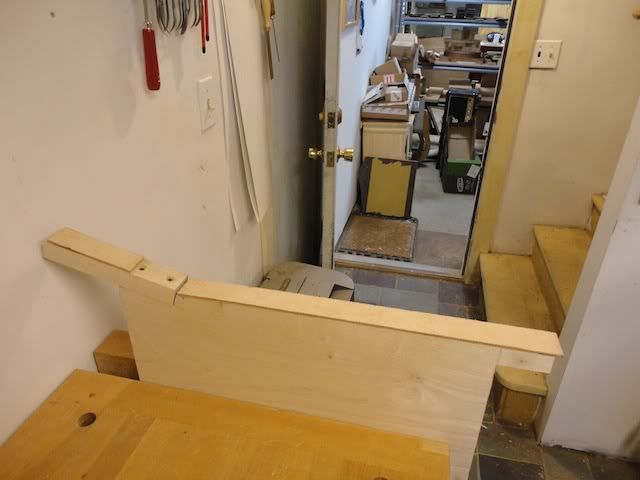
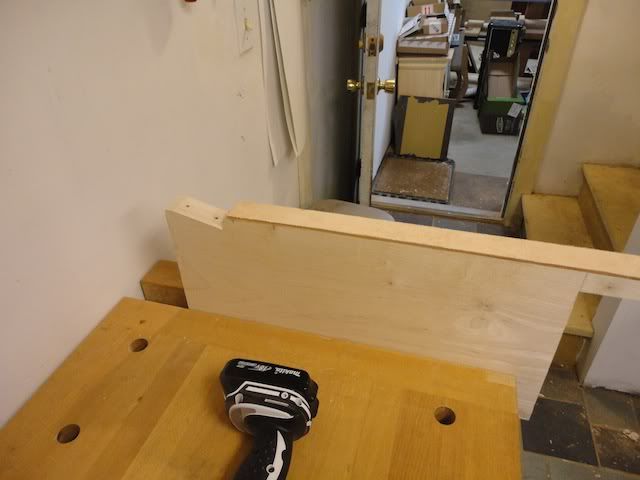
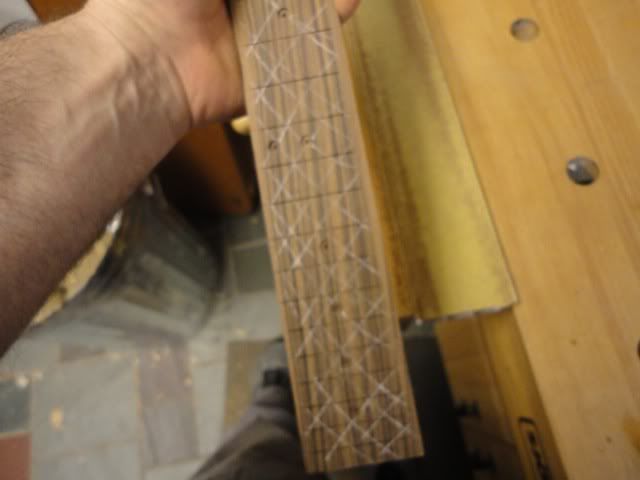
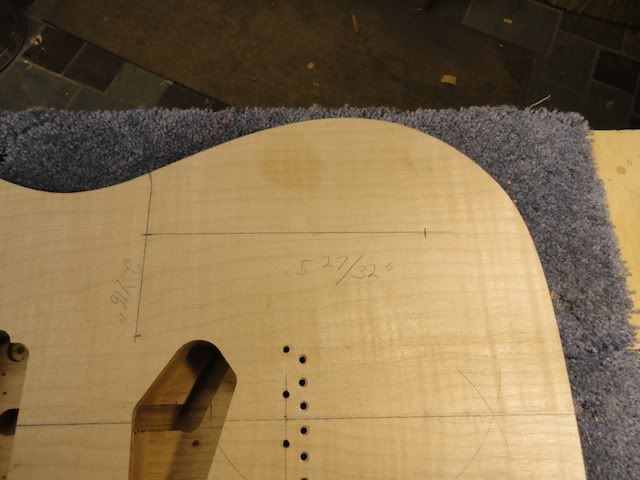
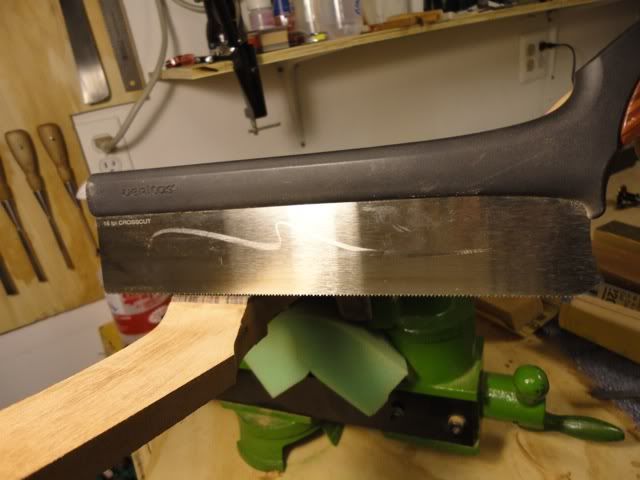
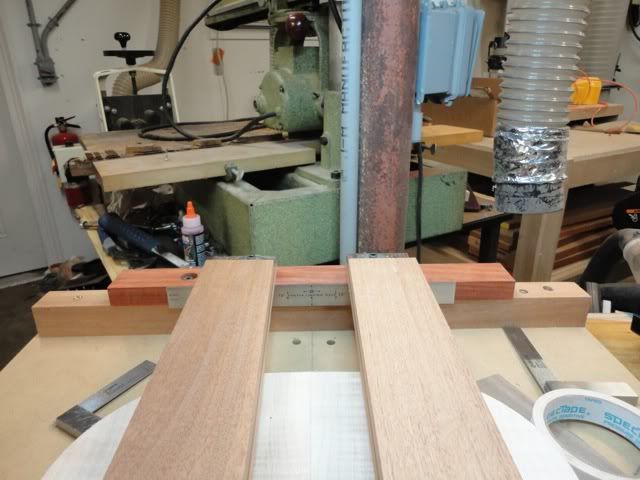
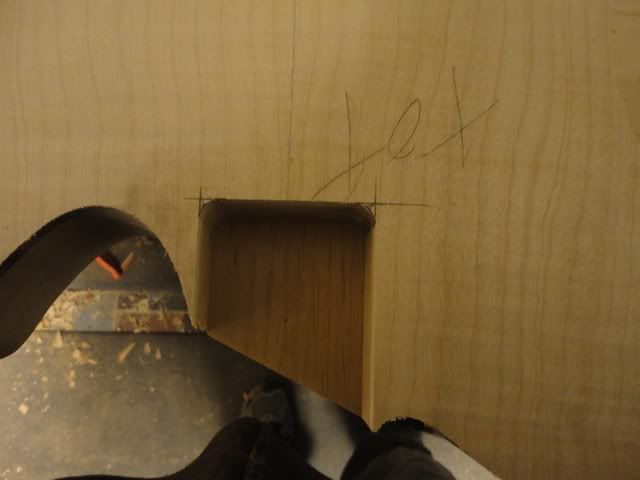
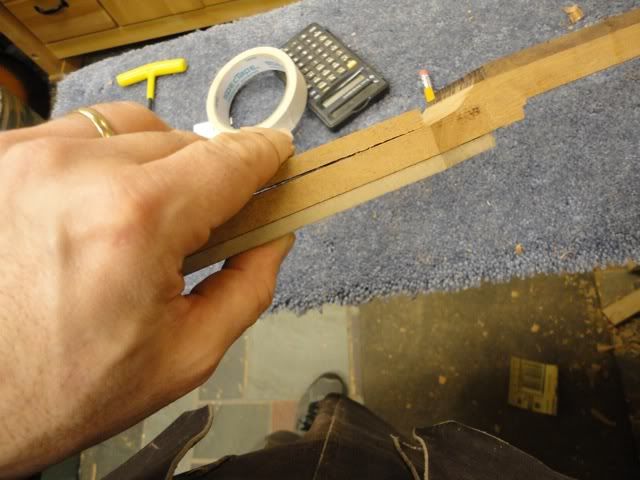
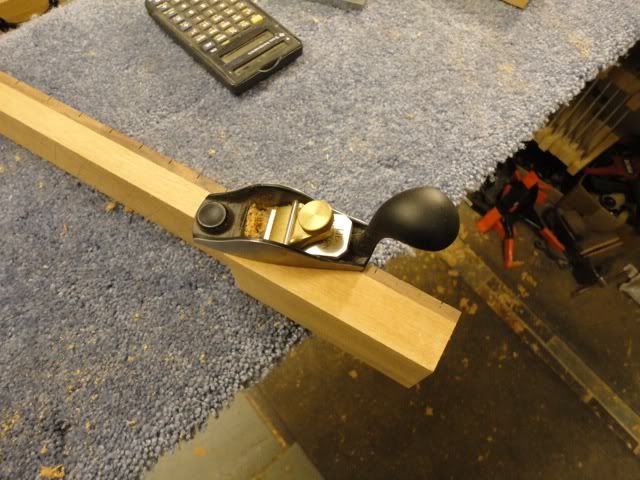
    Then I grab my trusty Veritas crosscut saw again and cut precisely to the inside of that line. Okay, sometimes you can get close and trim later. This is not one of those times. You want to make a precise cut, and all those hours spent ruining drawer sides will pay off here.


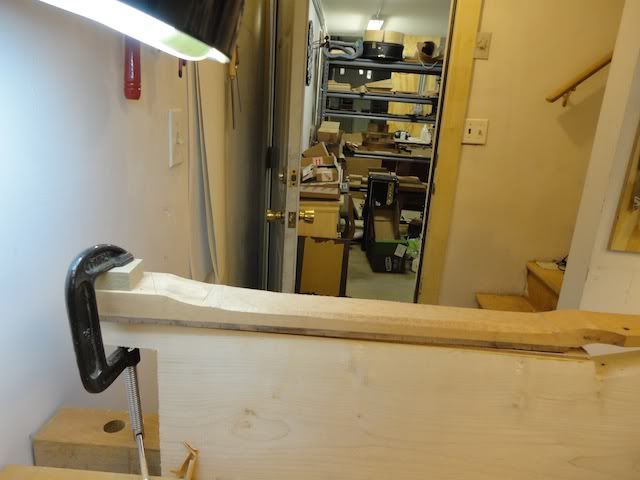
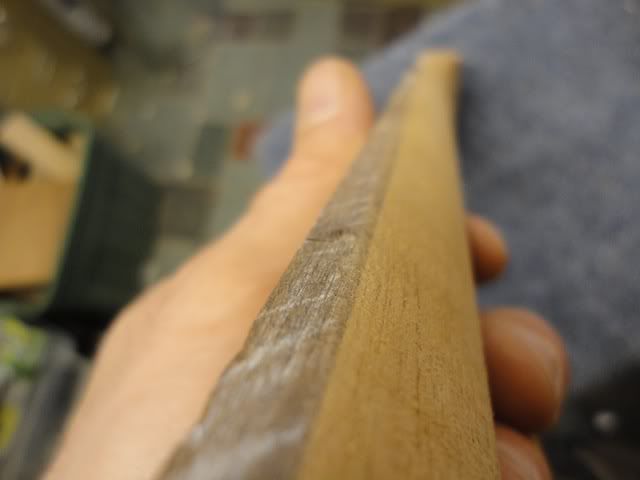
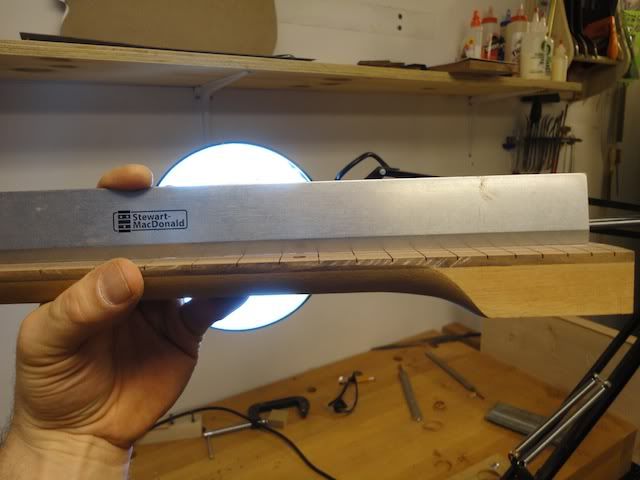
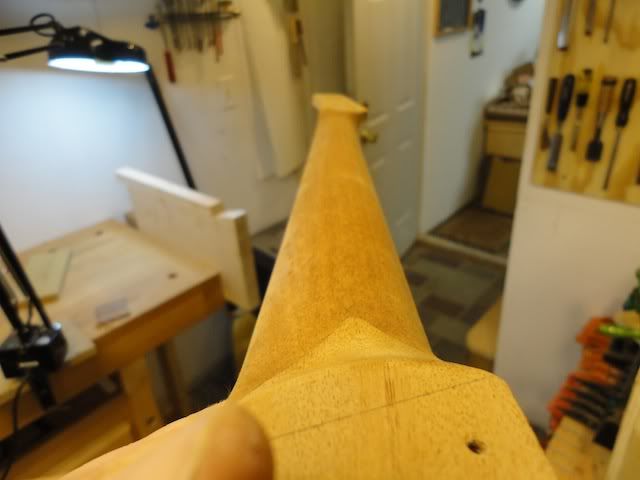
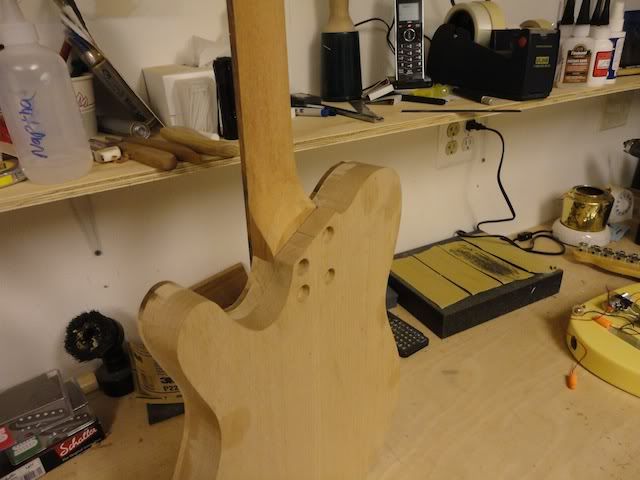
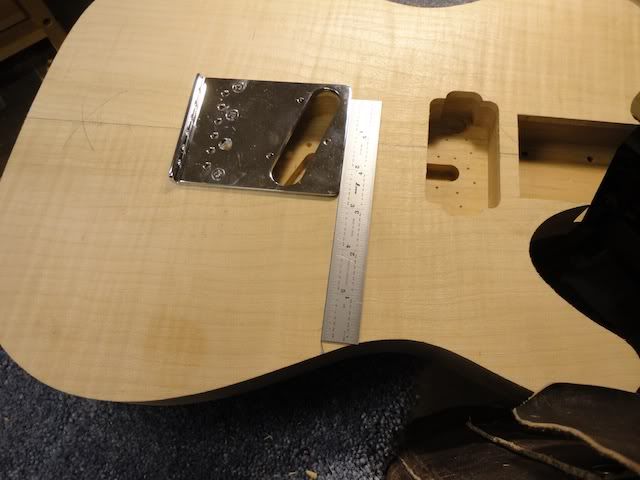
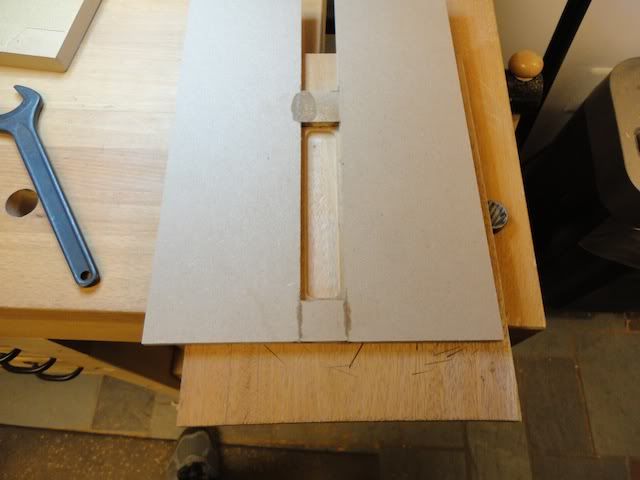
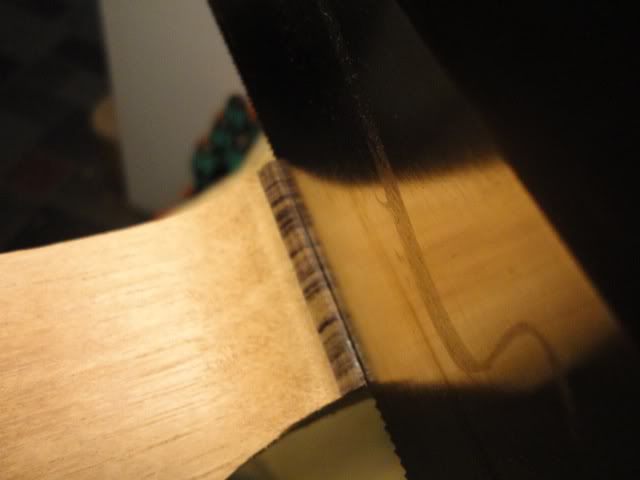
    I monitor both sides. To the left, I insure that I am exactly kissing the inside of the pencil line with the saw kerf


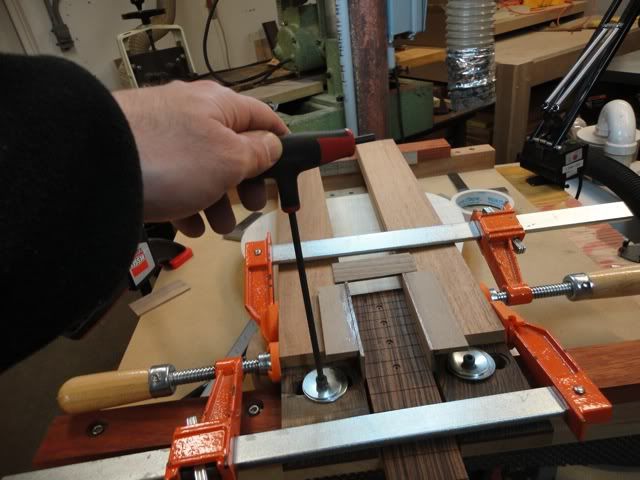
    ...and on the right side I am monitoring my cut for plumb....when the reflection makes a straight line, it's plumb. Usually, you could monitor for plumb on the same side as your mark, but I don't have any wood there! Poor planning on my part, but this is why we make prototypes.


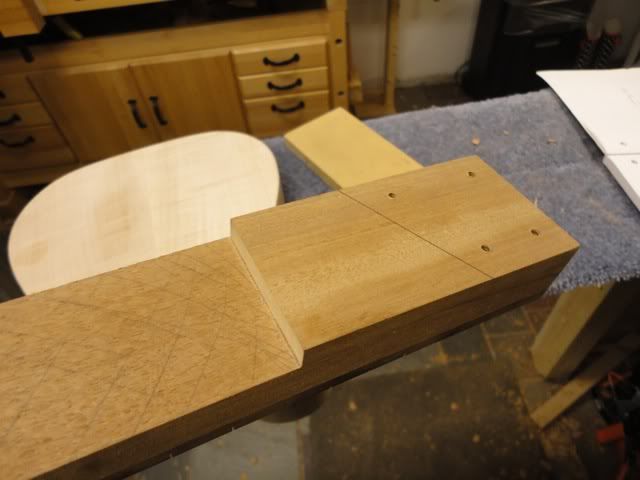
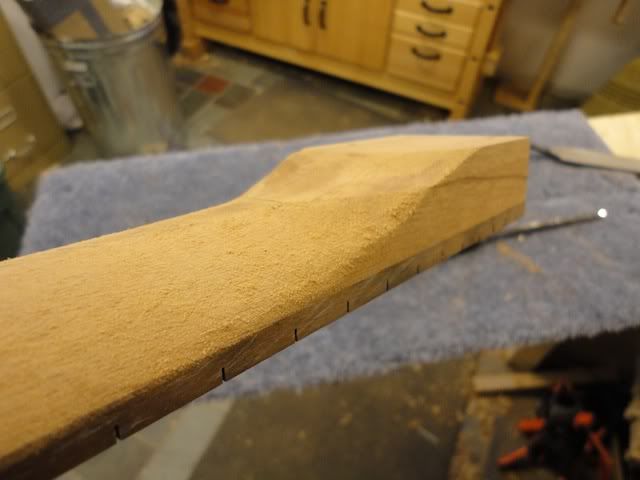
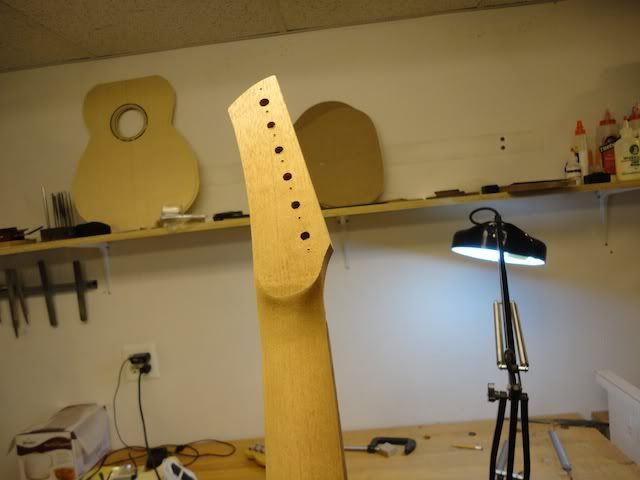
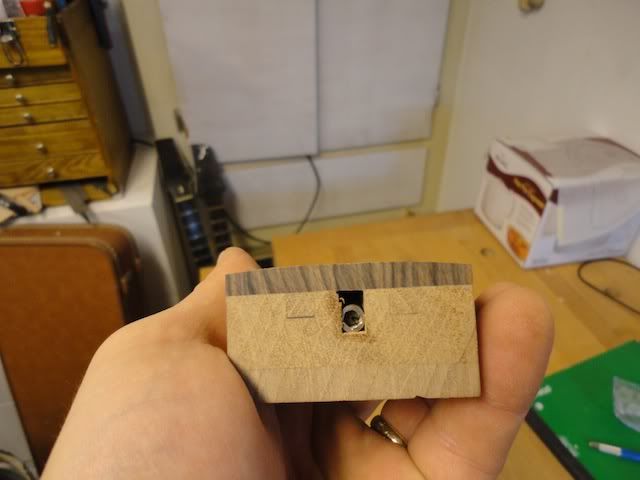
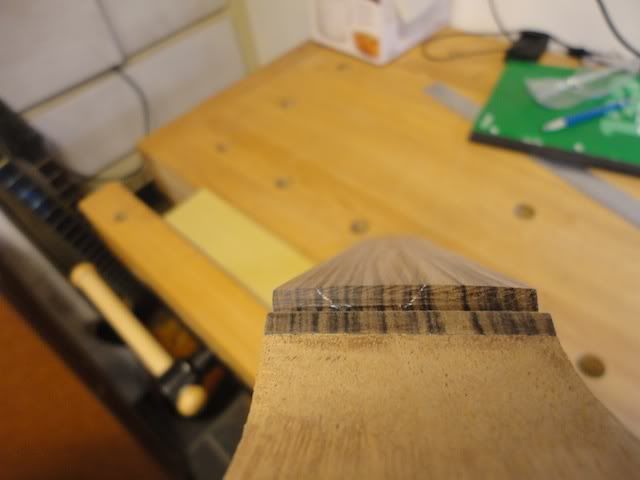
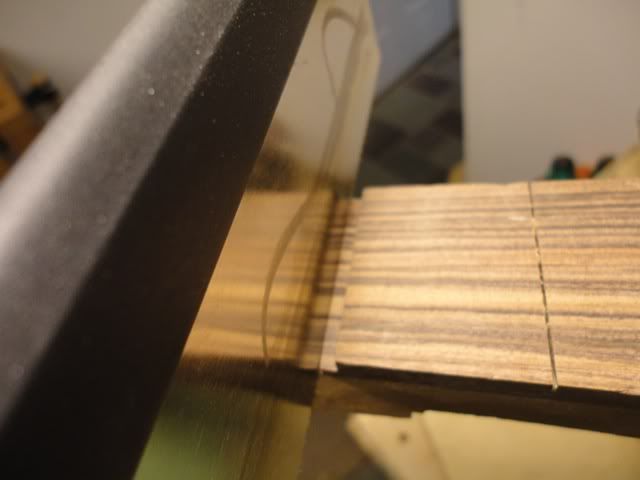
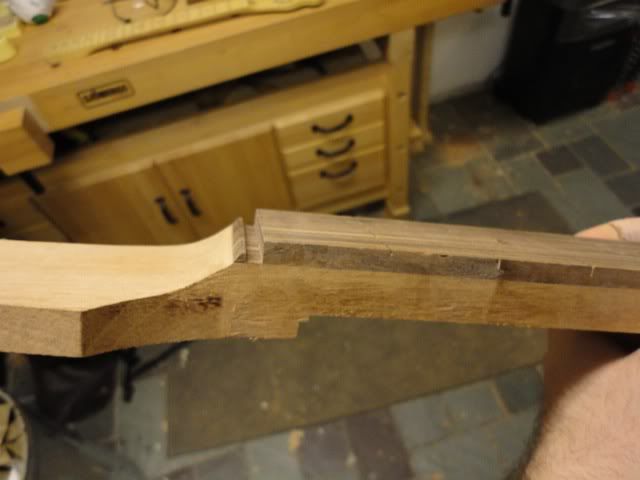
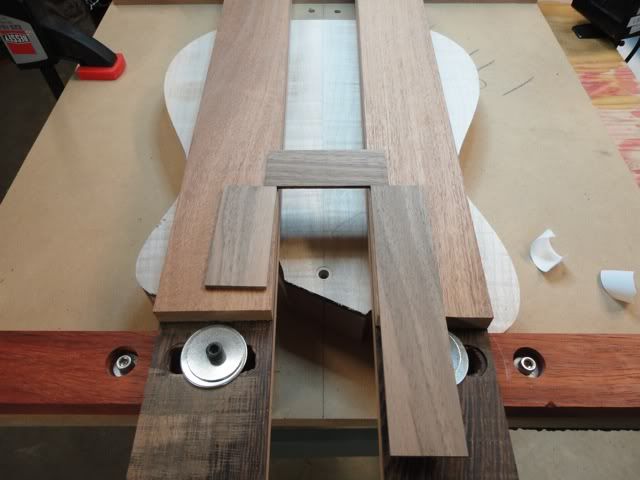
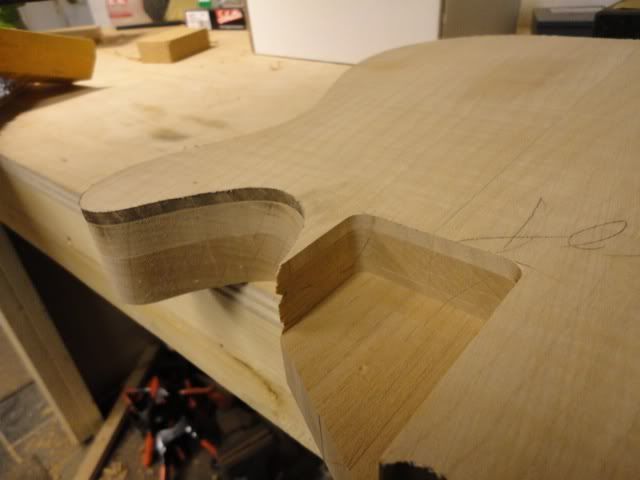
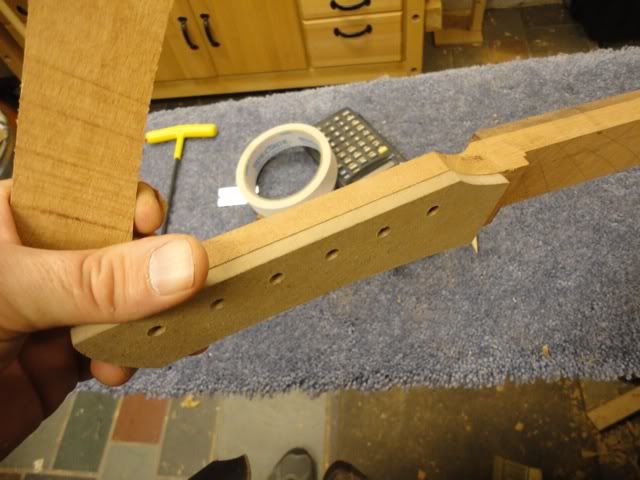
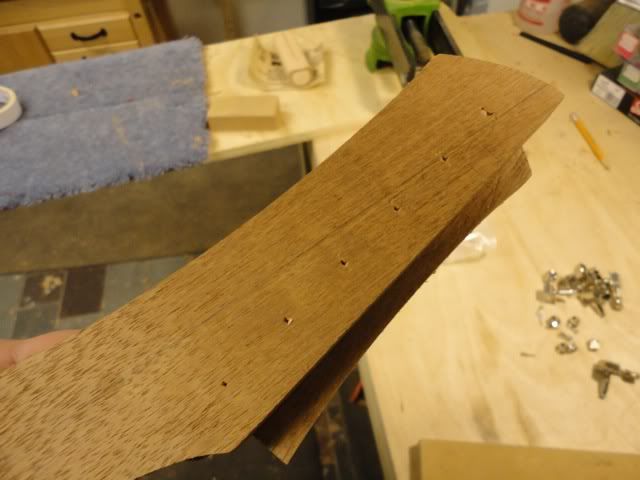
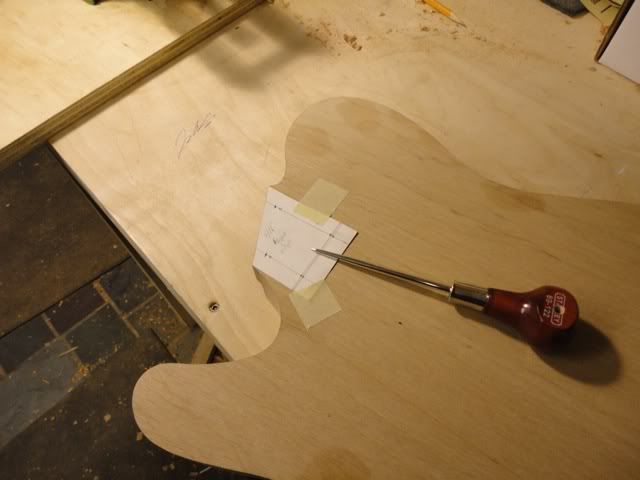
    Then I do the same to the inside position. Notice the slot looks crooked but it's not. The end of the fingerboard is slightly crooked where it meets the headstock, but the headstock is swooping up at that point too, so it's kind of following the swoop of the headstock instead of the centerline. I haven't decided that I like that look yet...I've been going back and forth. I can straighten it out later so I leave it like this for now.


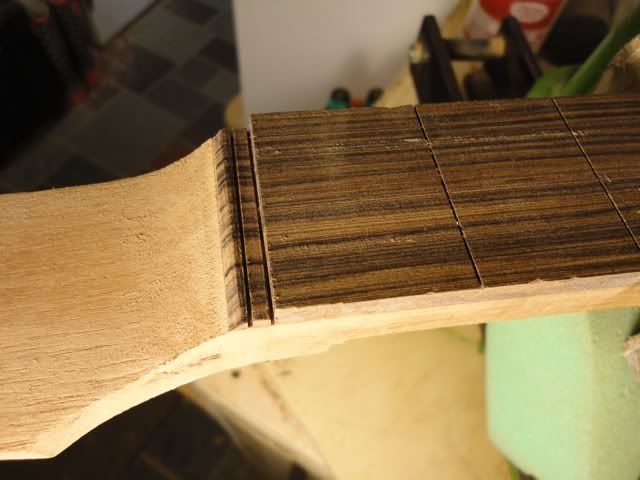
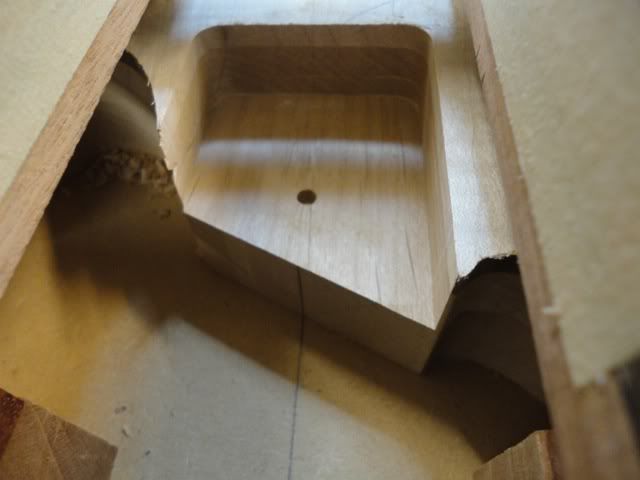
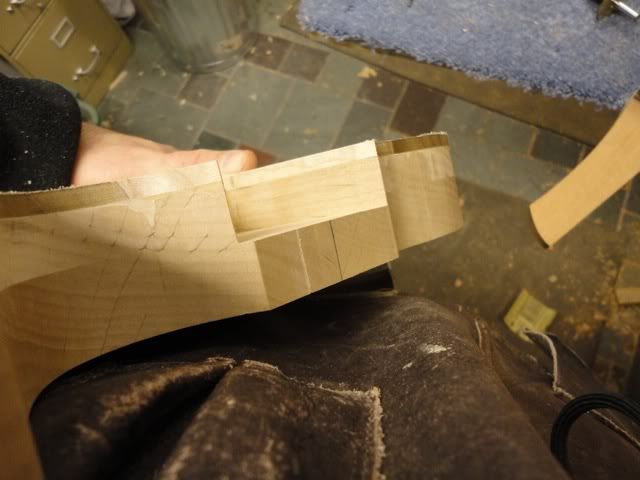
    Then I cut out the waste with a small chisel...


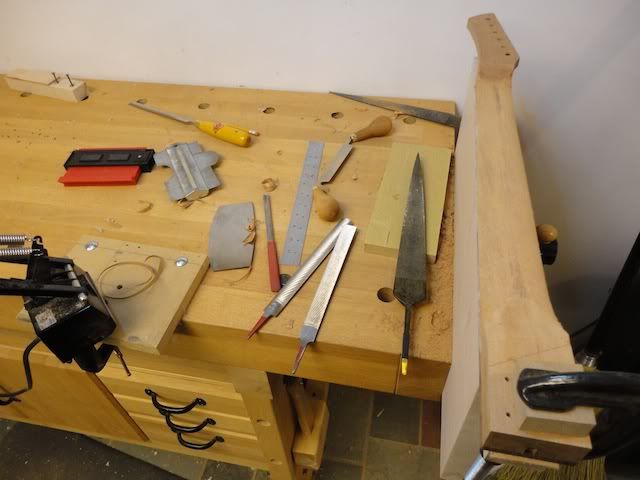
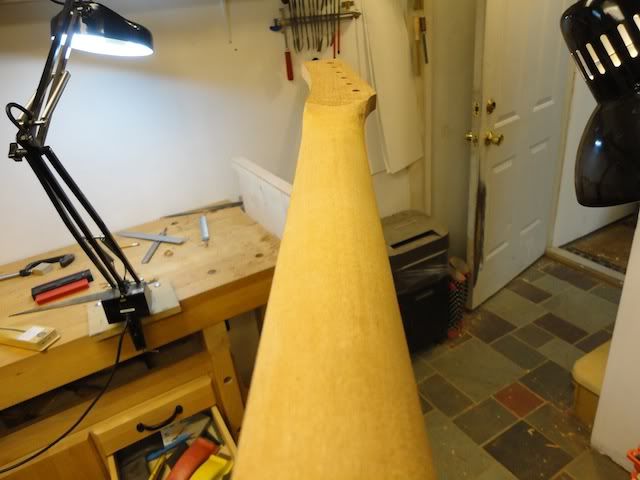
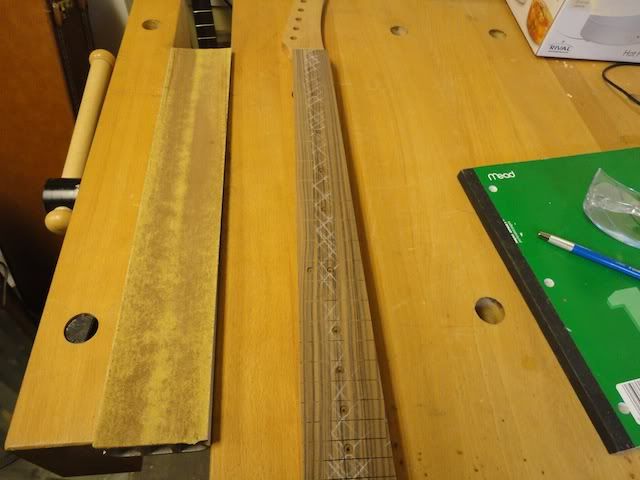
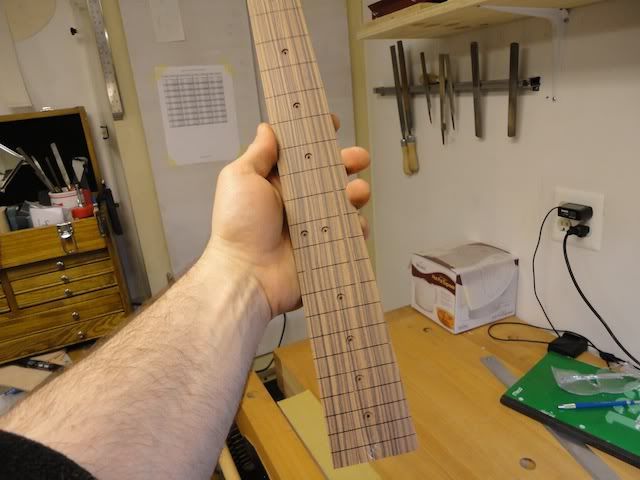
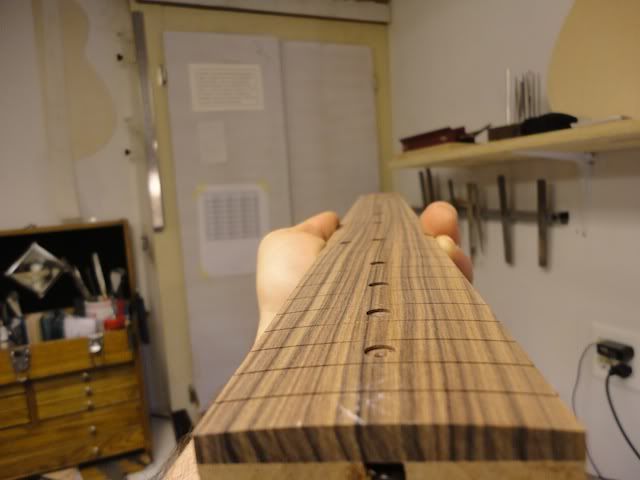
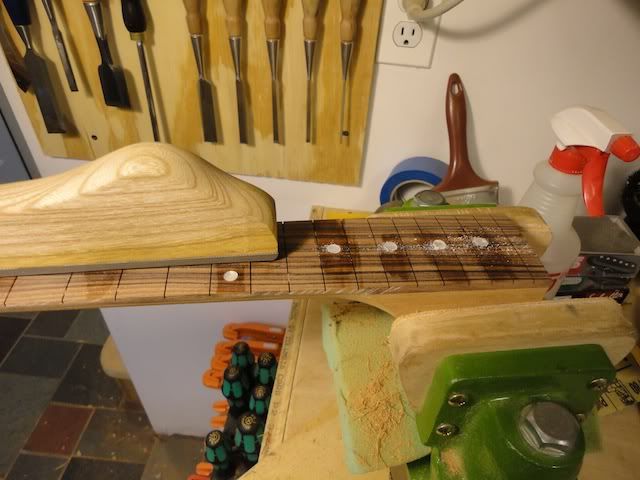
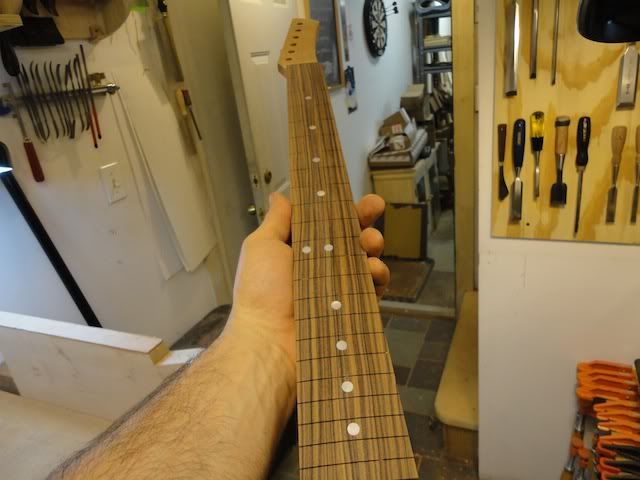
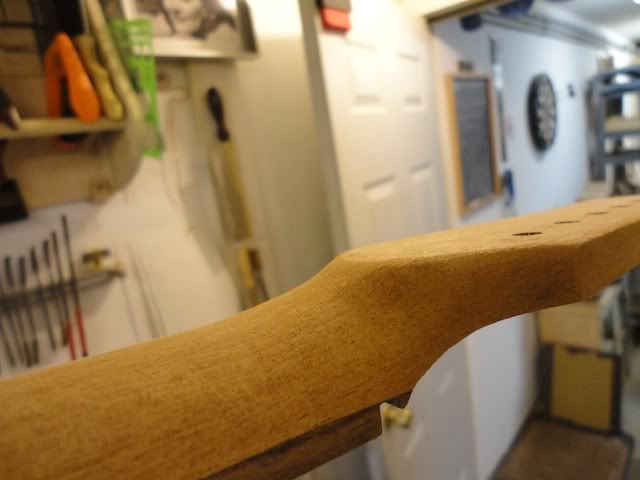
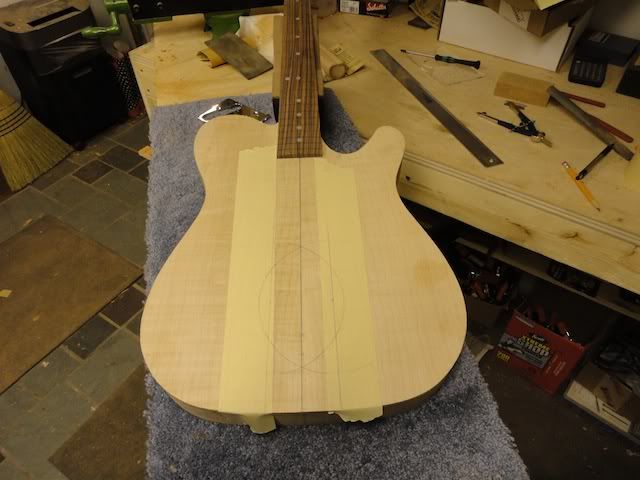
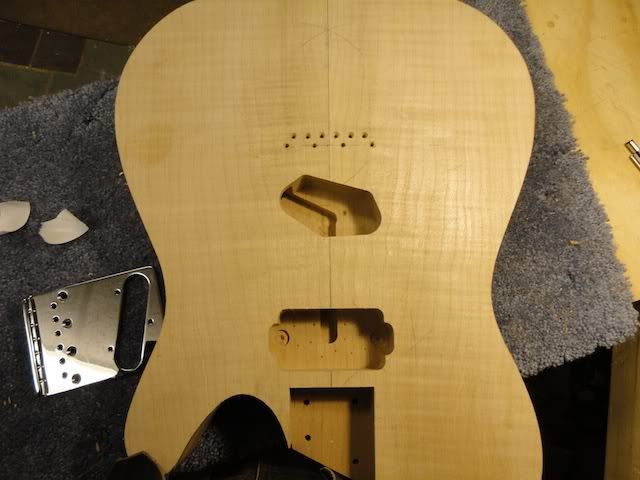
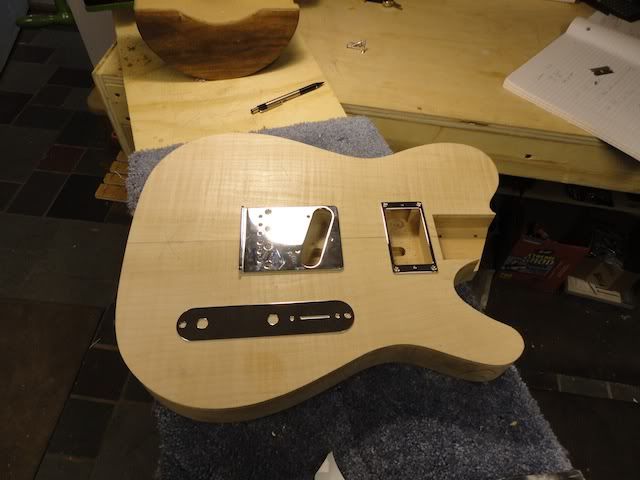
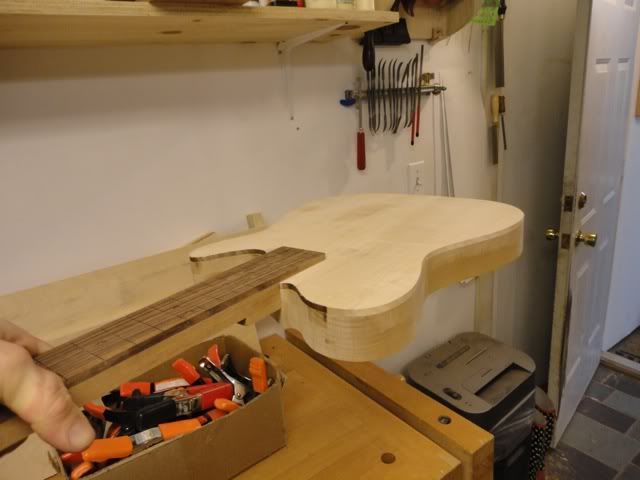
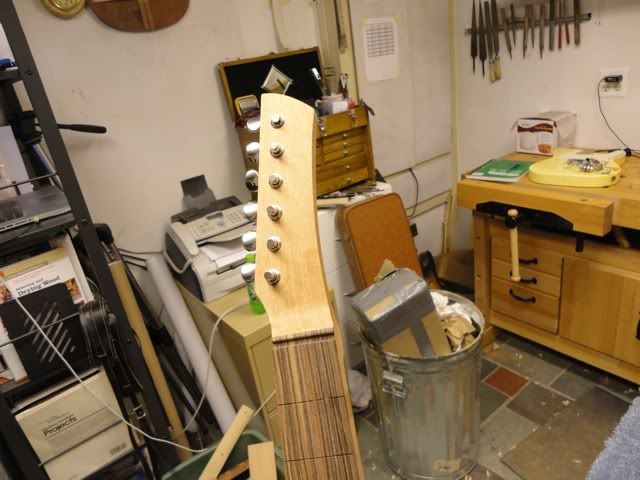
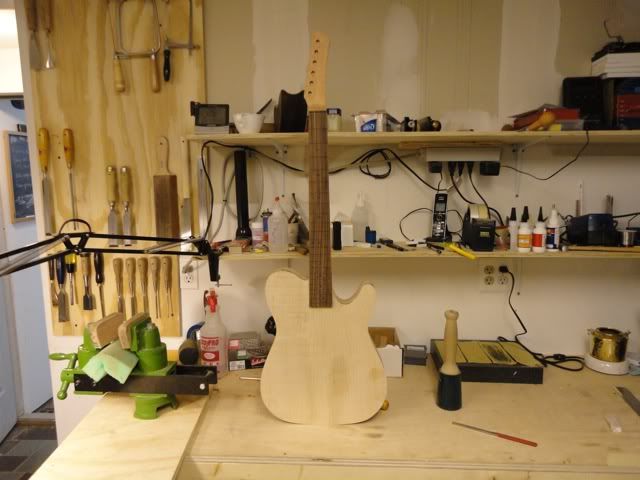
    Clean everything up with a bit of sand paper, and voila, a basic neck blank ready for radiusing and shaping.

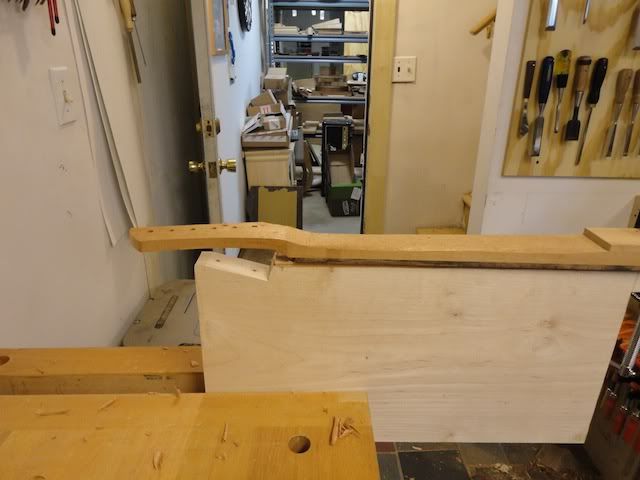
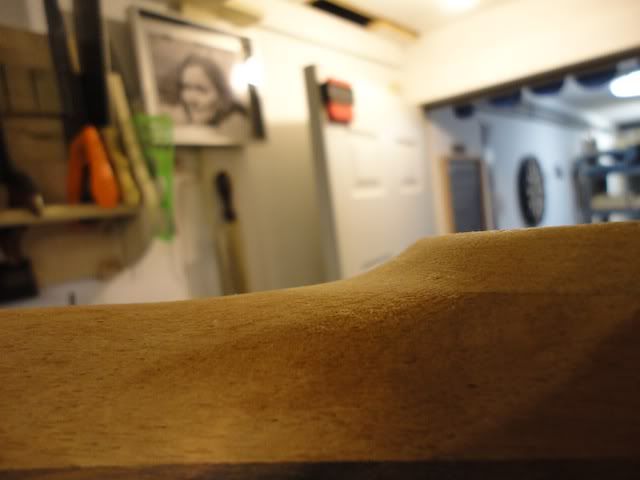
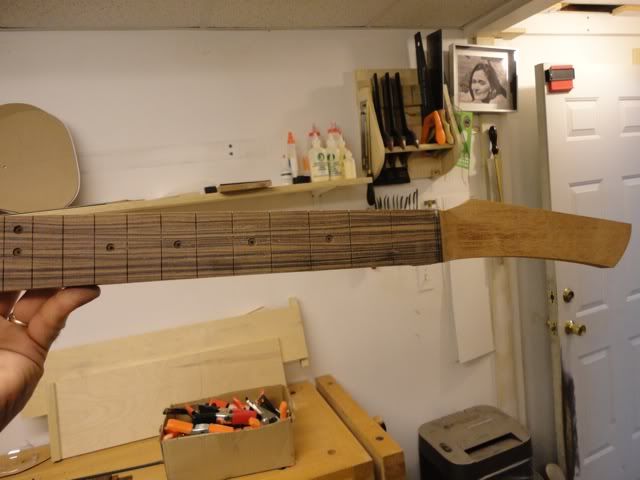
    Somewhere along the line, I made a pass on the router table to even of the edges of the neck with the fingerboard, and then blended the headstock into the neck. There's no magic there....just a bit of work with a draw knife, paring chisels, and Iwasaki files.


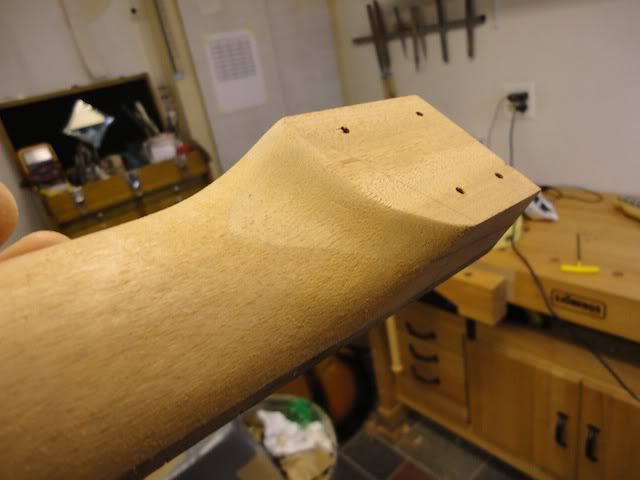
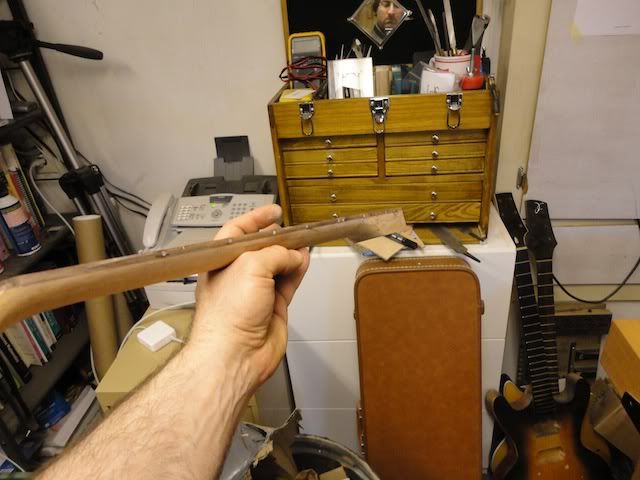
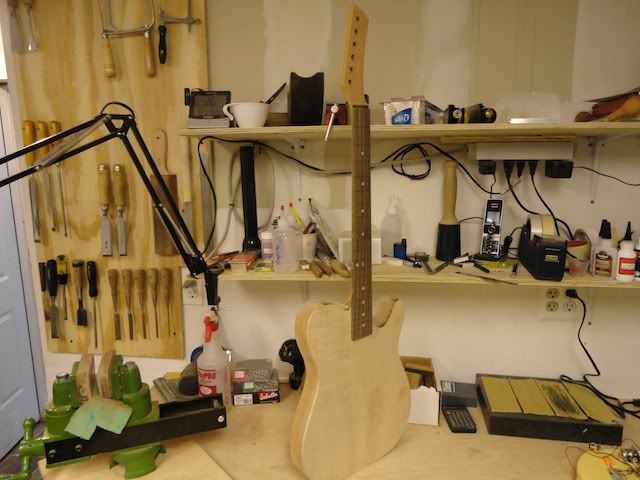
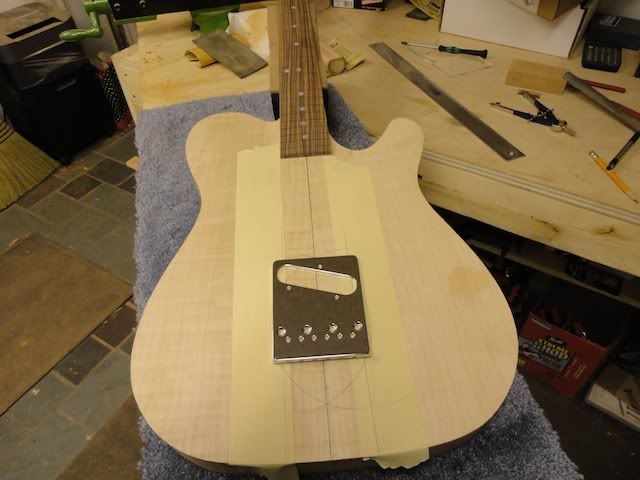
    I think tommorow, I will rough carve the neck, radius the fingerboard, install the mother of pearl, finish off the headstock, and cut the pocket for the neck. This will be a bolt on neck, BTW, but the process is identical for my glue in necks up to this point. A bolt on neck requires a bit of additional work at this point to install the hardware, loosen the fit, etc etc. From there, I can locate the bridge, and thus the pickups and controls, and then finish carving the body. Really, there's just another day or two's worth of work in this thing before I transition to finishing, assuming everything goes well.

  2. #17
    Join Date
    Apr 2009
    Location
    Connecticut
    Posts
    6,670

    Here's by neck pocket jig, shamefully stolen from David Myka. Mine has no angle built into it, though. I build any neck angle into the heal. In this case, 0 degrees.


    The body gets taped down to the centerline.


    At the far end is a centerfinder ruler precisely aligned with the centerline as well.


    Myka uses a bearing bit on his jig, but I made what I think is an improvement. I use a bushing. To get the proper offset, I have these little things I made out of Walnut and MDF that are precisely 1/8" thick. Then I stick the neck between the straight edges, and clamp it down tight, careful to align the neck more of less wherever I want it to end up (there's some play here, but not much. Then I carefully align the whole thing so my neck's centerline is on the body's centerline, and the far end of the straight edges have the same reading on the centerfinder ruler. This is a very precise way of doing this.


    I tighten it all down and remove the clamps, ending up with this:

    A custom neck template that is perfectly sized and perfectly aligned.


    The rest is pretty conventional. I route it out with a plunge base. I did put a couple of layers of tape on the edges, and then removed it for a final cleanup pass...I get very nice results that way. Notice the tearout near the feathered edge. Pay that no mind...it will be squared off later. I could never have a feathered edge like that survive on a bolt on neck If this were for a set neck, or if it had binding, I would actually offset the center line just a touch to leave me between 1/32" and a 1/16" at that edge. The body template is built to accommodate that. You wouldn't think it, but there's actually a lot of planning that goes into new designs. Starting from kits or at least plans for the first time builder is really a great help.


    And done. Really not complex at all. Setting up the jig is a bit fiddly, and it would be simpler to just make a neck pocket template, but then I'm locked into using one neck design. Doing it like this allows me to use whatever profile a customer fancies without concerning myself with custom templates for everyone


    There are two ways to approach the front of the heel. You can round the heel to fit the pocket, or you can square off the pocket to fit the heel. I square off the pockets...I think it's a more refined look. The rounded heel just looks like everything came straight off a router or a CNC machine, and slapped in there....which is essentially what happens in the factories, BTW. So I mark it out and with a medium sized Taylor paring chisel, I square it off. Actually, I undercut the corners slightly, and allow the neck to rest on the middle of the front edge. It's slight, but this way even if I get a bit of finish, polishing compound, dirt or whatever in the corner, it won't impeded the neck from seating properly.


    And this is what the end result should look like. You should be able to pound in the neck, and confidently pickup the guitar with no reservations whatsoever. Now, I would never ship a guitar like this. I couldn't even GLUE in a guitar like this....there's no room for glue. For a set neck, I would slightly loosen the joint until I could get it in and out with just a a bit of pushing and wiggling. For a bolt-on, like this one, I will loosen the joint to the point that I'm confident someone won't have to yank on it so hard to remove that they will blow out a corner....snug, but just barely.


    Finally, I square off that feathered edge. Nothing fancy here. Again, just a sharp paring chisel.
    Last edited by John Coloccia; 03-01-2012 at 2:08 PM.

  3. #18
    Join Date
    Apr 2009
    Location
    Connecticut
    Posts
    6,670
    Time for some neck work.


    I choose to use vintage style tuners on this guitar. The holes need to be drilled absolutely precisely or they won't line up properly because they have to fit end to end. Here I am test fitting in the headstock template.


    Nice.


    I tape the template to the back.


    ...and the cutoff I saved from the front to prevent tearout. It doesn't matter that much, actually, because the front will get enlarged with a piloted reamer to fit the bushings, but I try to be a little neat anyway.


    I used a transfer punch to transfer the tuner locations to the back of the neck.


    Then just drilled them out on the drill press.


    Reamed the front for the bushings....


    Eyeballed the screw locations with an awl, drilled the pilot, and done. Personally, I don't like this style tuner, but I wanted something a little different. I'll probably not use these again unless I have a special request for them, but every now and then I like to change it up a bit.


    Then I loosened up the fit of the neck with my little Lie-Nielsen modelmakers plane. I'm just taking off dust, practically. Just a touch at a time.


    And then I stand back and have a look. If there's something I want to change, now is the time. This is really just a sanity check before I start drilling holes. I'm satisfied.


    I have a little template that I use on all my standard neck/heels to mark the screw locations.


    First I drill the counterbore with a forstner bit. The ones near the lower horn are deeper, with the deepest one being the one nearest the edge of the body. This is to accommodate the carved heel that I use.


    Then I insert the neck and match drill a pilot for the screws, using the mark from the forstner as my center. I just do this by hand as it's awkward to do it on a drill press. With a little practice, drilling a plumb hole (or close enough to plumb) is just not that hard. Finally, I remove the neck, drill the clearance hole in the body, insert my "dummy" hardware, and test fit the whole thing. We're good 
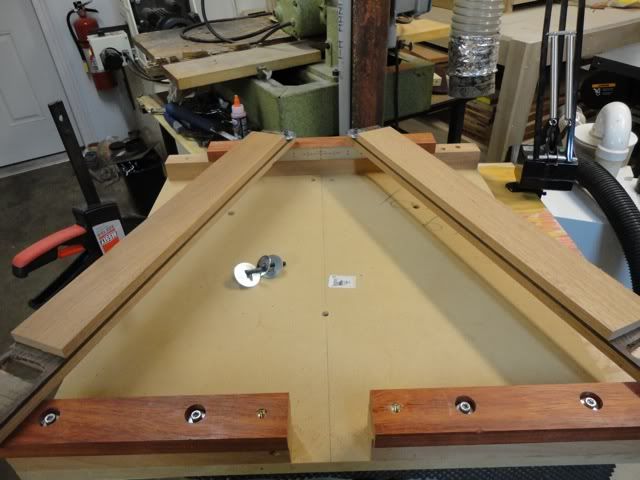
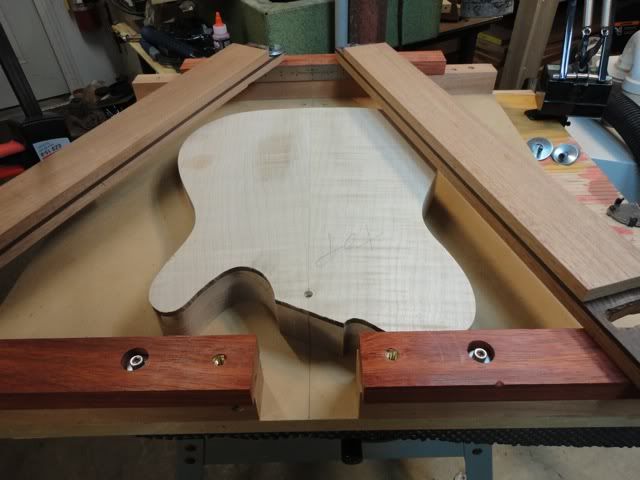
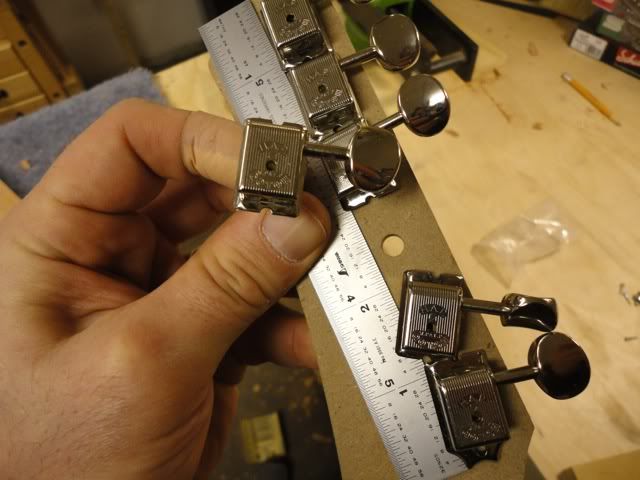
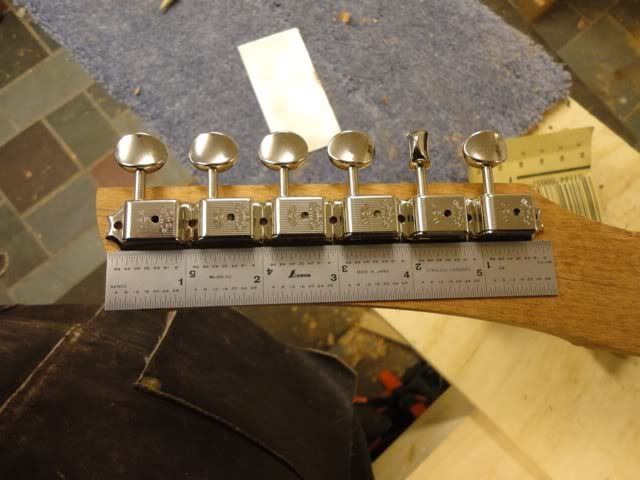
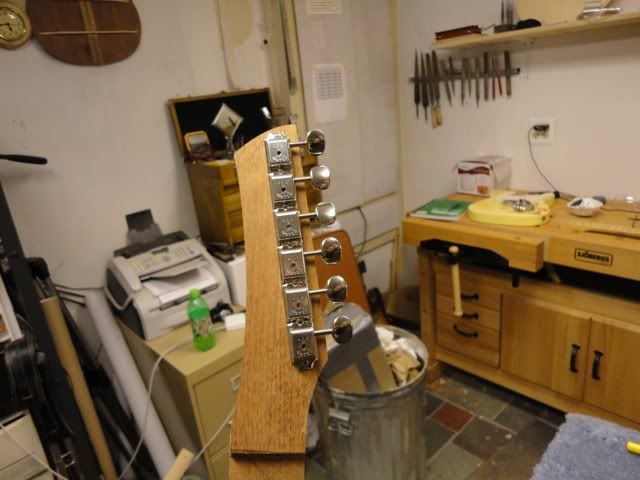
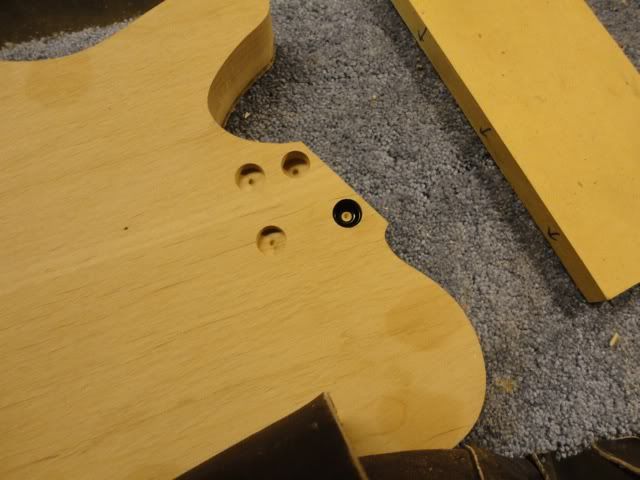
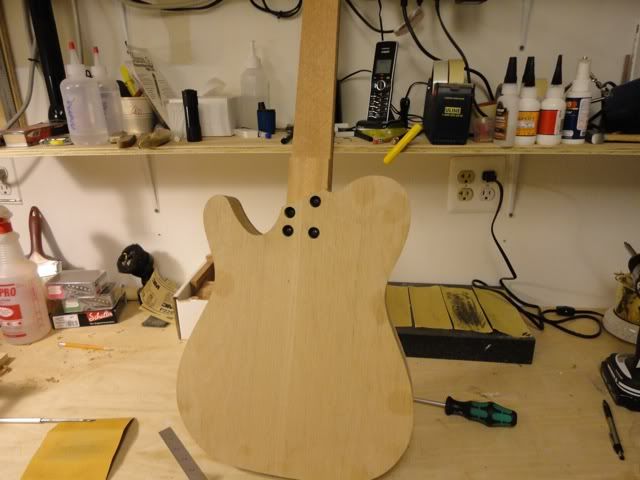
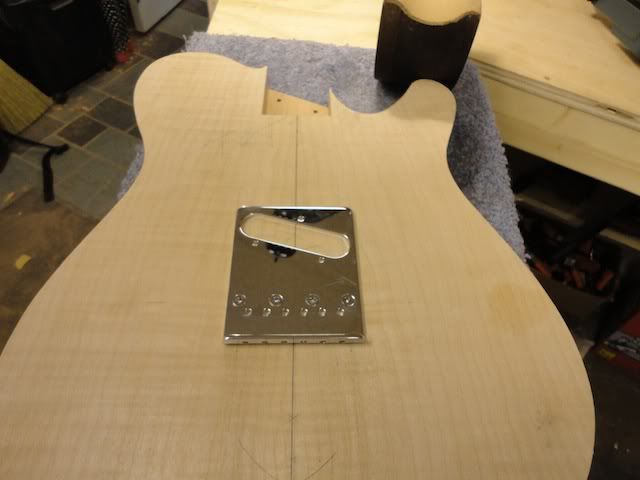
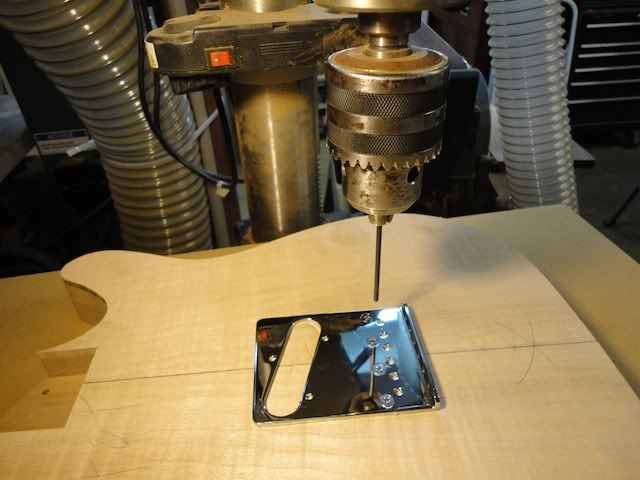
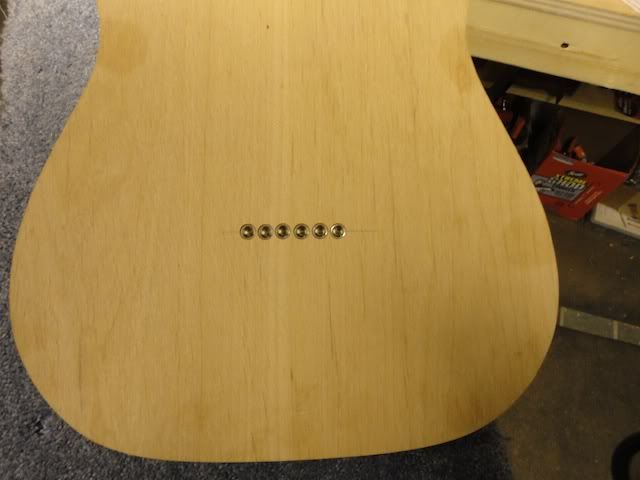
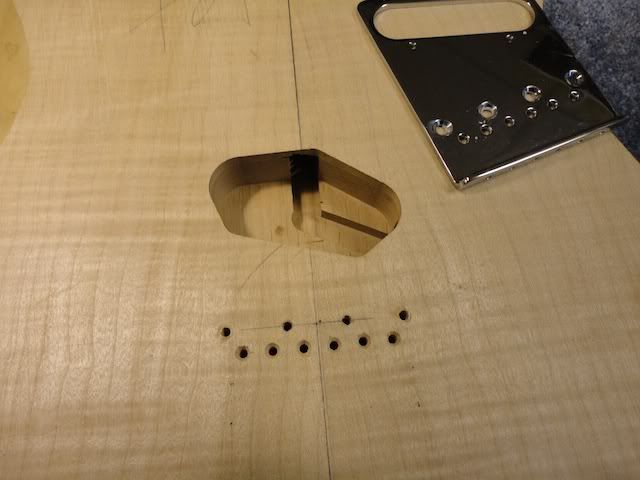
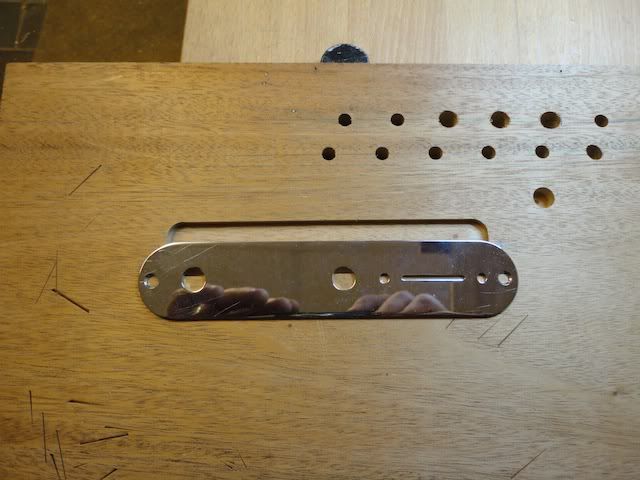
The dummy hardware, btw, is just a set of countersunk washers that I've filed to loosen up the fit. The real ones are just too hard to get back out once I stick them in there.


    Before removing the neck, I mark the location of the body so I have a guide to carve the neck. I can't go even a smidge past that mark or the neck will no longer fit flat and it will look funny.


    At this point, the neck and body only need to be matched one more time in order to determine the bridge location and perform a final sanity check before drilling those holes. Other than that, all that's left is final shaping of the neck and body, and those are both done separately. I will probably finish that tommorow, route the pickup and control cavities, and fit the bridge. Then it's off to finish. With any luck, the body will be in the booth sometimes Saturday (no grain filling required). The neck is mahogany so it will need some filling. Also, I like to fret before applying the finish so any minor slip ups will just disappear. I also need to drill for the side markers. With luck, I can start applying finish to the neck Sunday some time. We'll see.

  4. #19
    Join Date
    Feb 2003
    Location
    Yorktown, VA
    Posts
    2,755
    John,
    Thanks again for the update. The pictures and step by step are very helpful and I'm grateful you take the time to post.

  5. #20
    Join Date
    Apr 2009
    Location
    Connecticut
    Posts
    6,670
    So everything up until now has mostly been the instrument equivalent of stock preparation. Right here is where the rubber hits the road....carving.


    Here's my neck carving fixture. It has an angled piece on it for carving my 14 degree headstocks, but this one is a straight headstock. No problem...I though about that when I built it and made the 14 degree part removable....


    Like that.


    So clamp the neck in like so. During the carving, I can flip the whole fixture around (it's just clamped into the bench vise, or move it right out to the edge of the bench. In this shot, you can see I've started blending the headstock into the neck.


    Then I blend the heel into the neck. Also, detail of my high tech clamping mechanism. Patent Pending.


    Then I start to round it, mostly with the drawknife at first. You can do the whole thing with rasps but it will take a long time.


    I don't use a contour gauge very much. I rely on my eyes and hands to feel what's going on. These are handmade guitars...if you want a perfectly CNC'd neck shaft, buy the guitar somewhere else. The only claim I make is my necks feel nice. For SMC purposes, though, here's what the contour looks like. I generally try to get a circular profile because that's what I find comfortable, but really any shape is possible. Notice the flat spot on top. The center of the neck is still straight off the tapering fixture and is the correct height. I'll not blend that in until the very end.


    Here are the tools that are used, BTW. Spokeshave, Dragon rasps, Iwasaki carving files...nothing exotic. One good rasp and sandpaper would do too, but it would be harder and take longer.


    I don't go right to the shape...I take a little off here, a little off there until I get it. Sometimes I'll make straight facets and then blend them. It all depends on my mood. This time, because it's just a quick prototype, I'm just winging it


    The heel area has a lot going on and can be tough to get right. Here I am roughing out some of the basic contours.
    Last edited by John Coloccia; 03-02-2012 at 8:43 PM.

  6. #21
    Join Date
    Apr 2009
    Location
    Connecticut
    Posts
    6,670

    Notice how I carve right into the fingerboard. Not everyone does this....some do, some don't. I definitely do. I try to treat the fingerboard as just another part of the neck. The white charcoal on the side is there so I can monitor my progress.


    At this point, I've probably switched to sandpaper and am starting to blend my tool marks...it's starting to look nice.


    The headstock transition was fighting me. Here I am fiddling with it. It took some time to figure out what to do with it....it's a bit of an odd shape. I eventually got it later on.


    The heel is pretty standard, though, so it came along without much trouble.


    Now it's time to radius the fingerboard. I do this after shaping the neck because shaping will cause the neck to move as wood is removed. I want the radius process to leave me with a dead flat neck. So I start by marking it with the white charcoal again...


    So I can monitor my progress. You can see that I've started knocking down the edges.


    Now, there are a number of ways to approach this process. Best would be to "swing" the fingerboard with Grizzly's sander. As much as I'd like to have one, I don't right now. You could just use the sanding form you see clamped to my bench there, and go back and forth for 20 minutes. That works fine too, but is slow. You can use hand planes, belt sanders, scrapers, etc. Personally, I take it over to the belt sander for a few seconds and get a radius going. Then I finish it up in the sanding form. By varying pressure points and constant measuring, I can not only radius the fingerboard but make it absolutely pin straight.


    Here it is in process. The apex of the curve isn't perfectly centered but I will fix that by leaning to one side a bit.


    Generally, when you're dealing with these sorts of wood, and especially doing a lot of sanding, please be sure to wear one of these...


    Or better yet, one of these....


    So when I say we're going to get it flat, I mean flat. Here I am "candling" the fingerboard to check for straightness. This will make leveling the frets much easier later on. If I did this before shaping the neck, once I started removing material from the back, the neck would move and all this hard work would be ruined.


    I'm satisfied. The fingerboard is straight, all the white marks are gone (except just the tiniest bit at the end of the fingerboard where it doesn't matter)....


    And the apex of the curve is centered. Time to move on.


    I like to site from the nut end too to make sure I didn't introduce a twist. Now is the time to fix any nonsense like that.
    Last edited by John Coloccia; 03-02-2012 at 8:46 PM.

  7. #22
    Join Date
    Apr 2009
    Location
    Connecticut
    Posts
    6,670

    Just a random shot of all the wood that ends up on the floor. I think that pile's from the last two necks


    Now I install the fret markers. I left them out until after I radiused the neck because mother of pearl is HARD. It could very easily push me off line, especially because my 12th fret marker is asymmetrical. Often times I will install the ones on the center line, and leave the second 12th fret marker for later, but this time I just did them all afterwards for whatever reason. They're just held in with a drop of super glue.


    The StewMac fret leveling file is perfect for leveling the mother of pearl and any super glue. I use this same file for beveling my fret ends. I also use it for leveling the side dot markers. Really the only thing I NEVER use it for is fret leveling. LOL


    Tada. I made a quick cleanup pass on the radiusing form again, and time to move on.


    I also installed the side dot markers.


    And now back to final shaping of the neck. The contours are almost all correct now, and it's looking nice.


    It's very easy to end up with a convex shape at the heel and the headstock, but that leaves wood in place that doesn't belong. I like them to have a nice, concave shape. I finally figured out what to do with the headstock....it was sort of a funny shape but I finally got it under control. Just a mental block on my end I had to work through.


    Now it's really starting to look like a real guitar.


    A shot of how the heel blends into the body. Overall, it seems OK. I don't see anything that's standing out as terrible, so I'll get back to work on the body.


    First, I establish the REAL centerline, based on the neck. Sometimes this lines up perfectly with the top's centerline....sometimes not. It's often off by just a touch...usually not enough to matter either way, but why not get it perfect? I use a long straight edge (actually a 36" Starrett ruler....that's as straight as it needs to be, believe me). Then I measure the same distance from a fret...in this case, I think I measured from the 12th fret....and mark it along the lines you drew down the neck. Now go back to geometry class, grab a compass, and make two circles centered on the marks you just made. Voila, a centerline between two lines that aren't parallel.


    And that's enough for today. I just want to see what it will look like with the bridge on it. I didn't get as far as I wanted to today. It's my wife's off Friday, so I decided to goof off a bit too. Tomorrow, SOMETHING will transition to a finishing step of some point if I have to work till midnight!

  8. #23
    Join Date
    Apr 2009
    Location
    Connecticut
    Posts
    6,670
    Quote Originally Posted by Ted Calver View Post
    John,
    Thanks again for the update. The pictures and step by step are very helpful and I'm grateful you take the time to post.
    It's kind of fun to have someone looking over my shoulder in the shop

  9. #24
    Join Date
    Mar 2008
    Location
    Murfreesboro, TN.
    Posts
    212
    Great Job John!!

    Maybe this drawing will help novice know where your going.....

    kevin

    Rear Neck near pocket.jpg

  10. #25
    Join Date
    Apr 2009
    Location
    Connecticut
    Posts
    6,670
    Quote Originally Posted by Kevin L. Waldron View Post
    Great Job John!!

    Maybe this drawing will help novice know where your going.....

    kevin

    Rear Neck near pocket.jpg
    Thanks, Kevin. I was a bit hesitant to post a prototype at first because there are inevitably mistakes and missteps along the way. This one really hasn't been too bad. The headstock transition really fought me. I will approach it differently on the next one, but this one is good enough for now.

    Do you CNC guitars, Kevin?

  11. #26
    Join Date
    Apr 2009
    Location
    Connecticut
    Posts
    6,670
    And the beat goes on...no rest for the wicked.


    Time to locate the bridge. I took my paper template, and made a sharp bend at the nut. This will hook over the nut slot and index the whole template.


    Then I marked 25" and change for the bridge screw holes. Normally you would have to calculate this out yourself based on the bridge, HOWEVER if it's a bridge that StewMac happens to carry, you can use their fret position calculator and it will spit out the correct bridge SCREW location for your specific bridge. VERY useful. Here's the calculator. http://www.stewmac.com/freeinfo/Refe...-fretcalc.html Brilliant!


    And voila, the bridge is mounted. Nothing fancy here...just measuring, marking and drilling.


    Now to transfer the string through holes. I chuck a transfer punch into my drill press, and mark. The bridge is too thin for the punch to stay vertical on it's own.


    Here are the marks, and I drill about and inch down with an 1/8" bit.


    Then I tool another 1/8" bit, and cut off the shank with bolt cutters. I drilled a hole in my table, and stuck the 1/8" stub in there. This is an indexing pin.


    WITHOUT MOVING ANYTHING, I turn the body over and use the 1/8" stub to index the body under the drill bit. Then I use the 1/8" brad point mounted in the drill press to mark the correct locations.


    I draw a straight line to double check my marking. There's always one that's off...LOL. I don't worry about it. I just fix it when I drill the actual hole. I go through all this trouble because it's nearly impossible to drill a perfectly straight hole that's almost 2" deep. Sure, it will be close enough and it will work, but this is one of those places where if you're off even just a touch, it will look absolutely terrible. You can be off a little, but not much.


    I'm using countersunk ferrules on this one. Overall, not too bad. It's looks off in this shot, but it's actually pretty straight and even.


    Then I chamfer the holes on top...


    And I do the bottom by hand

  12. #27
    Join Date
    Apr 2009
    Location
    Connecticut
    Posts
    6,670

    Now I take the routing template, and carefully line it up with the centerline and the through holes. This is a StewMac template, btw.


    I remove a lot of the waste with a forstner bit, and then route it out. Very straightforward. The one thing to watch is that these templates are very thin. For the first pass, be sure that the bearing rides on the template AND that the bit is slightly into the template too. Too far one way, and you miss the template (making a horrible mess). Too deep and the bit won't catch the wood right under the template. These templates should be another 1/16" thicker. Oh well. They're usable. In this shot, you can also see the channels I routed way back when. Those will be for the pickup wires.

    One more thing to watch routing is that when you get deep enough, if you let the bearing get too deep, it will fall into one of the routes and make a BIG mess. Be sure the bearing is always riding on something! Typically, I'll make a route, remove the template, route again, plunge, and finish. These routes are about 1" deep, and I usually knock it off in 3 or 4 passes.


    Out comes the magic template and do the same for the neck pickup.


    Stick it down....


    And route


    Hey...it's looking like something!


    To lay out the control cavity cover, Leo did us a favor. The forward screw lines up with the front of the bridge. This is a simple matter of drawing some lines, making some measurements, and done.


    Here's the general layout.


    Now I have to make a template....I usually don't go into this much detail, but I wanted to give an idea of the process. I'm using a bushing for this. I prefer to use a bushing for the deeper routes. This one goes 1 1/2". Now, there are all these fiddly measurement and things to transfer to a template. There are a number of ways to do that. You can mark and measure, and then try to cut out a template perfectly.....


    Or you can rip some MDF the correct width, sandwich it between two other pieces of MDF, and done. LOL. The other way of doing it is just too hard. I've never seen this method of making a straight template described anywhere, but I'm sure others must do it like this too. Well, consider it described!


    Here's a test route on a scrap piece from the burn pile. Looks like the same piece I tested my tuner template spacing on.


    Well, I screwed up the positioning of the template. I goofed on a measurement. That's why it's offset towards the lower mounting hole. It's OK....I got away with it. I double checked it before I routed so I knew I wouldn't go TOO far, but it's off, not perfect. The mounting plate will still go in the correct location, though. I asked an experienced builder once, "Boy, you must be very good at fixing mistakes by the time you get to your level." He smiled and said, "I am, but I make very small mistakes these days. At this point, I usually see the big ones coming." Thankfully, mine are starting to get smaller too. I caught the first 2 wrong positionings before removing wood!


    And the test fit.....nice.


    At this point, there is no more machine work left except sanding. There is still the body left to carve (heel and belly carve), and that will be done by hand. Rounding the edges I do by hand. I think I have a pretty typical mix of hand work and machine work. Machines for the grunt work, and hand work for shaping, fitting, jointing, etc. More to come tomorrow

  13. #28
    Join Date
    Mar 2008
    Location
    Murfreesboro, TN.
    Posts
    212
    John,

    You have got this project going your way...... looks great...... and I like your explanation for what and why you do things........ including a rear peghead 3d and a 3d of the holes/cavities for a graphical view for others to see why you did what you did.... with the holes/pickup - template things. ( for me.... if I can see what I'm supposed to be doing graphically it just helps me visualize the process and why I need certain templates etc. )

    Blessings,

    Kevin

    NT1 3D Hole Layout.jpgRear Neck Peghead Area.jpg

  14. #29
    Join Date
    Apr 2010
    Location
    Columbia, TN
    Posts
    535
    John, will there be any additional shaping on the headstock?

  15. #30
    Join Date
    Apr 2009
    Location
    Connecticut
    Posts
    6,670
    Quote Originally Posted by Bobby O'Neal View Post
    John, will there be any additional shaping on the headstock?

    You mean beyond the paddle shape? Nope. I like being very minimalistic in my design. For this headstock, I set out to see what would happen if I removed all of the wood that I possibly could and just let that drive the design. When I was done, it turns out that I had redesigned Parker's headstock. Well, I can't use that of course, so I had to add a little back. Still, I tried to find a balance between removing everything that's not necessary and still vaguely implying the original Fender shape.

Posting Permissions

  • You may not post new threads
  • You may not post replies
  • You may not post attachments
  • You may not edit your posts
  •