Results 1 to 15 of 15

Thread: Wood shop build within my shop

  1. #1

    Wood shop build within my shop

    I recently moved into a shop that is double the size of my last one. Along with it came some much wanted amenities - heat, a/c, deep sink and bathroom, etc.


    When I moved in there was a room, sort of that I planned to put my woodworking tools in. I want a separate room to control the dust, etc.


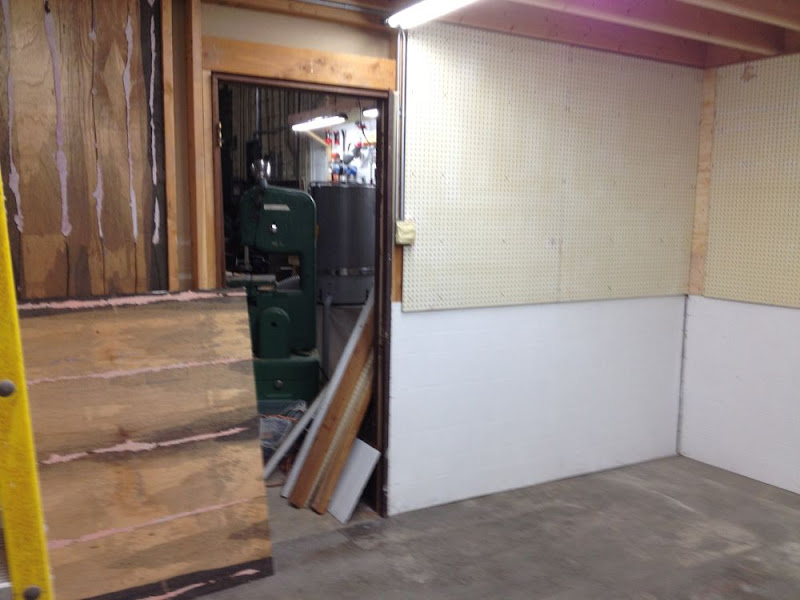
    This is what I started with. The room is 12' wide x 20' deep. The hall way is 4' wide.


    After being in the space a while working on other parts of the shop I decided the hall way was of little real use. So, I did this.


    Cool side-by-side before and after:


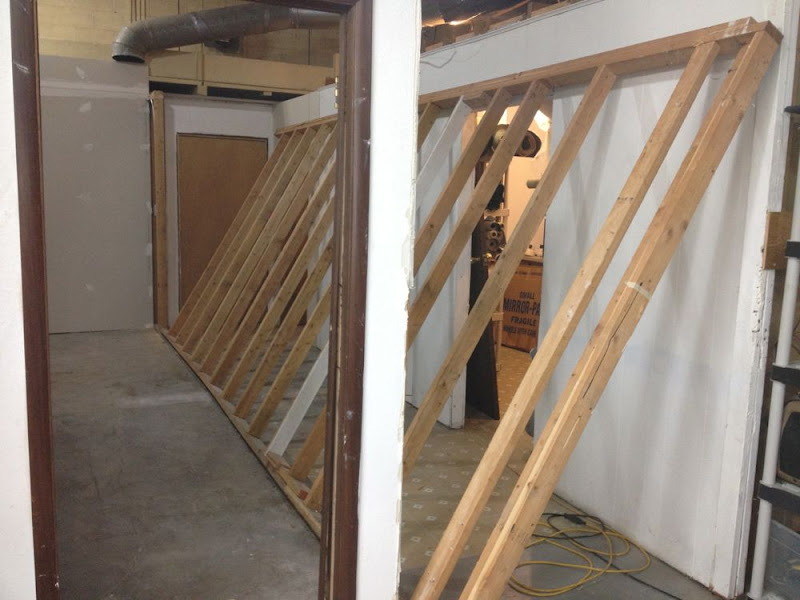
    Joists tied the existing wall into place.


    (the electric heater is no longer in use)


    The ceiling joists are 2x8 with reused 3/4 plywood for the deck. I plan to store some stuff up there. The height to ceiling is only 54" so no standing.

    I'm happy with the results thus far. I have a Unisaw and Powermatic bandsaw as seen in the photos. Plan is to get a jointer and planer. I have 6" S&D pipe to run my dust collection through. Thinking the 6" will run across the top of and down through the deck down to the tools. Still trying to sort out where to place the dust collector. Plan is to buy a cyclone in a year or so.

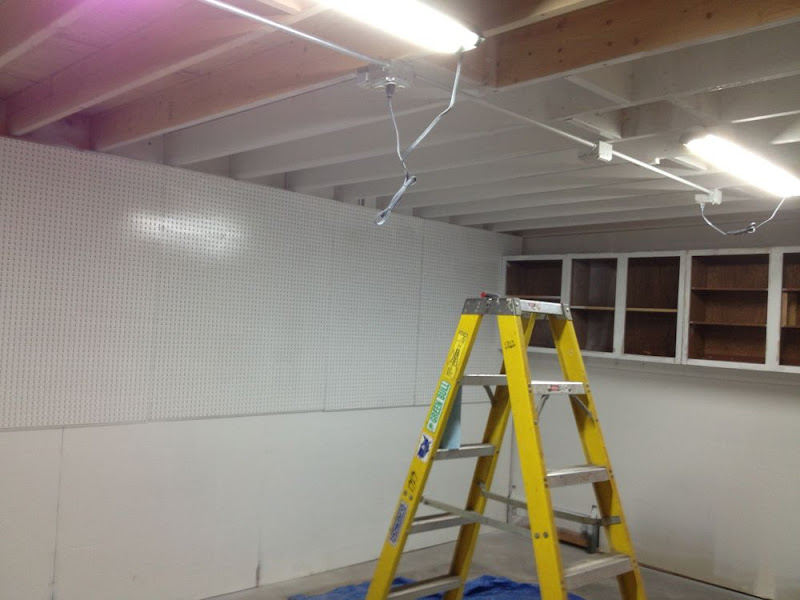
    Current plan is to run 3 rows of 5 T-8 shop light fixtures that I already have on hand for lighting.

    I welcome any input, advice, etc on anything you see or want to pitch in. I just moved here and have no local friends yet, so no second set of eyes.

    Final size is 20' deep, 15.5' wide and 8' to bottom of ceiling joists.

  2. #2
    I already had a bunch of T-8 4' shop lights and 6500k bulbs. I ran a row of quad outlets down the center of the shop with switches by the door. One for the lights the other for the JDS air filter. All of the electrical is ran through EMT.


  3. #3
    Join Date
    Aug 2012
    Location
    Bangor ME
    Posts
    111
    Awesome! How much does a space like that run where you are? I'm having a hell of a time locating space like that around here. Nearly impossible it seems.

  4. #4
    Join Date
    Jun 2012
    Location
    No. Virginia and Fulton, Mississippi
    Posts
    207
    Quote Originally Posted by Luke Pighetti View Post
    Awesome! How much does a space like that run where you are? I'm having a hell of a time locating space like that around here. Nearly impossible it seems.
    Not to totally hijack a good thread. (love the pics and they give me ideas for my own shops)

    It probably depends where "here" is on the planet.

    We bought a our retirement home last year, and on the APPRAISAL on one line it gave a value of $14,000 for the following:
    The 4 workshops pictured below
    A covered deck 40'x20' attached to the house, overlooking
    A deck 50'x40' with
    A 35'x16' swimming pool (they valued the swimming pool area alone at $3,000 when they did the comparison to other properties).
    So I figure they valued the workshops at $10,000.

    The "workshops" cover 5,500 sq. ft., with ceilings ranging from 8' to 14'. All fully powered, solid concrete floors, 400 amp service with 4@ 220V lines so far. With a 40' x ~18' apartment (bedroom, bath w/ shower, kitchen, living area) across the back of the middle one.

    The second pic is the inside of the small workshop on the right where I'm planning my shop.

    But that's northeast Mississippi. In Alexandria, Virginia, where my main residence is, I could probably get it for under 1 million, but not much under.

    For $10,000 in Va. I MIGHT get a 10x20 concrete floored, powered shop built on land I already own.
    So it often depends on LOCATION, LOCATION, LOCATION.
    Attached Images Attached Images
    Setting up a workshop, from standing tree to bookshelves

  5. #5
    Join Date
    Aug 2012
    Location
    Bangor ME
    Posts
    111
    Yet another thing to look forward to for later in life.

  6. #6
    Made some progress today. I bought these old upper kitchen cabinets at a reutilization type store. Got them hung on the far wall. A bit of a challenge doing this alone, but I got it! The wall to the left will have the pegboard the full length. Still deciding what I'll use below it to finish off the wall.


  7. #7
    Cleaned the room up today. I'm still trying to sort out how I want to handle the walls. I have a lot of nice quality pegboard, some more cabinets, some old wood paneling and a bunch of 3/4 plywood. I've considered drywall below the pegboard on that wall.

    I'm going to paint the ceiling and walls a satin white. The cabinet doors and other trim will be black. Lots of work still remains.


    Went back after dinner and got another panel hung.

    Last edited by Steven Wayne; 09-24-2012 at 12:36 AM.

  8. #8
    Join Date
    Nov 2010
    Location
    Anchorage, Alaska
    Posts
    1,617
    Awesome, Steve! You may want to consider installing French Cleats in part of the shop. It provides great flexibility for rearranging, you can have some panels you lift off to carry to your bench, and the upper weight limit is only the strength of the studs! Even pegboard can be hung on cleats.
    One can never have too many planes and chisels... or so I'm learning!!

  9. #9
    The pegboard is just going up as wall covering. I bought thirty pieces (47" x 54") of heavy duty retail store display type pegboard for $20. So, this wall is getting a 54" tall section along the whole wall. I have some stuff that is built to hang off of cleats. Up to this point, I just screw a section up where I want those items.

    Thanks for the tip, Jim.

  10. #10
    I used materials I had on hand, which in this case was old wood paneling for the lower portion of these two walls.


    I picked up a Ridgid variable speed ROS and sanded all of the walls in preparation for primer.


    Got a screaming deal on on this guy used on CL.


    Got to priming the ceiling and walls tonight.


    Walls and ceiling will get white. The cabinet doors, other doors and whatever trim I sort out will get black. Lots of work. I'm really enjoying it.

  11. #11
    This is the first time I've done most of this sort of work. In cases like this, I accept my results and move forward chalking it up as a learning experience. I sprayed the white top coat today after work. It went on quickly. Thus far it looks great. Now, I can move my stuff in, run conduit on the long wall, hang lights and so on.

    For anyone on the fence about painting their shop ceiling, do it! The difference is something you have to see to believe.

    A few photos of the fun thus far today..


  12. #12
    Got the floor scrubbed, swept and mopped. I'll sort out the remaining 1.5 walls after I get moved into the room and figure out what I need from them. Long road ahead..


  13. #13
    I got all of the lights up - twelve 4' T-8 fixtures. It is nice and bright in there. I started on the cabinet doors. Sanded them down, primed and then painted them black. I'm doing three doors at a time. I really like the way it is coming together.


  14. #14
    Join Date
    Dec 2006
    Location
    Northern California
    Posts
    197
    Looks great! I can almost smell the paint

  15. #15
    I finished the cabinet doors. I'm happy with the way they turned out. It's a huge improvement. I'm running conduit around the room for my 110v and 220v outlets. So far so good..


Posting Permissions

  • You may not post new threads
  • You may not post replies
  • You may not post attachments
  • You may not edit your posts
  •