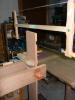
Here is another infill I just finished. It is a gift to my nephew on his HS graduation. He's going to attend a furniture making school after graduation so I figured he could use something like this.
The tote is walnut (thanks to Richard Kee). The base is Durabar (cast iron) one piece with a 3/8" sole. The mouth is adjustable, when fully closed it has a .005 opening, set this way so you can push it closed and still not nick the blade. The frog is mild steel. The blade is from Lee Valley.
This is the second of this basic design, the first I posted a while back with an open tote. I have one more to finish up, thinking about either a bit different full tote or maybe something completely different.

 Reply With Quote