Results 1 to 7 of 7

Thread: Another update on Kist.

  1. #1
    Join Date
    Feb 2004
    Location
    Perth, Australia
    Posts
    9,494

    Another update on Kist.

    By way of update, I include below a copy of a reply I made to Ellis Walentine at Wood Central, who described the difficulties in matching boards with curly figure. Bill Tindall suggested getting around this with bookmatching.


    Thanks Ellis and Bill.


    Ellis, I am sure that others, like I, first think of Jim Krenov when it comes to deciding what to build from a specific piece of wood .. letting the wood decide. Alternatively - and Warren made this point earlier - that one should choose the wood to match a project. He would not have selected Curly Marri for a project where a single board could have avoided the clashing of joined panels, or he would have gone with a wide panel that included all the faults. Bill, you suggested something similar (actually, you suggested spending more on wood! It might therefore surprise you to know that these Curly Marri boards in their rough sawn state cost me $450. Not cheap!).


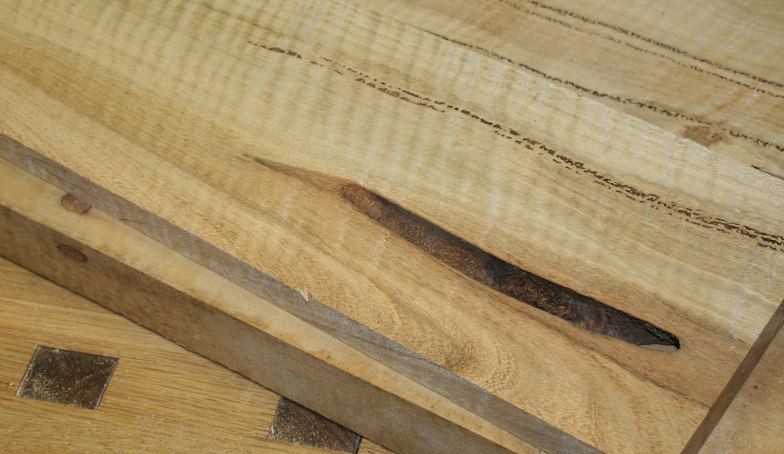
    The decision to cut away many (not all) the faults in the boards was partly because the faults were not attractive. While I am not a fan of 99% of live edge furniture, I do enjoy the natural faults that occur in most woods. Often I choose these deliberately and emphasise the fault as a feature. Mostly these involve a few faults that blend in with the surrounding figure. Curly marri is not like that. The faults are not attractive. They are just holes in the wood ...


    Large, small ... lots of them.


    So why use the wood at all? Because it is beautiful. It has potential just waiting to be unleashed. Curly Marri is quite rare. There is not much around here in Western Australia, where it grows. There is a fair amount of Marri, but Marri has the colouring without the charm, the warmth, and the figure. Marri is not expensive and is used a lot by local furniture makers. With all the voids filled in with black tinted epoxy, this furniture tends to look like a spotty Dalmation. The epoxy takes the place of figure.


    What I wanted to do was try and join up the best of the wood and create boards that flowed together as naturally as possible. This is what we all try and do, so it is not an unusual factor. What it was, however, was an exercise in creativity. That is why I termed it 'painting in wood'.


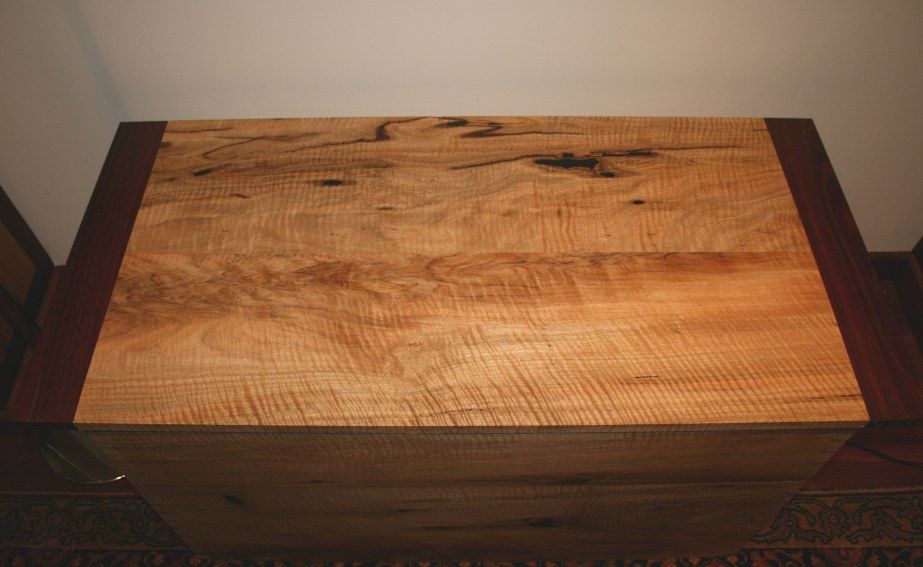
    I have essentially completed the lid, and I will show this shortly (try to avert your gaze!). There was enough to fashion the top out of two long boards, and I played around with these to get the best out of them. One option would have been to bookmatch one. I did not want to do so. The aim was to avoid too much symmetry in the wood as the design itself is very symmetrical.


    What I have below is incomplete. I have not yet decided on proportions. The kist has been placed in an alcove (between built-in bookcases and in front of a large window). It will be storage and side table between two black leather seats. What I have to decide on is the width of the breadboard ends - do I make them narrower?


    The Jarrah breadboard ends will link with a Jarrah base. How high I can make the base will determine whether I go ahead with my original design, or modify it. The plan is to build a base that sits proud of the outside and into the front of which I can build (hide) two drawers alongside one another. If you noticed before (or now) that the pins are different widths at the corners, this was so that there is support for a section around the base so that the dovetails are symmetrical along their length after the base is fitted. I'll leave the design of this to your imagination for now! Got to keep something back to surprise you later


    Here is the top (at this stage) ...


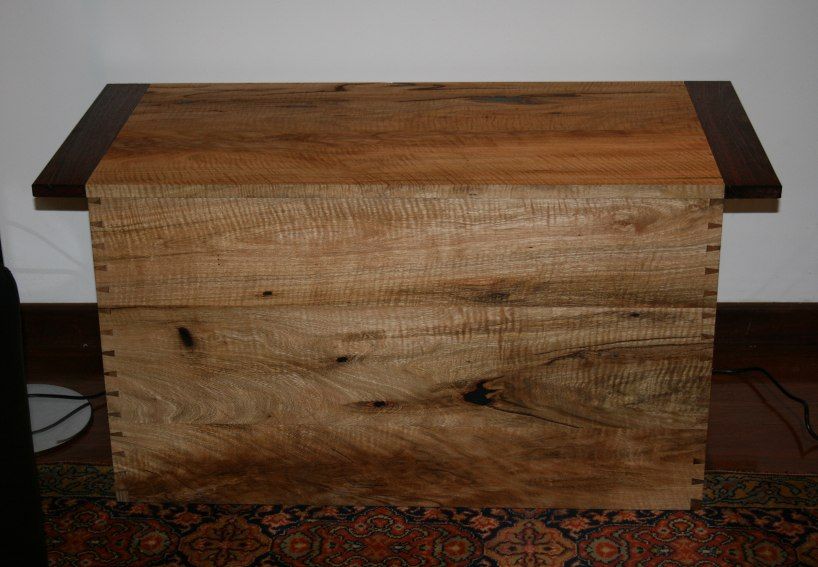
    And here is the front view - minus the base. The point here is to show the blending of the three boards ...


    All comments and criticisms welcomed.


    Regards from Perth


    Derek

  2. #2
    Join Date
    Dec 2010
    Location
    South Coastal Massachusetts
    Posts
    6,824
    Will the breadboard ends function as handles?

    If they're unsupported, will anyone attempt to perch on them?
    The back of the cabinet is striking - did you manage to get a consistent grain direction?
    (I'm unclear if the grain of Kurri is interlocking, or like Curly Maple in North America.)

    A technical question, if you please -
    What planing steps were used to get the boards dressed?

    As always, i'ts a pleasure to view your projects.

    Jim
    Westport, MA

  3. #3
    Join Date
    Feb 2004
    Location
    Perth, Australia
    Posts
    9,494
    Hi Jim

    Yes, the breadboard ends will double as handles. The tenons are 1" long and 1/4" thick (the boards are 3/4" thick overall). I would be most surprised if someone sits on the ends - I don't think that they are in danger of that - but they are probably strong enough to withstand it anyway.

    The grain of Curly Marri is very interlocked. This is one of the reasons I was not altogether fussed about grain direction when matching the boards.

    Dressing?

    After jointing and thicknessing the rough sawn boards with power tools (seriously, this stuff is too hard to try to do this with hand tools), initial dressing was completed with the LV LA Jack. Working the sides, I traversed the boards with a low angle PM-V11 blade. Some I could plane with a LV BUS (62 degree cutting angle), but the grain was so unpredictable that I ended up using a card scraper. Although the traversing is by definition across the grain, it did create some tearout, and this required quite a bit of work to remove later. Consequently, for the lid, I used a toothed blade in the LA Jack. This worked very well, and there was no tearout. I was able to plane one side with a LN #3 (55 degree frog and closed up chip breaker), then finish the highly interlocked areas with a card scraper. The other side was done with a HNT Gordon smoother (60 degree cutting angle), and again finished with a card scraper.

    Regards from Perth

    Derek

  4. #4
    The match on the top and front turned out much better than I thought it would when you showed the original boards next to each other. Looks pretty good.

  5. #5
    Join Date
    Dec 2010
    Location
    Burlington, Vermont
    Posts
    2,443
    I second what David says - I've been away from the forum and the net in general, and have probably missed a bunch of photos about this project, but the the top and front look a lot better than I thought it would, as well. Certainly in a perfect world, one wide board would be great, but this looks very nice; you did a nice job bringing all the pieces together. Figured wood can be tough this way sometimes. You can get by with a dramatic bookmatch on a small piece, but matching up figure and chatoyance on a larger piece, particularly if you need more than two boards, can get interesting fast.
    " Be willing to make mistakes in your basements, garages, apartments and palaces. I have made many. Your first attempts may be poor. They will not be futile. " - M.S. Bickford, Mouldings In Practice

  6. #6
    Join Date
    Feb 2010
    Location
    Philadelphia, PA
    Posts
    3,697
    Thirded! My first reaction was what a great job you did with the grain and color match. Much more uniform and congruent than I anticipated. No easy task. Great eye Derek, and very nice work.
    Woodworking is terrific for keeping in shape, but it's also a deadly serious killing system...

  7. #7
    Join Date
    Dec 2010
    Location
    South Coastal Massachusetts
    Posts
    6,824
    Quote Originally Posted by Derek Cohen View Post
    Consequently, for the lid, I used a toothed blade in the LA Jack. This worked very well, and there was no tearout. I was able to plane one side with a LN #3 (55 degree frog and closed up chip breaker), then finish the highly interlocked areas with a card scraper. The other side was done with a HNT Gordon smoother (60 degree cutting angle), and again finished with a card scraper.
    Derek
    I suspected something like that would be necessary. I can't imagine curl like this behaving much differently, across species.
    In short, if it looks wavy - the grain is "rising and falling" in relation to the surface.

    I was hoping there was some "Ancient Aussie Secret" to skipping the necessary steps.

    * sigh *

Posting Permissions

  • You may not post new threads
  • You may not post replies
  • You may not post attachments
  • You may not edit your posts
  •