Page 1 of 2 12 LastLast
Results 1 to 15 of 17

Thread: Black Ash Bedroom Set

  1. #1

    Black Ash Bedroom Set

    Hello Everyone,

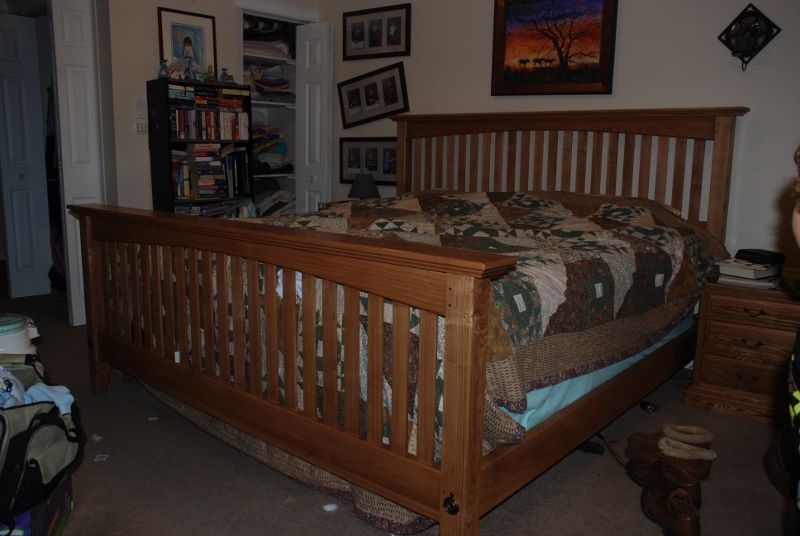
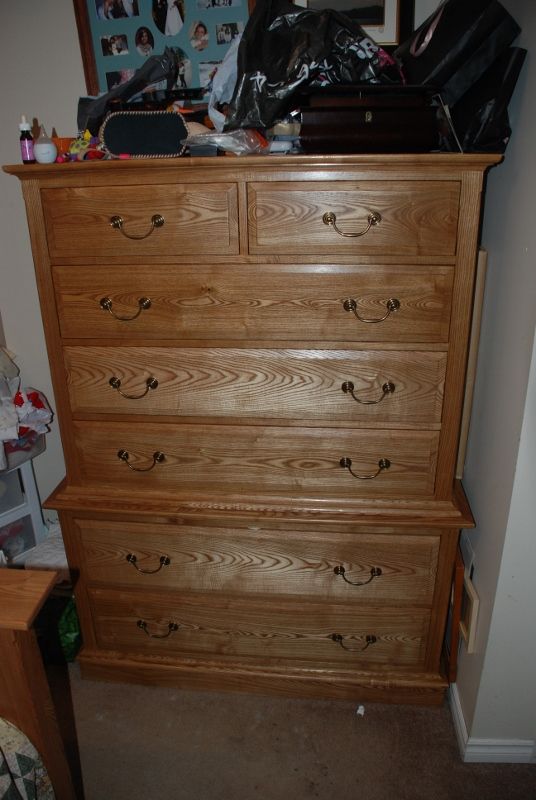
    Long time woodworker, but a new Sawmill Creek User. For the past several years, I've been trying to build a bedroom set of furniture (King Size Bed, Chest on Chest of Drawers, couple of nightstands). I'm building out of black ash, with a cherry stain and polyurethane top coat. The bed took me three years to build (friends and family kept having babies, so I kept taking breaks to build gifts for them), and the chest on chest was completed about four years ago. I'm finally building a pair of night stands.

    All the furniture was custom sized for my house, but was based on the Cherry set from plans now, originally published in Woodsmith magazine. A link to the nightstand is: http://plansnow.com/nitestnd.html

    If anyone needs plans for the king size bed, plansnow didn't offer this, so I can send the sketchup plans I drew up.

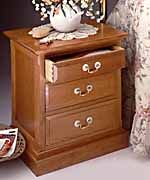
    The original set was supposed to look like this:


    Mine looks (and will look) a little different - I used different hardware, and also built the suite entirely out of solid wood. The Kingsize bed was bigger and higher than the original set in plansnow, so I have had to modify the three draw nightstand to make a fourdraw nightstand.

    If anyone's interested, I'll post some pics, and I'll post progress as I move along.

  2. #2
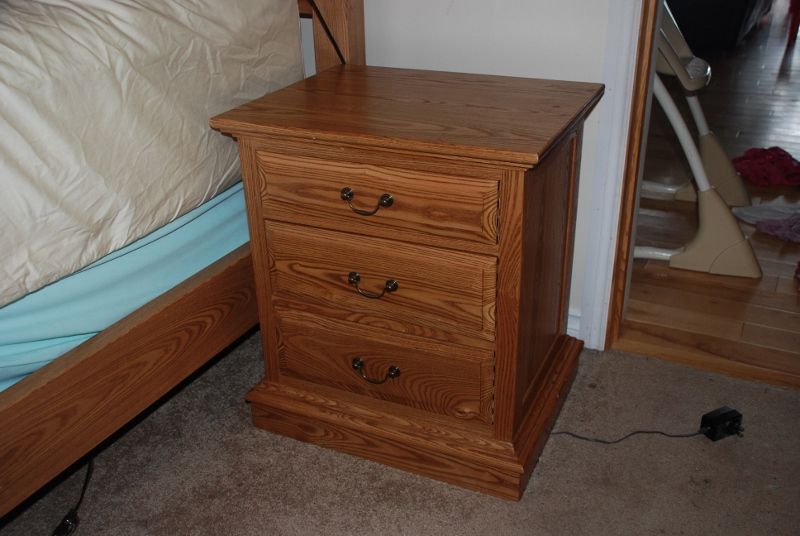
    So here are the finished items so far - as you can see from the side table, this is a little too short in comparison with the bed height. Please excuse the total disaster that is our bedroom - new baby in the house.


  3. #3
    So here is my first question - how thin is too thin on a solid wood panel in a frame and panel side?

    I messed up when building the bed, and had to scrap and redo the stiles that hold in the slats. I was able to recover much of the wood from the stiles - but each piece, rough, is about 1/2 inch thick. I plan to plane them down to 1/4 to 3/8 of an inch thick and use them in the new panels in the night tables. Too thin? Just right? What do you think?

  4. #4
    Join Date
    Mar 2006
    Location
    SoCal
    Posts
    22,513
    Blog Entries
    1
    I used panels of pecan at 1/4" and 5/16" thick by about 5"wide floating in frames on a recent project with no concerns.
    "A hen is only an egg's way of making another egg".


    – Samuel Butler

  5. #5
    OK - so after about three months out of town for work, I've had a little time over the Christmas break.

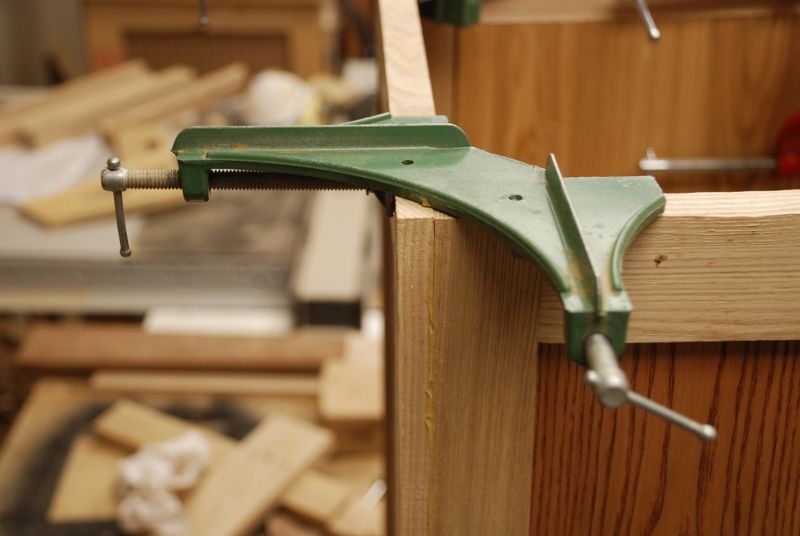
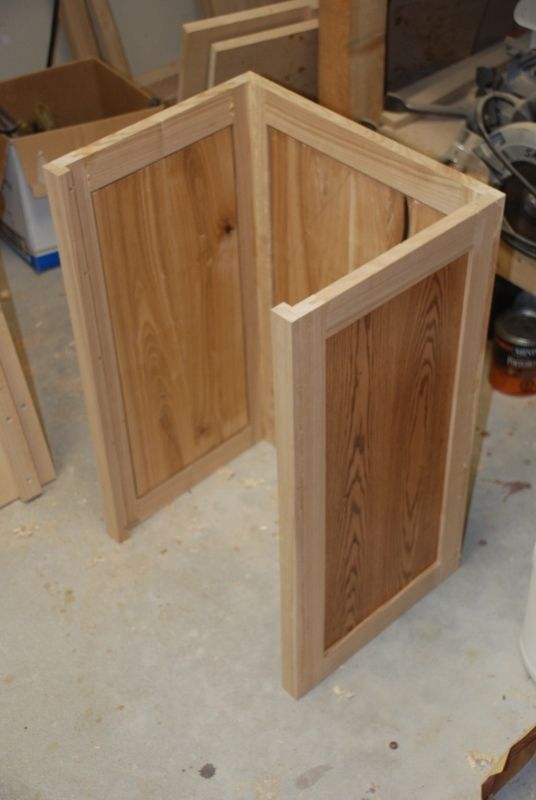
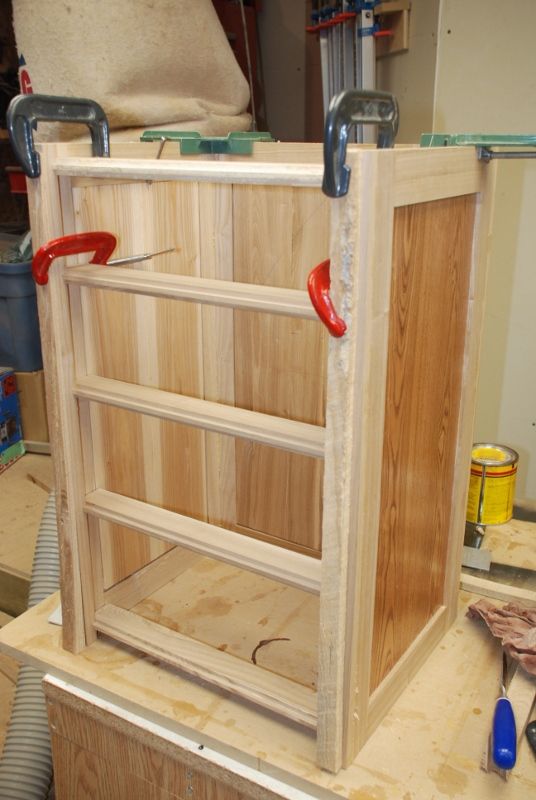
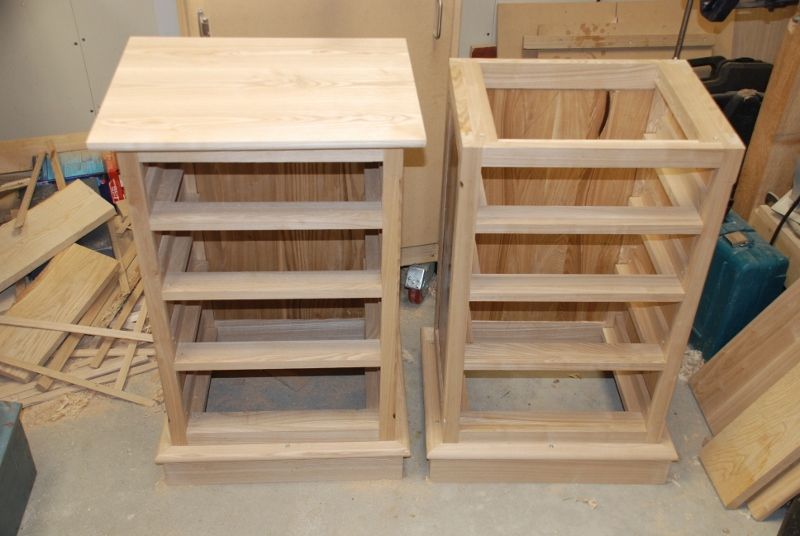
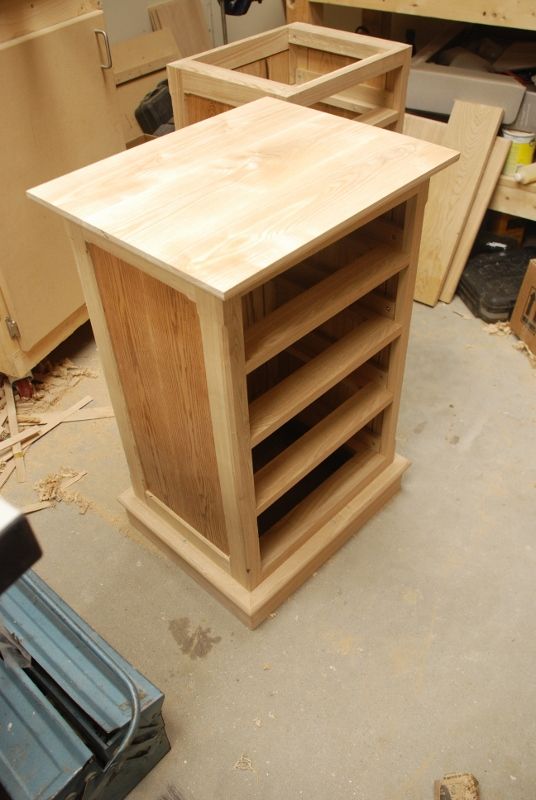
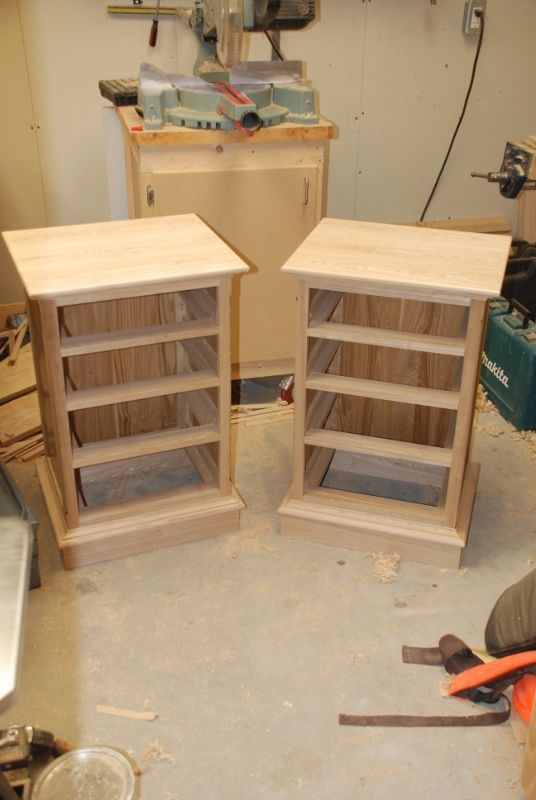
    I have built the panels, and joined them using glued dado joints to form a "U" shape to form the boxes for the two night stands. I then added the wooden framework onto which will be mounted the front drawer spacers. In building this frame on the original nightstand, I had issues getting the U-Shape exactly square. This time, I used a couple of corner clamps that I found for a buck in a garage sale - worked like a charm.


    Next step will be adding the drawer spacers, then smooth planing the frames, ready for finishing.

    Here's a few photos of the progress so far.


    Attached Images Attached Images

  6. #6
    Nice ,
    keep the Pix coming !
    Mike >............................................/ Maybe I'm doing this Babysitting Gig to throw off the Authorities \................................................<

  7. #7
    Join Date
    Mar 2006
    Location
    SoCal
    Posts
    22,513
    Blog Entries
    1
    Looking good Peter. That black ash resembles pecan:

    Kit-Hut-(133).jpg

    Looking forward to tagging along on your build.
    "A hen is only an egg's way of making another egg".


    – Samuel Butler

  8. #8
    Thanks. The finish is simple: after sanding to 220 grit, two coats of cherry Minwax stain, plus three coats of semi-gloss Minwax polyurethane.

    I tried 3/8" panels, but they warped a fair bit, enough to make it hard to install them. I used the 3/8" panels on the back - but on the sides, I replaced with panels that were a shade under 1/2" thick.
    Last edited by Peter Keen; 01-02-2014 at 11:43 AM.

  9. #9
    Join Date
    Sep 2013
    Location
    Carrollton, Georgia
    Posts
    1,815
    Quote Originally Posted by glenn bradley View Post
    Looking good Peter. That black ash resembles pecan
    That's pecan ? I've never seen pecan that dark. It's beautiful . . .

  10. #10
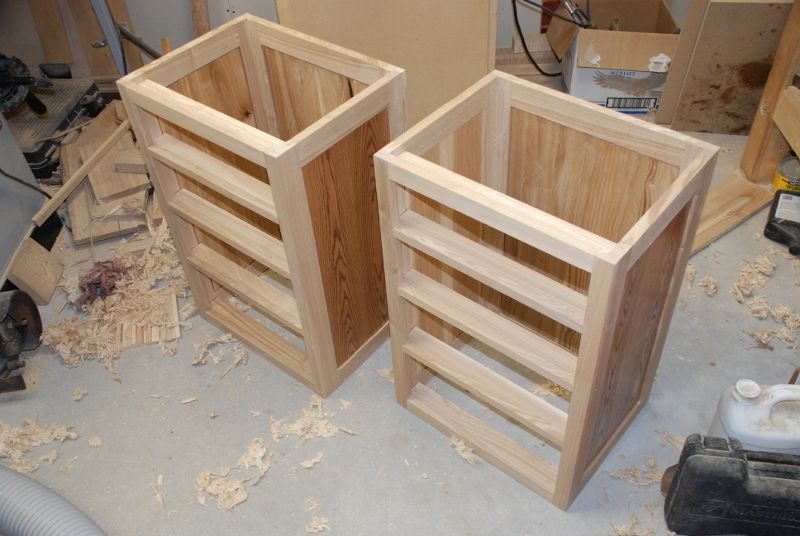
    So the cases for both cabinets are now built. I'll be taking a break from this for a couple of weeks, while I remodel an apartment.


  11. #11
    Renovations done, and I'm back to the side tables....photos will follow with some more details tonight.

    I had a pm for my sketchup models for the bed....here's the response I sent.

    Our computer crashed, deleting all files, and I have lost the sketchup model of the bed plans. In going through my paper copies it turns out I no longer have a hard copy of the sketchup plans, but I have measured the bed, so have some information for you.

    I began working from the stock plans for the Cherry bed, which are available at this link: http://www.plansnow.com/bed.html. All the construction details, joinery etc.came from there.


    I had to make several changes to the stock plans to accomodate a king size bed, plus a box spring and mattress (the box spring isn't necessary if you don't want one, but we wanted a higher bed,which meant scaling up the height of the bed, height of the slats etc. Most of the changes were done to accomodate the larger mattress, and were fairly straight forward. I won't include those here, as the thickness of mattress and box spring will effect how big a bed you will build. The hardest change was to the head and footboards, as you can't just scale it up (the math doesn't work).


    So for the head and footboards, what I did was this:


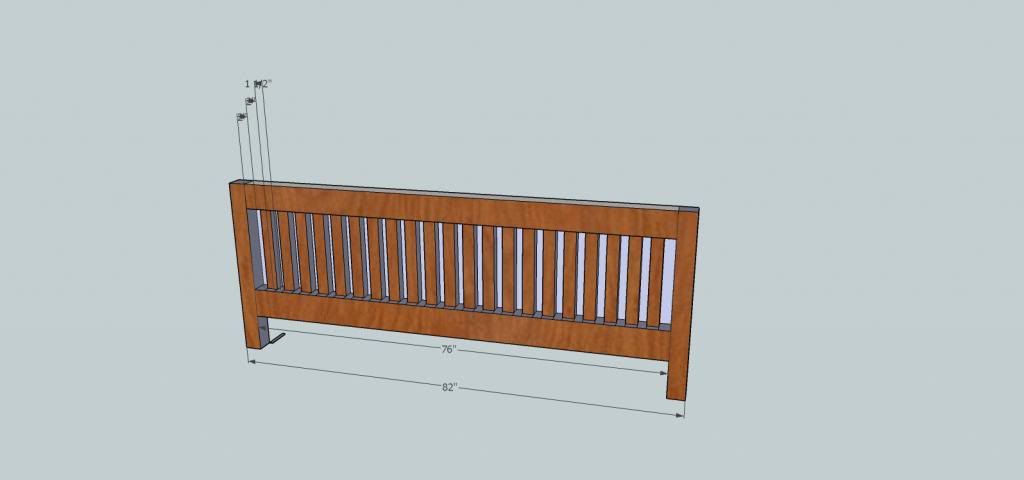
    I made the stretchers plus upper and lower rails 76" long (PLUS the length of the tenons). In other words, the distance between the two headboard bed posts was 76." The footboards were the same. I then cut 21 2" slats for each end (42 in total). The slats were each spaced 1 1/2 inches apart. The gap between the end slats and headboard posts was 2"
    Last edited by Peter Keen; 03-12-2014 at 8:35 PM.

  12. #12
    I did a quick sketchup to show the width dimensions of the end of the bed. The other change I made was to add in a hidden center support under the bed to support the center of the mattress (required on King Size beds). The hard to read dimensions at the top of the model are 2", 2", 1 1/2". Hopefully the pic will make what I was describing somewhat easier.

    Last edited by Peter Keen; 03-12-2014 at 8:36 PM.

  13. #13
    Progress to date.

    Notice anything missing....


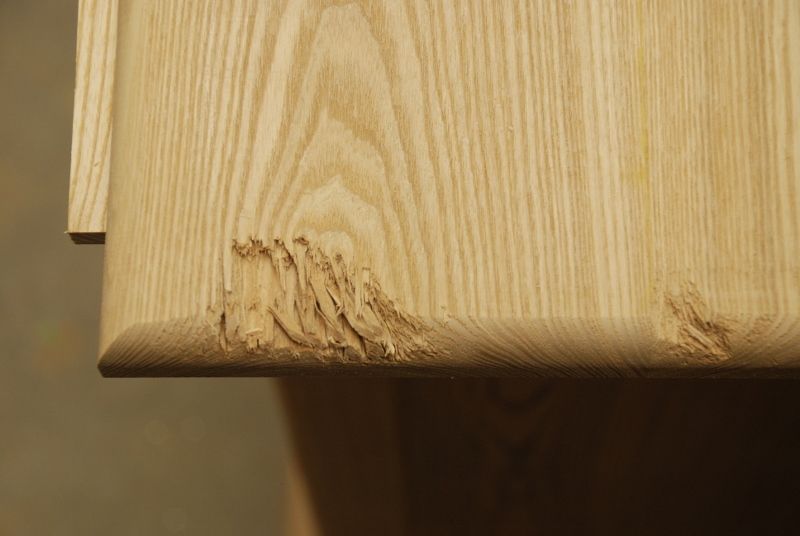
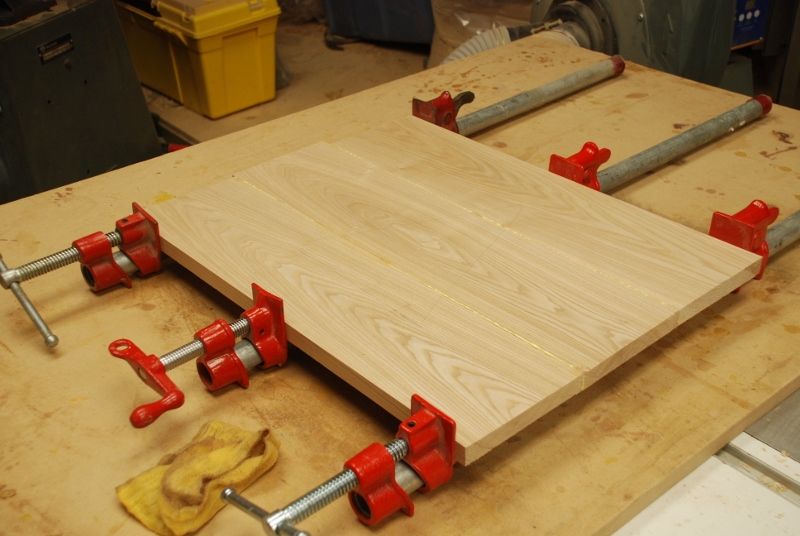
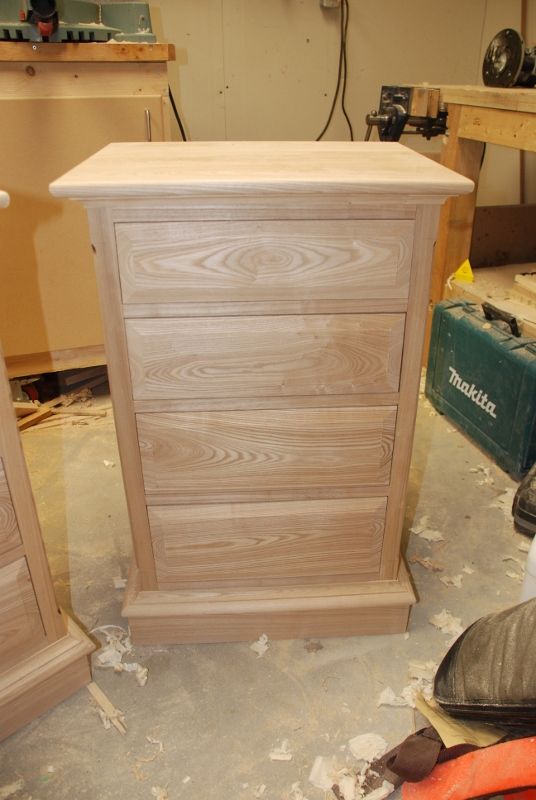
    So progress to date - runners in, all wood for the drawer fronts, tops, and bases jointed and planed. Bases made, router-profiled and mounted. Tops glued up, cut to size, finish planed, and almost done for the night.....3/4 of the way through routing the bottom edge profile on the second top....


    CRRRUNNNNCH!!!


    I moved the top in towards the router a little too far, and in the wrong direction, and it tore a nasty hunk out of it in two places. Alas, although this is on the bottom, it would be quite visible from any angle, so the top wasn't savable. After exercising my knowledge of the Queen's English, thankful that Her Majesty was no where near to hear it ....


    Tomorrow, I'll cut that to size, rout it....ever so carefully, and then I'll recycle the top into the cove moldings that go on the base and under the top.
    Last edited by Peter Keen; 03-12-2014 at 11:51 PM.

  14. #14
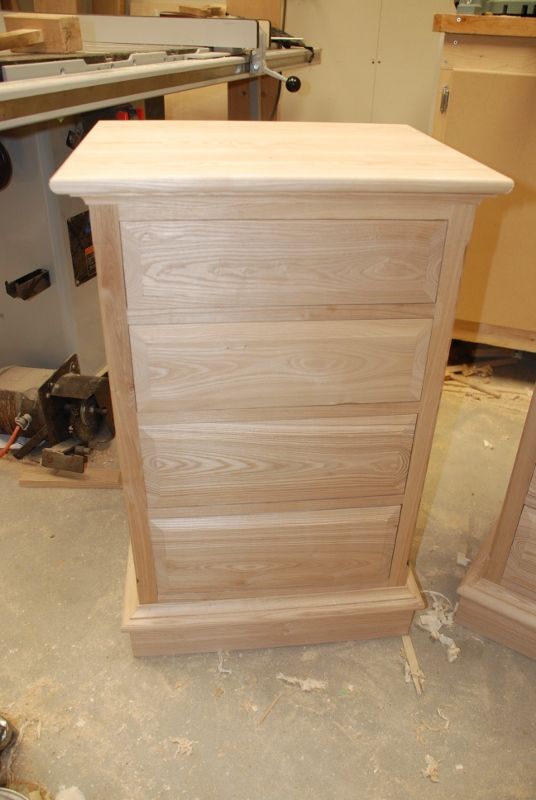
    And cases finished. On to the drawers tomorrow.


  15. #15
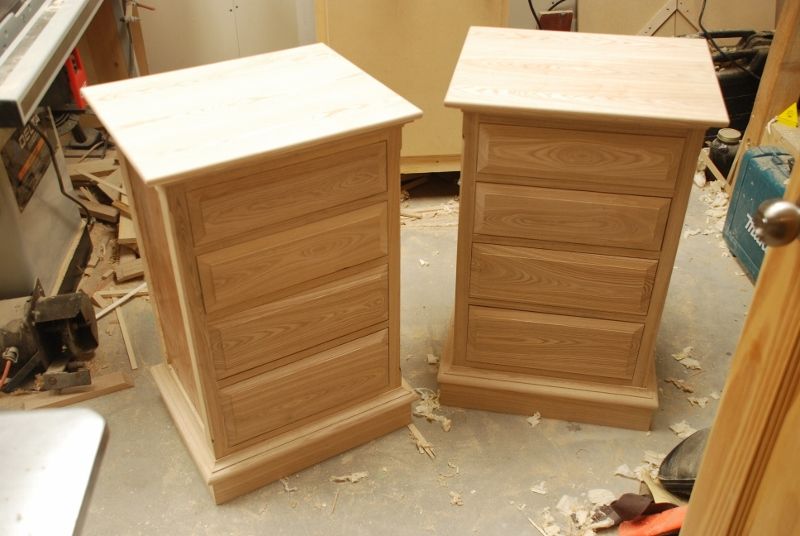
    OK - Drawers done, fit and in. Holes for hardware tomorrow, followed by FINISHING!!!!!


Posting Permissions

  • You may not post new threads
  • You may not post replies
  • You may not post attachments
  • You may not edit your posts
  •