Page 1 of 3 123 LastLast
Results 1 to 15 of 31

Thread: Cherry Bench build

  1. #1
    Join Date
    Apr 2007
    Location
    New Jersey
    Posts
    13,725

    Cherry Bench build

    I'm building a cherry hall bench. It will be about 60" long.
    I've roughed out the parts and am almost done with the joinery. I can't repost the picture since it's in a different thread. Here's the link: (See post#11).
    http://www.sawmillcreek.org/showthread.php?208990-Walnut-piano-bench&highlight=


    The back will contain over 10 spindles.

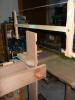
    I need advice on how to connect the crest rail to the rear legs. A non-visible M&T will require me to glue up the spindles and crest at the same time the rest of the legs (and lower stretcher) will be glued up. I'd prefer to save myself the tension of a complicated glue up. Rather, I'd like to glue up the legs and base and lower stretcher, and then later 'drop in' the crest rail with the spindles.

    In the past I've done this using a butt joint between the leg and crest, and then screwing/plugging. That is really the easiest and is my last resort.

    I've considered making an exposed, stopped mortise on the leg to accept a stub tenon from the crest. The thing is, the top of the leg is only about 1 1/4" thick. I'm thinking that joint needs to be fairly robust as it will take all backward pressure of the sitter.

    Should I half-lap the leg top? That way I could keep the leg support as thick as possible. I just don't think this will look great, though...

  2. Sliding dovetail?

  3. #3
    Join Date
    Aug 2010
    Location
    USA
    Posts
    5,582
    So will the crest rail fit in between the rear leg supports or do you intend for it to be wider than the space in between the supports? From the ideea you presented about half lap I got the idea that it is wider, so maybe a saddle joint?

  4. #4
    I think the half lap or Mark's idea of a sliding dovetail would each look very nice.

  5. #5
    Join Date
    Apr 2007
    Location
    New Jersey
    Posts
    13,725
    I decided on a bridle joint. Here's the mortise. I made this with a Domino. Instead of squaring off the end of the mortise, I might just bevel the edges of my tenons. Anyway, thanks for the votes. On to fitting the remaining joints...

    I have a nice piece of curly cherry on its way from Horizon that'll be the seat. I should have ordered enough for the headrest too, but that just might have to be straight grain. This slab is 18" wide.
    Attached Images Attached Images
    Last edited by Prashun Patel; 10-23-2013 at 6:36 PM.

  6. #6
    Join Date
    Dec 2010
    Location
    South Coastal Massachusetts
    Posts
    6,824
    Will you pin the bridle joint?

    That's a great deal of long grain surface area, but you've got
    a 5 foot long span carrying a bending load, and splaying the legs.

    I've always wanted to build an interlocking version, at the top of a leg joint.
    Carl Jara shows a clever variant here.

  7. #7
    Join Date
    Apr 2007
    Location
    New Jersey
    Posts
    13,725

    Trimming the fat

    This is the fun part: initial shaping. All the pieces were cut large and square (at least at the joints) so that the joinery is straightforward to make. Pattern routing and spindle sanding might be quicker and more accurate, but to be honest I like rough cutting close to a drawn line using a pattern and then using a spokeshave (inside) or block plane (out) and rasp to 'find' the true curve. It's not critical to get the faces completely smooth yet.


    Jim, yes, I will pin the headrest to the legs.
    Attached Images Attached Images
    Last edited by Prashun Patel; 10-25-2013 at 6:16 AM.

  8. #8
    Join Date
    Apr 2007
    Location
    New Jersey
    Posts
    13,725

    Progress

    I completed most of the rough shaping.

    I'm committed to it now, but I'm not that happy with the lower stretcher assembly. The stretcher joints are half-lapped and then rounded over. The ends are turned into dowels that fit through the legs. I'm trying to combine sculpted and turned elements into projects, and I haven't found a balance that feels right yet.

    Normally, I'd connect the seat directly to the legs. I read an FWW article explaining how decoupling the seat from the frame simplifies construction. I'm trying this out to see if it's possible to make such a seat that has the lightness of the look of 'apronless' chairs.

    One happy accident: I wanted to use 1x2's on the apron to avoid adding too much weight. However, I needed to beef up the ends to provide some meat for thicker tenons. I added 1x2x4" blocks on the insides of each end. In addition to serving the intended purpose, they also provide a great clamping surface so I don't have to mess with 60" pipe clamps during dry fits and glue ups.

    The frame parts are all dominos.

    I'm still learning and experimenting. So, I would love to hear constructive criticisms on this design (both aesthetically and structurally).
    Attached Images Attached Images
    Last edited by Prashun Patel; 10-29-2013 at 9:11 AM.

  9. #9
    Join Date
    Apr 2007
    Location
    New Jersey
    Posts
    13,725

    Arm to leg joint

    No comments, eh?

    The bottom of the arm is curved and doesn't meet the front leg flush. Instead of cutting a flat on the arm, I used a rasp to round over the top. I think rasps are underrated. Not quite sure how to attach this to the front post. Screw? 1/2" dowel?

    Sorry for the blurry pix.
    Attached Images Attached Images
    Last edited by Prashun Patel; 10-30-2013 at 2:26 PM.

  10. #10
    Join Date
    Sep 2013
    Location
    Carrollton, Georgia
    Posts
    1,815
    I'm not sure how it would be screwed. I would use the largest dowel I could manage.

  11. #11
    Think a mortise would have been better,but of the existing choices I would use a dowel. I have an inch thick piece of scrap steel with slightly under sized holes drilled and counter sunk . That will squeeze a dowel smaller ,then I use slightly thinned glue which swells the dowel tight. It's so easy to split a narrow arm support . Nice looking piece.

  12. #12
    Join Date
    Apr 2007
    Location
    New Jersey
    Posts
    13,725

    Shifting in my seat

    I finished pegging the arm with a walnut dowel.

    I have to rethink my approach to the seat. Having glued the arm in place, I realize that I can't get a single slab in place, because it has be notched to fit around the legs. I also realize i need to make the seat pretty thin to fit the design. Last, a slab would be constrained by the legs. For all these reasons I decided to laminate the seat out of edge-grain pieces.

    This will allow me to bevel each piece at slightly different angle on the tablesaw instead of having to scoop the seat manually.
    Attached Images Attached Images

  13. #13
    Join Date
    Sep 2013
    Location
    Carrollton, Georgia
    Posts
    1,815
    I built a bench like that that had slats in the seat which fit next to each other but were not attached to one another. I found I had to round over the edges so they didn't pinch when someone sat down.

  14. #14
    Join Date
    Apr 2007
    Location
    New Jersey
    Posts
    13,725
    Thanks, Yonak. I do want to glue them up, but I will either leave an expansion gap around the leg or possibly even a single slot in the center.

  15. #15
    Join Date
    Apr 2007
    Location
    New Jersey
    Posts
    13,725

    Bevels

    I'm fitting the slats. The center (1) board is flat. (2) is cut at 2.5 deg, (3) at 5 deg, and (4) at 10 deg. I didn't have a formula for this. I just cut some test boards at these angles and it felt about right to my eyes (and butt).

    I toyed with the idea of beveling the edges of each board (instead of the tops), which would have made the seat coopered on the top and bottom. While I like that aesthetic better, a flat bottom and straight sides makes for easier glue up, and registration with the supports. Some of the visual lightness that such a coopering affords can (hopefully) be accomplished by beveling the ends of the seats after glueup.

    I really like this slatted construction for other reasons. Scooping a seat manually is fun for about the first 10 minutes. Then it's a lot of hunched over, back straining work. Apart from being able to do the hard work on the band or table saw, A thin rear slat will make for easier manipulation when drilling the spindle holes.

    I might make the slats thinner still. (1) is currently at about 7/8". There's good support underneath, so I think I could take that center board down to 5/8". I think I may also split the center piece to allow for expansion. I'm not sure how that'd look, though...?
    Attached Images Attached Images
    Last edited by Prashun Patel; 11-04-2013 at 9:25 AM.

Posting Permissions

  • You may not post new threads
  • You may not post replies
  • You may not post attachments
  • You may not edit your posts
  •