I would argue that this test demonstrated no significant difference. What is surprising is that the half lap faired so well, but then Derek wouldn't like the look of the half lap on his chair.Originally Posted by glenn bradley


 Contributor
I would argue that this test demonstrated no significant difference. What is surprising is that the half lap faired so well, but then Derek wouldn't like the look of the half lap on his chair.
My hand tools skill would definitely not allow me to hand drill a mortise with the degree of accuracy I would want for that joint. I have also never built a chair (don't we have an emoticon for "chicken"?) so my experience with the stresses is from a sitter's perspective as opposed to a builder's. I have no basis for a comfort-zone as to the stresses on the joint over time versus my attachment method.
If I did have the holes done and had a piece of stock for the floating tenon I do not think I would be worried about strength. If I did have concerns I could epoxy the tenon into one part and use my usual method to attach it to the other (hide, PVA, whatever you favor for chairs). I know folks like chairs to be repairable so I don't know that epoxy would be appropriate for both parts using the floating tenon (although, in my ignorance, that would be my preference).
"A hen is only an egg's way of making another egg".
Samuel Butler
 Member
I'm trying to remember where that graph came from, and how they tested the joint - depending on whether the tenon was through or not, and how the force was applied, I could see the lap being stronger in some fashions, and possibly weaker in others.
But if the joint can take even the least amount of weight listed in that chart, maybe we all worry too much about appropriate joinery!
" Be willing to make mistakes in your basements, garages, apartments and palaces. I have made many. Your first attempts may be poor. They will not be futile. " - M.S. Bickford, Mouldings In Practice
Guest
OK, as promised I rewatched Make a Chair From a Tree last night, and can say with certainty that there's no way I can adequately reduce a two hour treatise into a reasonably sized message; but I'll try to hit the high points in case you're thinking about buying this dvd.
First, Alexander spends a lot of effort sizing and orienting the legs and marking them carefully so she can recreate that orientation, incorporating techniques such as drawing lines across their tops and/or bottoms. Then she applies jigs including: a seat alignment trapezoid with small levels; vise jaw inserts that form a diamond (each insert with a V) for holding the legs precisely for marking and drilling; a stick with 3 inline screws for marking mortise locations where she draws circles around much of each leg (drill above the line for the side stretchers, below for the side to side); and the hanging level from the brace bit extension.
Then she assembles the sides. I didn't get further last night. I still think her process is excellent, in spite of the fact I prefer a more casual relationship to woodworking. This type process seems a requirement for chair making, mainly because the front of a chair is normally wider than the rear, which introduces angles that must be addressed. Now if you want to make square chairs....
 [OP]
Contributor
[OP]
Contributor
Many thanks for this report, Jack. It is very reassuring as I have done something similar with regards the orientation lines. I have yet to see this through - will do so later today - and then I shall have photos to report whether this is going to be a chair or firewood!
Regards from Perth
Derek
 Member
Derek:
I am following this with great interest as I have in your many other educational posts/ articles.
I just want to thank you for allowing us to follow along as well as give access to the trials and tribulations of your journey.
While a project of this complexity is way beyond what I could accomplish, I can hardly wait to see finish on that wonderful, curly piece of wood.
Regards,
Dave B
[OP]
Contributor
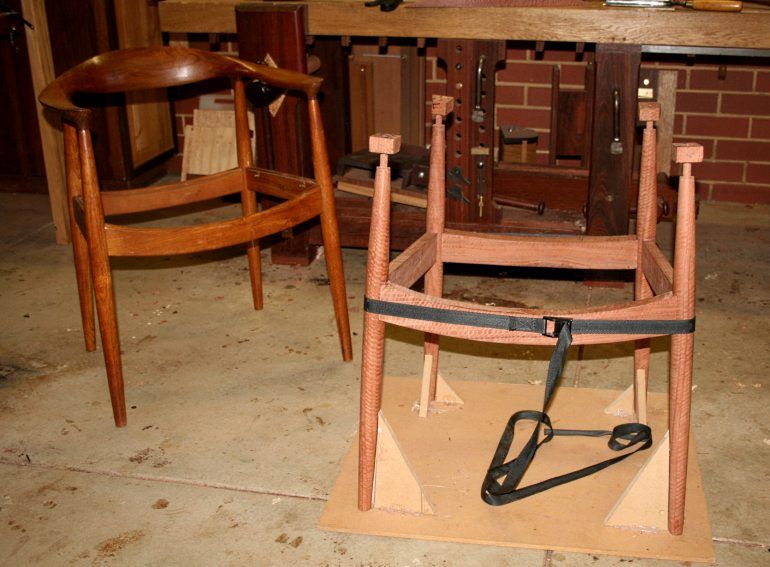
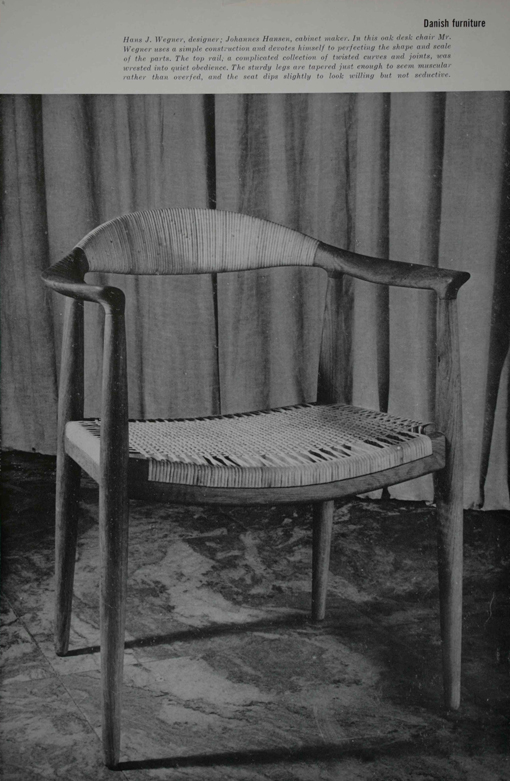
The chair is beginning to resemble The Chair ...
The Chair – Fitting the Front and Rear Stretchers (Part 2)
Link: http://www.inthewoodshop.com/Furnitu...8Part2%29.html
All comments and discussion most welcome.
Regards from Perth
Derek
 Contributor
Thanks for another Monday morning installment. I particularly like the trick with the hand screw for truing the shoulders in the previous post.
C
[OP]
Contributor
The Chair is nearly at a point where I can begin to think of a glue up. Well, that's really getting a little ahead of myself. What I mean to say is that the stretchers are nearly done. Basically, there is one significant (through mortice) and one minor task (rounding the sides) to complete, and then it is ready.
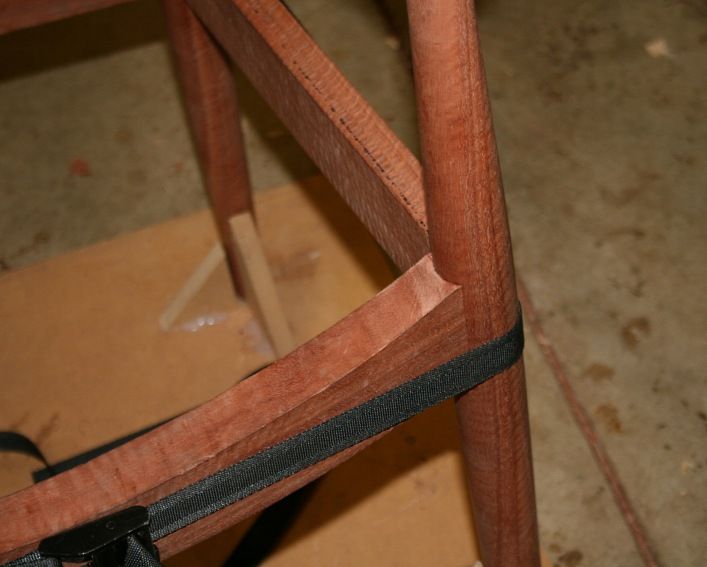
This is where we are ...
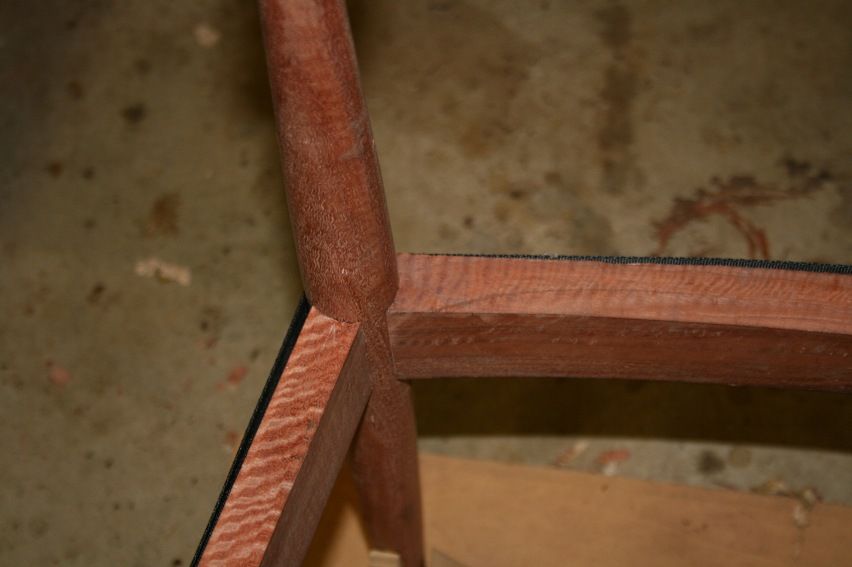
All the coped joints have been fine tuned ..
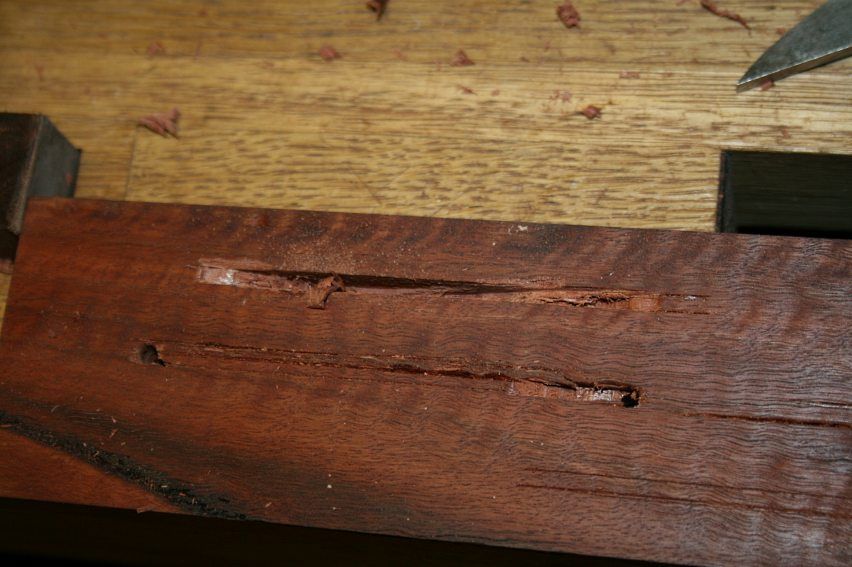
Before the side edges are rounded, a through mortice (I'm not sure what else to call it) needs to be created in each of the stretchers for the Danish Cord seat. The through mortice runs nearly the full length of the stretcher, beginning and ending 30mm ( 1 1/4") from the ends. It will be 3mm (1/8") wide and through the middle of each stretcher.
This is what it will look like ...
Now here is where I could do with your thoughts: how would you create this through mortice with hand tools? Power tool of choice would be a router. That would be an easy process.
My first thought was to saw it out with a coping saw and then clean up the edges with a rasp and file. I practiced on a scrap and decided that this would require too much cleaning up. The saw blade tended to wander with the grain, and the through mortice was too narrow to saw two parallel kerfs.
The other method is to use a mortice chisel. Chisel half-way from each side of the stretcher.
Keep in mind that the front and rear stretchers are compound curves. The side stretchers are straight.
It should be straight forward: score the sides, and chop out the waste. Well, scoring the sides is not straight forward for the compound curves. To begin, a cutting gauge needs to have the appropriate fence to follow a curve. OK, so I can do that.
I practiced on scrap ...
In this wood a single blade cutting gauge was not reliable. Even with initial light passes, the blade wandered with the grain enough that the mortice was in danger of wandering off course or widening. A mortice gauge would be better, but I did not feel like making one with the correct fence specifically for this project.
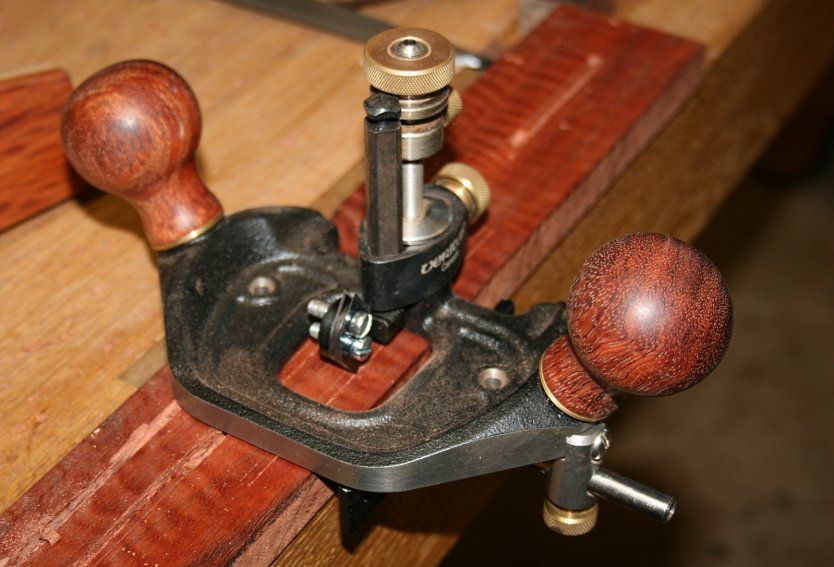
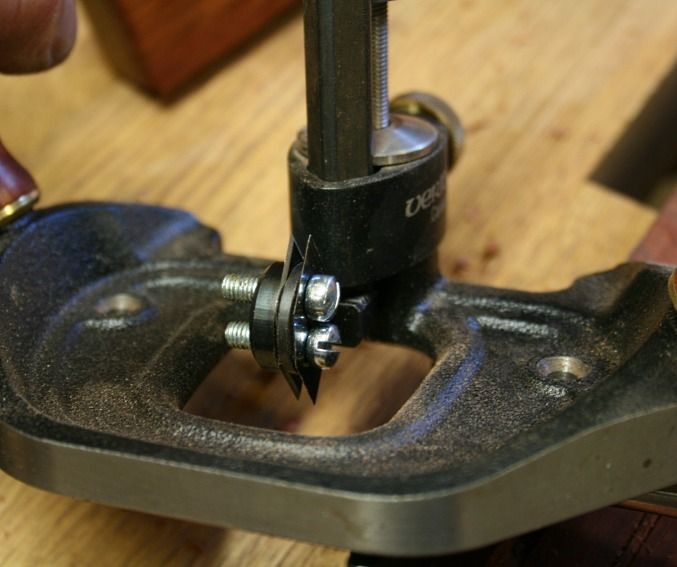
It occurred to me I could use the Veritas inlay cutter for the Veritas router plane. This has a fence that will follow a curve.
This has twin blades to score a parallel line for inlay ...
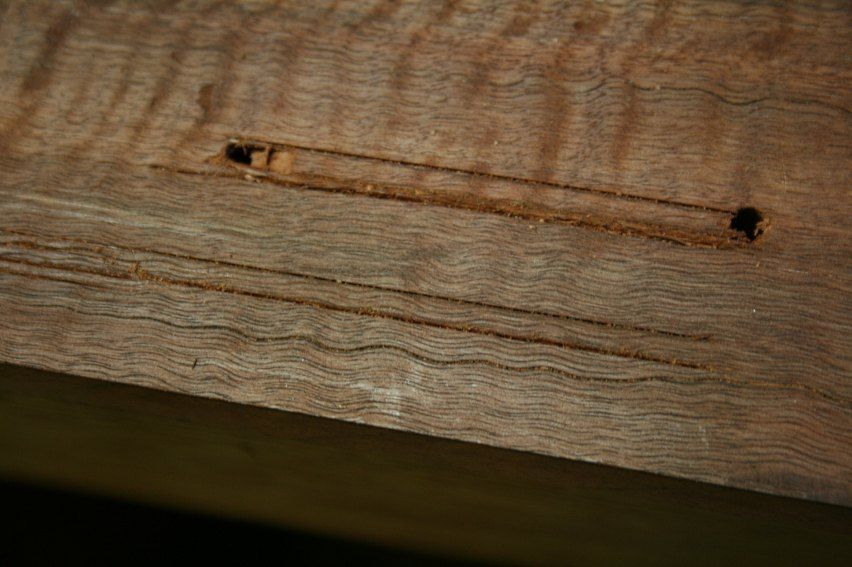
This is the line created (lower example) ..
Chopping out the waste with a 1/8" mortice chisel was OK ....
.... however, I can see that this will take time to do.
Anyone have another idea?
Regards from Perth
Derek
Last edited by Derek Cohen; 01-17-2014 at 10:39 AM.
 Member
A beading tool with a fence suitable for curves and either a blade that scrapers or routes might be something else to try:
http://www.craftsmanstudio.com/html_p/A370.htm
Contributor
What about attaching a semicircular "post" fence to a plow plane to allow it to follow the curve (i.e., like a post fence used on some bandsaws) to efficiently start the grove. Fence on the convex side; perhaps with a second closely spaced post to give registration but also follow the curve? Then drill/mortise the rest.
Good luck!
C
Member
A scroll saw would be a good bet. So I don't really follow why a hand version - jewelers saw - wouldn't do fine as well - just slower.
 Contributor
Derek, looks great so far. Your inlay cutter seems to work very well. You could try doing the same on the opposite side and then use that seldom used compass (keyhole) saw to get most of the waste and clean up with a chisel. That empirical set up your using should make it easier to get placement and shapes for the rest of your build. Stretcher joinery you have done is top drawer work.
Jim
Guest
My first thought was to use individual drilled holes, relieved at the tops, one for each strand. Of course they might have to be too close together, and the trench line is probably more attractive, to say nothing of being easier to weave.
You mentioned that you could saw the trench but couldn't clean it up. How thick are the LN cheek floats? If they're > than 1/8", how about that very thin Japanese rasp LV sells (http://www.leevalley.com/US/wood/pag...96&cat=1,42524 is 1/8" thick at the tip) or their Japanese Finger files (http://www.leevalley.com/US/wood/pag...95&cat=1,42524)?
So my approach would be to use a Japanese kebiki to mark the trench, maybe front and back, drilled stop holes at each end, then either chopped or sawed full trench, cleaned up with the LV Japanese finger files (hey, I already have them).
Member
Personally, I'd drill a bunch of holes with a power drill and join it together with rasp and chisel or a router.
If it was my limited tool set--drill holes with hand saw, joint holes with keyhole saw, files/rasp to smooth transition, sandpaper.
On your hard Aussie wood, I'd be pretty tired after just one mortise!
Personally, I like Jack's idea more.
 Posting Permissions
 Here's one test, there have been others.
 Reply With Quote