Hello to the wonderful Sawmill Creek community! Thank you so much for all of the information you've provided so far as I lurked through your forum archives.
I'm 99% new to woodworking (I've built a few rickety skateboard and bike jumps as a kid) and I'm trying it out as a new hobby as well as a way to keep me busy through these cold Cleveland winters. My first project is a workbench. So far I've done a lot of research on woodworking (mostly here) and using SketchUp. It's been a lot of fun so far and a great departure from what I'm normally into. I know I can simply go to the big box stores and pick up a kit but I want to use this project as a way to learn a few different techniques and I like the added bonus of it being custom to fit my garage space. I'll be using it as a general purpose bench for projects like changing the brakes on the cars, putting together things for the kids, fixing pieces from around the house, throwing a vise on it to "adjust" some bent pieces on my truck and probably a lot of other things.
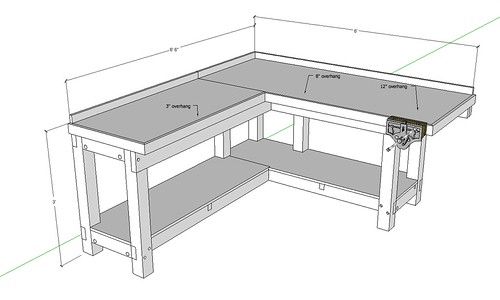
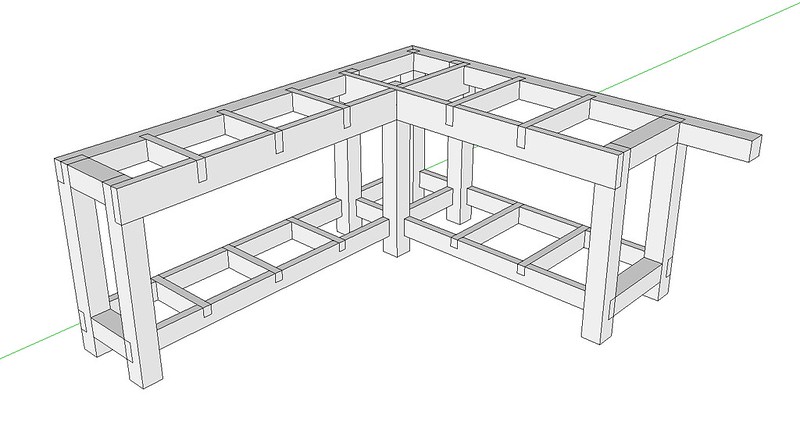
Here's what I've drawn out:
The basics are:
3 x 3/4" MDF + 1/4" sacrificial tempered hardboard top with trim around it and a 3/4" x 2" backsplash to stop any stray hardware from falling to the floor. I'll glue and screw the MDF together then lay the hardboard on top maybe held in by double sided carpet tape so it's easy to remove.
6'x30" main bench top with a 4'x2' side bench top (so I can cut each layer from the same piece of 4'x8')
Front of the bench will be 36" high (Sloped garage floor means it's shorter in the back)
4x4 legs and side supports
4x4 back support attached to the studs so it doesn't tip
2x4 framed lower shelf
1' overhang on the right for a vise in the future that's supported by the 4x4 into the studs
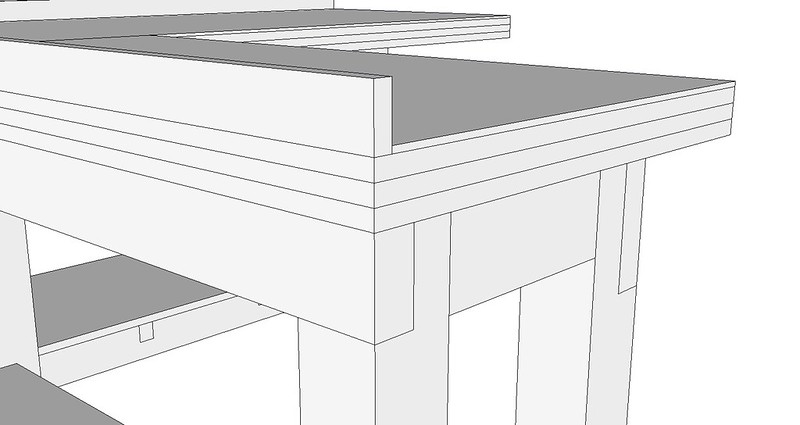
8" overhang around the front for ease of clamping and knee clearance when sitting
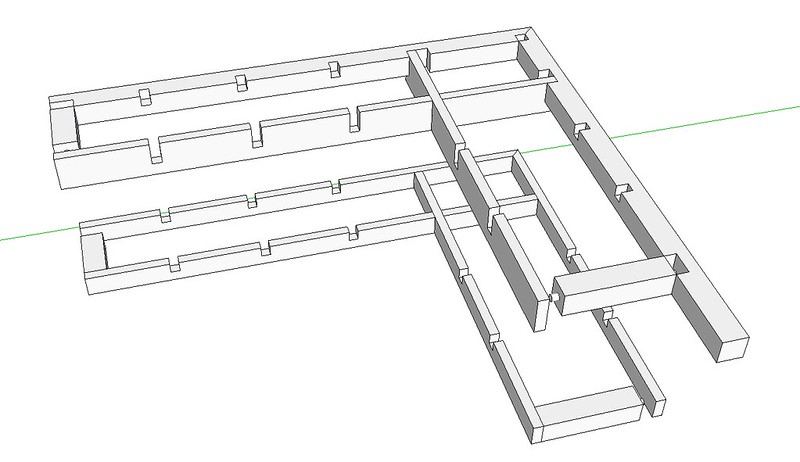
Here is the top:
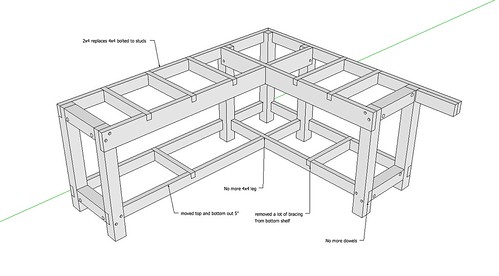
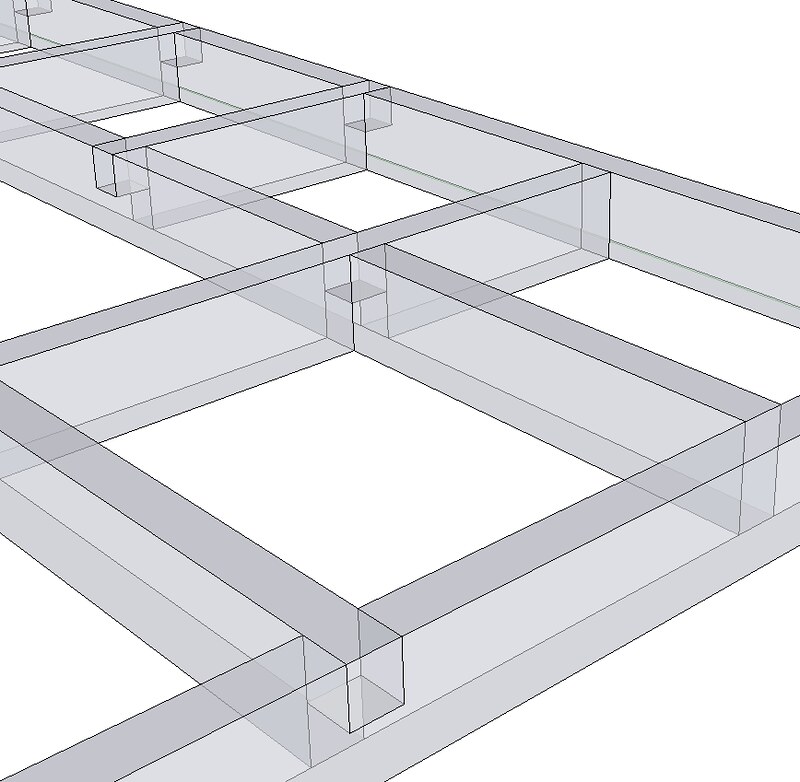
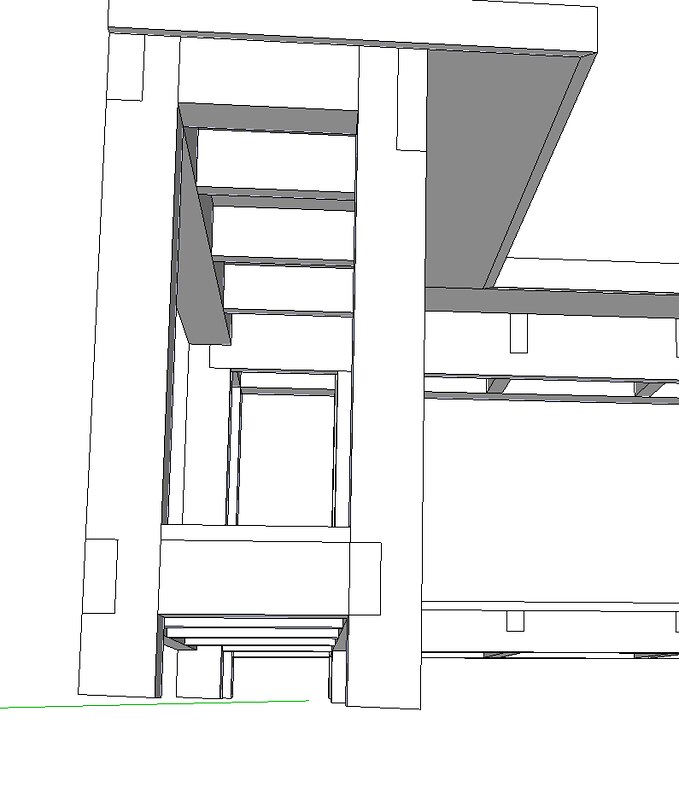
Here is the frame:
I tried to avoid butt joints everywhere so the stringers, legs and supports are connected by half laps:
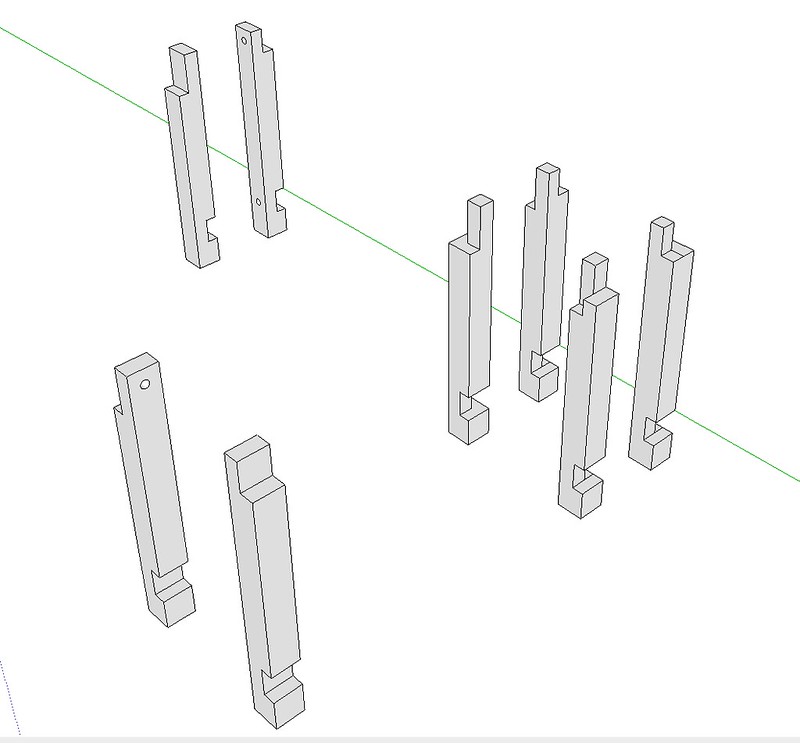
The side support 4x4's are connected to the legs with 1" dowels:
What this results in is a frame that looks really intimidating to me:
And legs that look like even more fun:
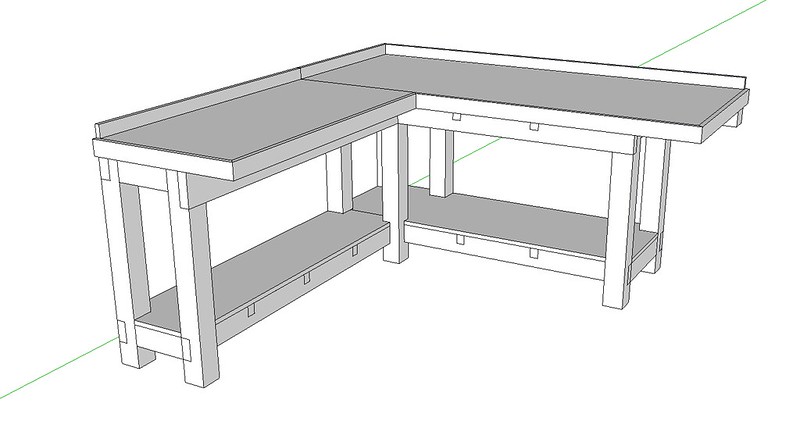
Note that I also have a sloped garage floor for drainage (measured it to be roughly 1 degree) so the legs will also be different lengths and have angled bottoms:
I want to settle on the design before I worry about how to make it. It looks over-engineered to me but I like the idea that it would be rock solid and hold up to anything.
What I need from the community are your opinions. What do you see here that may be causes for concern in relation to the design?
What would you change?
Are any of these joints going to weaken the structure? The legs have half laps cut into both sides and I'm curious if that's a bad idea.
Would I be looking at issues with the top over time with this much overhang?
I have no problem with this project being a stretch for my abilities. I want to use it as a learning opportunity. That being said, have I bitten off more than I can chew with this design?
I think it would be really cool not to have to use any fasteners to hold the frame together but I'm assuming these joints won't be strong enough without them (but what do I know??). Does this need fasteners? If it will need them, what do you suggest?
Thanks in advance,
-Brad


 Reply With Quote