Results 1 to 15 of 15

Thread: Glue question for a specific crack type

  1. #1
    Join Date
    Feb 2007
    Location
    Idaho Falls, Idaho
    Posts
    1,359

    Glue question for a specific crack type

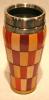
    A couple of weeks ago, I posted this vase that had a bad day on the lathe.

    photo1.jpgphoto2.jpg

    Now that the bruising is going away, and my ego is healing, I would like to try and salvage it. The question is what would be the best glue type to use? I think CA would be easiest, but probably not the best choice because it is so brittle. Epoxy may be the best, but it is hard to get thick glue in a crack this narrow, and i don't know if the epoxy will have the same strength if I thin it. Titebond will be easier to get in the crack , but I don't know about the strength.

    The next problem, is how the heck do I clamp this crack shut while the glue dries? When it cracked, it released some stresses in the wood, and the "flap" shape does not exactly match the area it detached from. To get it to match, I have to push in on the center of the flap, while at the same time pulling the right end out, and pushing down from the top. Maybe a strap clamp could pull it all together long enough for the glue to set.

    Anybody have any other ideas on adhesives or clamping methods?
    Brian

    Sawdust Formation Engineer
    in charge of Blade Dulling

  2. #2
    Are you planning on turning this some more?

    For the glue, I would go with the original Titebond. Chances are you will not even see the seam. With regards to clamping,holding it with yours hands for a couple of minutes should do the trick. Titebond sets up pretty quickly. Or you could try some of that plastic shrink wrap they use for shipping,the one that stretches

  3. #3
    Join Date
    Jan 2011
    Location
    Gresham, Oregon
    Posts
    406
    Brian - I'd consider taking a bit different approach to this crack. I took a class from Alan Beatty a few years back and I recall him coaching me to "accentuate" a flaw in the wood rather than hide it. I have done that with leather lace stitching, butterflies, colored epoxy, doing some pyrogrqaphy work, or even using a thin plate of hammered copper riveted to the piece. Looking at photos of your vase, if it were mine, I would probably start by doing some leather lace stitching with some colored beads at the loose ends of the leather, and then burn something into the side of the vase, like a coyote, eagle feather, or some sort of design that seemed fitting for the "theme" of the vase. A couple of photos maybe????

    DSC01344.jpgDSC01345.jpgphoto (21).JPG
    Last edited by mike ash; 01-11-2014 at 4:15 PM.

  4. #4
    Join Date
    Nov 2009
    Location
    Peoria, IL
    Posts
    4,525
    What are you going to do with the other cracks in the wood? You've got more than the big one that almost shattered the piece.

  5. #5
    Join Date
    Feb 2007
    Location
    Idaho Falls, Idaho
    Posts
    1,359
    Yes, Greg, I am going to turn it more. The outside needs a shear scraping with a tiny bit of truing. I'm sure it will need more now because of the crack, and I'm sure the glue squeeze out will need to be turned off and the seam trued up a bit. It takes considerable pressure to hold the crack shut, so it seems like I will need some sort of mechanical means to hold it securely while the glue dries. The vase is in one piece now. The "flap" crack ends in the middle of the vase.
    Brian

    Sawdust Formation Engineer
    in charge of Blade Dulling

  6. #6
    Join Date
    Feb 2007
    Location
    Idaho Falls, Idaho
    Posts
    1,359
    Mike,

    I had considered the lacing. I did a piece a few months back where I started with a cracked blank, and planned for the leather lacing all along. This was the result.

    _MG_4727.jpg

    I am not really crazy about the lacing on the horizontal part of the crack, but it is still plan B. I think the lacing will become the focal point rather than the void opening at the top. I am not a fan of butterflys, but the copper is intriguing. As for the pyrography, I've never tried, and don't have the equipment or skill.

    EDIT: I had a computer problem that kept me from seeing your pics, but now that I can see them, those are beautiful pieces. I really like the feather pyrography, and the lacing.
    Last edited by Brian Brown; 01-11-2014 at 4:45 PM.
    Brian

    Sawdust Formation Engineer
    in charge of Blade Dulling

  7. #7
    Join Date
    Feb 2007
    Location
    Idaho Falls, Idaho
    Posts
    1,359
    The other cracks are surface checks that have been stabilized with CA. I am not certain, but I think they are shallow, and I may be able to turn them out when I remount the piece. I started this piece years ago when I had a smaller lathe and no hollowing tools. It sat on my bench waiting to be finished for years before I got new tools. The surface cracks were stabilized way back then. I think they are ugly with the CA, so I am looking for a way to make them go away.
    Brian

    Sawdust Formation Engineer
    in charge of Blade Dulling

  8. #8
    Since you plan on turning it more, don't bother to pull the crack back together. Put masking tape on the inside, and build a dam on the outside with clay or plumbers putty. Use a bit of black dye in epoxy and let the epoxy wick into and fill the crack. Return the outside and if needed, the inside.

    The crack will be visible to at least some extent no matter how well it is clamped. Might as well make it a feature.

  9. #9
    you could get the propane out....do a little burn around the edge.....age it some with a rotor type cutter around the edges...then the burn....i do not remember what type of wood it is.....maybe a little color.......this piece should not be worried about if you screw it up .....experiment with the idea that you may apply technigques in the future

  10. #10
    If you want to use thicker glues, you can try to get a vacuum nozzle inside the vessel, and try to suck the glue into the crack..
    Be the kind of woman that when your feet hit the ground each morning, the devil says, "oh crap she's up!"


    Tolerance is giving every other human being every right that you claim for yourself.

    "What is man without the beasts? If all the beasts are gone, men would die from great loneliness of spirit. For whatever happens to the beasts will happen to man. All things are connected. " Chief Seattle Duwamish Tribe

  11. #11
    Join Date
    Mar 2009
    Location
    Orleans, Cape Cod, Ma.
    Posts
    758
    Brian, I think that trying to force the crack closed would be a fools errand. If a bit of modest pressure would improve the shape, fine. Like others have expressed, I think that you could use this as a design opportunity and let people see the crack as what it is..... a natural wonder. Some colorful filler, or some other means of accentualting the obvious. I don't turn hollow forms, so I can only speak at the appearance, but it is amazing how some folks will turn their nose up at a "repaired" turning, and others will fight to obtain it. Have fun saving a potentially unique item. :-) :-)

  12. #12
    Join Date
    Aug 2007
    Location
    Lakewood, CO
    Posts
    761
    I have some big rubber bands that I use to clamp oddball shapes. Can't remember where I got them, I think they were holding something together that was shipped to me. They are from 4" to 6" diameter at rest. Maybe an office supply or big box store sells bigger sizes?

    If the crack requires very much pressure just to hold it closed, be very careful when you re-turn it. Internal stress has been relieved, glue is holding it closed against it's will, and the crack is the weak point. You don't want that big flap flying off. I know you want to save the piece as is, but that's a pretty big crack to glue back together.

  13. #13
    Join Date
    Feb 2007
    Location
    Idaho Falls, Idaho
    Posts
    1,359
    Pat,

    I am definitely worried about what you suggested. I have already been hit by this one once.
    Brian

    Sawdust Formation Engineer
    in charge of Blade Dulling

  14. #14
    Join Date
    Feb 2007
    Location
    Idaho Falls, Idaho
    Posts
    1,359
    Well, it has been glued. I used titebond glue, and pulled it together with a band clamp. It didn't come together as well as I hoped, but we'll see how it works. I just hope it doesn't come apart when I return it. The rubber bands were a great idea but I couldn't get enough clamping pressure with about 2 pounds of bands.
    Brian

    Sawdust Formation Engineer
    in charge of Blade Dulling

  15. #15
    Hey Brian ; sorry to be so late with my suggestion, but you might have use for it in other situations. It is simply a rubber tourniquet like the nurse uses when she takes your blood pressure. I have used these for years and they have a tremendous amount of strength when pulled tight and will conform to many contours with ease. Simply wrap and tuck the end under one of the wraps to secure. I have used these with great success making staved items such as coffee mugs vases etc. Most Dr's ofc , nurses will be glad to supply you with a few for the asking, especially if you gift them with one of your turnings.

Posting Permissions

  • You may not post new threads
  • You may not post replies
  • You may not post attachments
  • You may not edit your posts
  •