Page 3 of 3 FirstFirst 123
Results 31 to 38 of 38

Thread: bevel up wooden planes

  1. #31
    Quote Originally Posted by Kees Heiden View Post
    I have two higher pitched planes, an Ulmia at 49 degrees and a non descript infill also at 49. But that's not enough to see much better results regarding tearout compared to a 45 degree plane. Luckily they both have a capiron and they work very well with that.

    My wooden foreplane happens to have a cambered capiron, a bit less camber then the iron itself. It came to me like that. It's a sweet plane.
    Kees, what is your impression of the cambered cap iron? I recently cambered the cap iron of my Stanley no.5 to match the cutter, just to see what would happen…the jury is still out, but my initial impression is that, contrary to what is commonly said, the cambered cap iron is really an improvement. One problem I have is that I'm using a thicker cutting iron, so with the cap iron set close, I can't extend the irons far enough to get a really deep cut. But that problem could be solved with a different iron.
    It's very interesting that you say the cap iron is slightly less cambered than the cutter…because another problem I found was that the center of the cap iron tends to drag and leave witness marks on the wood, if the cap iron is set too close. So I was considering exactly what you have--cambering the cap iron half as much as the cutter itself (hope that makes sense).
    Anyway, would love to hear your thoughts on this.

  2. #32
    Hi Steve,

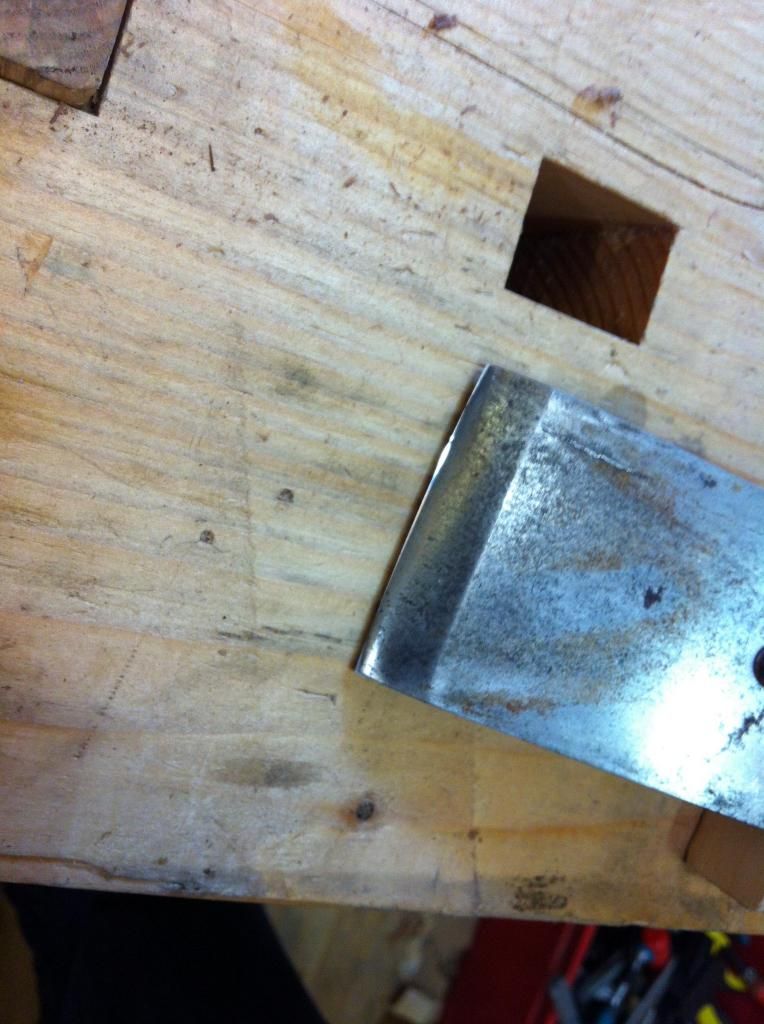
    Here is a picture of my wooden foreplane iron. Not the best picture, sorry. The camber on the capiron is rather straight in the middle and bends away towards the corners. It now actually almost touches the edge at two point. It is very crudely shaped, I should redo that someday.


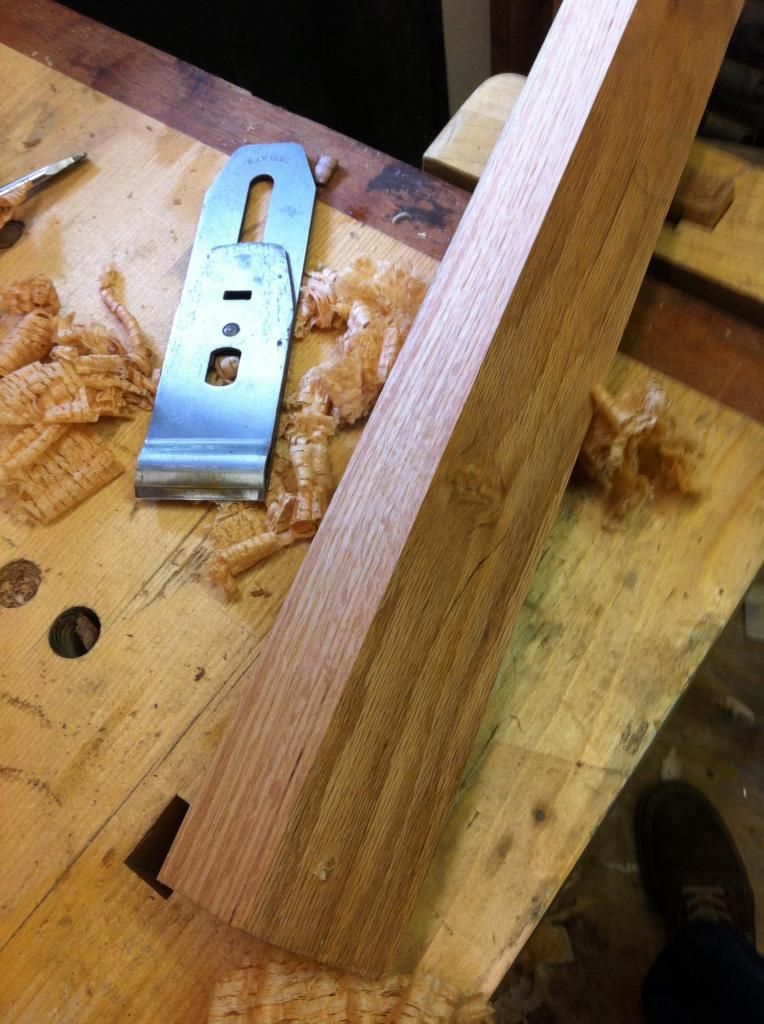
    I planed some quarter sawn oak. I don't know what species, something European. As you can see in the next picture it has a knot in the flat sawn face which makes for interesting grain in the QS face. I couldn't plane it without tearout with the foreplane, but the tearout never was very bad. Just some scruffy feeling areas. 0.2 mm thick shavings, capiron about 0.4 mm from the edge in the middle.

    With a few passes of my Stanley smoothing plane the wood turned out absolutely smooth. For the record, smoothing plane is a Stanley #4, Ray Iles iron, original capiron with bevel at 43 degrees, set 0.2 mm from the edge, wide open mouth. Shaving thickness is 0.05mm.


  3. #33
    I am the one who always says there is no reason to camber the cap iron.

    The reason for this is that the concept that the cap iron would need to be cambered suggests that the implication is there is a heavy shaving at the edges of the iron in a heavy cut, and the cap iron needs to be moved back to accomodate it. There are two problems with this:

    The cap iron in the middle of the plane never advances below the mouth of the plane. If the iron is so cambered that it doesn't project from the mouth, it will not be in the cut where it doesn't project.

    The part of the cut that limits how close the cap iron is to the bottom of the plane is the center of the cut, and not the edges. The cap iron will never work the chip at the edges while it's working it in the middle on a heavy cambered cut - if you so choose to set it closely enough.

    If you have a very cambered iron and you want some cap iron influence, it is literally no problem at all if the edges of the cap iron overlap the iron and hang off into space - that is just a confirmation that that part of the iron is so cambered that it will be entirely recessed well into the plane in the middle of the cut. If wasn't, the cap iron would have to be way down into the cut, and the cap iron can't even be used right at the mouth of the plane, let alone in the cut.

    What's done then, though, is to make that particular cap iron less compatible with smoothing. It has no effect in a cambered cut, but if you went back to a straight cut, it's been clipped and will be ineffective.

    It may be aesthetically pleasing to do it, but it is counter productive.

    The same is true even on a "Charlesworth" camber on a smoother - the cap iron will be recessed enough so that it is not down in the wood during the cut, and the cut at the edges of the plane will not be limited by it, either. The center is still the limiting factor. If there are scuffed surfaces at the edge of the wood, then something else is wrong - perhaps there is somewhere in the plane at the corners where shavings hang up (this is common when they hang up in the corners on a wood plane at the abutment or wedge points). That is a feeding issue with the plane and not a cap iron issue, though.

  4. #34
    Quote Originally Posted by David Weaver View Post
    .... it is literally no problem at all if the edges of the cap iron overlap the iron and hang off into space.

    Now you are getting into the "patented lift and cut technology", with the cap ahead of cutter. I think it was Norelco and not Remington.You need to develop a double iron straight razor. It would work on end grain. Put the fibers under tension. Is pine endgrain a sharpness test because it is not as dense and the fibers are not backed as strongly and can be pushed away from a dull blade? I find dried out doug fir floor joists to have the nastiest end grain to work. Especially the fast growth stuff. It has a huge variance in hardness from early to late growth rings. I soak it in Linseed oil.

    I don't know. Jammies! they had Yodas and bleep on'em.

  5. #35
    Douglas Fir is an awful wood once it has dried for several decades. Parts of it turn to splinters and the rest turns to powder.

    You're right about norelco lift and cut, remington and the microscreen was "shaves as close as a blade, or your money back".

    Now, getting either to chase down those hairs that grow parallel to your face after two days of not shaving, and doing so without razorburning the entire area...something entirely different! I bought into those advertisements hook line and sinker in school, bought one of each, went back to a bic disposable after a little bit of use from each. Then the braun...same thing. Glad to be rid of those smelly things!!

    Kind of like woodworking - lots of "improvements" offered to allow you to think that it's better to avoid learning a skill (be it straight razor shaving or using a cap iron). Few of them turn out to be real improvements!!

  6. #36
    I wasn't singling you out Dave, other people have said this as well.
    Everything you say makes sense. A couple points though:

    Quote Originally Posted by David Weaver View Post
    … the concept that the cap iron would need to be cambered suggests that the implication is there is a heavy shaving at the edges of the iron in a heavy cut, and the cap iron needs to be moved back to accomodate it.
    This is the opposite of what I was thinking. My purpose in cambering the cap iron was to get closer to the middle, not farther from the edges. Since the chip is heaviest in the middle, that is where the most tearout will occur, so it seems like it might be advantageous to have the cap iron close at the middle.
    If you can get the cap iron closer at the middle, then it would not seem to make sense that "has no effect." Again, my initial impression is that it does have an effect (but I'm entirely willing to admit that my anecdotal experience is not the same as proof).


    … If you have a very cambered iron and you want some cap iron influence, it is literally no problem at all if the edges of the cap iron overlap the iron and hang off into space - that is just a confirmation that that part of the iron is so cambered that it will be entirely recessed well into the plane in the middle of the cut. If wasn't, the cap iron would have to be way down into the cut, and the cap iron can't even be used right at the mouth of the plane, let alone in the cut.
    Perhaps I'm just not seeing it, but I don't understand why the cap iron can't project into the mouth. Maybe not on a Stanley, but on a wide-open woodie, it seems like it should be workable.
    I am not a big fan of the "overlap" strategy; certainly it works, but my intent is to have the corners of the blade just barely disappear into the mouth, so that I'm using 95% of the width of the iron. Otherwise, why not just use a plane with a narrower iron?

    The same is true even on a "Charlesworth" camber
    What's that?

  7. #37
    David is right of course. The capiron shouldn't project below the surface of the sole of the plane. If it is deeper then the sole, it hinders the shaving. You can get away with it for a few hundreds of a mm, but pushing the plane becomes increasingly heavy. The capiron in facts works like a shaving depth limiter like that. So, if the capiron is straight and sits just above the sole surface, then that should be the ideal spot for a cambered iron in a jack plane. Of course, with a deep camber and shavings in the region of 8 to 10 thou thick, you shouldn't expect a perfectly smooth, tearout free surface in difficult wood.

    I really need to work on the edge of the capiron from my wooden foreplane, it is in pretty bad shape now. So I might just as well make it straight.

  8. #38
    If the cap iron projects through the mouth into the cut, the plane will stall in the wood and you won't be able to push it. I guess I should've clarified that by through the mouth I mean literally past the bottom of the sole.

    It's nice to have a very cambered jack where the cut is only part of the width of the blade. The extra width of the plane makes the plane a lot nicer to use askew. On the remainder of the cuts, you can go full width following a jack with a plane and with a heavy cut as long as whatever you're using has enough weight. If you use something light, it will punish you, but it won't do so with more camber and a scalloping cut.

    Anyway, the charlesworth camber (which isn't a standardized name, I guess) is what David Charlesworth does in his sharpening video. He counts strokes on the corners of an iron with an eclipse jig to have a very very gradual camber that is precisely created and that has full sharpness all the way to the edge. If you're literally finish smoothing with a plane (nothing else at all after it), it's a very nice method to use because the iron is sharp to the edge but the corners don't contact the wood.

    At any rate, the overlap is awkward looking, but because the cap iron can never project below the sole of the plane, it literally is telling you that you won't be using the part of the iron that's overlapped in the cut, and if you want to use that part of the iron in the cut in a deeper shaving, you'll have to move the cap iron back - just as you would with a cambered cap iron.
    Last edited by David Weaver; 02-15-2014 at 2:03 PM.

Tags for this Thread

Posting Permissions

  • You may not post new threads
  • You may not post replies
  • You may not post attachments
  • You may not edit your posts
  •