Page 7 of 18 FirstFirst ... 3456789101117 ... LastLast
Results 91 to 105 of 260

Thread: Electric Bass Guitar Build

  1. #91
    Join Date
    Jan 2009
    Location
    Williamsburg,Va.
    Posts
    12,402
    Bend the binding to a tighter curve than the curves,like the waist,that it rests against. That will help it to not spring loose years later,like you often see on old guitars. The trouble with plastic binding like celluloid is it keeps degenerating until it literally falls apart. The cause is it isn't cured properly. Nitric acid left in it wreaks havoc with the metal parts,too,when it starts to fall apart. I have seen very old instruments,though,where the celluloid is still perfect. It's a gamble. Wood is really better in the long run.

  2. #92
    Join Date
    Jul 2012
    Location
    Punta Gorda, FL
    Posts
    3,028
    When I first considered binding for the bass I just didn't like what I imagined it would look like, thin on the top and wider on the sides. I wanted something wider on top but then you run into problems with splitting the wood as you work around tight corners. Binding the full thickness of the bass worked for me aesthetically but when the grain issue hit me I thought attempting this would be a mistake.

    George, your idea about over-bending is a good one but I've already cut up the forms I'll be using to press the slats into shape and later to glue them on the body.


    This is what I plan to use to steam the wood:


    Tommy Mac used 4" PVC for a steam bending project much bigger than this so I'm hoping the PVC won't be a problem. I already had the pipe. It's left over from when we built the house in 1986. I'm also hoping the eggcrate will hold up too. That was left over from reef tanks we used to keep.

  3. #93
    Join Date
    Jan 2009
    Location
    Williamsburg,Va.
    Posts
    12,402
    Can't you do some over bending after you remove them from the forms? Use a pipe with a torch inside,and dampen the wood. Practice on some scraps of the same wood to get the temp. so it doesn't burn.

    If you don't,I can practically guarantee there will someday be some separation on the concave bent areas and the body.

    By the way,it really takes weeks for those steamed pieces to actually get thoroughly dry and quit shrinking. I know this from long experience.

    When I made my orange Gretsch guitar,I made the sides from several layers of 1/28" veneer(you can't get it that thick any more). It was WEEKS before I got the guitar done. Possibly MONTHS,I can't recall-it was a part time job on weekends mostly. The lacquer on the sides has done some crazing now,because of continued shrinking of those glued veneer layers. It's shrunk a small amount under the lacquered surface,"jamming" the lacquer together. I guess it makes the guitar look more authentic. I'm not going to refinish it at this late date.
    Last edited by george wilson; 08-03-2014 at 1:59 PM.

  4. #94
    Join Date
    Jul 2012
    Location
    Punta Gorda, FL
    Posts
    3,028
    I've seen the heated pipe bending process. One GAL member used a 3" piece of copper pipe and placed a torch inside it then did his bending on that. It was positioned overhanging the bench with the torch laying on the bench. He said he had to be careful when doing the bending because the heat from the torch could burn his belly button!

    I'll do some practicing and see how it goes. Maybe I need to do a practice glue up too but I'm thinking it would take so long for separation to occur if I waited for that on the practice piece, I'd never finish the real thing. But not sure when I'll get to it. The weather here has been gorgeous lately and I just can't go down into the basement and miss out on this perfect weather.

  5. #95
    Join Date
    Jan 2009
    Location
    Williamsburg,Va.
    Posts
    12,402
    You don't wait for separation oin the practice piece. It WILL take too long!! Just over bend the curves so they hug the body more tightly,and let it go at that.

  6. #96
    Join Date
    Jul 2012
    Location
    Punta Gorda, FL
    Posts
    3,028
    Quote Originally Posted by george wilson View Post
    Just over bend the curves so they hug the body more tightly,and let it go at that.
    If it's good enough for you George, it's good enough for me.

    When I do the bends, I'll post pics and let you know how it's going.

  7. #97
    Join Date
    Jan 2009
    Location
    Williamsburg,Va.
    Posts
    12,402
    Julie,you make such great,organized jigs! The steam bending outfit is very nice. I need you to come down here,organize my shop,and make jigs for me!!!

  8. #98
    Quote Originally Posted by george wilson View Post
    Julie,you make such great,organized jigs!
    She really does, doesn't she? Much nicer than anything I've ever made

  9. #99
    Join Date
    Jul 2003
    Location
    Smithfield, Va
    Posts
    328
    Just a reminder Julie, make certain that pvc pipe is well ventilated. Plastic pipe does not play well with live steam under pressure! I use a length of thin wall aluminum pipe when I need to steam bend.

  10. #100
    Join Date
    Jul 2012
    Location
    Punta Gorda, FL
    Posts
    3,028
    Oh boy! You guys missed it! I plugged the steamer into the 4" PVC, sealed very well, I might add... and something started to bubble and gurgle. The drain hose I put in the pipe was cooking like the Chattanooga Choo-Choo!

    So I loosened the cap and the "sweat" came out the other end. Add one more bucket! It was interesting, to say the least. I now know why all of the steam boxes I've seen are made from wood. Lots of places for the pressure to be released. The SCH40 4" pipe bowed. I could have shaped it to anything I wanted. But it didn't fail.

    Anyway, I took the sample piece and steamed it for over half an hour. They say one hour per inch. This was 1/8" thick and it was still pretty stiff, except the part closest to the steam inlet. That was like spaghetti. So I took that part and placed it in the tightest curve. But the rest wasn't much different than dry wood. I'll know tomorrow how it turns out.

    I'm thinking a steam box needs to distribute the steam evenly over the whole box. But what do I know?

    Brian and his mom were jamming tonight. He's been playing the red Strat and doing some really cool magic. It's sad to be able to build a guitar but not play. Playing is where it's all at. Maybe one day...

  11. #101
    Join Date
    Sep 2009
    Location
    Norway
    Posts
    224
    You really need a small opening in the far end to let the steam circulate through the tube, - and some healthy flow going through the pipe. No need for pressure in the box, though...
    I'm not so sure PVC is the right material for this. Some insulation also helps in keeping an even temperature through out the tube.
    Boatbuilders steam large 3"+ planks in order to twist them to the right profile on the hull, but the ones I remember used a woden box and a large steam boiler. Too long ago to remember the details....

    We used to harden Copper Beryllium antenna blades in a large 5" alu tube, appx 2m long, with a 1.5 KW hot air gun. Some insulation on the outside of the tube and covering the ends to retain the heat, but still allow flow through the tube....... IIRC the ideal temp was 154C....

  12. #102
    IMHO, this method of bending is a bad habit to get into for guitar work. It may work on some woods, but when you start using figured wood, it will fail miserably. You'll find that soaking something like figured maple, for example, will cause the piece to just come apart when you try and bend it.

  13. #103
    Join Date
    Jan 2009
    Location
    Williamsburg,Va.
    Posts
    12,402
    The trouble with steaming is the pieces will wrinkle down the height of the sides. I have a special steam box we made in the 60's. But,I only use it for steaming strips of wood for antique repair,not wide pieces for guitar sides.

  14. #104
    Join Date
    Jul 2012
    Location
    Punta Gorda, FL
    Posts
    3,028
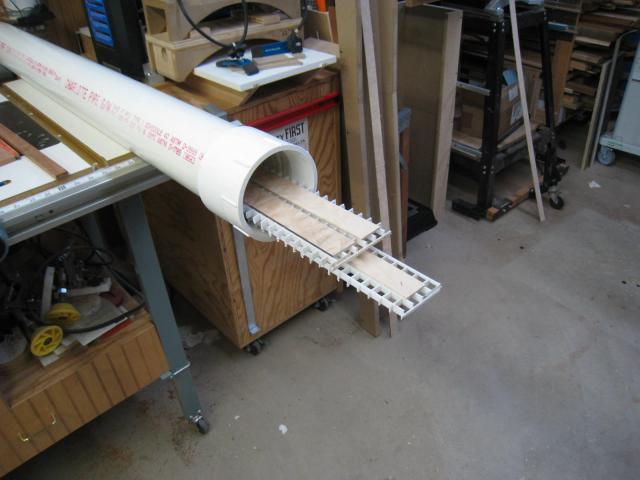
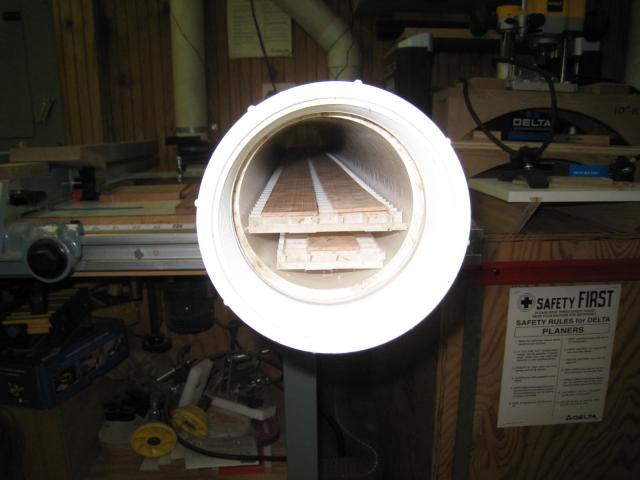
    I've been doing some reading up since the first run. I was surprised how many steam boxes were made of PVC. Though most were supported underneath to keep the pipe from sagging. I also found most who build wooden steam boxes sealed them very well and only drilled one hole for the drain and one small hole at the other end for the pressure to escape. All the ones I saw, PVC and wood, used dowels as a shelf to suspend the wood being steamed.

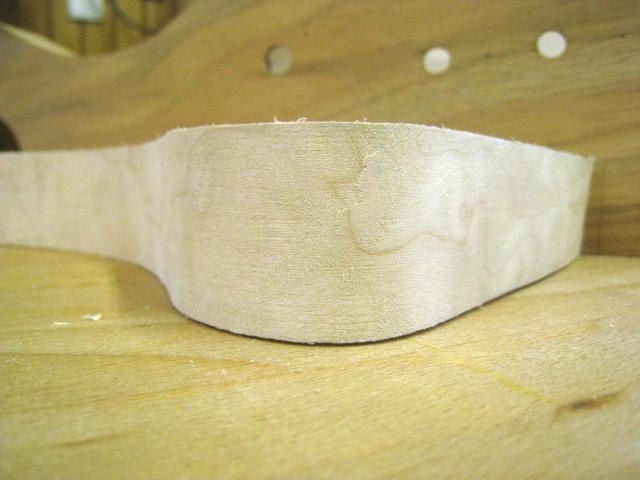
    This is the piece after 24 hours in the forms. I found one place where the fibers broke around the horn. And that part of the wood was pretty saturated because it was closest to the steam inlet. As you got farther from the inlet, the wood got drier and less pliable. As you can see from the picture below, there was a lot of spring back on one end. That was the end farthest from the steam inlet.


    I lightly sanded some of the fibers away to make the split easier to see.


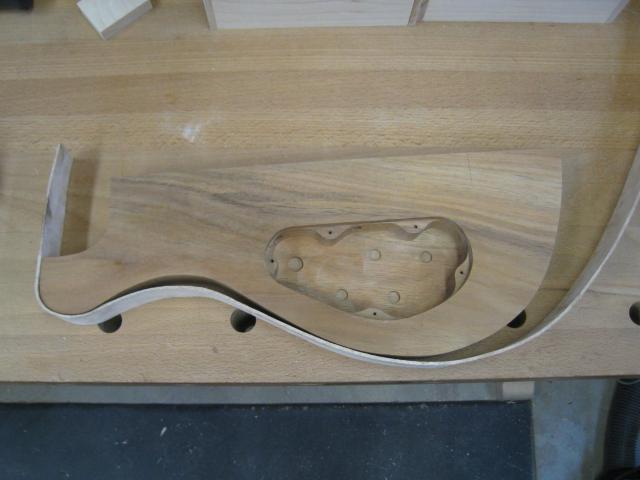
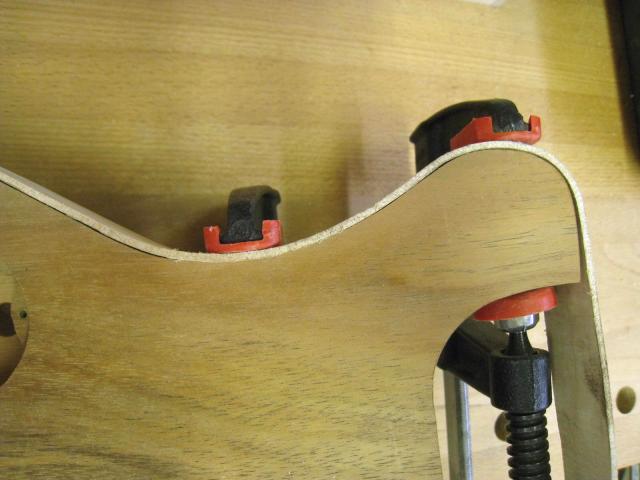
    Like George said, overbend. Even with clamps pressing things into place, there are gaps. I'll need to fix these with a bending iron. My goal is for the strip of maple to hug the curves of the body.


    I'm beginning to see why you guys don't go to the steam box for bending guitar wood. When the bending iron gets here, I'll get some practicing in and see if I can take a fresh piece and bend it to snug up against the body.

    I have a book by Jonathan Kinkead on making an acoustic guitar. From what I read, it seems he soaks the wood in water then takes it to the bending iron. He places a wet rag on the inside (between the wood and iron) and a bending strap on the outside. Is this what you guys do?

  15. #105
    I usually just spritz it with water from a spray bottle. Ideal would be to bend dry, but it's difficult to get enough heat into the wood without scorching it. You can get away with it with something like rosewood.

    I personally think the bending is just fine, and I wouldn't go futzing around with it any more, especially where the fibers have started coming apart. Get yourself some butchers tape. You can also use masking tape. In tight curves, or when I need extra oomph, I use nylon reinforced plastic tape. Anyhow, after applying the glue, I hold the binding in place with lots of pieces of tape. That insures that the most important part of the joint is tight....the edges. Once it's glued down, that little bit of torn fibers will just sand out. A traditional fix is to wick a little CA glue in there if you want, but you'll just need to be careful so it doesn't interfere with the finishing.

Posting Permissions

  • You may not post new threads
  • You may not post replies
  • You may not post attachments
  • You may not edit your posts
  •