Results 1 to 14 of 14

Thread: "Sticky" Hollow Mortising Chisel

  1. #1

    "Sticky" Hollow Mortising Chisel

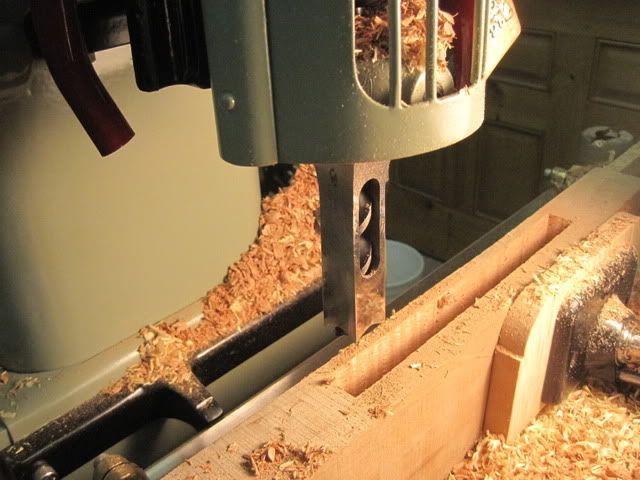
    I'm cutting some 3/8" mortises in soft maple using a Delta Hollow Mortising Chisel on my drill press. It's taking forever to extract the chisel after making the plunge cut. The chisel appears clean and rust free. I'm afraid to apply anything to it for fear that it would cause problems with glue adhesion.
    Does anyone have any tips ? Thanks.

  2. #2
    Plunge in 3/8" depth increments then move sideways rather than plunging all the way down before moving over. I have a big Powermatic mortiser with a big clamp and it gives me sticking chisel problems too. I have tried waxing the chisel and it helps a little.
    Last edited by Loren Woirhaye; 04-18-2014 at 7:53 AM.

  3. #3
    have you sharpened the outside of the chisel and in doing so have made the leading edge smaller than the body? PICs would help
    jack
    English machines

  4. #4
    I use a reamer to sharpen the inside of the chisel, followed by a auger bit file in the corners. This pushes the cutting edge slightly proud of the body of the chisel. I notice less sticking after sharpening.

  5. #5
    Join Date
    Aug 2013
    Location
    Enchanted land of beer, cheese & brats
    Posts
    1,314
    What I've done is to simply make sure the wood is clamped well. Any rocking/twisting/lifting of the board on the up stoke will only make the chisel jam up. And of course don't sharpen the outside of the chisel.
    I got cash in my pocket. I got desire in my heart....

  6. #6
    I have alleviated this problem by grinding some relief into the sides of the chisel, leaving the corners alone, and a judicious use of buffed wax with no apparent glue effects. Loren's suggestion of successive shallow cuts is good.

  7. #7
    Join Date
    Aug 2013
    Location
    Enchanted land of beer, cheese & brats
    Posts
    1,314
    Quote Originally Posted by Kevin Jenness View Post
    I have alleviated this problem by grinding some relief into the sides of the chisel, leaving the corners alone, and a judicious use of buffed wax with no apparent glue effects. Loren's suggestion of successive shallow cuts is good.
    That reminds me, I think I ground the corners (just a little) on my chisels up say about ½ or ¾" past the cutting part. IIRC the chisels seemed to tapered nearer the shank. So I didn't think the corner removal did anything. Some are manufactured this way though.

    I'll have a look when I get in the shop and shoot a photo or two.
    I got cash in my pocket. I got desire in my heart....

  8. #8
    I'm reluctant to sharpen. I "touched up" my 1/2 chisel with a diamond paddle yesterday and it was worse after. I polished the 3/8 with a scotch brite pad and put a hold down on both sides of the chisel - much better. After the initial plunge, I was able to take 3/16 bites (1/2 a chisel worth) and moved along smartly. Thanks for the feedback.

  9. #9
    Join Date
    Jan 2004
    Location
    Lewiston, Idaho
    Posts
    28,533
    Ken,

    Don't be afraid to sharpen but you need the right tools to do it.

    I use a sharpener from Woodcraft: http://www.woodcraft.com/Product/200...ening-KIt.aspx . I use this to sharpen the inside edges of the chisels and then

    I use a diamond hone set from Rockler to hone the newly sharpened edge: http://www.rockler.com/3-piece-morti...sharpening-set .

    Using this system, I made a swing of white oak for my wife. It had 51 mortise and tenon joints, IIRC. I sharpened before I started and once about 1/2 way through the process.

    I also hone the outside edge with a flat diamond hone.
    Last edited by Ken Fitzgerald; 04-18-2014 at 5:19 PM.
    Ken

    So much to learn, so little time.....

  10. #10
    Join Date
    Aug 2013
    Location
    Enchanted land of beer, cheese & brats
    Posts
    1,314
    Yes. The hold down on both sides is just about the best, unfortunately its not always possible. I've found is best to use clamps that are not springy, like quick acting one handed clamps. Better to use bar clamp, something stiffer.

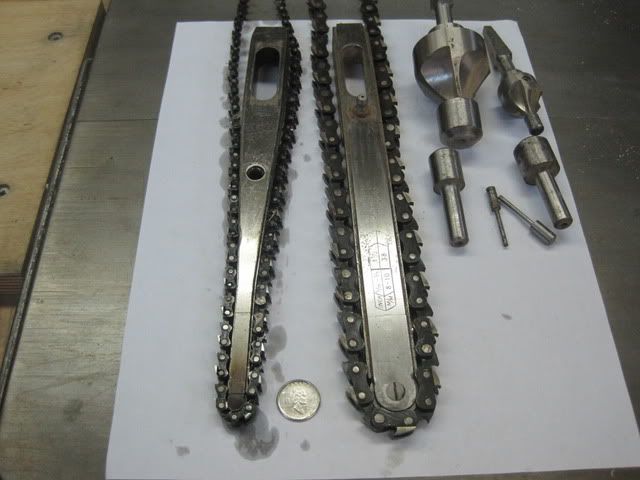
    Here's a photo of my ½" chisel. You can see I slightly filed the corners. And look close at the photo with the calipers... the calipers are set at the width of the chisel at the tip, so you can see the amount of taper. Not sure if all hollow mortising chisels are tapered.


    IMAG1730.jpg IMAG1733.jpg

    The most I've ever done, regarding sharping, to the outside of the chisel was very light honing like you would a bench chisel or plane back. And even then I'm not trying to polish it just to remove a bit of the burr. In short the sharping is supposed to happen on the inside. The little cylinders on sticks are for different size chisels, the ½" one is in.

    IMAG1734.jpg
    Last edited by Judson Green; 04-18-2014 at 5:01 PM.
    I got cash in my pocket. I got desire in my heart....

  11. #11
    Join Date
    Feb 2014
    Location
    Lake Gaston, Henrico, NC
    Posts
    9,029
    Make sure there are no burrs turned to the outside. This happens sometimes at the corners, and can be the worst cause of making it difficult to pull the chisel back out. I use a flat extra fine diamond hone to dress the outsides flat once in a while between other sharpenings. Sharp is good for all of it, but perfectly flat on the outside is most important.

  12. #12
    Join Date
    Apr 2009
    Location
    Mandalay Shores, CA
    Posts
    2,690
    Blog Entries
    26
    Quote Originally Posted by Judson Green View Post
    What I've done is to simply make sure the wood is clamped well. Any rocking/twisting/lifting of the board on the up stoke will only make the chisel jam up. And of course don't sharpen the outside of the chisel.
    I polish / flatten the outside of the hollow chisel. Do it just like you would a chisel back. Ken's suggestion on sharpening the inner cone is solid. Ensure that you have the chisel / bit clearance right. If improperly adjusted, the chisel will get hot and expand holding it in the mortise.
    Shawn

    "no trees were harmed in the creation of this message, however some electrons were temporarily inconvenienced."

    "I resent having to use my brain to do your thinking"

  13. #13
    I agree polish the outside but use the correct hone. I know of 4 types of tooling. The flat bottom British standard and the pointer Asian both jap and china. this is what LV sale. the better hones are reamers and keep the sharpening centered with removable tips. there are special files for the inside corners though i do no see this on the cheap Asian tooling.

    1" flat bottom bit


    http://www.scosarg.com/tooling/morti...harpening.html


    Quote Originally Posted by Shawn Pixley View Post
    I polish / flatten the outside of the hollow chisel. Do it just like you would a chisel back. Ken's suggestion on sharpening the inner cone is solid. Ensure that you have the chisel / bit clearance right. If improperly adjusted, the chisel will get hot and expand holding it in the mortise.
    Last edited by jack forsberg; 04-18-2014 at 10:57 PM.
    jack
    English machines

  14. #14
    Join Date
    Aug 2013
    Location
    Enchanted land of beer, cheese & brats
    Posts
    1,314
    I guess I should try polishing mine up and give it a try.
    Last edited by Judson Green; 04-18-2014 at 10:09 PM.
    I got cash in my pocket. I got desire in my heart....

Posting Permissions

  • You may not post new threads
  • You may not post replies
  • You may not post attachments
  • You may not edit your posts
  •