Page 3 of 4 FirstFirst 1234 LastLast
Results 31 to 45 of 60

Thread: Tele-Style Guitar Build

  1. #31
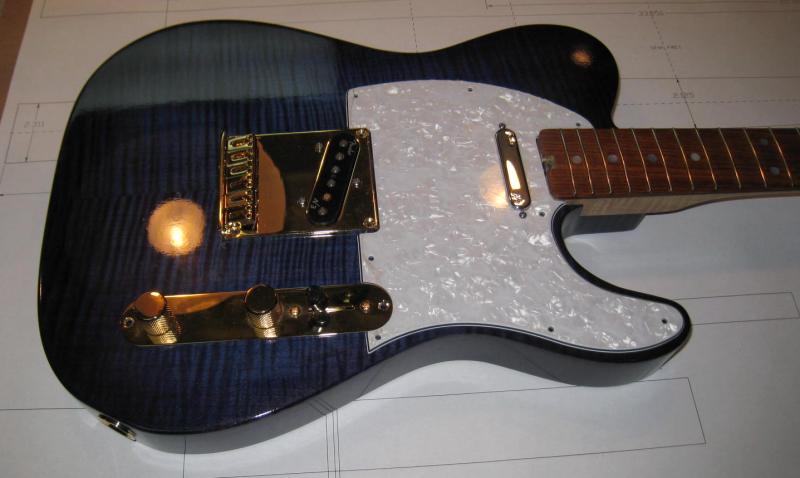
    Be careful with chambering. It's not always obvious what the results will be. If you just need it lighter, drill relatively small (maybe 1/2" to 3/4"), unconnected lightening holes with a forstner bit. Alternately, you can route 1/2", unconnected channels and that usually works OK too. If you do actual chambers, you might find that it ends up sounding great, or you might very well find that you completely killed the bass...or introduced dead notes....or any one of a bunch of different maladies. Strange things start to happen when you take a solid chunk of wood and significantly weaken it, allowing it to develop funny modes of vibration. It's much easier to predict hollow, or semi-hollow effects than it is to predict the effect of chambering. It's often times a trial and error thing.

  2. #32
    Join Date
    Jul 2012
    Location
    Punta Gorda, FL
    Posts
    3,028
    We have a guest in from CT this week so I don't know how much I can progress on the Tele. I haven't yet talked to KB about "lightening the load". He may say don't bother. But that whole process of chambering and gluing a bookmatched piece over the chambered body is something I want to do. And I just got my first American Lutherie magazine issue. WOW! Some pretty cool stuff there! With so much to learn, I think this can keeping me busy for a very long time.

    Sotos, I'm not sure if you have followed the threads here but I owe so much to the wonderful people here and without their help I might still be wallowing in confusion. Not sharing would seem unforgivably selfish. And of the drawings I am assembling, I'd say maybe 20% of them are my own work and much of that is extrapolated from the work of others.

    As a dear friend often tells me, "Sharing is caring."

  3. #33
    Join Date
    Jul 2012
    Location
    Punta Gorda, FL
    Posts
    3,028


    So why is it that I get that dark/light effect? Flip it over and the dark strip is still on the right side. To make the body, I had to rotate it and flip it to make the curly figure symmetrical. So the dark streak on both sides were both on the same side of the original stock. But I don't understand why I couldn't get the dye to absorb evenly. The lighter blue just wouldn't absorb the dye well at all. I had the same problem with the body to Brian's guitar, also blue.

    FWIW, all of the dye colors I have are Trans Tint except the blue, which is Trans Fast (Woodcraft was out of blue Trans Tint). Trans Fast comes in powder form and can only be dissolved in warm water. But I've dissolved Trans Tint in water and haven't had this problem. Unless dissolved Trans Fast isn't as small on the molecular level as Trans Tint, I'm stumped.

  4. #34
    Join Date
    Jan 2009
    Location
    Williamsburg,Va.
    Posts
    12,402
    Julie,I'm not certain what you are describing. But,on book matched wood,looking at the side view of a plank,if the grain is going upwards on one side,and downwards on the other side,even a perfectly bookmatched guitar top(for example) will look light on one side,and darker on the other. This is from sawing the planks out parallel to the log,on a tree that grew in a spiral. I hope this makes sense. When bookmatched pieces of wood are cut from such a tree,the spiral will be going up on one side,and down on the other. Stain applied to the 2 sides will be absorbed differently on each side. The cure? Spray CLEAR lacquer on the wood first.Totally seal it first,and then spray colored lacquer OVER the sealed wood,so none of the stain actually goes into the wood. The stain will help minimize the difference in reflected light that will always be seen in the naked wood. It does no good to re arrange the wood. That same effect will still be there.

    To preview if you are going to have this reflected light problem on bookmatched pieces,I'd put the pieces together like you are going to use them,and wet the pieces with water. Step back and look at the pieces to see if one looks lighter or darker than the other. This would best be done in sunlight. I think the best policy is to seal the wood,then spray tinted lacquer on that does not go into the wood at all.

    I hope this is an answer to your question.
    Last edited by george wilson; 05-23-2014 at 9:22 AM.

  5. #35
    Join Date
    Jul 2012
    Location
    Punta Gorda, FL
    Posts
    3,028
    Thanks George!

    As this color tone problem was happening, my initial reaction was frustration because this was the second time I has having problems with dye absorption and the second time it was blue Trans Fast dye on curly maple. I thought it was the dye brand. I wasn't getting any replies here so I took the question to the finishing section. Scott Holmes replied, "Let me take a guess... this is a used guitar and my guess is that there are body oils or something inhibiting the absorption of the dye." That's when it hit me. On both guitars the first attempt of achieving the right tone didn't meet "customer" expectations and on both guitars I had to sand it all back and start all over. Scott may not have had the used guitar part right but he did get it right by guessing the wood had a previous finish on it.

    I've been thinking of toning the lacquer to even the color out. It will be tricky but I can do it with patience. I'm just not sure I can add water-dissolved dye into the lacquer. If not, I'll have to pick up some blue Trans Tint dye.

  6. #36
    Join Date
    Jan 2009
    Location
    Williamsburg,Va.
    Posts
    12,402
    I didn't realize you had posted a new post,Julie. Had I known,I'd have replied sooner.

    I don't understand about the guitar. It HAD a previous finish on it?

  7. #37
    Join Date
    Jul 2012
    Location
    Punta Gorda, FL
    Posts
    3,028
    Quote Originally Posted by george wilson View Post
    I don't understand about the guitar. It HAD a previous finish on it?
    It was raw wood when I started. I bought a piece of 8/4 x 13+" wide maple, wide enough to make a body w/o a glue-up. But the figure on the piece was inconsistent. One half was a nicely figured curly maple, the other side looked mostly flat sawn with some curly maple on the edge.


    I took the piece above and ripped it along its length. In order to get the bookmatch effect, the face of the above piece was on the front of the guitar on one side and on the back of the guitar on the other side. The dye absorption was consistent with whatever face it came from on the original stock, one side absorbing more deeply than the other. That's why I originally thought the problem was with the wood and dye combination and not with anything I may have done.

    On the first run, I thought the dye job looked good. So I began spraying lacquer and did 3 coats. The next day I removed it from the rack to sand the orange peel out. When I saw it in the light of the workshop, I knew it was too dark.

    So I stripped it with lacquer thinner and then sanded it back to bare wood (there was still dye left in some of the figure) and started the coloring process all over again. And stripping with the thinner is probably where I sealed some of the wood pores creating the problem of the dye being absorbed unevenly.

    Woodcraft is having a 15% off everything-you-can-fit-in-the-bag sale on Monday. I'll be there and will be picking up some things I need, including blue Trans Tint dye. Then I can tint the lacquer and stop taking two steps back. I think it will turn out fine.

  8. #38
    Join Date
    Jan 2009
    Location
    Williamsburg,Va.
    Posts
    12,402
    In case you need to know,curly figure shows up MUCH more intensely on quarter sawn wood. That's why the curls look better on the edges of your board: The grain is at least curving away from the flat surface of the board,and starting to become more vertical to the surface. Riff sawn at best,but at least half way to being quartered. The problem is finding quartered wood. Grizzly sells some well figured billets,but they are not inexpensive. Have you tried Luthier's Merchantile in Heald,California? another source to check out. But,it still will not be a lower cost place.

  9. #39
    Join Date
    Jul 2012
    Location
    Punta Gorda, FL
    Posts
    3,028
    Usually George, the hardwood store has a nice selection of 8/4 curly maple but the last time I went there the only piece they had was the one I bought. They had a bigger than normal selection of quilted maple but our friend doesn't like quilted.

  10. #40
    Join Date
    Jul 2012
    Location
    Punta Gorda, FL
    Posts
    3,028
    Got the color toning problems solved. What I did was spray a lightly blue-tinted lacquer on the light spots, very sparingly, until I had built up enough color for it to blend in with the rest of the body. Then I used the same mix to spray several more coats over the body. The color looked so much richer, like it had more depth. I'll have to use that trick again.

    Then I finished everything with several more coats of clear and finished with a 50/50 mix of lacquer and thinner. That makes a huge difference in leveling out orange peel. There's still some but nothing like the coat just before.


  11. #41
    Very nice, Julie!

  12. #42
    Join Date
    Apr 2009
    Location
    Mandalay Shores, CA
    Posts
    2,690
    Blog Entries
    26
    Beautiful Julie. Simply beautiful!
    Shawn

    "no trees were harmed in the creation of this message, however some electrons were temporarily inconvenienced."

    "I resent having to use my brain to do your thinking"

  13. #43
    Join Date
    Jan 2009
    Location
    Williamsburg,Va.
    Posts
    12,402
    Very nice,Julie. I'm glad you got the color problem under control. In years to come,if the blue fades,the uneven effect may re appear,so next time,from the bare wood on up,use a consistent technique. I recommend tinting the lacquer blue from the start.

  14. #44
    Join Date
    Jul 2012
    Location
    Punta Gorda, FL
    Posts
    3,028
    Thank you guys. That means a lot to me.

    What may be the coolest thing about this is the experience Kevin (the recipient) has had. He's been playing guitar for over 30 years and performs weekly in his community. I told him early on that a custom built guitar from an experienced luthier is as good or better than a Fender Custom Shoppe guitar. His reply left me with the impression he thought FCS was the pinnacle of guitar perfection.

    When he was here, I had him do all the fine sanding on the neck and by the time he was done his comments made me wonder if FCS had fallen a notch or two in his mind. Now I'm working with him to set the action at the nut on his guitar when he gets it. Again, he was initially reluctant but just today he told me he has ordered files, feeler gauges, etc for fine tuning the nut. That brought a big smile to my face. I'll get it in the ballpark but I have learned the player is the only one who truly knows what feels right. And I think Kevin may just find that it's not so hard to get that perfect feel. When he does on one guitar, I suspect he'll do it on all his guitars.

    We begin knowing nothing. The learned pass on their knowledge. And when we learn well from them, we have an obligation to pay it forward. To do so in nothing short of a great honor.

  15. Hi, Julie. This is my first time here. My name is Peter. What I want to know is, what is the best method for determining the center line on any body? Is there a good method for any body or is it different for each?

    Peter

Posting Permissions

  • You may not post new threads
  • You may not post replies
  • You may not post attachments
  • You may not edit your posts
  •