Page 1 of 2 12 LastLast
Results 1 to 15 of 17

Thread: Saw geek pictures

  1. #1
    Join Date
    Feb 2011
    Location
    Carlsbad, CA
    Posts
    2,230
    Blog Entries
    2

    Smile Saw geek pictures

    I have been hand tool woodworking in my suburban garage for 35 years, typically with the front, overhead garage doors open. I've spent enough time woodworking in the garage that most of my neighbors have eventually stopped by the find out what I'm doing. This results in me being known around the neighborhood as either "the wood guy" or less favorably "that guy with the loud Stevie Ray Vaughn music coming out of his garage all the time".

    I have a pathological "hand saw problem", which invariably leads my shop visiting neighbors to ask about all the saws hanging on the walls. In a feeble attempt to avoid being immediately identified as some kind of "horder", I usually show them a few saws of historical interest and some pre-and post restoration saws. Some neighbors seemed genuinely pleased with the transformation from "rusty and broken" to "restored".

    A number of my neighbors have turned out to be avid "garage-sale" shoppers, and they often remark that they occasionally see old saws when they're out searching for other treasures at garage sales. As a consequence, I now have about a half dozen neighbors who occasionally bring me some of the rusty old saws they run across. Southern California doesn't have nearly the concentration of quality old vintage tools that are found in other parts of the country and most of these are run-of-the-mill saws that are typically in bad shape. After sincere thank you's and reimbursement for the five or $10 they paid, and I just hang them in the rafters.

    Occasionally my neighbors run across some interesting saws. I just finished a furniture project and thought this would be a good time to sort the wheat from the chaff hanging in the rafters. I thought my fellow Neanders might enjoy some pictures of those that made the cut:

    11 (2).jpg11.jpg


    A couple Disston, 28" thumb holes D-8, D-100. I do most ripping by hand and I love 28" rippers and the Thumbhole for those long rips. I replaced the top horn on one of these.
    Another rippers; Atkins 401 series, their top-of-the-line, in a ship point design with rosewood totes. The patented Atkins "Perfection" handles are my absolute favorites. Although there's no room in the till, I'm going to have a hard time not working this one into the rotation:
    DSC_0136.jpg


    The keeper of the group for me; a Disston #12 with the rare 4 PPI pitch – perfect for ripping thick stock. I had to replace the bottom half of the tote- can you see the repair?

    A very old Disston #12 with domed saw nuts. I'm not sure of the date for this one, but I'm thinking around 1875? Any suggestions where I should look for the missing domed saw nut?

    WWI era Disston Victory saw (regrettably the etch is almost gone) also with rosewood tote. This one will end up as a "thank you" gift to a member of the US military, once I figure out how to post that – classified give-away?
    12.jpg

    Finally two 12 PPI by crosscut saws, and Atkins 65 and a turn-of-the-century Disston #7 with one of my favorite totes with lambs tongue. Also sort of "before and after" Restoration picture.
    13.jpg


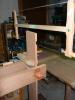
    The obligatory sawdust photos with 12 PPI Atkins in 8/4 cherry:

    14.jpg14 (2).jpg


    Just when I thought I have the whole saw sharpening/tuning thing down pat, turns out I don't: it took me almost a full day of bending over the saw vice to do these two. The tooth line on the 24" #7 was in terrible shape and required lots of joining to finally get a breasted profile.

    12PPI x 26" plate = 312 teeth. Yikes! - BTW, What is the maximum daily dose for Ibuprofen anyway ?

    For those that are interested, I'll post the real saw geek teeth filing photos below.

    Thanks for looking, Mike

  2. #2
    Join Date
    Feb 2011
    Location
    Carlsbad, CA
    Posts
    2,230
    Blog Entries
    2
    Here's my shop in full "Saw Geek" mode.
    1.5 (2).jpg

    For me, the most important tools are the saw vice, magnification visor, micrometer/caliper (not really sure what that's called) and saw files. The machinist vice works a little bit to remove excess set (although there is really only so much you can do with that, mostly just have to file through it). I got fresh boxes of Grobet and Bahco files. I was disappointed with the recent batches of Grobet "American pattern" saw files ( less expensive than their "Swiss made" files), their hardness and consistency seems to have declined versus previous years. The Bahco's are my first choice, Go To files, but lately have been harder to find in desired sizes.


    Picture of rip teeth profiles. I use 5° of rake, which was Disston standard pre-1928. They then went to 8° of rake as fewer of their customers were adept handsaw users and 8° is a little easier to start. I also add 5° of fleam – it probably doesn't make a difference but I think helps the saw track a little straighter in wandering grain. The lines are intended to show the alternating sloped gullets (although I think they're probably hard to see in the picture). The concept is the deeper "sloped" gullets carry more sawdust and thus help the saw cut more quickly, particularly in thicker stock (once the gullets fills up with sawdust in the kerf, the tooth stops cutting.

    I'm going for smooth, consistent one-plane faces on the cutting edge of these rip teeth. Unless you file all the way across and look closely, you may find the file hasn't worked all the way across the face of the tooth to the cutting edge:

    2.5.jpg5.jpg


    Here's pictures to illustrate the same concept in crosscut teeth; nice, consistently profiled teeth with clean, "knife point" cutting edges . Your finger should " stick" when you touch them:
    6.5.jpg6.6.jpg


    You need the same consistently smooth one-plane surfaces on the back of the teeth to achieve the best cutting edges:
    6.7.jpg


    Illustration of the sloped gullets in crosscut teeth:
    6.8.jpg

    I'm sure by now there are only a couple pathological saw geeks like me viewing these pictures – sensible neanders have moved on to other more interesting topics. Thanks for indulging my illness!

    All the best, Mike
    Last edited by Mike Allen1010; 06-30-2014 at 5:31 PM.

  3. #3
    Join Date
    Dec 2010
    Location
    South Coastal Massachusetts
    Posts
    6,824
    That D7 sort of leaps out of the pack, dunnit?

    Those must have been at the cusp of pure handwork turning over to more
    industrial approaches. There's something about those.

    I'll take a good D7 over a fancy D12, every time.

  4. #4
    Join Date
    Oct 2009
    Location
    Ossining, NY USA
    Posts
    61
    Blog Entries
    2
    Quote Originally Posted by Mike Allen1010 View Post
    12PPI x 26" plate = 312 teeth. Yikes! - BTW, What is the maximum daily dose for Ibuprofen anyway ?
    I know there's a smiley but... 3200mg per day maximum, 800mg maximum per dose. Use the least amount necessary.

  5. #5
    Join Date
    Aug 2010
    Location
    USA
    Posts
    5,582
    Quote Originally Posted by Mike Allen1010 View Post
    ....micrometer/caliper (not really sure what that's called)
    That's a Caliper. A micrometer is shaped kinda like a C clamp
    That's all I can do for you though.
    I would like to see your start to finish saw resurrection process though.

  6. #6
    Join Date
    Feb 2011
    Location
    Carlsbad, CA
    Posts
    2,230
    Blog Entries
    2
    Thanks Pat for the caliper explanation.

    You probably would not be very interested in my saw restoration; mostly sweaty, grimy work. I pretty much follow the excellent primer on vintage saws.com. The concepts are simple and logical- good execution takes more than a little practice- at least in my experience.

    I've given a few talks on saw sharpening\tuning complete w/ Extensive PP slides etc. Platform presentations are a big part of what I do in my day job. FWIW, I think saw sharpening is waaaay easier to just show someone in person - kind of 3 dimensional task that tough to demonstrate/describe in two dimensions (just my experience , I'm sure other find this simple.

    If you send me PM would be happy to share how I do it and answer any questions etc.

    All the best, Mike

  7. #7
    Great finds and write up...A a fellow so cal boy..where should i drop them off ? good stuff

  8. #8
    Join Date
    Sep 2007
    Location
    Longview WA
    Posts
    27,454
    Blog Entries
    1
    I'm sure by now there are only a couple pathological saw geeks like me viewing these pictures – sensible neanders have moved on to other more interesting topics. Thanks for indulging my illness!
    Thanks for sharing your illness.

    Even a post of tedium, sweat and grime can contain nuggets of information to help others have an "a-ha!" moment of understanding to help them embark on their own efforts at saw restoration and sharpening.

    jtk
    "A pessimist sees the difficulty in every opportunity; an optimist sees the opportunity in every difficulty."
    - Sir Winston Churchill (1874-1965)

  9. #9
    Join Date
    Nov 2007
    Location
    Goleta / Santa Barbara
    Posts
    969
    Michael, mi amigo, your posts are always very informative and loaded with eye candy.
    I have to agree on the tote on the number 7: very nice indeed.

    stay well, PatrickPatrick

  10. #10
    The #7 and some of the early #9s are, to my eye, disston's nicest handled saws in terms of looks. Disston pretty early went to cutting out a lot of the labor and skill on the handles, though, separating the process and turning a lot of the work to machine operators.

    Atkins was also guilty of really removing the labor from the handles, but the plates on the 1900 or so saws are my favorite era of plates - nothing usually breaks off, etc, and they aren't too hard on files and aren't too soft and the steel is still a nice "dry" steel.

    Nothing worse than correcting the tooth line on a saw only to feel a tooth crack loose when you hit it with a saw set, only to confirm that it's loose by flicking it off!!


  11. The handles on the two clean crosscut saws have very different pitches.
    Which do you prefer?

  12. #12
    Join Date
    Feb 2011
    Location
    Carlsbad, CA
    Posts
    2,230
    Blog Entries
    2
    Quote Originally Posted by Michael Kellough View Post


    The handles on the two clean crosscut saws have very different pitches.
    Which do you prefer?


    Hey Michael,

    Personally I love the "Perfection" style handles on the Atkins 53 and 65 saws, which as you noted have a larger/higher "hang angle" then the Disston #7 (I believe the term "hang angle" refers to the angle between the tooth line and the primary plane of the "Barrel" of the tote -e.g. where the palm rests).

    As you can also see in the picture, independent of the hang angle, the Atkins "Perfection" tote also places the sawyer's hand lower/closer to the tooth line than the #7. I prefer this configuration, particularly for fine pitch crosscut saws as it makes it very easy to "hover" the tooth line above the layout line and start the saw exactly online – not that is particularly hard to do with other tote configurations, just particularly simple with the Atkins perfection tote geometry, and especially important for final crosscutting/dimensioning stock.

    Theoretically, a lower hang angle (like the #7 pictured here) provides more "power" as the thrust vector of the sawyer's hand on the tote is more directly in line with the plane of the teeth in the kerf. if your saws are sharp and well tuned, this is more of a theoretical advantage as the weight of the saw itself is typically more than enough to give you all the speed you need.

    I do think a lower hang angle and the associated power is advantageous for coarser pitch saws, particularly rip saws were power/efficiency makes a bigger difference in terms of speed. For fine pitch crosscutting, probably less so.

    FWIW Just my experience, there are certainly lots of experts here on the creek who may feel differently.

    All the best, Mike

  13. #13
    Join Date
    Feb 2011
    Location
    Carlsbad, CA
    Posts
    2,230
    Blog Entries
    2
    [QUOTE=Pat Barry;2283518] I would like to see your start to finish saw resurrection process though.[/QUOTE]

    hi Pat,

    In retrospect, I realize my earlier "non-answer" to your request was entirely unhelpful, and not at all in keeping with the spirit of sharing I so much enjoy here on the creek – my apologies! I responded that way because I didn't want to bore folks with how I do restoration given there so many good existing tutorials. That said, I'm happy to share what works for me. Certainly nothing revolutionary, but maybe one or two ideas that could be helpful for those interested:

    I like the small, 1 1/2 ounce plastic condiment containers at fast food restaurants as they're the perfect size for holding the collection of saw nuts once the saws disassembled (Still doesn't stop me from losing these all the time in the sawdust on the floor- Ughhh!). A wide bladed screwdriver with a narrow blade is helpful for pushing through the years of accumulated grime in saw nut slots to unscrew them.

    Saw plates:

    If you have any bends or bulges I try and before remove them first thing, before removing the rust to minimize hammer marks on the plate. Many times you can correct minor bends simply by bending the plate in a semi circle and working it over the edge of the bench without having to resort to the hammer/anvil. Sometimes pouring boiling water over the plate (Gloves required) and then bending can remove a lot of tension in the plate. However for dents/bulges, smithing is the only way I know to get those out.


    To preserve the etch and avoid deep scratches in the plate, I try to scrape as much as possible before resorting to sandpaper. A scraper with lots of single edge razor blades is really helpful. I try and scrape off as much of the flaky rust and corrosion as possible before soaking the plates in Evaporust. MDF "saw plate sized" box lined with lots of plastic works for me.

    I usually leave them overnight, but it works pretty quickly - a couple hours is probably fine. Sometimes for the really rusty plates I'll soak for a couple hours, then take them out scrape again and then put them back into soak some more.

    Remove the plates from Evaporust, rinse off with a hose ( Way easier than using million paper towel/rags) and immediately dry/spray WD-40.

    I try to start sanding with nothing coarser than 220 grit wet/dry sandpaper. Sometimes I have to resort to coarser grits, but those do leave scratches in the plate that are hard to get out. I use a small 2" x 2" woodblock which makes it easier to focus your pressure, particularly along the tooth line. I usually use 220 grit and 400 grit, but I'm more than a little OCD in a finer grits are probably not necessary.

    To get a bright shiny, super slick finish, I use a buff in the drill press (not sure if it's cotton or wool) moving through three different grits of abrasives. I'm not in the shop now but I think the grits are from course to fine: white, green, blue. Honestly I know nothing about metalworking and have no idea if this is the appropriate progression of abrasives. This is certainly not necessary, but I like to do it (yes OCD is an illness). I justify the time/effort because a super slick plate requires microscopically less set (certainly a trivial amount) and I like to set up my saws with the minimal amount of needed set. Less set= narrower kerf = less wood removed = faster cutting saw. Admittedly the downside of minimal set is it's tougher to "steer" the saw if you start off line. On the other hand with minimal set, once you get started on the layout line the saw will pretty much track straight as a laser even with your eyes closed.

    Finish with a rub of paraffin wax, spray of WD-40 and wiped down. and I have a rag that's been used for this so frequently I no longer need the wax/WD-40 just a quick wipe the rag keeps things slick, smooth and rust free.


    Totes
    I'm pretty much a bottom feeder when it comes to the quality of saw totes. Most that come through my door are completely dried out, with no original finish remaining and frequently have cracks, broken horns etc. First thing is any repairs – the closest thing to woodworking in the whole process.

    I stand with 220 grit to remove surface imperfections, but don't worry about previous owner's initials Orother major defects that aren't structural. Frankly, I kinda like the initials from previous owners. For Rosewood I go up to one finer grit maybe 320 – 400.

    Soak totes in Watco Oil/varnish "fruit would" color. I put 3-4 totes in a big Ziploc baggie and periodically roll them around on the bench. When they've had enough, I cut a hole in the baggie and drain the finish back into the can. Wip dry and let stand overnight.

    Pad on 2-3 coats of garnet shellac (I usually make my own, but you can use Zinseer Amber right out of the can). These dry quickly so you can usually do all three coats in the day.

    Finally the reward: Rub on paste wax, little 0000 steel wool and buff - to my eyes these hundred-year-old totes with their lifetime of accumulated scars really look beautiful when you're done!


    Sharpening
    I
    use CalPERS to measure the thickness of the plate at the toe and the heel along the both the top line and the tooth line. The greater the taper grinding of the plate, the less set you need. Key dimension is the thickest cross-section – usually tooth line at the heel. Ultimately this is the reference for the of amount set you want to end up with. As a general rule +20% of this cross-sectional thickness for hardwoods and +30% for damp softwoods (maybe a little bit more for coarse pitch rip saws and a little bit less for fine pitch cross cuts).

    While you have the saw in the vice measure the current amount of set versus your target (usually there's too much). This tells you how much you have to "file through" or squeeze out in a metalworking vice to get your target amount of final set. Lastly check the tooth line against the straight edge - you want straight or slightly breasted and will have to joint out the appropriate amount with a mill file. there are dedicated saw jointing jigs for holding no files to do this, but you can use a simple block the slot to hold your file 90° to the width of the plate.

    Joint the tooth line (how much of the teeth you need to remove depends on how uneven the tooth line is to begin with). Mark the flat spot on top of the teeth – I use a red felt marker.

    With the saw secure in your saw vice (I use a shop built wooden saw vice that fits between the guide rods of my twin screw face vice on the bench so I can file the entire length of the tooth line without having to move the saw around. The wooden saw vice has the added benefit that you can draw guidelines on top of it for the fleam angle you want). Use the appropriate size, tapered saw file (vintage saws.com and other tutorials have tables – when in doubt go with the smaller size), and with a guide block on the tip of the file for desired rake angle (5° – 8° for rip saws, 12° – 15° cross cuts work for me), start at the heel and filing from one side of the plate only, file straight across, 90 degree perpendicular to the tooth line (0° fleam angle) to establish the uniform tooth profile, spacing and height. Look at the little flat spot you previously marked and bias the pressure you apply to the file (towards the heal or toe) as appropriate to shape the teeth so that they are uniformly spaced.

    Joint again and Mark flat spots. You should be pretty close to uniform to Tooth height, so go easy and check after each pass with the mill file – are looking for the smallest possible flat spot you can get as long as your touching at least 3/4 of the teeth.

    Rotate the plate in the vice so your filing from the other side. Identify the teeth that are set away from you, You're only going to file those now, Again starting at the heel. If it's a rip saw, I can file straight across using the guide block to maintain a consistent rake angle and biasing the pressure left or right to remove the flat spot. Generally the path of least resistance for the file is towards the cutting edge of the tooth closest to the heel, so you'll typically want to apply more pressure to the tooth in front of the file – closest to the toe. Better to take one or two strokes and check your progress, then to take too many strokes and find out you just screwed up the consistent profile/tooth tiger trying to achieve. Use a file card to keep your files clean, the last longer and cut faster.

    Again flip the saw end for end in the saw vice and now file the other half of the teeth that are set away from you. The same stuff above applies here. Use light pressure and check to make sure your achieving a smooth uniform surface all the way across the width of both the cutting-edge of the tooth behind the file and the back Surface of the tooth in front of the file.

    If you think your file is cutting slowly, leaving a rough surface on the teeth and is dull – it is. Get a new file – this may be the single best thing you can do to make your saw sharpening effective and efficient. Trying to stretch a dull file for a few more teeth is a sure way to make this a horrible experience– at least for me.

    The only difference with a crosscut saw is rather than filing straight across like you did for the rip saw above (0° fleam angle), you're now going to angle the file to achieve the "fleam angle" for the knife edge teeth you need to sever wood fibers when cutting across the grain. Fleam angle is measured relative to a line 90° perpendicular to the long axis of the saw plate; straight across (90° perpendicular to the saw plate long axis) is 0° fleam angle. For crosscut teeth 20° – 30° of fleam is typical; higher fleam angle= Fast cutting teeth that are less durable, lower fleam angle = teeth that don't cut quite as quickly but last longer. The exact fleam angle isn't as important as just being consistent from tooth to tooth. Realistically this is saw esoterica – you could go with anything around 20 – 25° fleam angle and be fine for the rest of your life. Sharp saw all stay sharp for long time as long as you don't abuse it ( I'm looking at you plywood and MDF!).

    If you're crosscut tooth line has been no neglected/abused, you will likely have to repeat the steps above to get an ideal result. If you're just tuning up a saw in decent shape, filing the cutting-edge/fleam angle once is fine.(remember half the teeth from one side, the other half from the other side of the saw – always filing the teeth set away from you).

    Now you should have uniformly spaced, profiled teeth with both rake in fleam angle established – congratulations stretcher back and have a beer! Now is the time to check your set with the calipers. If you need more set use the saw set. Pistol grip or plunger typeBoth work. For my money I recommend bite the bullet and get a Stanley 42X; They're infinitely adjustable and intuitive to use. Many other sets won't allow you to add just a small amount that you typically want. If you still have too much set you can either try and squeeze the teeth together in the metalworking vice or keep filing toilets gone.

    Once you have the desired amount is set, joint one more time very lightly. Put on the visor and look for that tiny little shiny flat spot on the apex of the teeth – that's all that stands between you and a precision tuned saw you be proud to enjoy using.

    Flip the saw end for end in the vice one more time. Now is an ideal time to use a fresh file (and probably another slug of that beer that's getting warm on the bench). Again working from the heel of the saw, set the tip of the file in the gullet and feel to make sure you've got solid contact on the surfaces of both teeth for final sharpening. Your geometry of rake and fleam angle is already established and we don't want to screw that up now – you're just looking to remove that tiny, shiny flat spot and leave a nice sharp apex on the cutting edge of both teeth. One or two strokes of the file max should do it. one pass from each side of the saw and filing is complete! While the saw still in the vice I use the flat side of a broken piece of Waterstone held lightly against the saw plate and make a pass from the heel to the toe on each side of the teeth to remove any final burrs.

    Congratulations you're done, put together and enjoy! Ultimately the feedback you get from your test cuts will help you refine your technique. Once you feel comfortable, for extra credit you can incorporate sloped gullets simply by doing the exact same process described above except when establishing your fleam angle and during final sharpening lower the handle of the file by 15 or 20 degrees below the horizon. This will make the gullet deeper on the side closest to you. I'd recommend trying this for the first time On a rip saw, which is where you will really get the most benefit from sloped gullets.

    All the best, Mike

  14. #14
    Join Date
    Dec 2010
    Location
    South Coastal Massachusetts
    Posts
    6,824
    Quote Originally Posted by gregory young View Post
    Great finds and write up...A a fellow so cal boy..where should i drop them off ? good stuff
    Mike's saws are first rate.
    My largest saw (Big Rip, 5tpi D-23 filed ripcut) is one of his.

    When filing my own, it still sets my standard.

  15. #15
    Join Date
    Dec 2010
    Location
    South Coastal Massachusetts
    Posts
    6,824
    All the geometry of work aside,
    the D7 handle shown is purty.

    Somebody learned well, paid attention
    and turned out fine work, prolly in volume.

Posting Permissions

  • You may not post new threads
  • You may not post replies
  • You may not post attachments
  • You may not edit your posts
  •