

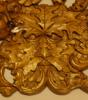

OK, so it isn’t fine art, but based on some really creepy clown heads I saw in a Baltimore antiques shop, I wanted to do something similar as a gift for my grown daughter (not trying to terrorize a child). She likes things that are a bit “off”, and clowns unfortunately come off a bit less than enchanting…so I decided to do a carving based on circus or amusement park “art”. Of course I had to scale back the creepy factor, as my tolerance is a bit higher than most people’s.I did make the eyes a little out of whack…
The wood is a Douglas fir 2x 12 joist scrap that had tight grain and was close to quarter-sawn in places so I wouldn’t get large soft pithy areas of flat grain. I’d recommend this wood for reliefs/ carving with large details; it cut nicely with SHARP chisels and knives, kept that way with a cheap flexi-cut stropping block and lots of their yellow stropping compound. I used a combo of large Pfiel and vintage gouges for roughing and the curved shapes, but for the lettering I used a v-tool to define the lines, then with one bevel down to carve the field. The most useful tool for overall shaping and smoothing was an old Marples straight chisel with a double-bevel, about an inch wide- it was used for outside curve smoothing, cleaning up the lettering, and all-around carving.
If you’re trying for something like this – a commercial-style or folk-art look, I recommend using the largest knives you have; I don’t think commercial shops broke out the ¼ inch chisels until the very end.
Dimensions: 13 inches long, about 9 inches tall. Thickness of carving is about 1 ½ inches at the tip of the nose down to zero (all the way through) near the ear. Clock movement is an inexpensive battery-operated quartz movement inlaid in the back.
Progress shots:
clown02.jpgclown03.jpg
Note the “ears” of the board used to hold it down with holdfasts during rough carving
100_4113.jpg100_4114.jpg
After some smoothing cuts
100_4115.jpg100_4116.jpg
After smoothing it with finer carving and a scraper in someplaces (and splinter removal with a sharp, very acutely-pointed chisel), I gave it two coats of gesso and lightly sanded it.
clown10.jpgclown09.jpg
I painted it with artists’ acrylic paints and gave it a coat of semi-gloss poly, then after it cured, a coat of brown furniture wax to lightly age it.
Looks pretty cool, if not exactly creepy…let me know if you have any questions or comments
Karl

 Reply With Quote
 Please help support the Creek.
