Results 1 to 8 of 8

Thread: Wooden Flowers

  1. #1
    Join Date
    Jul 2006
    Location
    E. Central IL
    Posts
    132

    Wooden Flowers

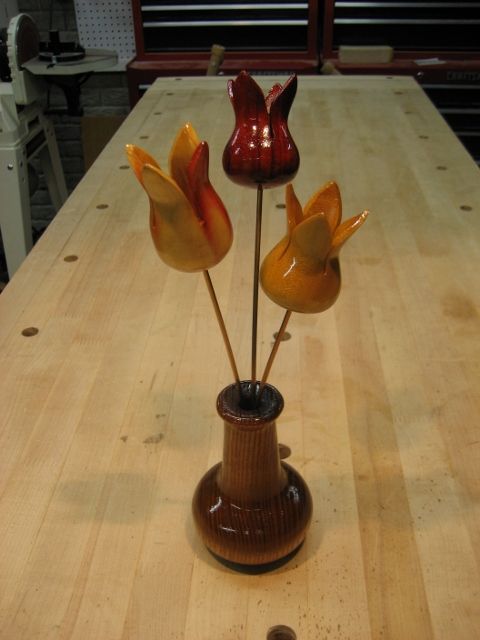
    Just finished a new project ... lathe-turned and hand-cut wooden flowers. The flowers are mounted on 1/8 inch dia brass rods and set in a Catalpa vase. The wooden flowers are three wood species (L to R): Flaming Box Elder, Padauk, and Yellowheart. They are finished with three coats of True Oil.

    Tom
    +++++++++++++++++++++++++++++

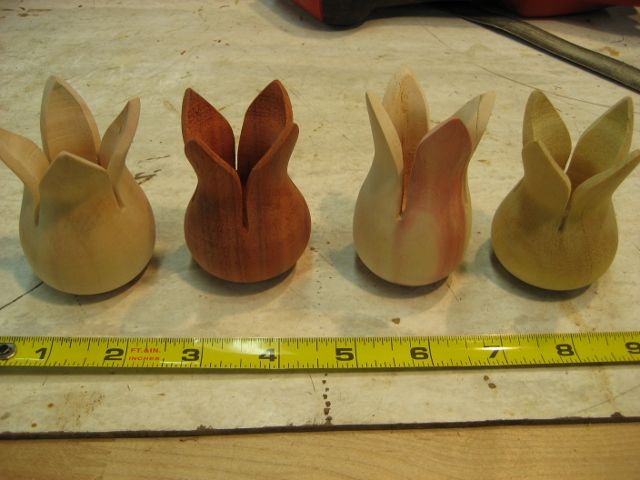
    Photo 1 is the final work. The 'making' process is illustrated in Photos 2 to 5 using a Yellowheart turning block. Photo 6 shows four different wood species flowers ready for finish application.

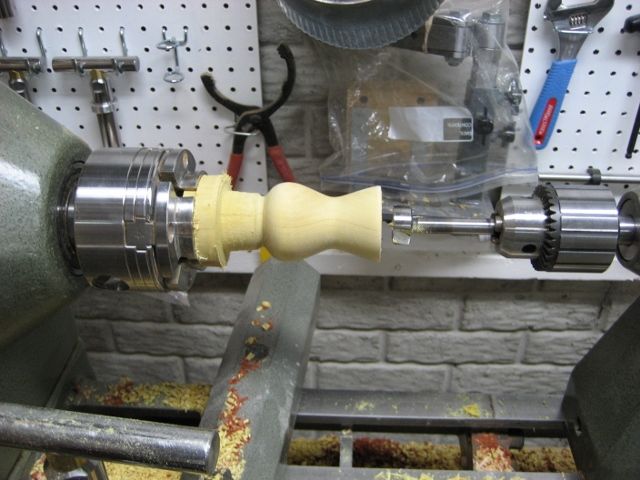
    The process starts with a 2x2x4.5 inch turning block mounted between centers to turn a tenon for chuck mounting.

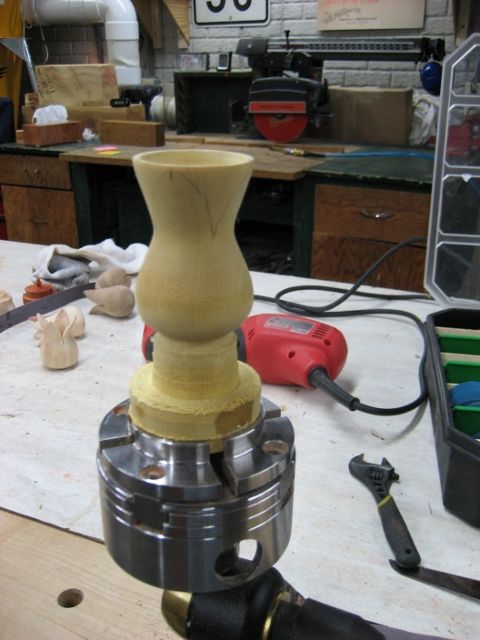
    Photo 2: With the tenon mounted in a 4-jaw chuck, the outside flower shape is turned and then a center hole is drilled leaving about 3/8 inch material at the bottom of the flower. The flowers are now 2-3/4 inches long x 1-3/4 inches dia at their base.
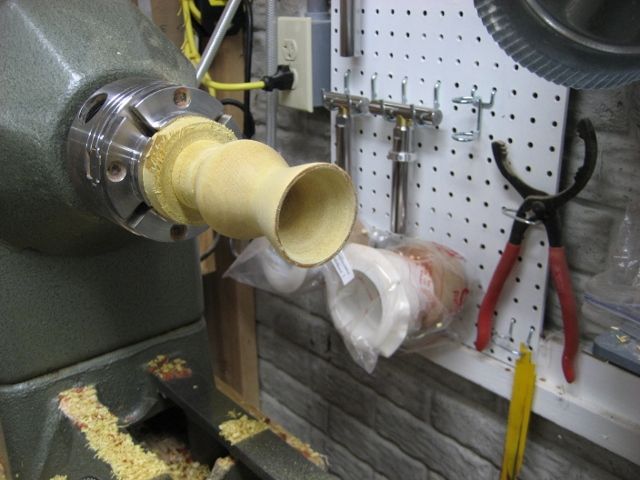
    Photo 3: The inside is hollowed out using hand-held hollowing cutters to maintain a wall thickness of 1/16 inch to 3/32 inch to match the outside profile of the wooden flowers.
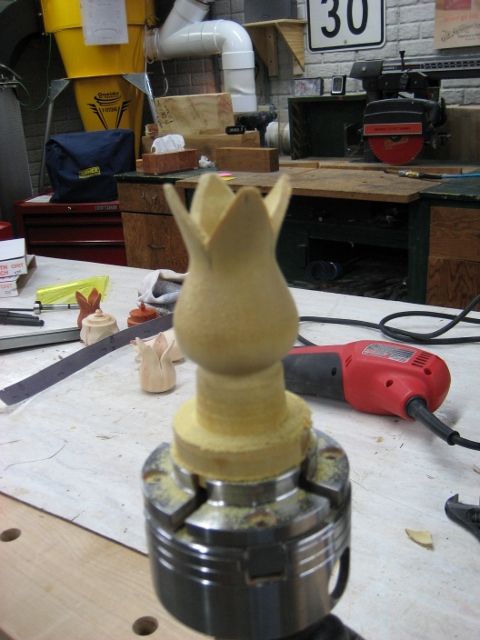
    Photo 4: The chuck is remounted on my workbench and the petal outline is penciled in.
    Photo 5: The petals are cut to shape using a small flexible handsaw then used 150 grit strips of sandpaper to smooth the petal profiles.

    Then chuck was remounted on the lathe and the wooden flower was carefully turned off of the turning block stub.


  2. #2
    Join Date
    Feb 2007
    Location
    Beautiful Lexington, SC
    Posts
    776
    Very Clever!!

    Something I'd like to try as well, thanks for sharing.
    Tim

  3. #3
    Join Date
    Feb 2009
    Location
    Central Kentucky
    Posts
    99
    Thanks......very cool!

  4. #4
    Join Date
    Jun 2014
    Location
    central New York
    Posts
    79
    Those are really neat. Nice job.
    you can never have too much pepperoni on your pizza or own too many clamps.

  5. #5
    Join Date
    Sep 2013
    Location
    Connecticut
    Posts
    362
    Awesome. Thanks for the inspiration. I've bookmarked this thread for future reference.

  6. #6
    Join Date
    Oct 2006
    Location
    Harvey, Michigan
    Posts
    20,804
    Very nice work Tom! Thanks for sharing your technique!
    Steve

    “You never know what you got til it's gone!”
    Please don’t let that happen!
    Become a financial Contributor today!

  7. #7
    Join Date
    Apr 2005
    Location
    Yorktown, Va
    Posts
    161
    These are cool but can be done easier if you start with a square piece and mark a V on two sides of the square and cut out the V on a band saw before turning. This gives you the flower petals from the start instead of using a hand saw. Ithink there is a u tube movie for this method. Also much less expensive to use a small dowel in lieu of brass rod. Either way , very nice results

  8. #8
    Join Date
    Jul 2006
    Location
    E. Central IL
    Posts
    132
    Dave ... appreciate your feedback. I used that approach couple of years ago ... http://www.sawmillcreek.org/showthre...ers&highlight= However, the flower petals wind up quite a bit thicker and less realistic using the bandsaw-first method. Carl Jacobson has a 2011 youtube video illustrating that technique.

    Carl put out a 2014 youtube video revising his technique and I followed that on the flowers posted here. I did a few things different, but the basic approach came from his video. So conceptual credit goes to Carl.

    Cutting the flower petal profiles by flexible handsaw after hollowing enables thinner petal thickness and thus more realistic flower appearance. I believe it'd be very difficult to avoid breaking/chipping the petals if the hollowing to thin walls was done with the flower petal profiles already cut out. Perhaps you are able to do such hollowing on already-cut petal profiles.

    Tom
    Last edited by Tom Hartranft; 10-27-2014 at 12:53 PM.

Posting Permissions

  • You may not post new threads
  • You may not post replies
  • You may not post attachments
  • You may not edit your posts
  •