Results 1 to 9 of 9

Thread: Veritas Beading Tool

  1. #1
    Join Date
    Jul 2011
    Location
    Indianapolis, Indiana
    Posts
    524

    Veritas Beading Tool

    Does anyone use Lee Valley's beading tool? I bought one a while back, and I've tried using it a few times, but I can't get the hang of it. I'm not ready to give up on it yet. Sometimes it takes me quite a bit of practice to figure out how to use a tool (card scrapers being one of the best examples), and then I'll wonder why I didn't get it right the first time. Anyway, does anyone use this tool? If so, for what in particular? And do you have any tips?
    Michael Ray Smith

  2. #2
    I have one but do not use it much because I also have several beading planes. You can not expect the tool to form a bead in one or two passes, I found a light touch and several passes and it will work very well.

  3. #3
    Join Date
    Feb 2004
    Location
    Perth, Australia
    Posts
    9,491
    Hi Michael

    Are you referring to the metal or wooden beader? I wrote a short review of the metal one several years ago ...

    http://www.inthewoodshop.com/ToolRev...tasBeader.html

    What may make this trickier to use is that it is pushed and not pulled, and there is no way to adjust the fence.

    Regards from Perth

    Derek

  4. #4
    Join Date
    Feb 2014
    Location
    Lake Gaston, Henrico, NC
    Posts
    9,025
    I have the LV wooden one, and an old Stanley with LN cutters. We had three reeded mantles to build for an early 19th Century house. I bought the wooden one because you can set the fence farther from the cutter. We used then with a pulling motion. We had maybe 20 square feet of reeding to do for the mantles. The smallest size multiple reed cutter matched other originals that we had to go by perfectly.

    There are four variables: downward pressure, moving forward pressure, speed, and direction of stroke. You may be using too much downward pressure. You don't need a lot. Speed is probably faster than you think. Try taking light cuts on a practice piece of wood. Keep th strokes in straight lines-not sweeping in an arc. Don't put so much pressure down that it doesn't allow you to move the tool along. It's mostly a feel thing. Reluctance is the biggest inhibitor I see with new woodworkers trying to do something. Go ahead and do it. Practice first, but it doesn't really take a lot to get a feel for what you need to do.

    To sharpen the cutter, lay it flat on your finest stone, and polish both sides. I could get the LV cutters sharper than the LN ones, so we did our finishing cuts with the LV one. Their cheaper wooden beader works just fine. I have no experience with the other one, but the method of use should be the same.

  5. #5
    As others have mentioned, it takes a sharp steel and repeated passes, chatter is the kiss of death. I like to adjust the blade to its full depth in stages, this really helps for me. I've done a fair bit of work with the LN beader and it does a great job with the right touch. Figured maple can really be a challenge.

  6. #6
    Join Date
    Nov 2009
    Location
    Ellsworth, Maine
    Posts
    1,808
    I personally would take a beading plane over scratch stock any day. My first time using a beading plane a couple years ago really was a special moment. This plane really got me interested in H & R's and other molding planes in general. I ended up buying a beading plane and absolutely adore this thing. I never used to use a lot of beads until this landed in my arsenal. Thanks to a friend of mine that let me use his tuned up antique beading plane because I ended up falling head over heels for molding planes after. But coming up with a usable antique version is a whole lot more difficult than I expected, therefore ended up making a few H & R's that work wonderfully. But the most used molding plane is by far my beading plane, it just works so nice and even planes some relatively figured woods being at such a high angle.

  7. #7
    Join Date
    Apr 2008
    Location
    Sierra Nevada Mtns (5K feet)
    Posts
    267
    I have the Veritas metal beading tool, however I have not used it very often. I did use it to put some beading on the lower rails of a buffet I have just finished. This amounted to about 7 linear feet of beading on slightly curved edges. The wood was cherry. The beading came out fine, but I was very nervous thruout the process. I have found that it is too easy to suddenly create a large garf across the bead. I do not blame the tool; this is undoubtly my fault. Nevertheless, until and unless I master its use I will remain hesitant to use it. I guess the answer is practice, practice, and more practice.

  8. #8
    I have one and I have used it a fair amount. go light passes and make sure the focus is keeping the fence against the work rather than digging the work in, that's about all I can say.

  9. #9
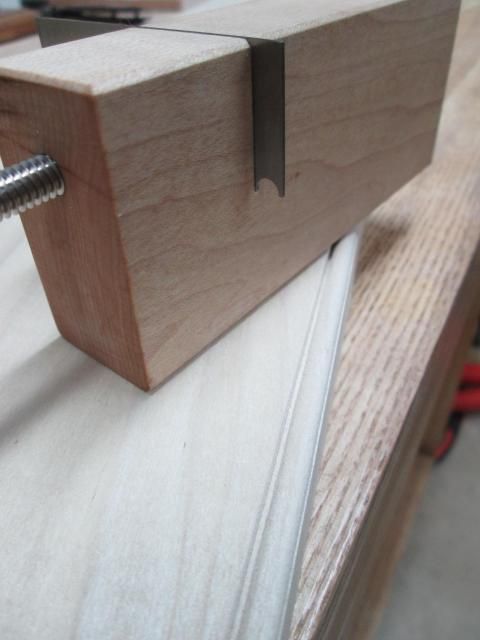
    Hi Michael. I needed a bead on a project and didn't have any sort of tool to do that. I cut a small section out of a thick hand scraper and filed a profile into it. I mounted it in a very simple maple handle and practiced on some scrap poplar. I learned that sharper is better very quickly. I also found that the angle of attack is just as critical in beading as it is in scraping. Overall I found the process to be fairly forgiving and successful. Go slow and make sure that the bead profile and the faces of the scraper are both polished.
    Last edited by Mike Brady; 10-28-2014 at 10:52 AM.

Posting Permissions

  • You may not post new threads
  • You may not post replies
  • You may not post attachments
  • You may not edit your posts
  •