Page 2 of 5 FirstFirst 12345 LastLast
Results 16 to 30 of 68

Thread: WIP saw bench

  1. #16
    Join Date
    Aug 2013
    Location
    Princeton, NJ
    Posts
    7,295
    Blog Entries
    7
    Thanks Stew!

    More pics;

    This is how clean this wood cuts straight off the jointer. I keep a loose setting on the cap iron (1/32~) since I usually take a heavy cut.


    Tight joinery


    Tight joinery plus some blood:


    Moving along


    This will be cut into four tenons which will be wedged through the top.


    Additional supports I may or may not make. Offset because I think it looks cool, and because I'm possibly going to have to angle the tenons.


  2. #17
    Looks great, I look forward to seeing the final design, so that I can steal from it some day.

    I built a pair of the SchwarzBenches; they are very solid, but my saw is always bashing into the splayed legs or the joinery underneath. (No offense to the CS design, I'm sure this is my work habits....) I'm kind of hankering for a split top one with straight legs.

  3. #18
    Join Date
    Aug 2013
    Location
    Enchanted land of beer, cheese & brats
    Posts
    1,314
    Quote Originally Posted by John Crawford View Post
    Looks great, I look forward to seeing the final design, so that I can steal from it some day.
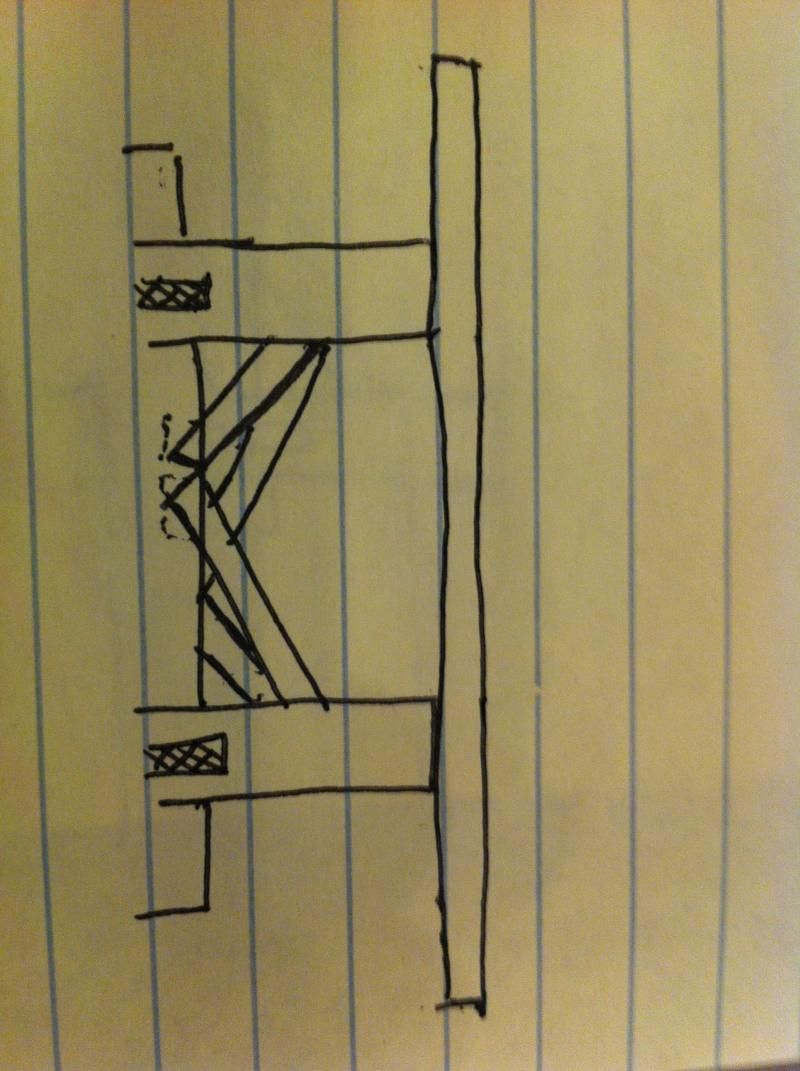
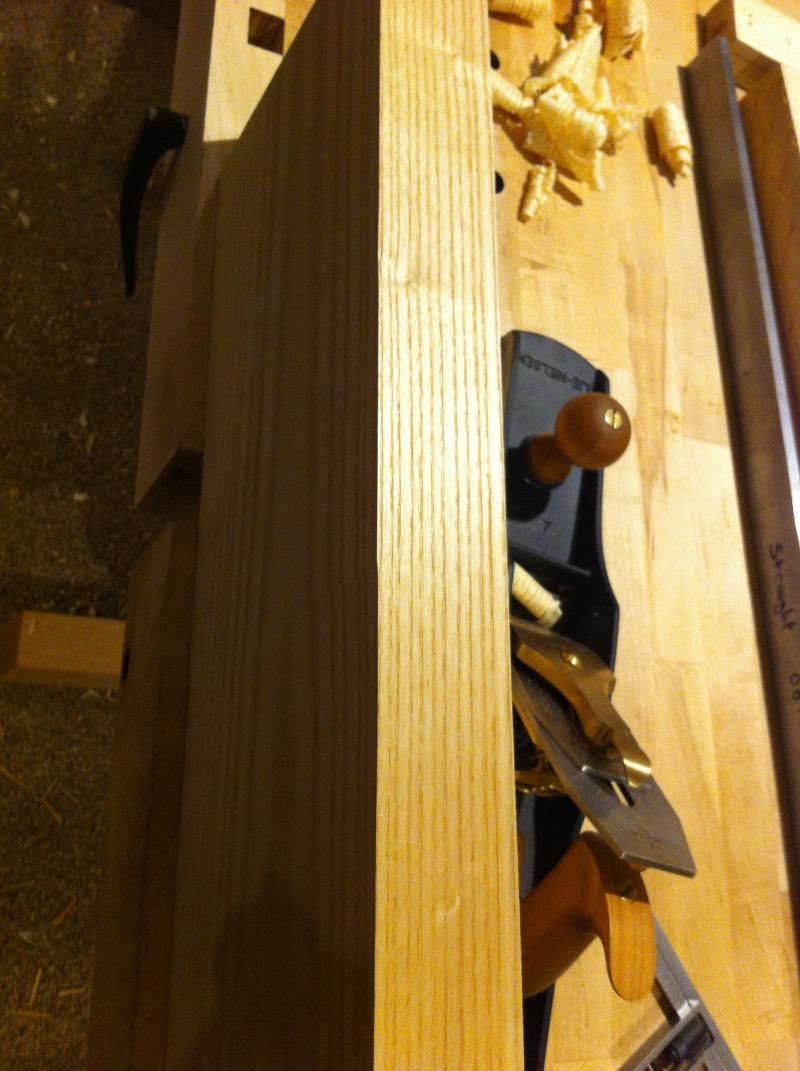
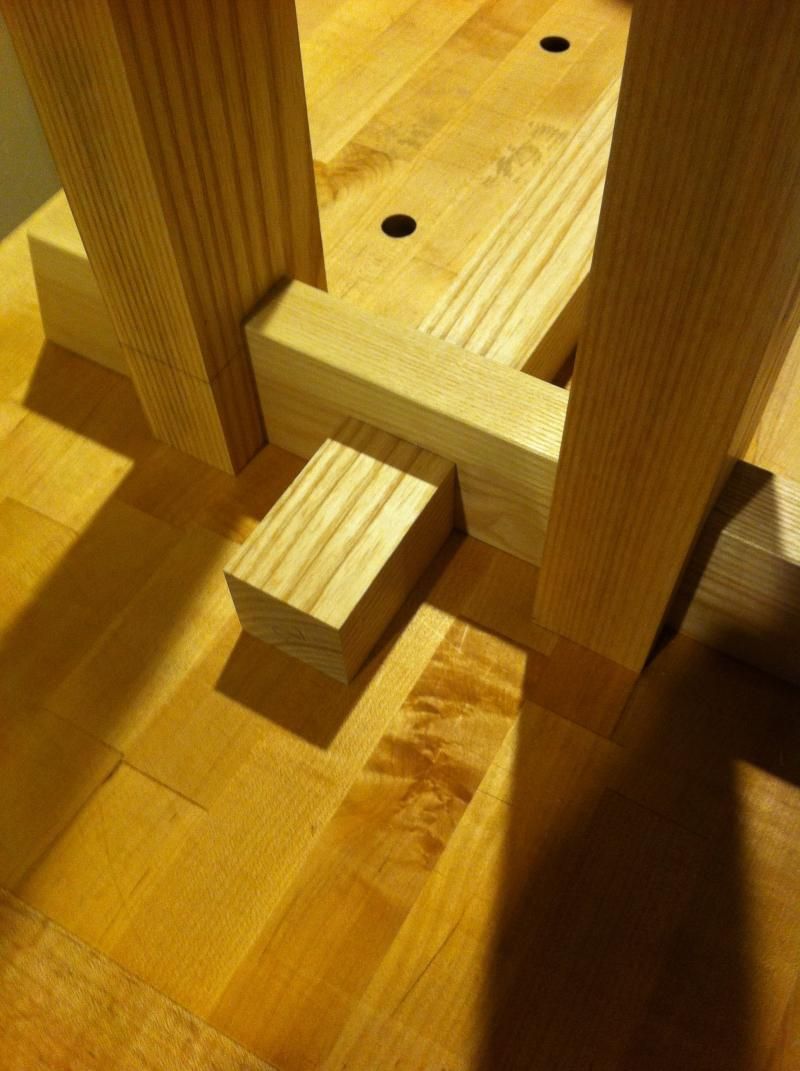
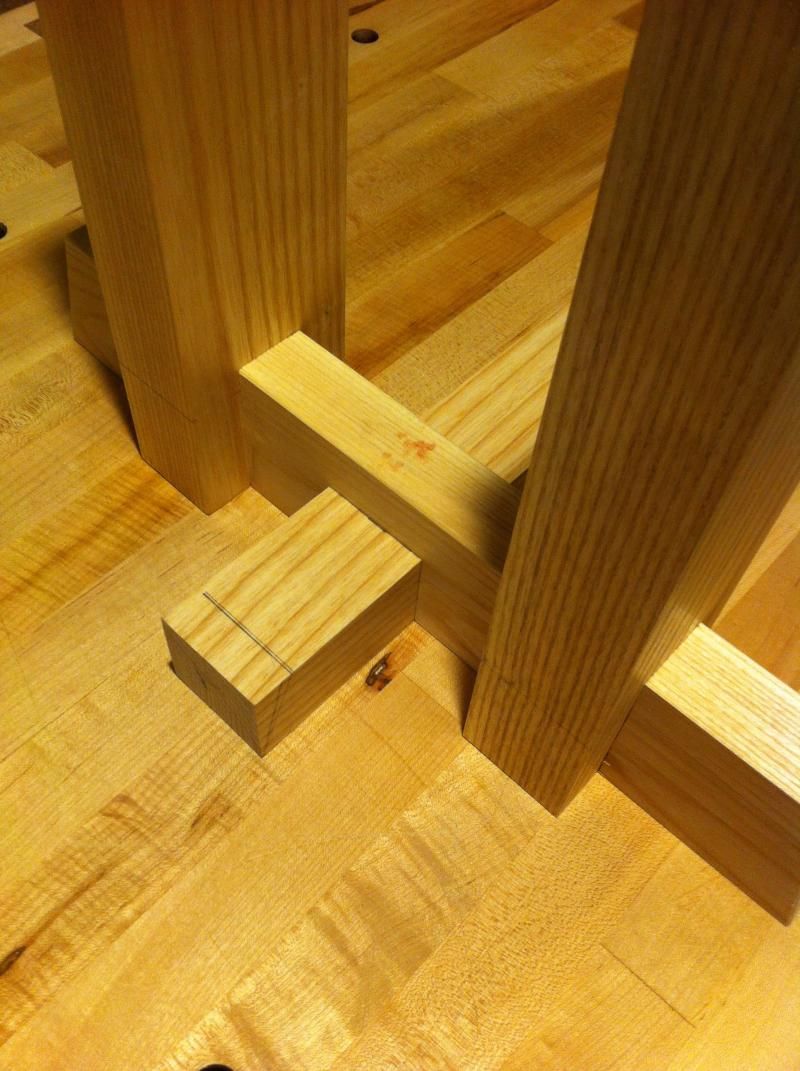
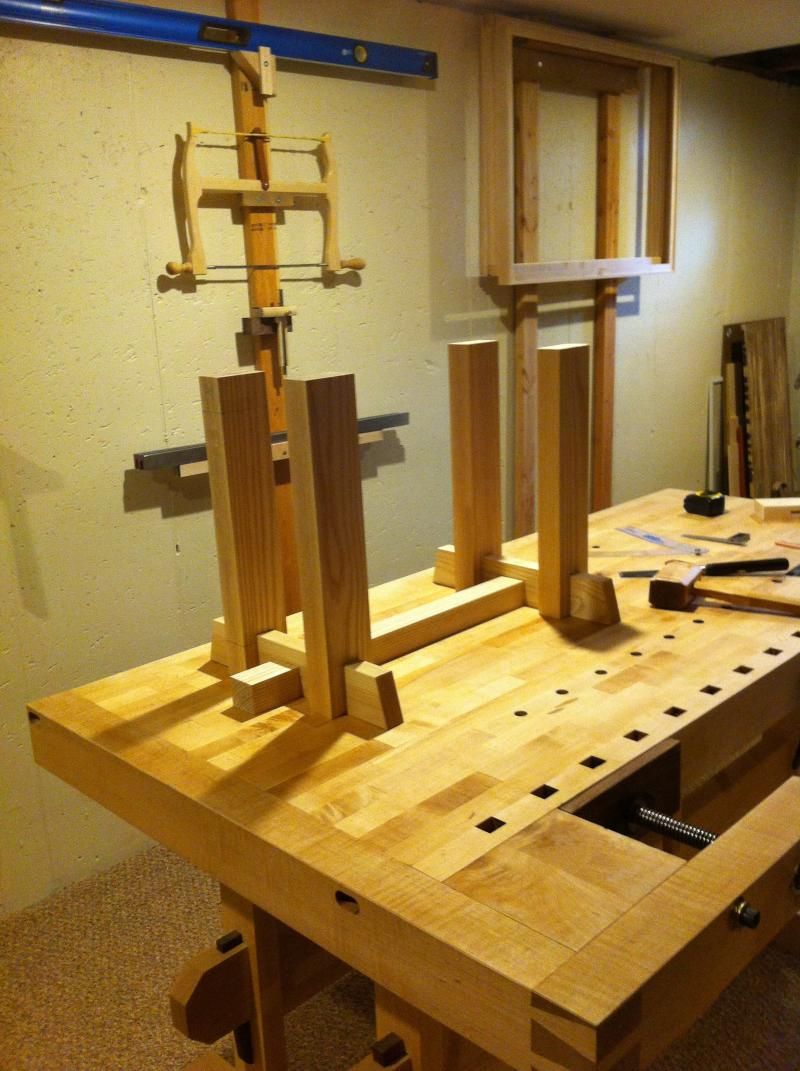
    John, or anyone else, if you want a less elegant version of the same kind of saw bench Brian's making (a split top) you can click on my profile and look at the album "saw bench and plans" - pictures and plans, feel free to modify to your liking. Please just make a thread here and show us your saw bench.
    Last edited by Judson Green; 12-18-2014 at 2:25 PM.
    I got cash in my pocket. I got desire in my heart....

  4. #19
    Join Date
    Aug 2013
    Location
    Enchanted land of beer, cheese & brats
    Posts
    1,314
    Looking good Brian. I sure do like ash, nice color, strong, light for its strength, works well and (this might sound funny, but it isn't meant to be) I like the smell of it. Funny how something like that can make an impressing on one, I like walnut but don't care for the smell of it.

    One thing though, your stretcher on the bottom (if your anything like me) is gonna get all nicked up from the saw nose bashing into it. I've learned to not have such a steep angle when sawing. Curious, how tall is it going to be?
    I got cash in my pocket. I got desire in my heart....

  5. #20
    Join Date
    Jan 2005
    Location
    Milton, GA
    Posts
    3,213
    Blog Entries
    1
    Brian, is this a work in progress? Will there be more pictures? Maybe we are looking at the end supports upside down? If they are upside down then I am guessing the hole in the center piece is for a dowel\mortise that will hold the top portion on? I believe typical Japanese construction technique for saw benches uses that type joint. Is that wood southern yellow pine, or maybe ash? Maybe I don't understand what I am looking at?

  6. #21
    Join Date
    Jan 2005
    Location
    Milton, GA
    Posts
    3,213
    Blog Entries
    1
    Ahhh you added pictures to the original post while I was posting, maybe I was close but had it upside down.

    Nice WoodJoy bowsaw hanging on the wall I think. That string keeper is pretty unique.
    Last edited by Mike Holbrook; 12-18-2014 at 2:21 PM.

  7. #22
    Your joinery is always so clean and precise. Gives me something to aspire to!

  8. #23
    Join Date
    Aug 2013
    Location
    Princeton, NJ
    Posts
    7,295
    Blog Entries
    7
    Thanks Gents!

    Mike, the stretcher will be on the ground, so the four pronged tenons will be in the top. The wood is white ash, good eye on the bow saw, I actually get a good deal of use out of it these days, it's also badass for limbing up landscape shruberies.

    Judson, it will be about 18" or so, there will be 16" clear from the top to the stretcher. My panel saws are around 16.5" from the top of the handle to the tip, so if I went straight down it would hit, unless I'm sawing something thicker than 1/2" or working at an angle.

    I am going to cut and fit the top before adding any supports, since is don't want redundant supports to impede use. Also, I plan to put holes for holdfasts down the center of each side.

    How tall did you make yours?
    Last edited by Brian Holcombe; 12-18-2014 at 7:06 PM.
    Bumbling forward into the unknown.

  9. #24
    Join Date
    Aug 2013
    Location
    Enchanted land of beer, cheese & brats
    Posts
    1,314
    21"

    Guess I've only bashed the saw nose with longer saws. I haven't added holes for holdfasts (don't have any holdfasts yet) but sounds like a great thing, someday. Maybe Santa will bring me some
    I got cash in my pocket. I got desire in my heart....

  10. #25
    Join Date
    Aug 2013
    Location
    Princeton, NJ
    Posts
    7,295
    Blog Entries
    7
    Certainly could be, LN panel saws are not particularly huge. Holdfasts are great, I think I overuse them aftrr getting a set.
    Bumbling forward into the unknown.

  11. #26
    Join Date
    Jan 2009
    Location
    Detroit, MI
    Posts
    1,661
    Quote Originally Posted by Jim Koepke View Post
    My suggestion is to make two. Especially when you want to crosscut a piece it is convenient to have a resting bench for the cut off.

    jtk
    Right you are! Make that a pair of saw benches.

  12. #27
    Join Date
    Jan 2009
    Location
    Detroit, MI
    Posts
    1,661
    Quote Originally Posted by Brian Holcombe View Post

    Tight joinery plus some blood:
    Did Roy Underhill come to visit?

  13. #28
    Join Date
    Dec 2010
    Location
    South Coastal Massachusetts
    Posts
    6,824
    Offset may not be necessary, if the top is split.

    I have a clumsy variant of this with a removable center board.
    When I want to have a long rip, the board straddles that opening.

    I've seen versions where one set of legs is splayed,
    presumably for stability when used by heavy operators.

    In practice, mine hasn't needed bracing - the lateral forces aren't great.

    I think the most important aspect of a sawbench is to ease all edges,
    so you don't leak anymore - it's okay to give blood to the jigs,
    but not for finished pieces.

    Good man for doing it by hand, there's something satisfying about that.
    I think it's precisely because you can put your finger on it...

  14. #29
    Join Date
    Aug 2013
    Location
    Princeton, NJ
    Posts
    7,295
    Blog Entries
    7
    LOL @ Ryan, he must visit often.

    Jim, Thanks!

    I think you're on the money, after assembling the base and using it as a stool without a board affixed to the top, it doesn't wiggle. Adding additional bracing is looking less important as I proceed. I'm always surprised at how strong bridle joints are, they always impress me. I plan to break the edges in the finishing process.

    I think the most satisfying part is finishing with a plane, oddly enough feeling like I escaped the sander is quite a pleasure.
    Bumbling forward into the unknown.

  15. #30
    Brian, the bench is looking great, as usual.
    I've mentioned before that we have a similar aesthetic…here's a couple pics of my dining table, ten years old and looking a little beat-up, but you'll get the idea. Great minds think alike!

    photo-212.jpg

    photo-215.jpg

    photo-213.jpg
    "For me, chairs and chairmaking are a means to an end. My real goal is to spend my days in a quiet, dustless shop doing hand work on an object that is beautiful, useful and fun to make." --Peter Galbert

Posting Permissions

  • You may not post new threads
  • You may not post replies
  • You may not post attachments
  • You may not edit your posts
  •