Results 1 to 14 of 14

Thread: Neander Chippendale Lowboy Build – Part 9 carved drawer, final assembly – tons of pic

  1. #1
    Join Date
    Feb 2011
    Location
    Carlsbad, CA
    Posts
    2,230
    Blog Entries
    2

    Neander Chippendale Lowboy Build – Part 9 carved drawer, final assembly – tons of pic

    Over the Christmas holiday I had some time to work on a Chippendale lowboy I’m building in cherry. Disclaimer: this post has tons of gratuitous hand tool pics of drawer assembly, carved drawer front and final assembly. I don’t pretend to be an expert and there’s nothing revolutionary here just the way I like to do things using primarily hand tools and a cheesy bandsaw and drill press. You can search for previous posts to see preceding steps.

    Dovetail layout for the drawers – I’m using white pine which is a joy to work with. My next project will be a pair of dressers for the boys and I’m thinking of using pine for those – inexpensive and lightweight. Not very sure about how to finish pine?


    Not smart enoughfor any math so I go with dividers and a chisel. I’m working on trying to speedup some of my typical word working tasks like dovetailing drawers. Once tails have been marked on one drawer side I use that to transfer dimensions to the other side.

    2.jpg3.jpg

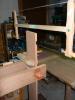
    I gang the drawer sides in my twin screw face vice. I freely admit I have a terrible “hand saw problem” - here I compared LN .015” thick dovetail saw with my shop built saw .018”thick plate that is a little bit longer and wider. Both saws cut really quickly. However I prefer the larger plate as it makes it easier for me to align the cutting edge on the layout line.

    4.5.jpg5.jpg4.jpg
    One of the biggest time savers is sawing out the waste between tails as close as possible to the layout line. Here I’m using a generic hoping saw. Later I switch to a recent acquisition, the Kew fret saw which I absolutely love; you can turn the blade on a dime to track right up against the layout line.
    6.jpg

    To expedite sawing the outside shoulders, I just use the marking knife (without chiseling a shoulder for the saw to run against). I think a really fine pitch saw makes a difference on this cut. I used an inexpensive Japanese replaceable blade dovetail saw I’ve had for 30 years.

    8.jpg7.jpg


  2. #2
    Join Date
    Feb 2011
    Location
    Carlsbad, CA
    Posts
    2,230
    Blog Entries
    2
    With the tails complete, time to mark the pins. I have to label the waste side (you know whyJ). For me, sawing the tails is the key cut in getting tightfitting DTs. I actually prefer the slightly thicker .020 saw plate for this job because it’s a little firmer and won’t deflect when you’re sawing down the line.
    9.jpg10.jpg11.jpg12.jpg


    Once the drawers are assembled time to clean up the protruding DTs. I made the back of my drawer slightly narrower than the front simply by marking the baseline little lower. This is one of my favorite jobs – sort of like “the reveal” as the excesses is planed away and you can see how the joints fit. I love my LV BU Jack if for nothing else it’s great for this job of trimming the end grain. Once the bulk of the waste is removed I clamp a board to prevent spelching on the far side of the pins so I can take a couple passes along the entire length of the drawer.

    13.jpg14.jpg15.jpg16.jpg


  3. #3
    Keep the pics coming....

  4. #4
    Join Date
    Feb 2011
    Location
    Carlsbad, CA
    Posts
    2,230
    Blog Entries
    2

    Another one of my favorite jobs final, finish planing of drawer fronts. Here I’m using a St. James Bay copy of a Norris infill – kind of fussy to set up but leaves a great surface.
    17.jpg

    Here’s some pictures of the assembled carcass with drawers in place. I still have to carve the drawer front for the bottom middle drawer. Back leg is sitting on a paper towel because I just spilled my beer – ugggh!

    18 (2).jpg19 (2).jpg19.jpg20.jpg


    The top is 4 boards glued up. I think the grain matching came out okay. The corners havethis little detail which took entirely too much time to execute. Didn’t comeout that great – I’m hoping no one will notice.

    21.jpg22.jpg


    Here’s the drawer front and a picture of the carving that will be next steps. First I need to saw the half blind dovetails for the drawer front. I waaaay over cut thebaseline. I know that’s not everyone’s cup of tea.

    22 (2).jpg

  5. #5
    Join Date
    Feb 2011
    Location
    Carlsbad, CA
    Posts
    2,230
    Blog Entries
    2
    23.jpg24.jpg

    Here’s the layout of the carving for the drawer front done with carbon paper.
    25.jpg

    I did the outside vines and the central little flowers first after lowering the background withthe router (which effectively erased the layout of the shell which I had to redraw – opps!).
    28.jpg


    This is the third carved element I’ve done for this piece; I started with the bottom apron then did the ball and claw feet and have gotten a lot faster – a key learning for me was using scrapers to clean up the background –a lot faster than sanding and leaves a much better surface. There’s a picture later on that shows the planed drawer fronts against the apron which I sanded (hadn’t figured out scrapers were the way to go at that point). You can’t really see in the picture very well but there is a significant difference in the quality/sheen in the finish in this cherry between the planed and sanded surfaces.
    27.jpg

    Here’s some pictures of the next steps of carving the fan. This was the most fun carving I’ve ever done. The much larger size of this carving made it a lot less tedious than previous carvings I’ve done which were a lot smaller. In total it took me about two full days to carve this drawer front. Many thanks to one of our fellow neanders Mel Fuchs for his coaching and encouragement!
    29.5.jpg29.jpg30.jpg

    Last edited by Mike Allen1010; 01-06-2015 at 4:32 PM.

  6. #6
    Join Date
    Feb 2011
    Location
    Carlsbad, CA
    Posts
    2,230
    Blog Entries
    2


    Here’s the assembled drawer. It took quite a bit of fussing with the layout/final dimensions of drawer sides and dovetails to get the spacing between all the drawer fronts consistent.

    31.jpg

    Our two boys are home from school for Christmas. They came out to the shop while I was re-sawing this drawer front by hand from a piece of 12/4 cherry. They are Division I water polo players 6’4” and 6’3” respectively and look like they spend way too much time in the weight room bench pressing small cars. As I was huffing andpuffing and dripping sweat doing the resaw, I asked if they would give me a hand – they said no way looks like way too much work!
    I wrote them this little note on the back ofthe drawer anyway.

    32.jpg

    Here’s some pictures of the finished carcass. I just need to do the turned split columns for the front corners and add the thumbnail molding around the top.
    33.jpg34.jpg35.jpg36.jpg

    I use plywood for the drawer bottoms. My granddad would cringe if he saw me using his 18” D-23 to saw Plywood. I’m thinking I’ll line the drawers with cedar once all the finishing is done.
    37.jpg

    Attached Images Attached Images
    Last edited by Mike Allen1010; 01-06-2015 at 4:18 PM.

  7. #7
    Join Date
    Feb 2011
    Location
    Carlsbad, CA
    Posts
    2,230
    Blog Entries
    2


    I am a novice turner and frankly it scares the hell out of me.

    38.jpg


    Here’s a nice slice in my leg I got when I dropped one of the turning tools. As usual, the LOML just happened to walk in when the blood was everywhere – I hate when that happens!
    39.jpg
    Thanks for looking.
    Mike

  8. #8
    Join Date
    Dec 2007
    Location
    Fishers, Indiana
    Posts
    554
    Really cool to see the progress you are making on this project.
    I greatly admire those who can stick with a long running project like this.

    Beautiful work.

  9. #9
    Join Date
    Oct 2010
    Location
    Australia
    Posts
    2,534
    Fantastic work Mike.

  10. #10
    Join Date
    Dec 2010
    Location
    South Coastal Massachusetts
    Posts
    6,824
    Look at the curl in that Cherry.

    I can't wait to see this in final finish.
    Then, I'm taking up curling.

    I aspire to this level of craft,
    but hold no illusions about achieving
    anything close to this.

    How many dovetails?
    All by hand?

    Yikes.

  11. #11
    Join Date
    Apr 2013
    Location
    Wild Wild West USA
    Posts
    1,542
    Mike,

    I woke up to black ice then it snowed on top of that so I took the day off. I am due some time off so no prob there.

    Man your thread hit the spot for a nice morning’s read. Glad I had the time to enjoy it properly.

    You really do beat the heck out of Fine Woodworking Magazine for interesting hand tool articles.
    Every time I read your generous and well done build articles I feel like I should be paying you a subscription fee.

    Thank You !

    I savored every photo and text.

    Ahhhhhhhhhh Nice drawer fronts too !

    Legs . . . Queenmasteroftheuniverseandbabybunnytrainer has the best legs I’ve seen but the ones on your table are looking really good too and there are four of them . . . you went all out and put the cabrios on the back too. Some would have just put plane O’ straight ones on the back side.

    Top corners detail. Didn’t come out well ? What are you kidding? Way to go !

    Nice lighting on the partial carving. If I had tried to take that photo outside I would have washed it out.
    Carving is coming out clean !

    You can buy tips from Pony to put on your clamp jaws instead of tape. That price is TOOOO high but you probably already seen these any way. Not that they are perfect either but I hate dealing with the glue from duct tape.

    As you know I can barely cut straight lines let alone curved surfaces that are pretty and pleasing so I am the last to comment on carving.
    I was thinking that using figured wood for the carving ground wasn't the best way to go. (I think it was here that I read plane grained wood is better to use for carving so it isn’t too distracting.)

    Boy was I wrong in thinking that in this particular case. The figure in the wood really complements and works with the subject.

    Stellar !

    You rounded the back corners of the drawer sides top and bottom. This was to make it easier for people to put the drawers into the carcase if they were to pull them all the way out.

    I don’t recall seeing that before. Makes too much sense not to do that. Is my memory going or is that kind of rare to see ?

    Here’s a nice slice in my leg I got when I dropped one of the turning tools. As usual, the LOML just happened to walk in when the blood was everywhere – I hate when that happens!
    Ha . . . I know what you mean.
    Yah coming from the metal lathe end of things I always thought sharp cutting tool bits should be securely bolted to the compound on the cross slide not hand held by mortal flesh covered phalanges.

    Some get by with sticking them on the end of a pole and poking them at the whirling timbers. Looks like it takes some knowing and practice. Perhaps one day I will give it a whirl. So to speak.

    PS: I still like Queenmasteroftheuniverseandbabybunnytrainer’s legs better than yours.
    Last edited by Winton Applegate; 01-07-2015 at 3:44 PM.
    Sharpening is Facetating.
    Good enough is good enough
    But
    Better is Better.

  12. #12
    Quote Originally Posted by Jim Matthews View Post
    Look at the curl in that Cherry.

    I can't wait to see this in final finish.
    Then, I'm taking up curling.

    I aspire to this level of craft,
    but hold no illusions about achieving
    anything close to this.

    How many dovetails?
    All by hand?

    Yikes.
    I am thinking that next year instead of a bunch of tools that I need to go to Lonnie Byrds fundamentals of woodworking class. Really want to get better at this, and I can sympathize with your desire to improve.

  13. #13
    Join Date
    Feb 2011
    Location
    Carlsbad, CA
    Posts
    2,230
    Blog Entries
    2
    Quote Originally Posted by Chris Hachet View Post
    I am thinking that next year instead of a bunch of tools that I need to go to Lonnie Byrds fundamentals of woodworking class. Really want to get better at this, and I can sympathize with your desire to improve.
    Thanks guys for your kind comments.

    Jim and Chris I think you're being far too modest about your own abilities – I seen your work in it's top-notch. Winton, I always enjoy your posts and I'm glad to hear you prefer your Queenmasteroftheuniverseandbabybunnytrainer legs to those on this project!

    Of course I didn't show you the many parts of this project that I screwed up. I have been a hand tool woodworker for more than 30 years, which is not to say that it takes that long to reach any particular level of expertise. IMHO there is no substitute for practice. In my limited experience, lessons learned from epic failures (of which I have many!), are often the most helpful (why I mark the waste side of layout lines for dovetails ).

    I've been married to the LOML for 28 years this December; most of the projects I built during the first 10 years "somehow" never seem to make it into the house. It's only during the last few years I've managed to sneak a couple past the "goalie". I was very proud of the huge red oak dresser and stereo component cabinet I built from my own design when we were first married. Mysteriously to me, somehow they never made the cut and are still in the garage being used to store extraneous woodworking stuff.

    Somehow having a couple boys without a stick of furniture to their name and limited resources to acquire same, has made my projects a little more desirable.

    All the best, Mike

  14. #14
    Join Date
    Sep 2008
    Location
    N. Idaho
    Posts
    1,621
    Hello Mike,

    Looks fantastic! I think my favorite part is the detail on the corner of the top because it unexpected (to me anyway). Glad the gouge injury was cosmetic. Many thanks for your fine posts, I always pick up something and they are among my favorite on SMC.

    Cheers,
    C
    "You can observe a lot just by watching."
    --Yogi Berra

Posting Permissions

  • You may not post new threads
  • You may not post replies
  • You may not post attachments
  • You may not edit your posts
  •