Now that's a nice finish sheen.


 Contributor
Now that's a nice finish sheen.
 Member
Thanks for all the pictures, thats really helpful to see your process and what a beautiful result it gives.
Member
Ta Brian. A picture vs a thousand words etc...
 [OP]
Contributor
[OP]
Contributor
Thanks fellas! Down to the last drawer front now and I'm exhsusted, lol.
ive got some planning to do then onto cutting dovetails since the sides and backs are ready.
Bumbling forward into the unknown.
 Contributor
Looking good, thanks for all the pics. I always pick up something--I may check out McMaster for an improved straight edge.
C
"You can observe a lot just by watching."
--Yogi Berra
 Contributor
Great work Brian and I love all the pictures and detail. Just one question though, does your tweed work jacket have patches on the elbows?
Contributor
Cabinet/work looks great. Always enjoy reading and following your process.
Brian - thanks for sharing all of the sharpening photos, very helpful for me.Originally Posted by Brian Holcombe

You mind captioning the stones/sharpening media in a left to right fashion. I am always interested in what people use, one of the things I miss about David Weaver not posting on here anymore.
[OP]
Contributor
How could it not?
Thanks Gents!
Chris, if you do buy one or more just be sure to check them for straightness.
Robert,
Left to Right;
Atoma 140, 400, 1200, DMT dia-flat 400, Shinden Suita (Yama Renge), Nakayama Asagi, Chosera 3k, 1k, Naniwa snow-White (8k) and finally Sigma 13000.
one note I wanted to make earlier, this setup, without running water has a higher risk of stray grit transfer, so I am extra cautious about it. Hence the spray bottle and soaking tub, rather then simply dipping the stone a second time. I wipe the stone down after soaking and smoothing, then spray water on to prevent stray grit from scratching the work.
i've also gone through a short period with sandpaper on granite, I like the granite plate, but the sander paper is not for me. The Atoma line up replaced that.
Last edited by Brian Holcombe; 09-03-2015 at 9:29 PM.
Bumbling forward into the unknown.
 Contributor
That is an interesting shape on your iron Brian. Do you have any curvature at all to the edge or do you hone straight across and just relieve the corners like it looks in the pictures? I personally have never had good luck relieving just the corners and now always hone a slight camber in my blades. This is just second nature now and is slightly different from blade to blade. I even hone my LN 7 jointer with an ever so slight camber, people say that is a no no but I still get perfect edge joints with the camber and also leave not tracks when jointing the face of boards.
It is always nice to see how different we all work and what methods have stuck with each individual. Thanks for the pics Brian.
[OP]
Contributor
Mostly straight across with the edges relieved. I find that in order to make certain that they don't dig into the sides I have to sharpen the radiused corners as well….meaning I can't just hone the flat or they will dig in at some point.
The Jointer, smoother and Try plane are all straight across with relieved corners. The Jack has one blade which is very heavily cambered.
Bumbling forward into the unknown.
[OP]
Contributor
My drawer fronts are now most of the way complete. I plan to move along with the majority of the rest of the work before deciding what to do on the drawer pulls. My intended plans will not work out as my mom has insisted that I build necklace hangers into the door fronts....using up all of the available space between the drawers and the doors.
So, I am building this setup and likely will complete the drawers before actually deciding on how to open them. Poor planning, I know, but I expect it will work out. Worst case I can do the Nakashima style pull, something I have been very much trying to avoid.
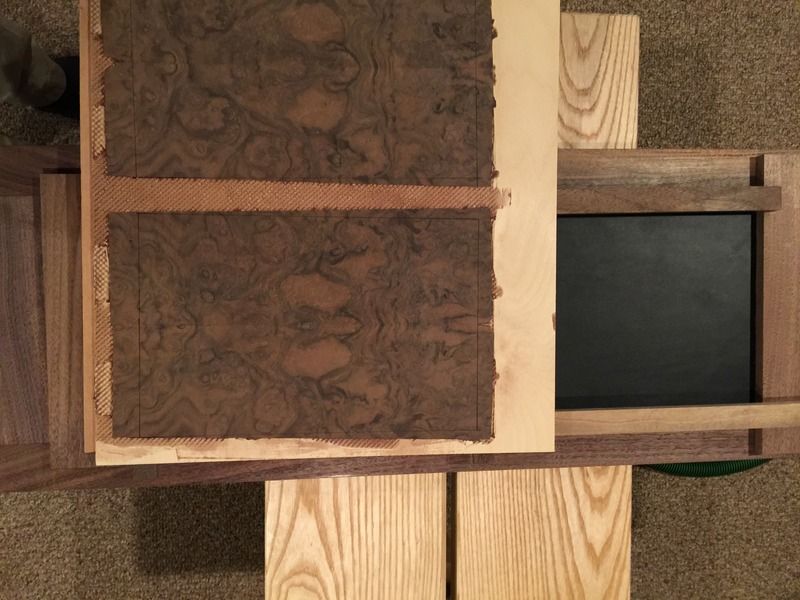
Showing the molding details inside the case, these are not actually attached yet except by how they lock into the inside panels
The inside of the doors will be lined with leather, with a thin open space for the necklaces covered by battens and veneered panels
This is a very rough mock-up of the inside of the door without the panel
and with the panel (uncut)
Last edited by Brian Holcombe; 09-10-2015 at 10:18 PM.
Bumbling forward into the unknown.
[OP]
Contributor
James, sorry to disappoint but I landed on Brusso butt hinges. As much as I wanted to use the Soss hinges I was concerned that reducing the clearance between the drawers and case sides would be trouble at some point.
Bumbling forward into the unknown.
 Contributor
Brian I am far from being disappointed. That is a beautiful piece of work and you have to make all of the discissions. Things I say are only suggestions. I was a long way into woodworking before I saw a Soss hinge and was totally intimidated until installing a couple. On another note I did see some drawer pulls made by cutting a more or less square mortise in the center of the drawer and then installing a rocker type affair on some type of hinge pin from the back. You push on the top and the bottom pops out enough to form a pull. It looked like a great idea but I could not investigate because it was a do not touch. Not intuitive at all because it looked like decor rather than a pull being made the same type of wood. Flush ring pulls would work but that isn't campaign furniture your working on. I can see your problem. I'd be willing to lay odds that you will figure it out. Again great work.
Jim
[OP]
Contributor
Thank you! I'll figure something out. I spent like 2 hours doing mock-ups yesterday, anyone watching certainly would have thought I have lost my mind.
Bumbling forward into the unknown.
Contributor
Those panels will look great finished! will you veneer both sides and then apply leather? Also curious to see your solution for drawer pulls as well. Recessed ring pulls also came to mind but agree with Jim they are out-of-bounds style wise. Must feel good to be on the downslope with the project...
Cheers,
C
"You can observe a lot just by watching."
--Yogi Berra
 Posting Permissions

 Reply With Quote


