Page 6 of 19 FirstFirst ... 234567891016 ... LastLast
Results 76 to 90 of 280

Thread: Cabinet build

  1. #76
    Join Date
    Aug 2013
    Location
    Princeton, NJ
    Posts
    7,297
    Blog Entries
    7
    LOL, thanks Mike!

    Bear in mind I continue my progression and study of Japanese tools, so I am not an authority, just proceeding with enthusiasm. I decided to get a 375g as well because 675g this is a heavy weight to swing for all tasks.

    The combination of metal hammer with a soft center and hardened ends combined with hooped handle has a dead-blow effect. It's that effect that really drives the chisel. I decided on red oak handles for the mortise chisels for that same reason.

    Ebony would not deaden the blow as much as red oak, and so for my small carving chores I decided on ebony handles and a small hammer, it should result in an untempered transfer of the hammer blow.

    I preferred this to the bouncing of wooden mallets, though I'm sure some may prefer them for that same reason.
    Bumbling forward into the unknown.

  2. #77
    Join Date
    Aug 2013
    Location
    Princeton, NJ
    Posts
    7,297
    Blog Entries
    7
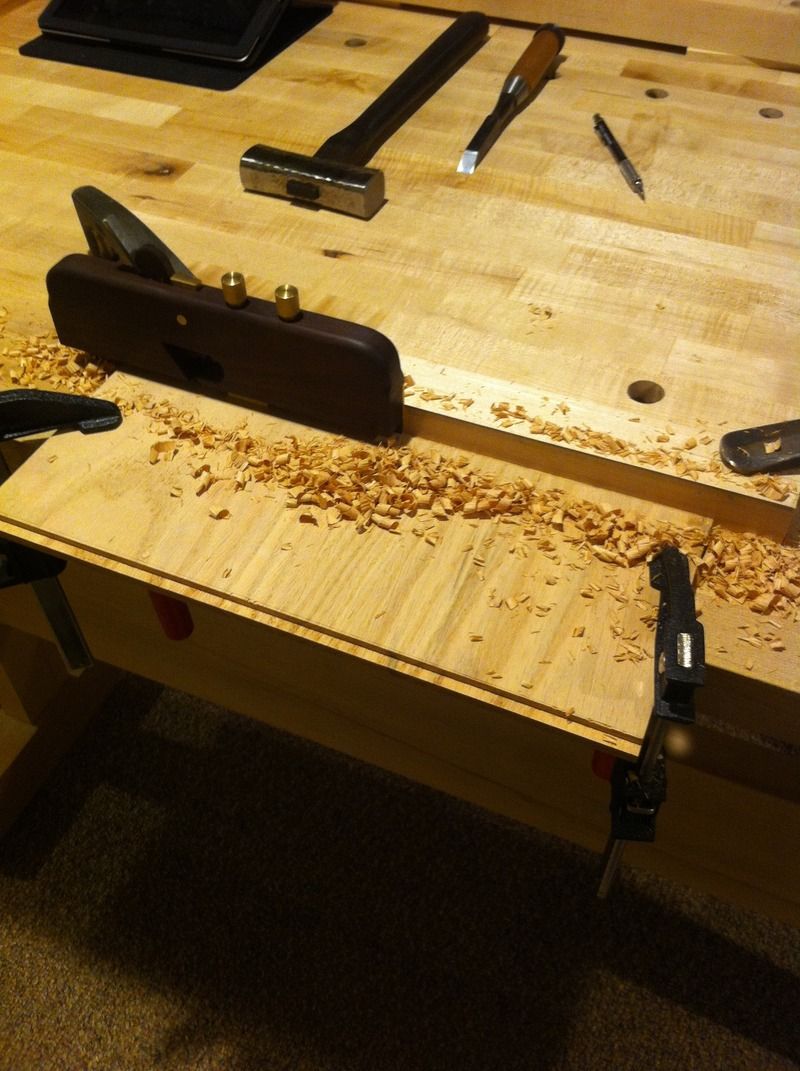
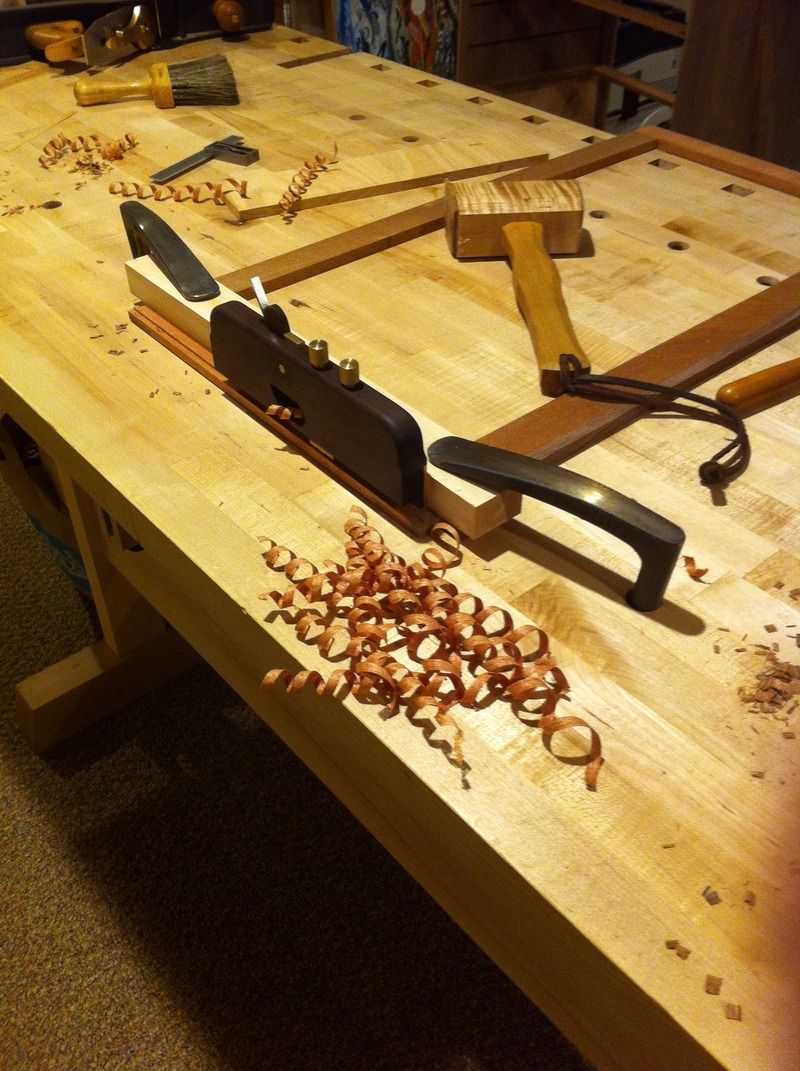
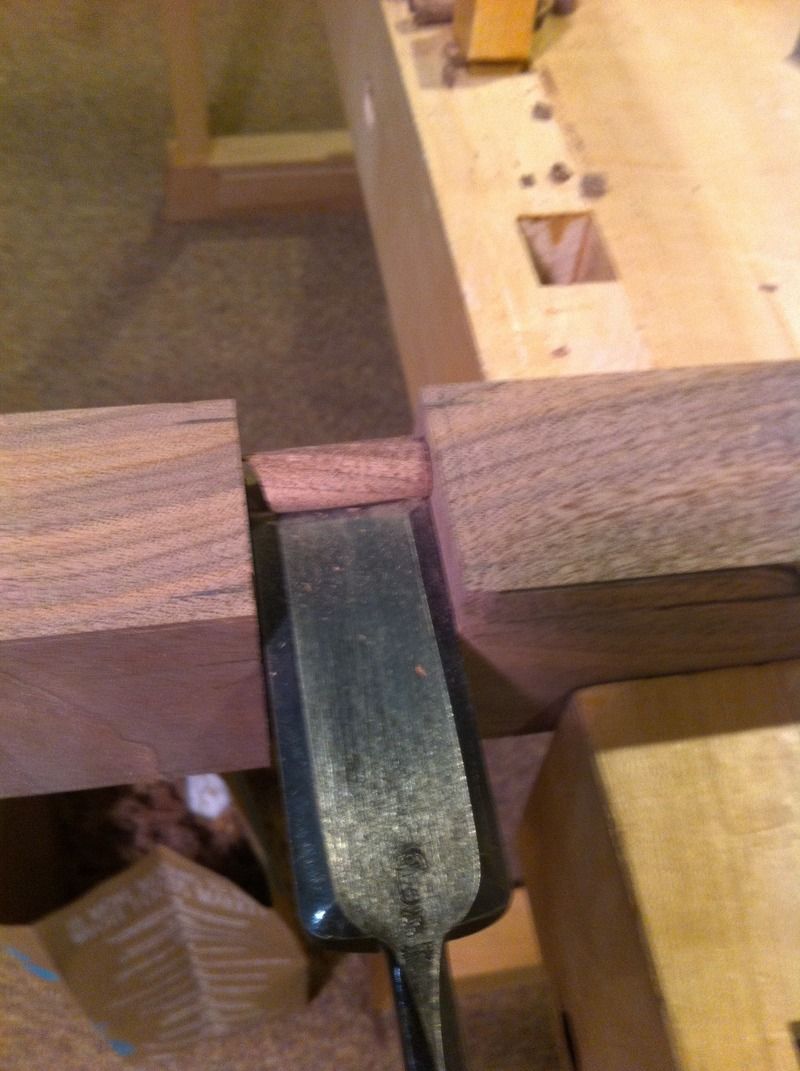
    Took a moment from banging my hammer to finish rabbeting the inner panels and cutting their receiver grooves in the web framing;


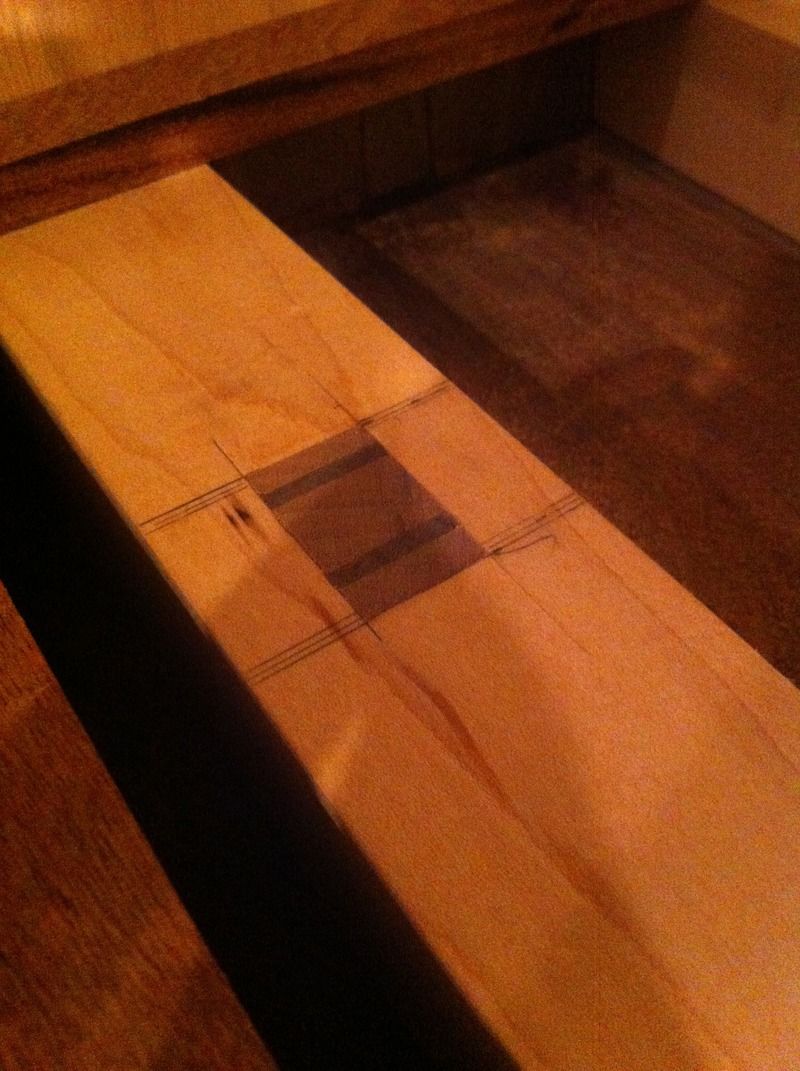
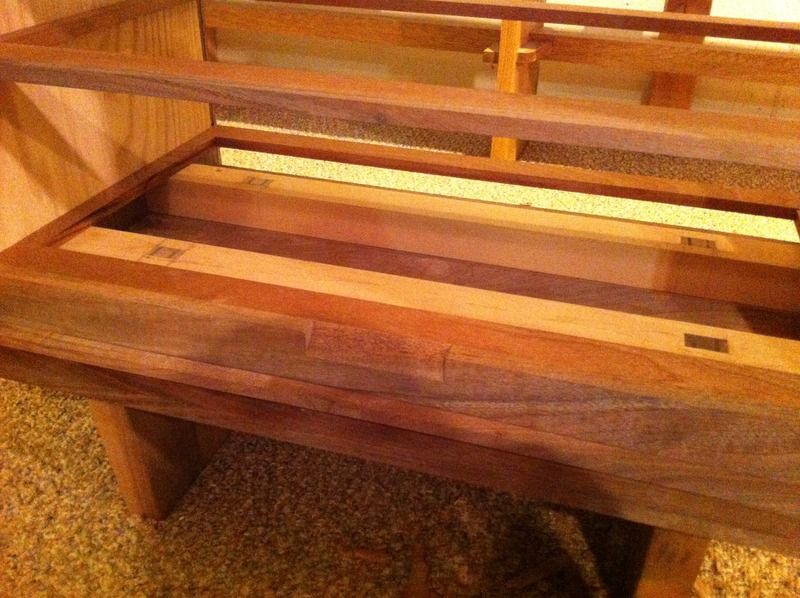
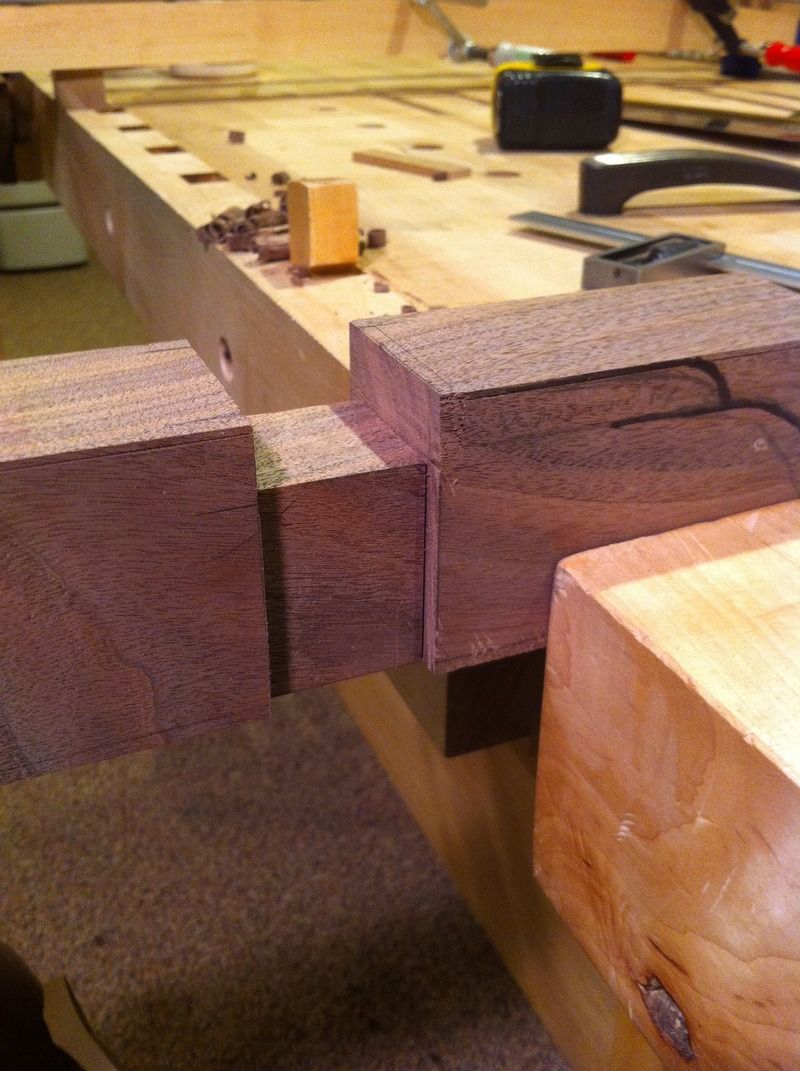
    Then I returned to finish chopping my mortises, test fitting, trimming, final fitting and then installation. I was in the groove all day and did not take much in the way of photos until most of it was complete.


    The cabinet is quite stiff now, the inner panels, base and crossmembers have added a lot of integrity to the structure.


    Onto the lower stretcher;


    Those few marks from an errant saw blade will be gone soon enough.
    Bumbling forward into the unknown.

  3. #78
    Join Date
    Mar 2015
    Location
    SE Michigan
    Posts
    3,225
    I don't know how I missed this thread until now. I suppose congratulations is in order since your last post. Hope mom and baby are doing well.
    Regarding your woodworking, I wish I were your Mother...you're craftsmanship is amazing. Thanks for all the step by step pics. While it's far beyond where I'm at, it reminds me to pay attention to grain, the value of a good saw (someday), and working through all the details. It's really inspiring.

  4. #79
    Join Date
    Aug 2013
    Location
    Princeton, NJ
    Posts
    7,297
    Blog Entries
    7
    Thanks Phil! Everyone is doing well!

    Reading the grain was difficult for me at first then it became much more intuitive after a sort of 'Ah-ha' moment. I try and reach a little further with every project, or most every project, by stepping slightly outside of my realm every time and inviting a new a difficulty. In this case I feel I was reaching a bit by deciding to dovetail the webframes, but now that is something I will likely incorporate on most of the casegoods that I build. However, I'll probably change the designs so that I can make them through and tapered.

    I went with tapered dovetails on the crossmembers and that is much easier to work with than plain sliding dovetails which seem to be either overly tight or overly loose.

    My wife really likes this Plan File type jewelry box, and so I would not surprised if I'm making another one of these very shortly after completing this one, but with a few minor changes.
    Bumbling forward into the unknown.

  5. #80
    Join Date
    Apr 2014
    Location
    Davis, CA
    Posts
    249
    Quote Originally Posted by Brian Holcombe View Post
    Thanks Phil! Everyone is doing well!

    ... In this case I feel I was reaching a bit by deciding to dovetail the webframes, but now that is something I will likely incorporate on most of the casegoods that I build. However, I'll probably change the designs so that I can make them through and tapered.

    I went with tapered dovetails on the crossmembers and that is much easier to work with than plain sliding dovetails which seem to be either overly tight or overly loose.
    I'll have to go back and see how you did the tapered sliding dovetails with handtools, Brian. On my nearly completed bench, I used that joint, but did so with a router and fairly elaborate jigs. It's a wonderful, self-locking joint, but I'd sure love to find a way to do it by hand.

  6. #81
    Join Date
    Aug 2013
    Location
    Princeton, NJ
    Posts
    7,297
    Blog Entries
    7
    If it's blind and not excessively long I cut them just like a half blind dovetail but with a slight taper. If they are through and through they're easier as I can cut them with a dado plane and dovetail side rabbets, Terry gordon has a really good video on doing just that on his site.
    Bumbling forward into the unknown.

  7. #82
    Join Date
    Sep 2008
    Location
    N. Idaho
    Posts
    1,621
    Hello Brian,

    Continuing to enjoy your build thread. Would you care to share your design process? Do you work from you're own drawings? To what degree do you design as you go?

    Thanks,
    C
    "You can observe a lot just by watching."
    --Yogi Berra

  8. #83
    Join Date
    Aug 2013
    Location
    Princeton, NJ
    Posts
    7,297
    Blog Entries
    7
    Awesome, glad to hear that you are enjoying! It's probably true that I am a woodworker out of being a frustrated designer. Meaning that I began woodworking because I had a design I wanted to see in the flesh and have continued because I want to bring my ideas to life. I work in classical proportion, which is also known as golden ratio, primarily.

    I work out the majority of my projects on paper, to scale, before ever picking up a tool. I am not a classically trained woodworker, so I'm working with intuition on how wood works and drafting ideas and theorising which will work and which will fail and why. Over time I have adjusted my 'on paper' eye to acknowledge my 'in the flesh' eye, meaning I have learned what I like and dislike about previous designs once they are in the flesh. Typically one draws in plan views on paper, but in real life you are only seeing in perspective. So you rarely ever see pieces exactly as you drew them, but instead at eye level or at a seated level and that changes how you enjoy certain designs. So, I have learned to keep a mental list of practical guidelines.

    I do alter designs as I go, sometimes I find something I planned is not very practical when actually in the wood, and so I'll make a change. Other times I decide that I want to incorporate a new idea or technique immediately. In this instance I decided that I would like to do a chip carved foot, reminiscent of timber frame, ahead of those angled cuts I typically make.

    I do like to increase my mental catalog of design ideas and I do so by traveling, going to museums, visiting workshops, visiting buildings, ect. I like to acknowledge the built world and how people accomplished things in the past and why and keep that in the back of my mind. When an idea is forming, certain aspects are often something I've seen in my past that then emerge on paper.
    Bumbling forward into the unknown.

  9. #84
    Join Date
    Sep 2003
    Location
    South Carolina
    Posts
    1,429
    Brian,
    I've watched Terry's video on the sliding dovetail, as well as several others, and want to try it. Do you have Terry's side rabbets with the dovetail fence, or do you use standard side rabbets with a batten clanped onto the workpiece? Are those his planes a couple of posts up?

    I wonder if the LN 98/99 would work for this?

  10. #85
    Join Date
    Aug 2013
    Location
    Princeton, NJ
    Posts
    7,297
    Blog Entries
    7
    Mark, I am using Terry's planes and my dovetail side rabbet has the fence. I haven't used a batten for this, but I could see how one would be quite useful in certain scenarios, especially near the finished cut. The fence acts as a depth stop as well and thats helpful in certain cases. Side rabbets can cut the floor of the dado slightly, and on a through dovetail this is something to avoid.

    I haven't used the 98/99 and the reason I went with Terry's planes over those was that I wanted a long reference. Most of the time when I'm planing a sliding dovetail it's fairly wide, and so a long reference is helpful in keeping those true.

    I have an ECE dovetail plane as well, it's bigger yet, and so I use it for roughing out the male portions of the joint.
    Bumbling forward into the unknown.

  11. #86
    Join Date
    Aug 2013
    Location
    Princeton, NJ
    Posts
    7,297
    Blog Entries
    7
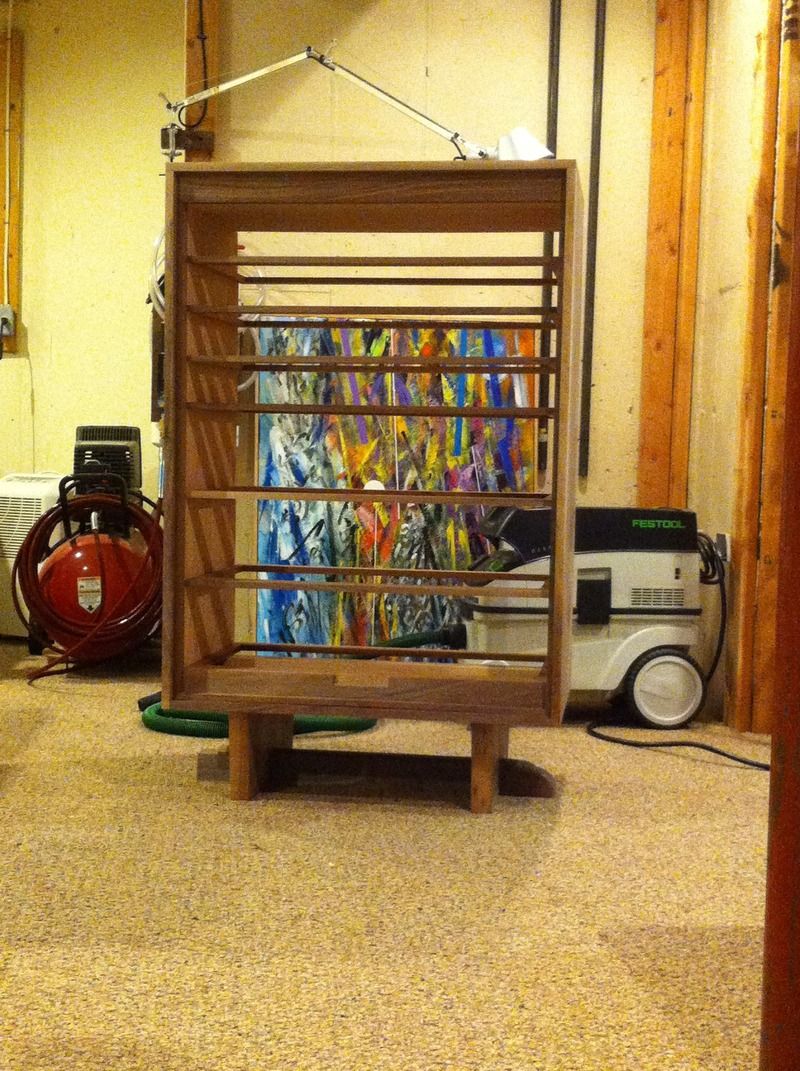
    Here's an updated shot of the cabinet. Pretty distinct Charlotte Perriand influence that will seem less so once the doors are on (she took to sliding doors typically). I have one side of the stretcher mostly finished in a chip carving. I applied the texture with a gouge.


    After the base is complete I will build a frame and panel back for the cabinet.
    Last edited by Brian Holcombe; 05-24-2015 at 3:47 PM.
    Bumbling forward into the unknown.

  12. #87
    Join Date
    Aug 2013
    Location
    Renton, WA
    Posts
    228
    Brian I am really jealous of your wood, and your skill. Nice stuff. As the saying goes "You suck"

  13. #88
    Join Date
    Aug 2013
    Location
    Princeton, NJ
    Posts
    7,297
    Blog Entries
    7
    Hah, thanks Chuck! Cheers!
    Bumbling forward into the unknown.

  14. #89
    That's coming together beautifully. Can't wait to see her finished!
    Fred
    "All that is necessary for the triumph of evil is that good men do nothing."

    “If you want to know what a man's like, take a good look at how he treats his inferiors, not his equals.”

  15. #90
    Join Date
    Aug 2013
    Location
    Princeton, NJ
    Posts
    7,297
    Blog Entries
    7
    Thanks Fred!
    Bumbling forward into the unknown.

Posting Permissions

  • You may not post new threads
  • You may not post replies
  • You may not post attachments
  • You may not edit your posts
  •