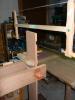
I'm just now getting into dovetails and thought I might as well get into planes at the same time. Looking at the prices of Veritas planes and the like makes my head spin. My other choice is to try to rehab some planes that my Father-in-law left me.
No cracks in the castings and they seem to be complete. He got them from his father.
Are they worth rehabbing? Is rehabbing a plane difficult?


 Reply With Quote