Results 1 to 7 of 7

Thread: Quick question for those with a LV custom plane and an eclipse sharpening jig

  1. #1
    Join Date
    Apr 2008
    Location
    Provo, UT
    Posts
    390

    Quick question for those with a LV custom plane and an eclipse sharpening jig

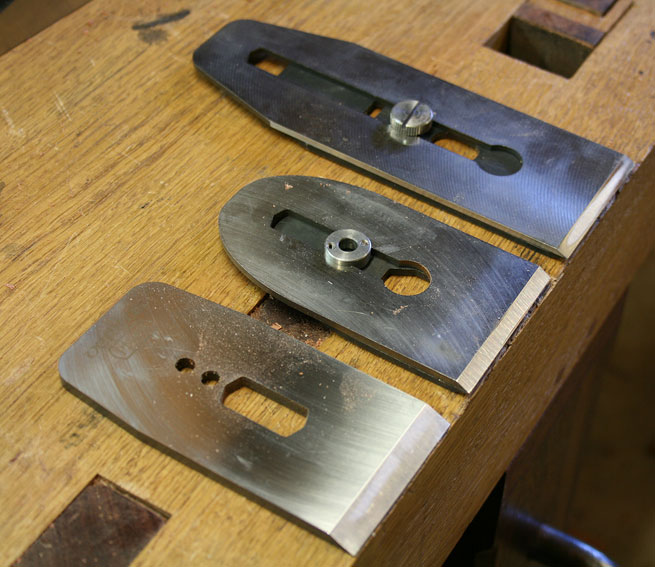
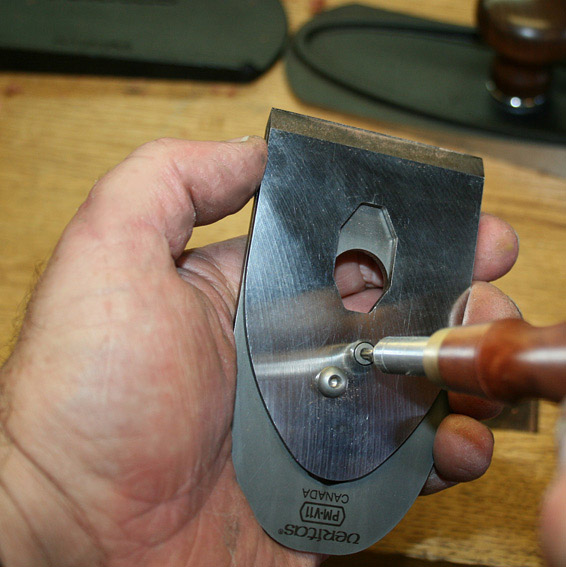
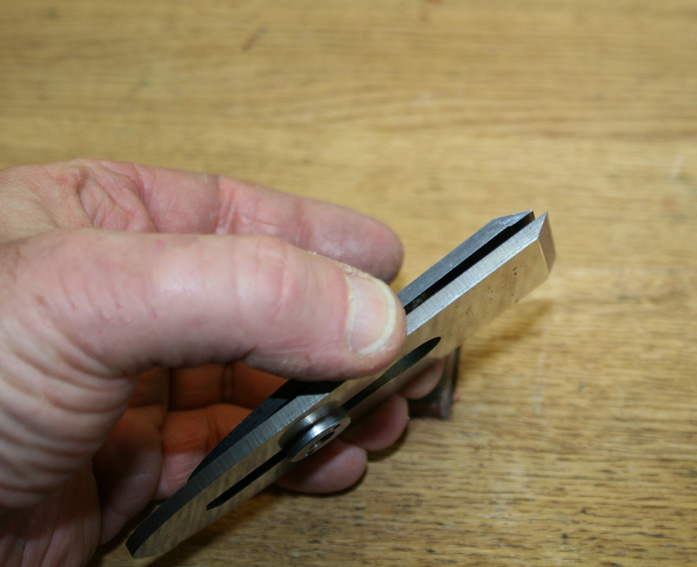
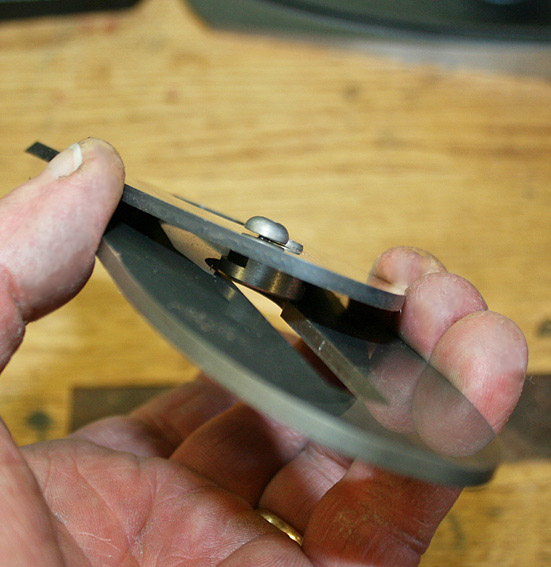
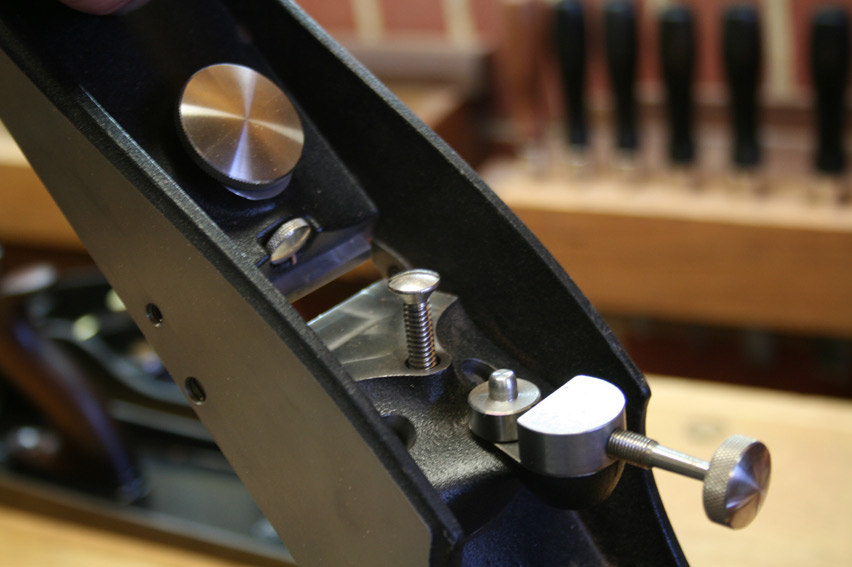
    One of the benefits that I can see to the LV approach to attach the cap iron to the blade in the new LV custom planes is that you can remove the cap iron without removing the carrier so it makes it easy to attach the cap iron back to the same position when you are done sharpening. However, having only seen pictures, I wonder whether you can sharpen the blade with the carrier still installed using one of the eclipse style sharpening jigs or whether the carrier gets in the way and you have to remove it anyway.

    If you can sharpen with the carrier still attached, i can see liking the system. If I have to remove the carrier anyway, I can see it being more difficult to reset the cap iron than in the plane with the traditional non-carrier attachment.

    Jeff.

  2. #2
    Join Date
    Feb 2004
    Location
    Perth, Australia
    Posts
    9,494
    Hi Jeff

    I do not use a honing guide so have not attempted to sharpen the custom blades with one. However, I think that you would need to remove the blade carrier completely if honing with a guide as it projects above the surface ...


    Left to right: BU, Custom Bench Plane, and Stanley Replacement Bench Plane.

    It may be possible to loosen the blade carrier and slide it back.

    Removal of the blade and carrier is actually pretty simple, possibly easier than a Stanley (since the blade carrier sits in the slot on guides and this helps keep it squared.

    The following is from my article (see my website) ...

    Removing the chipbreaker …


    Incidentally, it does not matter which way around the blade carrier is positioned. What is important is that the small, embedded screw locks the blade carrier to the blade, and the button-head screw locks the chipbreaker to the blade carrier/blade. The embedded screw also prevents the chipbreaker swiveling.


    Do not remove the screws – just loosen them. Contrary to advice, you will remove the blade carrier. Why? Because setting the chipbreaker requires minute amounts of placement, and it is something one must do by eye.


    Once the blade has been sharpened, and the chipbreaker is to be replaced, you are going to reverse the process. However, an observation by Chris Schwarz. Chris suggested first securing the blade carrier screw, and then the chipbreaker screw. Doing so the other way around will cause a tiny bit of movement of the chipbreaker, which is relevant when one is talking in fractions of a millimeter at the leading edge of the blade.
    Below, loosening the screws ..


    Now, if you hold the blade and chipbreaker apart with your fingers …


    there is sufficient space to slide the chipbreaker forward and over the end of the blade without touching the edge.


    Of course, you will reverse this process when bringing them together. Just ensure that the slots in the blade carrier align with the slot in the blade.


    Last point when removing or replacing a blade, tilt the body until the bed of the frog is horizontal for increased control …


    Regards from Perth

    Derek

  3. #3
    Join Date
    Apr 2008
    Location
    Provo, UT
    Posts
    390
    Thanks Derek! That is what I suspected, but really couldn't tell. Hmm.... I guess I'll need to think through whether to spend the money for one. I was thinking that I would replace my "old style" LV smoother with one of the custom smoothers. But I'm having a hard time justifying the switching costs!

  4. #4
    Join Date
    Sep 2007
    Location
    Longview WA
    Posts
    27,454
    Blog Entries
    1
    Derek, another excellent sharing of knowledge with others. Thanks for posting this.

    jtk
    "A pessimist sees the difficulty in every opportunity; an optimist sees the opportunity in every difficulty."
    - Sir Winston Churchill (1874-1965)

  5. #5
    Join Date
    Sep 2007
    Location
    Longview WA
    Posts
    27,454
    Blog Entries
    1
    I was thinking that I would replace my "old style" LV smoother with one of the custom smoothers. But I'm having a hard time justifying the switching costs!
    How is the "old style" LV smoother doing in the secondary market?

    Once justified, seldom lamented?

    Besides look at all the options for future money burning holes in your pocketses.

    jtk
    "A pessimist sees the difficulty in every opportunity; an optimist sees the opportunity in every difficulty."
    - Sir Winston Churchill (1874-1965)

  6. #6
    Join Date
    Apr 2008
    Location
    Provo, UT
    Posts
    390
    Quote Originally Posted by Jim Koepke View Post
    How is the "old style" LV smoother doing in the secondary market?

    Besides look at all the options for future money burning holes in your pocketses.

    jtk
    Jim, you crack me up!

    I have to say, there are some really great folks that hang out here and I'm lucky to just be able to "know" you guys. I've learned so much and can't believe how helpful everyone is.

    Color me really thankful to consider myself associated with you folks.

    Jeff.

  7. #7
    You can leave the chip breaker carrier on in the MK2 veritas jig, I actually first tried it that way, but as Derek said if you use chipbreaker properly it needs to be adjusted anyways.
    I am actually thinking of bying the old style Veritas 4 1/2, it is cheaper and I like that style 4 almost better than the new one.

    There is One advantage of the new style Veritas and bevel up planes, in cold weather four finger grip is warmer I have old No.6 that just totally kills my index finger if shop is below 32.

Posting Permissions

  • You may not post new threads
  • You may not post replies
  • You may not post attachments
  • You may not edit your posts
  •