Page 1 of 2 12 LastLast
Results 1 to 15 of 18

Thread: Two New Mortice/Cutting Gauges

  1. #1
    Join Date
    Feb 2004
    Location
    Perth, Australia
    Posts
    9,494

    Two New Mortice/Cutting Gauges

    Introduction


    As one of the few handtool-orientated woodworkers in my local woodwork club, I have been asked to present a regular lecture at meetings on handtools. This will be hands-on, for example, using tools to create joints. This coming month I plan to present a demonstration on mortice-and-tenon joinery.


    It occurred to me that the only mortice gauges I own are Japanese, not Western types. I have two, one being a Kinshiro (thanks Wiley), which is the very best mortice/cutting gauge, in my opinion. It is not simply that they are so well made and have amazing knives that leave a clean line, but they are ergonomically so well designed, and fit the hand like a glove. I also like that the Adjuster Screw is situated so that they may be tightened with one hand.


    I have built a number of single cutter gauges based on the Kinshiro, which are excellent for dovetails, or may be used in pairs for mortice-and tenons. The wide fence provides a lot of extra stability.


    Original Kinshiro on the right ...


    One should mark mortices and tenons from the same gauge, working from a reference face. In this regard, the single flaw of the Kinshiro is that that are not suited for marking mortices that are set back from the edge of a stretcher ..


    The advantage of the traditional Western mortice gauge is that one adjusts the pins to the width of the mortice chisel, and then the fence may be adjusted in-and-out as necessary.


    My thoughts went along the path of a fixed gauge, that is, one that was set up for a specific mortice chisel size. Indeed, why not make two, or more ..?


    I also recalled I had a rarely used set of Tite-Mark wheel cutters for a mortice gauge. Perhaps these could be pressed into service? At the same time, while I like and have a number of wheel gauges, I found that these wheels required more downforce than a knife. Perhaps a heavier gauge than the Tite-Mark ...?


    In the end I built two different mortice/cutting gauges. The first one looks traditional but has a few novel features, one of which I have not seen elsewhere. The second looks novel, but is more traditional.


    Gauge #1


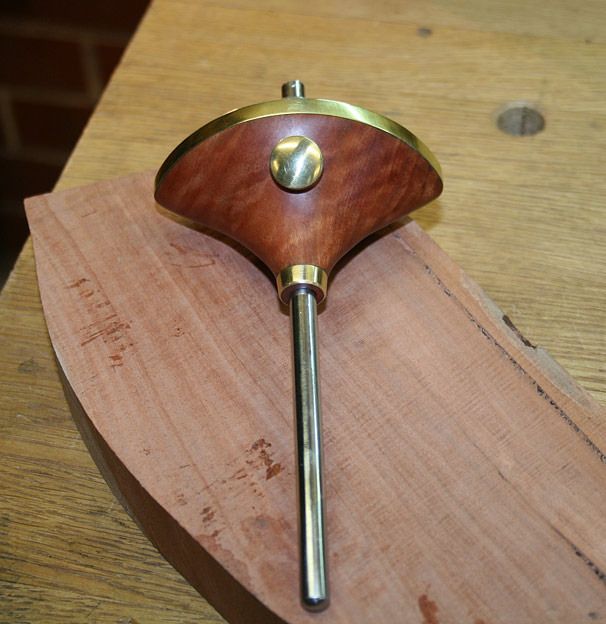
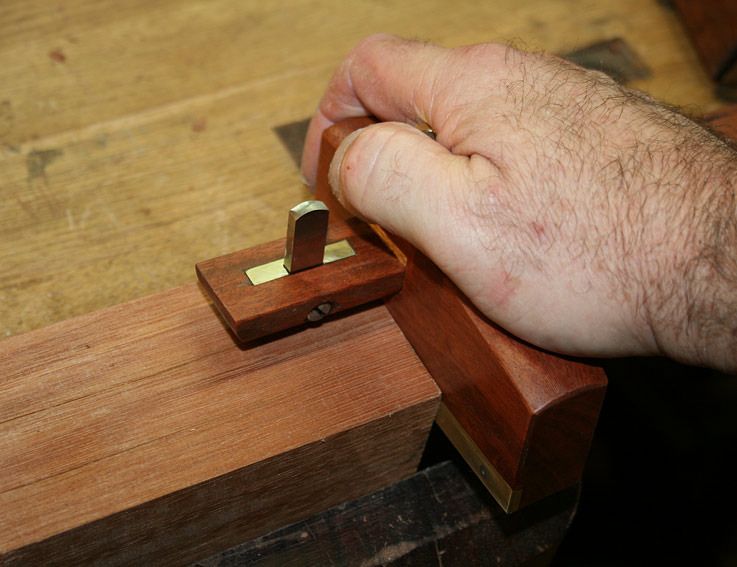
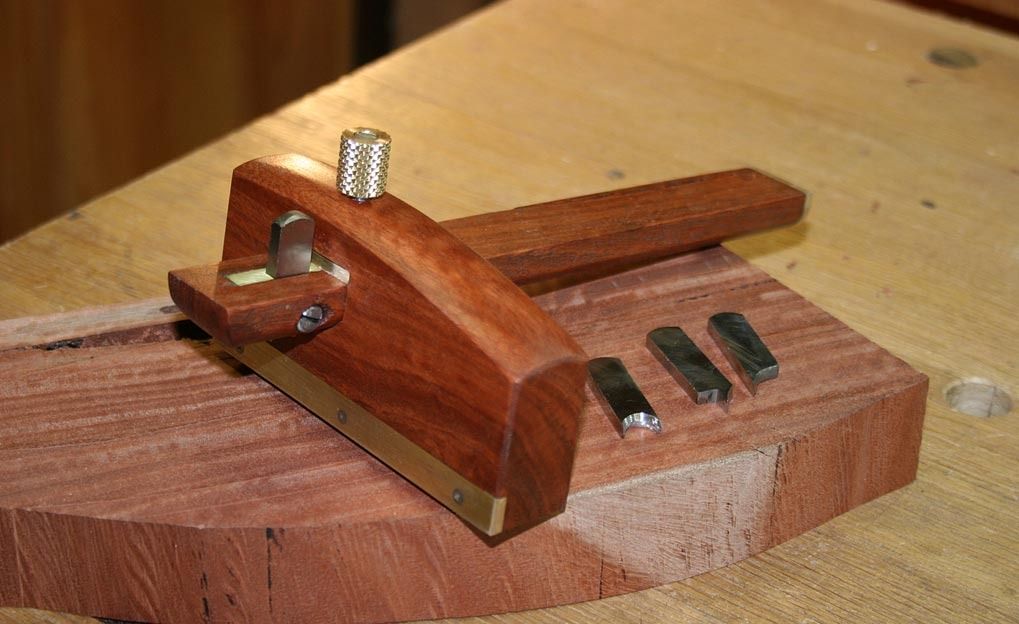
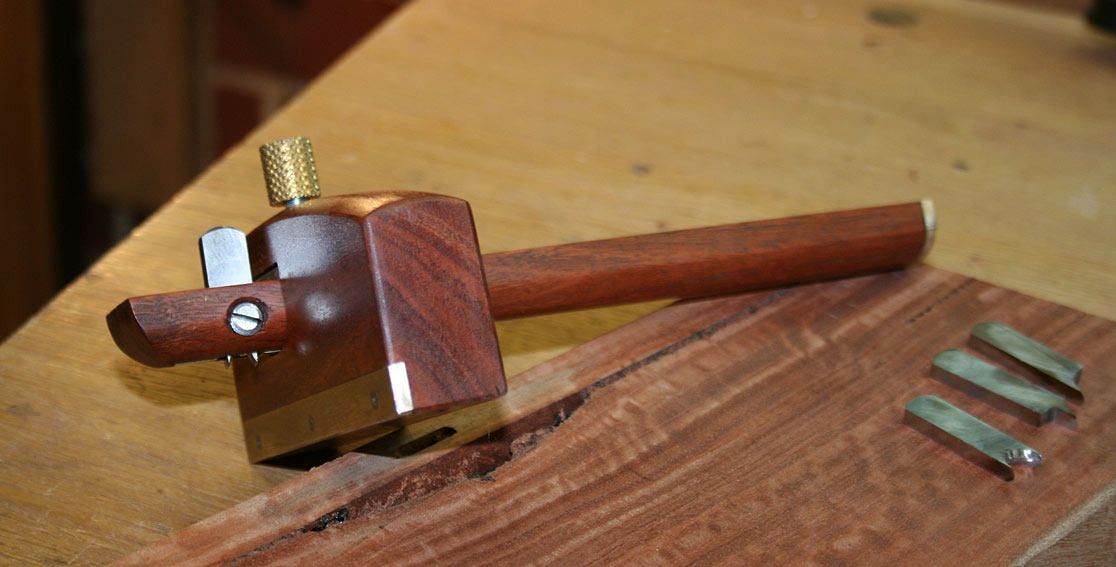
    The first gauge is based on the Kinshiro profile, but has a Western arm. It is made from some scrap Fiddleback Jarrah and brass. The fence is 4 1/2" long x 2" high ...


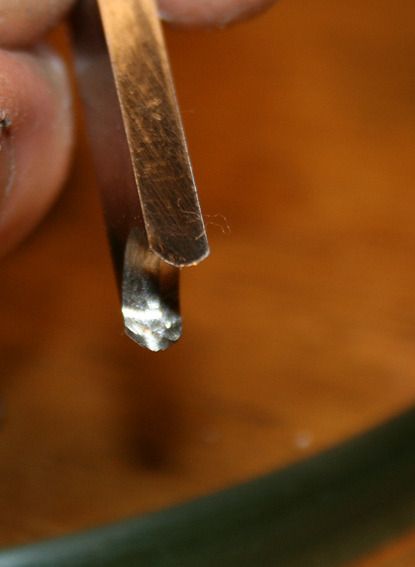
    The novel feature here is that the blade is a fixed width, but is exchangeable for other fixed width blades ..


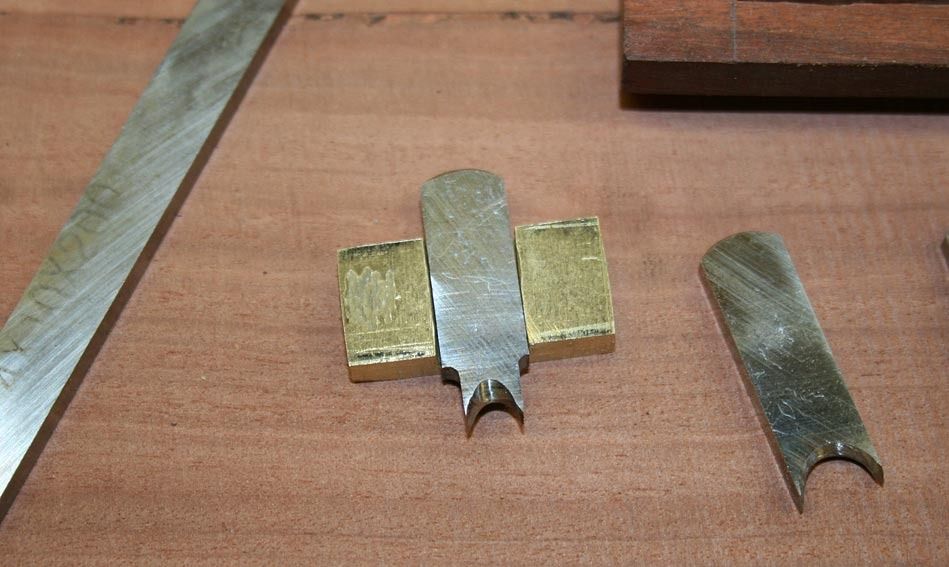
    The knives are made from 4mm thick HSS (they should not need resharpening for a while!). So far I have made double-sided knives for a 1/4" and 3/8" mortice-and-tenons, and two straight knives (I made a second when I realised that the first would score 3/8" away from the fence). The idea for these knives came from dovetail planes.


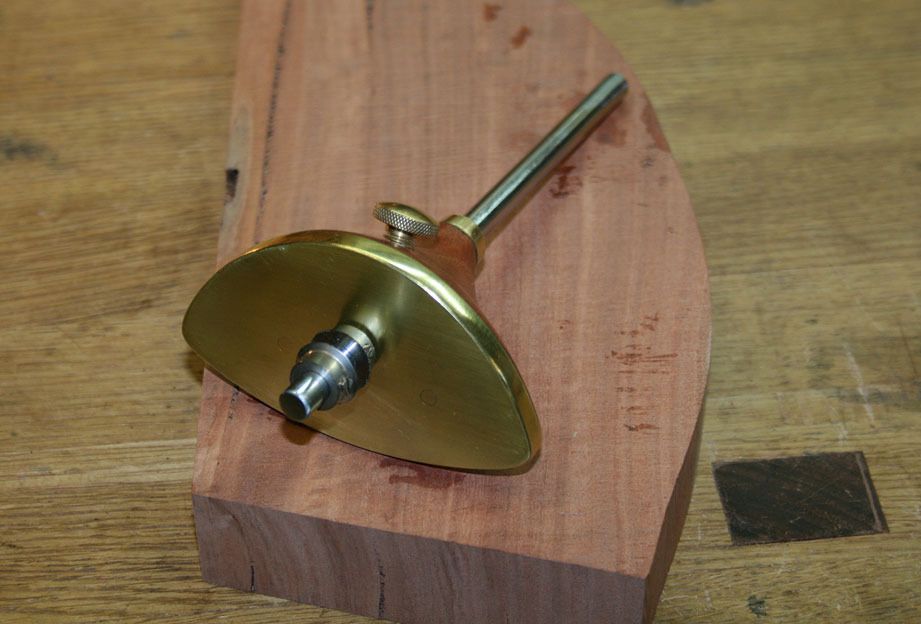
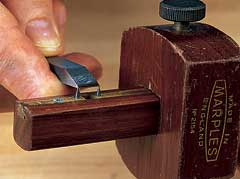
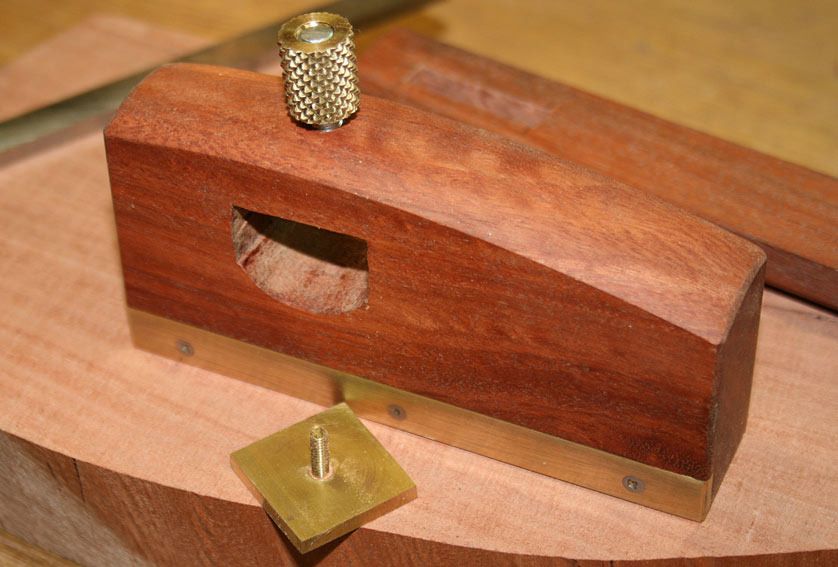
    The knives sit in a brass "cassette". This is fitted permanently in the arm ...


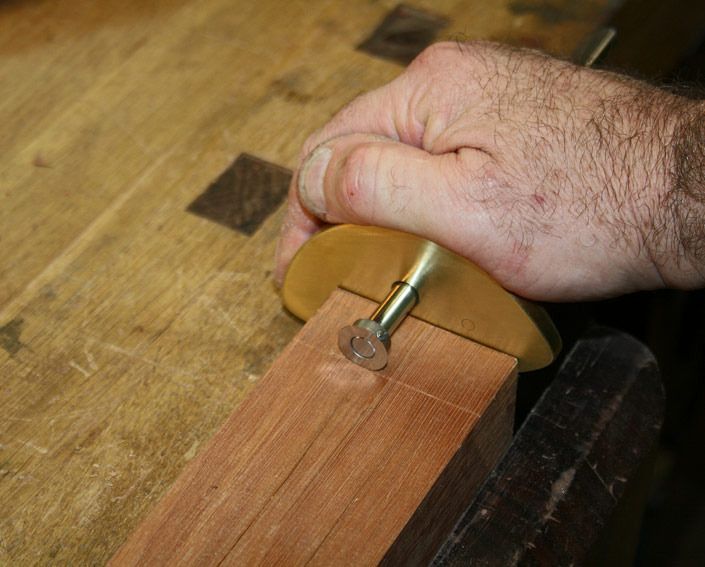
    As seen in the first image, each knife may be dropped in or out and is held with a set screw. As mentioned earlier, I have not seen a similar system on a marking gauge before.


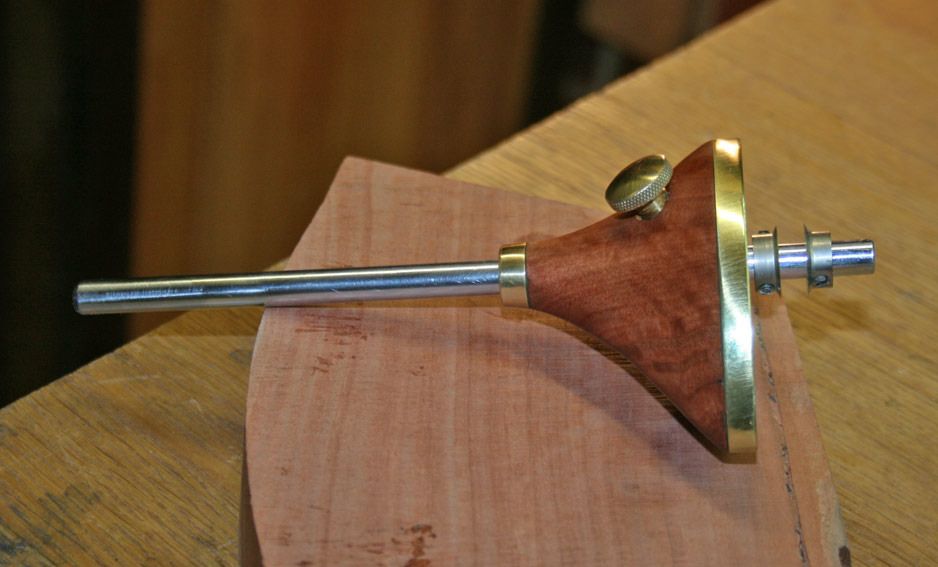
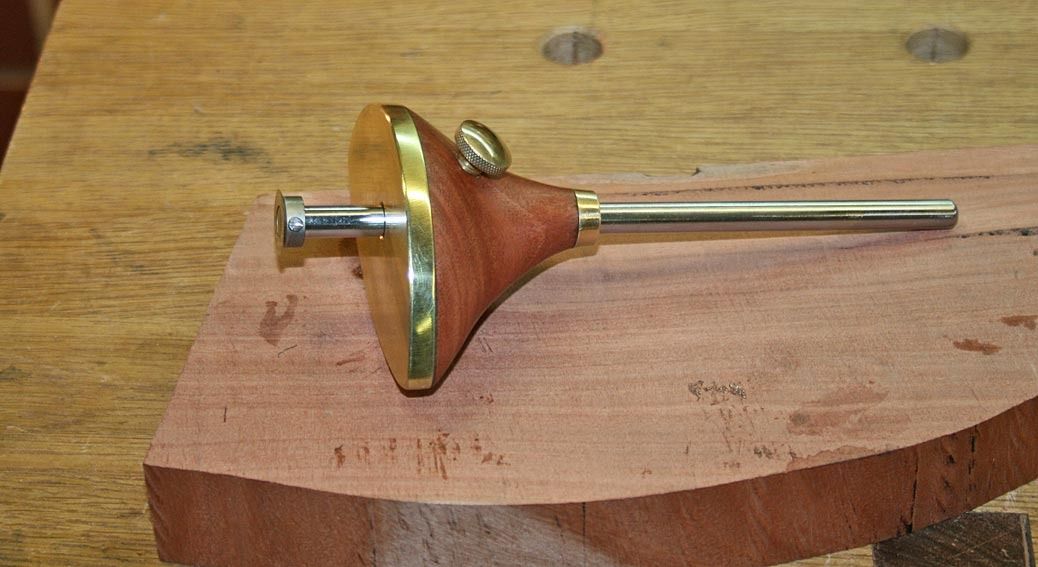
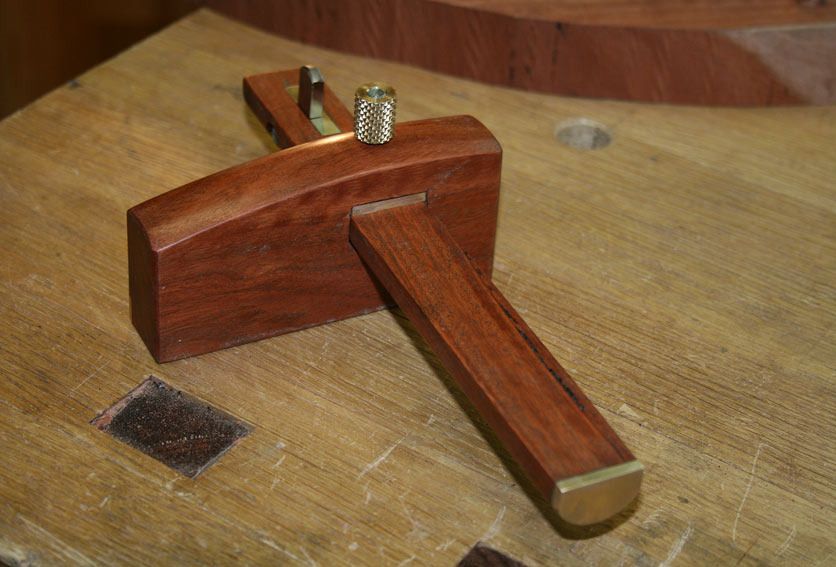
    The second design feature is a rounded lower section to the arm ..


    The reason for this is twofold:


    Firstly, this is a very strong design that locks the arm very securely. Just a little downforce and there is no sideways movement at all.


    Secondly, the rounded lower section offers better visibility that either a square section or a cutaway at the knife.


    In practice, this is very comfortable to use, and the knives cut clean lines both with and across the grain.


    Last edited by Derek Cohen; 02-22-2015 at 12:02 PM.

  2. #2
    Join Date
    Feb 2004
    Location
    Perth, Australia
    Posts
    9,494
    Gauge #2


    The second gauge was less clever and more fun - really an opportunity for a little functional art. It turned out to be a wonderful user.


    The face is 1/4" thick (very hard) brass, the wood is more scrap Fiddleback Jarrah, and the arm was donated by an ex-screwdriver. The knives are the Tite-Mark ones mentioned earlier.


    Here it is set up for a 1/4" mortice chisel and a 3/4" thick stretcher ...


    The adjuster screw is set at an angle (the end is rounded so it grips easily and tightly). This is allows the palm of the hand to rest comfortably over it.


    Remove one wheel and you can use it as a cutting gauge ...


    It is also very comfortable to hold, and the extra mass over the Tite-Mark is very noticeable ..


    Here is a size comparison of the two gauges along with the Tite-Mark and the offset Veritas ...


    Your comments and critique welcomed.


    Regards from Perth


    Derek

  3. #3
    Join Date
    Dec 2011
    Location
    Israel
    Posts
    1,503
    Blog Entries
    1
    Fantastic Derek! ! I am out of words..... Could you explain how you grind and sharpen the cutters for Gauge No.1 ?

    Also, you should open a line of Cohen toolworks stuff, you have a lot of stuff that users would love to use!

    Edit: I do have one comment, I think the bass wear strip on gauge no. 1 is unnecessary, especially with the dense woods used. it would be more elegant and friendly without it IMO, one of those 'less is more' cases. I do like the brass end cap on the arm, ties it all together.
    Last edited by Matthew N. Masail; 02-22-2015 at 1:32 PM.

  4. #4
    The second one looks very slick!

    And the mortise gauge with the fixed cutters is smart too. I have been thinking about making a simple mortise gauge with fixed pins, but mudle along with my Crown one for the time being.

  5. #5
    Join Date
    Sep 2007
    Location
    Longview WA
    Posts
    27,457
    Blog Entries
    1
    Great inspiration for a Monday morning, though it is Sunday here.

    jtk
    "A pessimist sees the difficulty in every opportunity; an optimist sees the opportunity in every difficulty."
    - Sir Winston Churchill (1874-1965)

  6. #6
    I really like the first gauge. I have been trying to come up with something similar, but the idea of turning the cutter 90° (so that the narrowest dimension is parallel, not perpendicular to the fence) never occurred to me. The idea of replaceable cutters is also really great. Way to think outside the box, Derek.
    Last edited by Steve Voigt; 02-22-2015 at 3:37 PM. Reason: confused myself with geometry
    "For me, chairs and chairmaking are a means to an end. My real goal is to spend my days in a quiet, dustless shop doing hand work on an object that is beautiful, useful and fun to make." --Peter Galbert

  7. #7
    Join Date
    Aug 2009
    Location
    'over here' - Ireland
    Posts
    2,532
    I like the way you get stuck into issues Derek and come up with very elegantly made solutions.

    You're probably well aware - but Tools from Japan as well as the budget Ryuma also do a somewhat fancier and more expensive variant of the twin knife gauges with an extra lock that seems to cover the Euro style requirement of locking in a mortice width setting while still allowing the mortice position is adjusted in and out. It's not a throwaway price at around $117, but it looks well made and is a lot cheaper than a Kinshiro. (way out of my league) I don't know a whole lot about marking gauges, but have the impression that it covers similar bases?

    It's not in the same section as their other marking gauges (it's in measuring and marking/precision marking gauges/precision kebiki gauges with some vernier based types and is called a 'two blade kegaki double lock marking gauge': http://www.toolsfromjapan.com/store/...oducts_id=2036 ), and is easily missed...
    Last edited by ian maybury; 02-22-2015 at 4:57 PM.

  8. #8
    Join Date
    Dec 2014
    Location
    Washington, DC
    Posts
    66
    Always a pleasure, Derek, to read your thoughts and solutions for the problems we all face in our woodworking. I bought a Kinshiro a while back based on the M&T treatise on your site, and it is a sweet piece of art and craft indeed.
    David B. Morris

    "Holz ist heilig."

  9. #9
    Join Date
    Feb 2004
    Location
    Perth, Australia
    Posts
    9,494
    Quote Originally Posted by Matthew N. Masail View Post
    Fantastic Derek! ! I am out of words..... Could you explain how you grind and sharpen the cutters for Gauge No.1 ?
    ...
    Hi Matthew

    One of the advantages of using HSS is that you can heat it without fear of ruining the hardness.

    I used a Dremel to shape the centre semicircle, and then a thin, round stone on the drill press to round the inside into a curve. Note that the external edges of the blades are rounded.


    Once the external size is done, leave it alone. Sharpen only from the inside.

    Regards from Perth

    Derek

  10. #10
    Join Date
    Jan 2005
    Location
    Milton, GA
    Posts
    3,213
    Blog Entries
    1
    Two very nice gauges Derek. I like the Kinshiro-esque gauge. I have been thinking about ordering the current TFJ iteration. Now I have a model to make one from, if I can tear myself away from my chair projects. I need a version that will fit into curves and etch beads into chair seats too though.

  11. #11
    Join Date
    Dec 2011
    Location
    Israel
    Posts
    1,503
    Blog Entries
    1
    Quote Originally Posted by Derek Cohen View Post
    Hi Matthew

    One of the advantages of using HSS is that you can heat it without fear of ruining the hardness.

    I used a Dremel to shape the centre semicircle, and then a thin, round stone on the drill press to round the inside into a curve. Note that the external edges of the blades are rounded.


    Once the external size is done, leave it alone. Sharpen only from the inside.

    Regards from Perth

    Derek
    Thanks so much Derek. I have been pondering if I should save up for 120$ Japanese gauge at TFJ, but I might just pick up a piece of HSS from the bay and give this a shot.

    I do remember your comment about the Japanese knife gauge having good visibility of the blade, and I just tried a cheap kebiki and I can see what you meant, it is much easier to set precisely when to can see the blade! small things, but they are the kind of things that make work more fun.

  12. #12
    Join Date
    Apr 2008
    Location
    Provo, UT
    Posts
    390
    These are so cool. The only thing I don't like about the traditional western mortise gauge (and your new Gauge #1) is that you can't see how the gauge lines up against a mark very easily. The cutting blade is buried under the arm of the gauge. I know that you rock the gauge and sort of look under it so you can see how things are lining up, but it seems like a suboptimal solution given the great visibility of you gauge #2, the other wheel type gauges (titemark, LV and so forth) and the Japanese type gauges you show.

    I'm thinking that the gauge that lets you lock the two mortise blades together that Ian points to would suit me better. (Hmm... maybe I ought to get some O1 tool steel and see what happens.) Now that I think of it, you could probably achieve the same effect by pulling both cutters out of the Japanese style gauge, setting the distance, running some blue tape around both blades to "lock" them in place and moving them in/out to adjust for the stretcher setback. Depending on how far you need to move them, it may work. Definitely not as elegant as your designs.

    All that said, I'm always impressed by the workmanship and creativity you show in your designs. I love the way they look, even if I don't know that I'd like using your gauge #1.

    Jeff.

  13. #13
    Join Date
    Apr 2013
    Location
    Wild Wild West USA
    Posts
    1,542
    As always
    Nice work Derek !
    Thanks for the enlightenment.
    Sharpening is Facetating.
    Good enough is good enough
    But
    Better is Better.

  14. #14
    Join Date
    Feb 2004
    Location
    Perth, Australia
    Posts
    9,494
    The only thing I don't like about the traditional western mortise gauge (and your new Gauge #1) is that you can't see how the gauge lines up against a mark very easily. The cutting blade is buried under the arm of the gauge. I know that you rock the gauge and sort of look under it so you can see how things are lining up, but it seems like a suboptimal solution given the great visibility of you gauge #2, the other wheel type gauges (titemark, LV and so forth) and the Japanese type gauges you show.
    Hi Jeff

    This is the reason I have been using the Japanese gauges - visibility it excellent. The wheel gauges offer this as well, but the thin blades do not cut as deeply, especially when doubled up in a mortice gauge. The one I made has a lot more mass and does a better job.

    The rounded arm on the Western type along with the rounded cutters does mean that the gage can be tilted. Still not as visible, but so much better than the standard versions.

    Regards from Perth

    Derek

  15. #15
    Join Date
    Aug 2007
    Location
    Dickinson, Texas
    Posts
    7,655
    Blog Entries
    1
    I resurrected this string because some of you probably missed seeing it. I have a Kinshiro gage that Is my goto gage.

    There is another string running now about gages.
    Last edited by lowell holmes; 01-25-2017 at 3:54 PM.

Posting Permissions

  • You may not post new threads
  • You may not post replies
  • You may not post attachments
  • You may not edit your posts
  •