Page 2 of 4 FirstFirst 1234 LastLast
Results 16 to 30 of 53

Thread: If You Squint

  1. #16
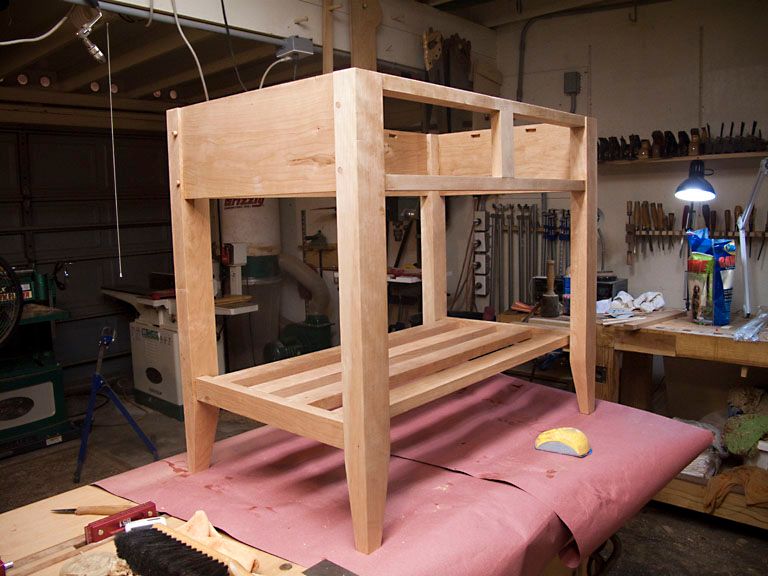
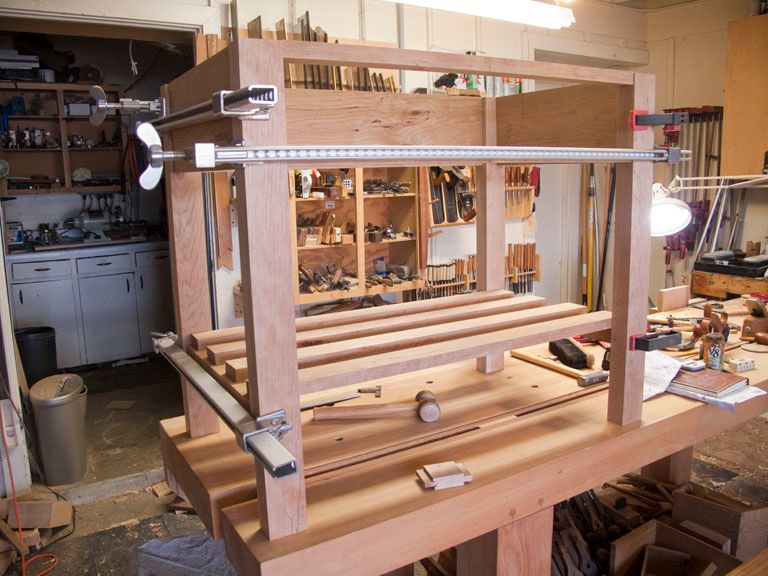
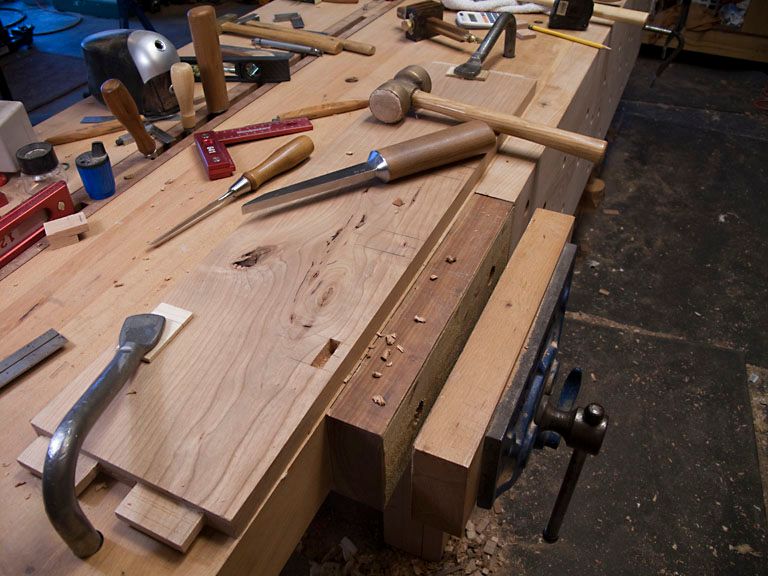
    The bath vanity is slow going for now....not many days off, so I'm only able to get an hour or so to work on it in the early AM most days. All the M/T's are fitted with the exception of the bottom cross slats. I've put it together one last time to mark the slats. After marking the slats I will chop and saw their M/T's and drill the draw bores for the joints that will be draw bored. I still need to make a couple of drawer boxes and the top. Not that much left if I can find a couple of days to rub together.

    The base with the slats laid out for marking:


  2. #17
    Join Date
    Aug 2013
    Location
    Princeton, NJ
    Posts
    7,294
    Blog Entries
    7
    Nice, coming together very well.
    Bumbling forward into the unknown.

  3. #18
    Progress is slow, just an hour or so in the shop today. I did get most of the marking out of the lower shelf slats and one of the tenons finished.

    Using my favorite goto saw. It was my first Bad Axe saw, a 12" Carcase filed 14ppi hybred. It's my "Jack Saw", it does a great job on almost any cut from dovetails to small tenons:


    Here's the finished tenon almost straight off the saw, just needed a little clean up of the nasty bits at the base of the tenon:


  4. #19
    Join Date
    Apr 2009
    Location
    Mandalay Shores, CA
    Posts
    2,690
    Blog Entries
    26
    Nice work! I love my Bad Axe as well.
    Shawn

    "no trees were harmed in the creation of this message, however some electrons were temporarily inconvenienced."

    "I resent having to use my brain to do your thinking"

  5. #20
    Thanks Brian,

    It's a pretty straight forward build but still, as usual, I scribble some basic measurements and start cutting, it other words working without a plan nor a net. For a couple of nano-seconds yesterday I thought about being wild and crazy and using a live edge slab for the top, even went by the wood store to see if they had one that would work. They didn't, and the thought passed so I dodged that bullet.

    I still haven't decided on the slab, I could just make it out of some of the Cherry I have on hand but....boring. I think a South American Walnut slab would look really nice but it is a little soft and can be almost brown-black when finished. I would like the almost black with the Cherry base but MsBubba has already shot that idea down....I've got to learn to keep my mouth shut and just build.

    ken

  6. #21
    Quote Originally Posted by Shawn Pixley View Post
    Nice work! I love my Bad Axe as well.
    Thanks Shawn,

    They, Bad Axe Saws, are a sickness.

    They are just enough custom to feel like they were made just for me but priced just a little higher than a good production saw like a Wenzloff or one from Lie Nielsen. I'm ashamed to admit but Bad Axe has my number, knows my buttons, and has a direct line to my paypal account.

    BTW, at the other end of the price/quality/saw bling curve, I have a full set of Veritas molded spine saws and use them almost as much as the Bad Axe, go figure.

    ken

  7. #22
    The vanity has been coming along, slower than I would like but that is the case with most builds, life has a way of intruding. No photos today because there isn't much to see other than just some markings on project pieces. All that is left are 24 small mortises to chop, shaping the legs and final clean up before assembly. My guess is with just a couple of exceptions all the joints will be draw bored and pegged and the only question left to answer is: Glue, do I use it? My guess is I will add a little hot hyde glue to some of the joints during assembly but it is not a given.

    Have I ever said how much I like to use draw boring and pegging? Almost as much as I love hot hyde glue. The old guys knew a little about making furniture, it's our loss when we forget.

    ken

    P.S. Twenty-four is a lot of mortises but they are all shallow and not too long, so it shouldn't take more than maybe four hours to finish them including the required breaks for doggie butt scratching and ball throwing.

  8. #23
    Chopped the 24 small mortises and have fitted all the pieces together. It all fits and pulls up. I need to shape the legs and clean up the show faces before assembly. I also think I will run some beads on the shelf slats to help prevent chipping and damage. While the beading plane is out I might as well run a bead around the drawers to add a little visual interest.

    Because it will be installed in a bathroom and subject to high humidity I will use metal runners for the drawers. I ordered some very nice bottom mount runners to use thinking they might be a little over kill but would be nice and smooth and not show on the sides. The runners showed up the other day, they ain't a little over kill....I could use 'em to support a diesel truck and then some. It's back to the drawing board and it may be side mounts if I can't find something a little less but better than the single runner el cheapo under mount I looked at before ordering the Taj MaMounts.


    Also the assembly puzzle woke me up tonight, not that it is really complex but there are a couple of places to screw up. As I'm back to work today, that puzzle may keep me awake for several nights. Pegging will help by taking some of the time pressure off but .....


    Chopping the button mortises:


    The bottom shelf:


  9. #24
    Join Date
    Sep 2003
    Location
    South Carolina
    Posts
    1,429
    Quote Originally Posted by ken hatch View Post


    Also the assembly puzzle woke me up tonight, not that it is really complex but there are a couple of places to screw up. As I'm back to work today, that puzzle may keep me awake for several nights.
    Not that I would wish sleepless nights on anyone, but I'm glad I'm not the only one laying awake at night figuring out the order of things, or how to work around a problem!

  10. #25
    The rubber is hitting the road this AM. One module is in the clamps and pegged, the second is waiting for my coffee to boil. Once the two long side modules are glued and pegged the two short sides will fit it all together....Pics to follow.....Maybe

  11. #26
    Join Date
    Dec 2014
    Location
    Lake County, IL
    Posts
    147
    Thanks for taking us through the project. I always like the posts with "action shots." I have to wonder, though, why someone who takes the time and effort to cut his joints by hand would have an electric pencil sharpener!

  12. #27
    Join Date
    Aug 2012
    Location
    Missouri
    Posts
    2,152
    Ken
    Very well done write up about your build. I like the step by step and the inclusions of your thoughts as you go along. Lots of draw boring to do. Will you be doing all of the slats as well. How do you like those Universal bar clamps. I have had some of their frame clamps for years and was thinking about those bar clamps. Looking forward to the finish.
    Jim

  13. #28
    Quote Originally Posted by ryan paulsen View Post
    Thanks for taking us through the project. I always like the posts with "action shots." I have to wonder, though, why someone who takes the time and effort to cut his joints by hand would have an electric pencil sharpener!
    Ryan,

    Thanks but Busted :-). It's kinda like my iron apprentices, handy to have.

    ken

  14. #29
    Quote Originally Posted by James Pallas View Post
    Ken
    Very well done write up about your build. I like the step by step and the inclusions of your thoughts as you go along. Lots of draw boring to do. Will you be doing all of the slats as well. How do you like those Universal bar clamps. I have had some of their frame clamps for years and was thinking about those bar clamps. Looking forward to the finish.
    Jim
    James,

    Thanks. Yep all the joints that had enough meat were draw bored, including the slats.

    The Universal bar clamps are very good, not cheap for bar clamps but worth the extra money. They are light, easy to set, very strong, and can exert a lot of force if needed.

    The vanity glued and pegged, I still have a couple of pegs to trim but for the most part the base is finished. I expect I will make the top out of South American Walnut and take the grief from MsBubba....been there done that before

    Of course when I went to look for drawer box wood today the piece I needed was near the bottom of the middle stack. It was time to quit anyway. Tomorrow is another day with, I hope, a stronger back and more ambition.

    Here is where I stopped today:


  15. #30
    Put the first coat of BLO on this AM. Wood was thirsty, glad I went with BLO instead of the usual Tried & True for the first coat. I'll let it set for a day or two and then come back with T&T.

    Here is the front:


    And the back:


Posting Permissions

  • You may not post new threads
  • You may not post replies
  • You may not post attachments
  • You may not edit your posts
  •