Contributor
Bumbling forward into the unknown.
 Contributor
Ian - "Not 100% sure what you have in mind re. the splines, presume it's to let them into a slot in the top surface of the above cross rails, and to cut mating crosswise slot(s) in the the lower surfaces of the halves of the split top. The BC design instead relies on a single closely fitted blind tenon at the top of each leg (which lets the legs into the top) to locate the tops. Even if you use the dovetails it seems unlikely that you will want to leave these out anyway, so maybe you already have the required sidewards location and don't need the splines? The BC bench uses lag bolts up through the cross rails to hold the top down, which seem simple and solid - but splines if used might get in the way of these. Gluing solid wood splines into the bottom of the top wouldn't be good anyway given the likely seasonal movement caused by the differing grain directions."
The idea of a spline appeals to me because of it's simplicity. I don't see that it needs to be glued but could be to the transverse stretcher. A dovetail at the leg vise and blind tenons for the other three legs would seem to be sufficient while allowing for seasonal expansion into the center gap. If needed, a few lags with wiggle room to hold the tops down.
I'm also toying with the idea of a non-symmetric top: maybe 15" for the front side and 9" or 10" for the backside.
If, indeed, these thoughts are wild and fanciful, 'tis best to find out before the build starts.
Contributor
Ah, I see, said the blind man to his deaf wife as picked up his hammer and saw.
Member
Tee hee. I'd missed the meaning of the 'rising' part in your mention of a dovetail Brian. It'd be the ultimate in 'looks right' joinery in the situation though!
I've a sneaking feeling i'm still not getting what you mean on the splines Curt, but I'm hesitant to extend the discussion in the circumstances.
I made no attempt to set myself up on a pedestal Steve, the opposite in fact - and was doing my level best to respond to a direct question from Curt. By pointing to how the same issues had ben handled on the established designs.
Anybody else had they the inclination was welcome to constructively come in on. As did Derek, Brian and Ken….
 Member
The main thing was using a face vise as an end vise, rather than a tail or wagon vise, and as a consequence placing the dog holes about 4.5" from the edge. I distinctly remember reading Chris Schwarz's advice to place the dog holes closer, and ignoring it (mostly for economic reasons; I already had the vise and couldn't afford another at the time). It's not the end of the world, but I've regretted that decision many times.Originally Posted by Curt Putnam

On the other hand, I remember shelving my preconceptions about leg vises and building a traditional one with parallel guide, again mostly for economic reasons. I had so many misgivings about using such a seemingly primitive device. But that thing has so vastly outperformed any other vise I've ever used, it's not even funny. I'd like to think that I learned something from those two experiences.
Not that you asked me for any advice, but if I were you I'd be very wary of things like splines and lap joints that aren't found in the literature. I recommend you get Chris Schwarz's first book on benches, or his article in the Sept. 2005 PW, and just do what he did.
"For me, chairs and chairmaking are a means to an end. My real goal is to spend my days in a quiet, dustless shop doing hand work on an object that is beautiful, useful and fun to make." --Peter Galbert
Member
Brian, is that a Japanese joint, or is it of your own design?
Either way, it looks pretty cool.
"For me, chairs and chairmaking are a means to an end. My real goal is to spend my days in a quiet, dustless shop doing hand work on an object that is beautiful, useful and fun to make." --Peter Galbert
Contributor
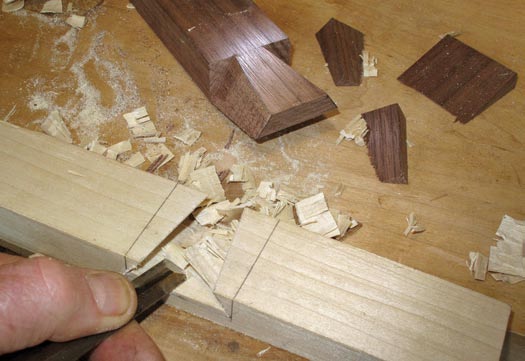
That's not a picture of my work, just one I found online. That being said I've made the joint, I have a model I constructed floating about the shop.
It's a Japanese joint. I've been dying to put it to work, but have yet to come to a project where it is needed.
Bumbling forward into the unknown.
 Contributor
It looks like the impossible staircase, until you see the slope on the back of the tenon. Thanks for posting that. I have a use for it after seeing it.
Contributor
Interesting: I am planning on using a face vise (a 7" Wilton) in the tail position. 7" on a 12" section means 2.5" unsupported on each side for the wood chop. I'm expecting to use a rack preventer and get enough pressure to hold stuff at the front edge. So far, all I've ever done with a tail vise is to keep stuff from wiggling around due to lack of skill on my part.
I hear your advise. Same as what CS put in his book. Already got talked out of a lap joint. However, I see the spline as a loose tenon. Making dados is a lot easier than chopping blind mortises.
 Contributor
They certainly are fanciful. I wonder if that's all they are though. What do you feel are the advantages?
Contributor
Over the dovetails original to the bench? I doubt that there are any. The interesting part of the rising dovetail is that from the outside it appears to be impossible.
The downside is that it the way it must be installed, which is that it cant go straight on like a tenon, it must 'rise'.
Bumbling forward into the unknown.
 [OP]
Member
[OP]
Member
This really got off topic, but that's fine. I'm glad everyone's talking.
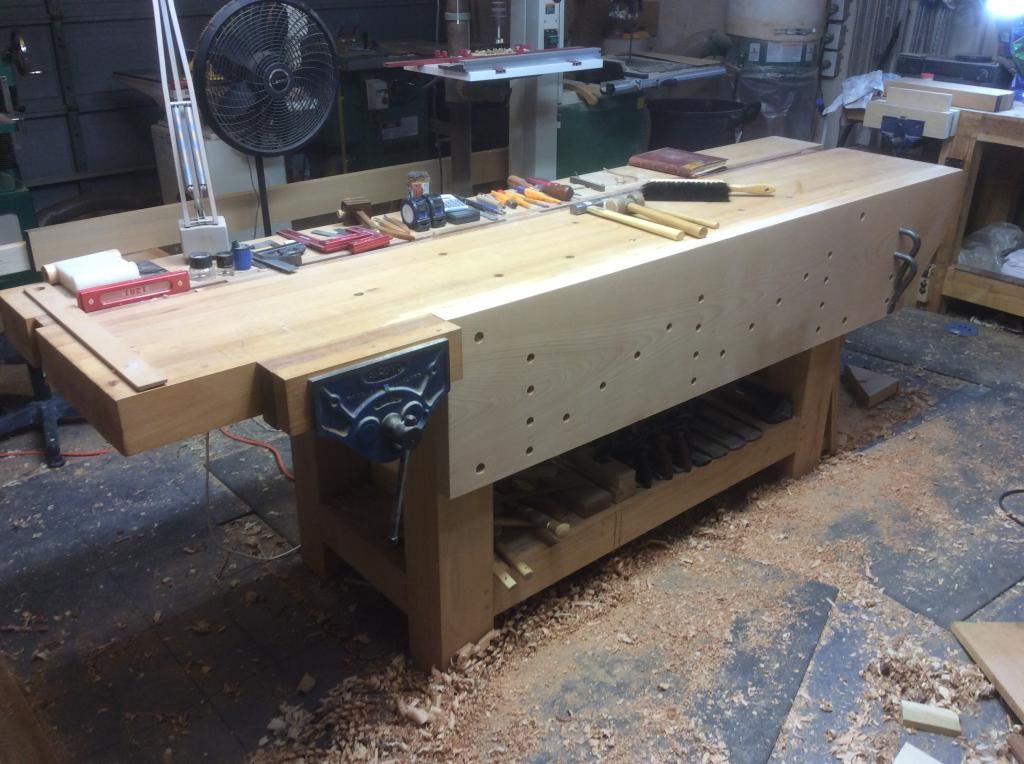
Fitting the legs to the top before completing the base went well. My biggest concern was maintaining alignment while marking out the mortise locations. The legs move around a bit if you aren't careful. The legs are fit, now it's on to the stretchers.
http://bloodsweatsawdust.com/2015/04...tises-by-hand/
Blood, sweat, and sawdust
 Member
Curt,
My split top bench is asymmetrical, one of the best changes over the previous bench which was also a split top but symmetrical. The original slab sizes were 190mm for the narrow side and 370mm for the wide side, that's a little over 7" and 14" for those still stuck in the foot, yard, and stone world. In the photo I've added a 50mm wide apron to the bench making the wide side about 420 mm or about 16" wide. I have no regrets and in fact the bench I'm helping a friend with is also asymmetrical.
ken
Member
I built the base and marked for the mortises on the underside of the top by turning the top upside down on my old bench then inverting the base on top of that. Way too difficult for one person to do easily. By the time I got the base inverted on the top I realized I was not going to move it off and on to test fit the mortises. I ended up drilling and squaring the mortises by keeping the base on the top and just sliding it enough to work the mortise. The test fit required spreader clamps beside each leg to move the base again. Then when everything was good and then drawbored I had to get someone to help flip it over. If you don't have a helper readily available for frequent moving of heavy parts the new trick might be the way to go.
[OP]
Member
Mike, that was one of my biggest concerns. Sliding the entire base several times, while test fitting the tenons would be a real pain. I'm glad I fitted the tenons before completing the base. All four legs are fitted and I am working on the stretchers.
Blood, sweat, and sawdust
 Posting Permissions

 Reply With Quote