Thanks on the "blue."
I have a small block and tackle setup for hanging game, that may work for the motor. I didn't expect it would be that heavy but I can see how that would help.


 [OP]
Member
[OP]
Member
Thanks on the "blue."
I have a small block and tackle setup for hanging game, that may work for the motor. I didn't expect it would be that heavy but I can see how that would help.

 Contributor
"Blue" Loc-tite is what I used. The screws remain removeable.
I used my Little Giant ladder and a Come-along with some straps to lift and put the table assembly on by myself. Be careful! If it doesn't "feel " right...it's not!
Ken
So much to learn, so little time.....
Member
hi:
I have the craftex (Cdn) version of it - you'll find assembly is easy and the manual generally correct,. However:
1 - I used acetone to get the grease off. If you do that, make sure you do it outside and allow lots of drying time before trying to carry the thing inside.
2 - When I finished, I had one machine screw left over and spent hours trying to figure out where it goes. Still have no idea... but the machine works well.
[OP]
Member
Oh well, I guess one extra is better the one short?Originally Posted by rudy de haas

Member
I simply picked one end of the bed up, put one edge of the bottom of the bed on the top of the base, and then picked the other end up and squared it up. The bed itself only weighs about 300 pounds and it's over 6 feet long, so you get a lot of leverage to work with and it's not too tough to manhandle.
I ended up with several extra screws. Grizzly usually ships several extras with their equipment, as well as all of the hex and open-ended wrenches you need to assemble the machine.
I degrease my tools with paint thinner. It's cheap, I always have it on hand, it doesn't hurt paint, and it works pretty darned well. There are better/faster organic solvents out there such as Goof-Off and brake parts cleaner but they are much more expensive and stink to high heaven. Most of the brake parts cleaner I have used will take paint off metal very easily as well.
Last edited by Phillip Gregory; 04-05-2015 at 9:46 PM.
[OP]
Member
Thanks for all the advice, I'm sure it well help. I will post back When I finish, maybe I will come up with a tip or two for the next one to assemble.
[OP]
Member
The snow is finally gone and the ground was dry enough to drive the tractor on. I got both the crates the jointer came in into the basement shop. It wasn't as bad as I thoight. I started to uncrate and read the directions. Hopefully it won't be too bad. Going to give it a start tomorrow, the blue loctite is ready to go.
[OP]
Member
Well last weekend I got my old jointer out and help to lift the bed onto the stand. Went at it today because now I really need it. Went together easy and the fit and finish was good (better then I expected). The directions were good and it was problem free until the beginning of the "important part".
I'm comfortable the pulleys are aligned correctly when I put the belt on. I tensioned it as instructed but it starts to roll off when I turn it by hand. It rolls off towards the back starting on the bottom pulley. I rechecked everything, motor level, and pulleys still aligned. The belt arrived badly twisted with a crease. I suspect, and hope, that this is the problem because I am at a loss. Grizzly is sending me out a new one but in the meantime I have it stretched out and flat using a clamp and sitting in the sun hoping I can get rid of the twist and crease.
Second, when I installed the fence it sits lopsided. When facing the jointer the right side sits on the bed and the left side sits over a 1/4" high. Any idea how to correct that? I called Grizzly and they said they need up to 48 hrs to research a solution. I don't see anywhere in the manual where it addresses this adjustment. I'm guessing you can shim up the track on the right side but I'm not sure if I shim it that much will there be enough track left to grab onto when you lock it down?
Anyone have any ideas on a solution? I need to get this up and running, I don't think my handplane skills are good enough.....
[OP]
Member
Ok, for anyone reading this in the future I was able to level out the fence. The two bolts that mount the whole fence assembly to the jointer bed were the culprit. I loosened those bolts and put one side on the extreme highestest and one on the lowest side of the hole. There is a little play when mounting. It's heavy so somebody holding the one side up while you tighten would be helpful.
No luck straightening the belt. The clamps don't seem to be working. I really don't want to wait 3-5 days for another. If anyone has a quick fix for the belt let me know. Otherwise a trip to the automotive store for a higher quality belt may be my best bet.
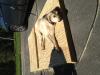
There is a foot on the left that rides the outfeed table. I put a piece of UHMW tape on this as I didn't want the marks left by the metal on metal as designed. This is normal unless they have changed the design.
G0490X fence foot 008.jpg . G0490X fence foot 007.jpg . G0490X fence foot 002.jpg
"A hen is only an egg's way of making another egg".
Samuel Butler
[OP]
Member
Thanks. Tape sounds like a good idea.
Member
I have the same jointer. When I shut it down it used to have a bit of a banging sound.
I found that that this was caused by my not having the little feet on the end where the foot pedal is, which is used to elevate that end of the jointer for movement,set low enough. So when the foot Pedal was released, the jointer still rested on the wheel at that end and the two wheels on the back end.
Once I set set the foot pads so that they rested on the floor when the foot pedal was released, the jointer became much quieter when turned off.
I also made made a simple gage fo checking drive pully position, which cannot be done easily witha straight edge due to obstructions. I posted a picture at the beginning of the tips and tricks thread. (Hope I got the thread name right ))
Bill
Too much to do...Not enough time...life is too short!
 Member
I hope you get your new belt soon. It really is a great jointer. Enjoy.
Red
RED
 Posting Permissions

 Reply With Quote