Page 7 of 9 FirstFirst ... 3456789 LastLast
Results 91 to 105 of 123

Thread: Lingerie Chest started and your strategy wanted

  1. #91
    Join Date
    Feb 2004
    Location
    Perth, Australia
    Posts
    9,494

    A stage completed

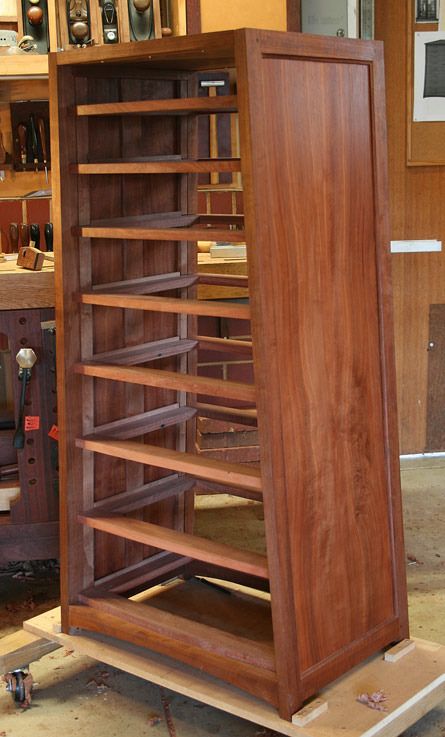
    Well, it has been a lot of work to complete the drawer runners. Everything is now done preparatory to building the drawers. I've really been looking forward to this stage, since it will be another challenge.


    The drawer runners, themselves, required a great deal of finicky work. Getting them in square and coplanar is straight forward in a straight construction, but curves and compound angles change all that.


    We left off last time with the basic frames in ...


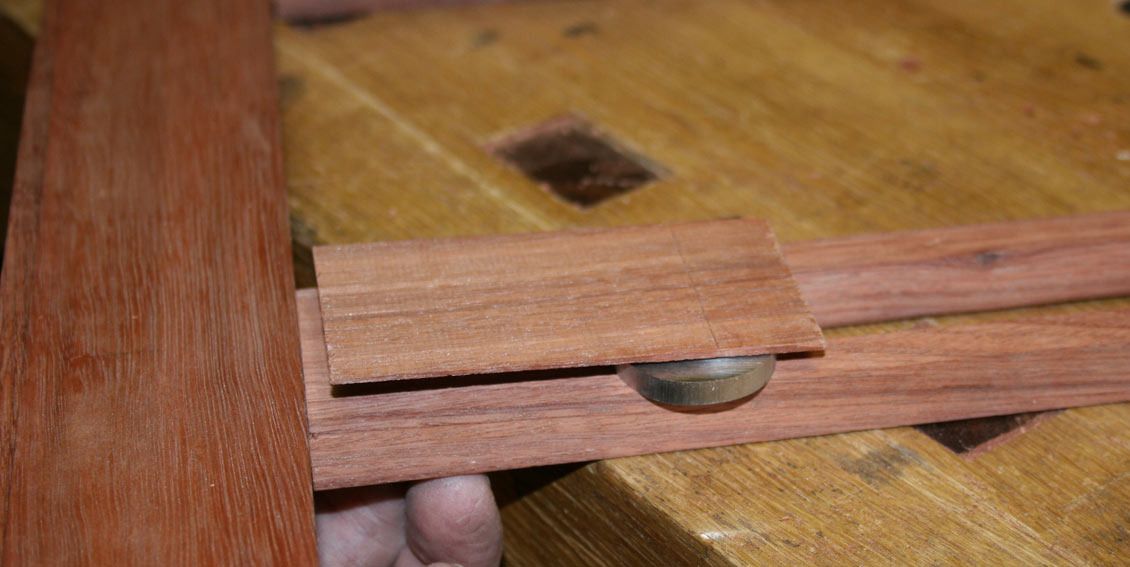
    To the front of each drawer blade was added a bow.


    I was asked early on why I did not just shape this directly on the blade. The reason I chose to do it this way was just that I felt I had more control over the result. Every drawer is a different width, and needs to project in a coplanar line from top to bottom. I drew up a template to shape a consistent curve ...


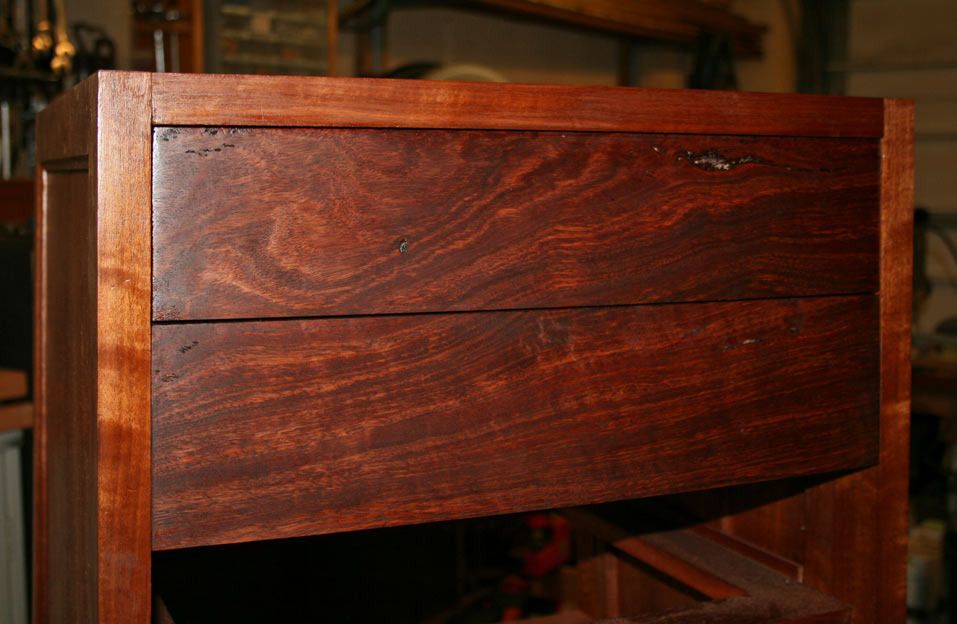
    That is the Jarrah for the drawer fronts at the rear.


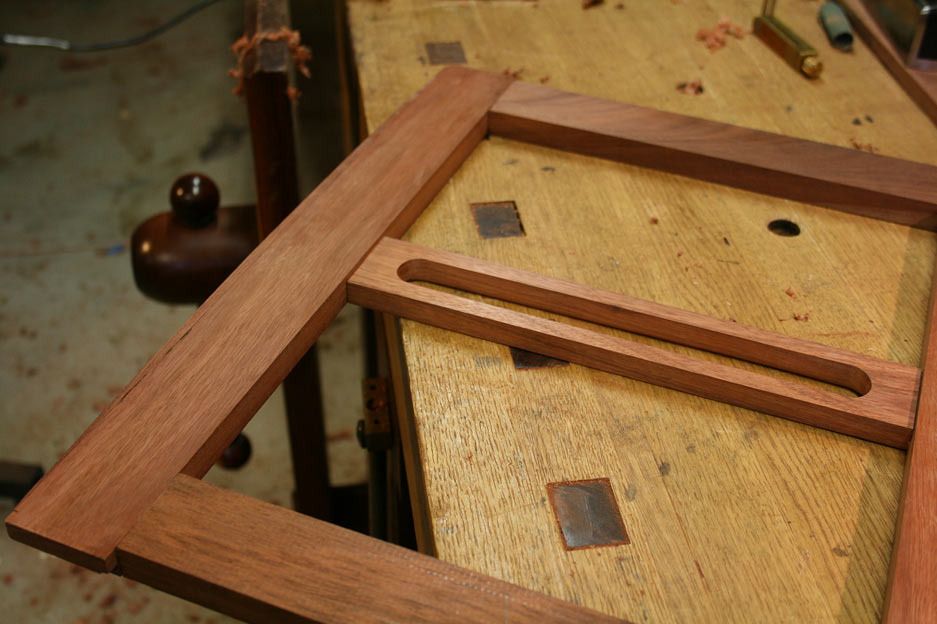
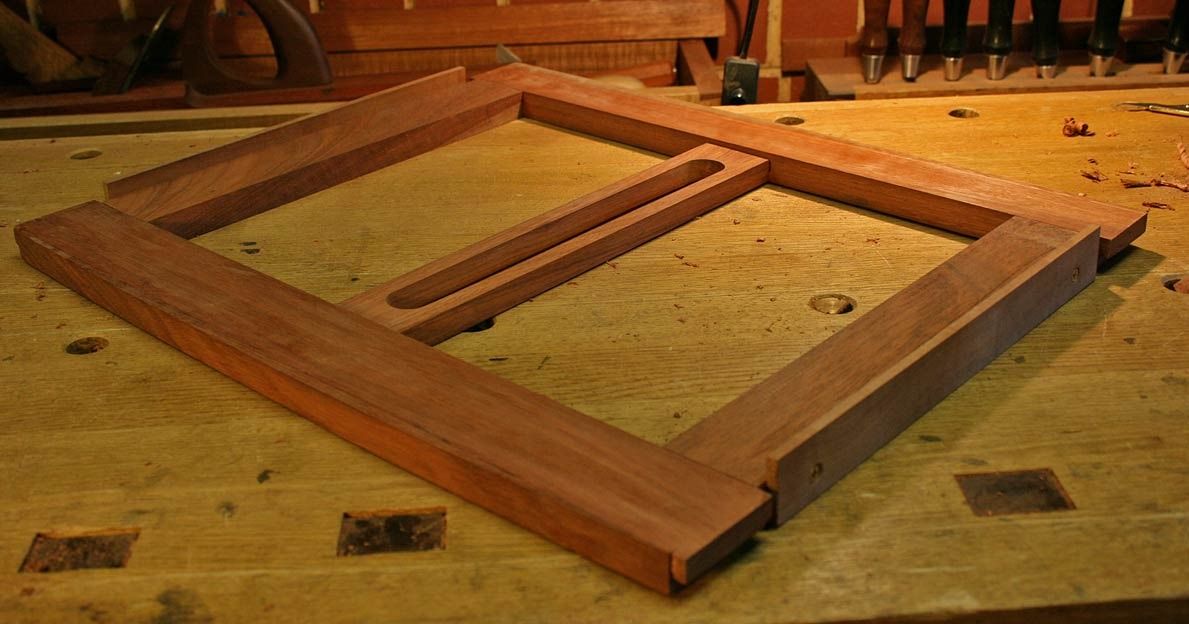
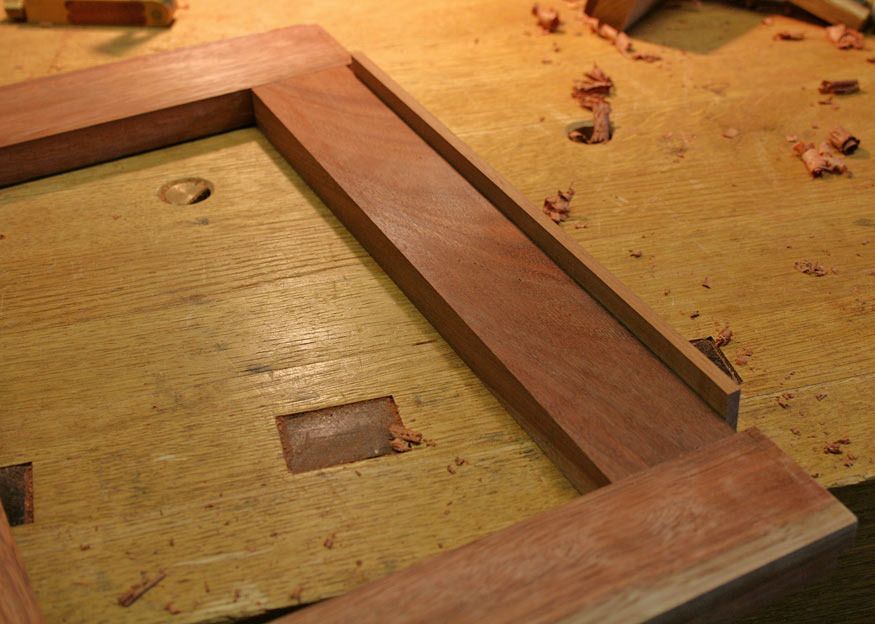
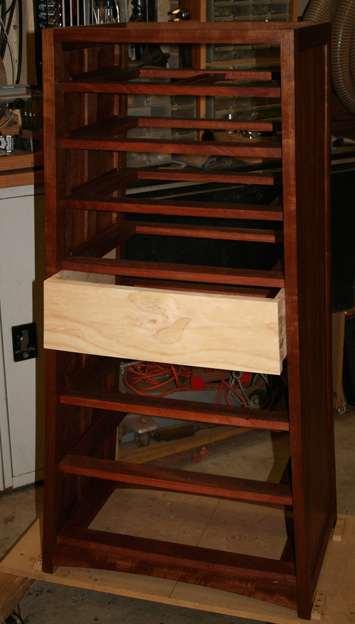
    The upper most drawer will have a secret lock (since this drawer will be a jewellery box). I decided to use the Shaker method. My variation consists of cutting a slot in a centre mullion ..


    ... which is lowered below the rails ...


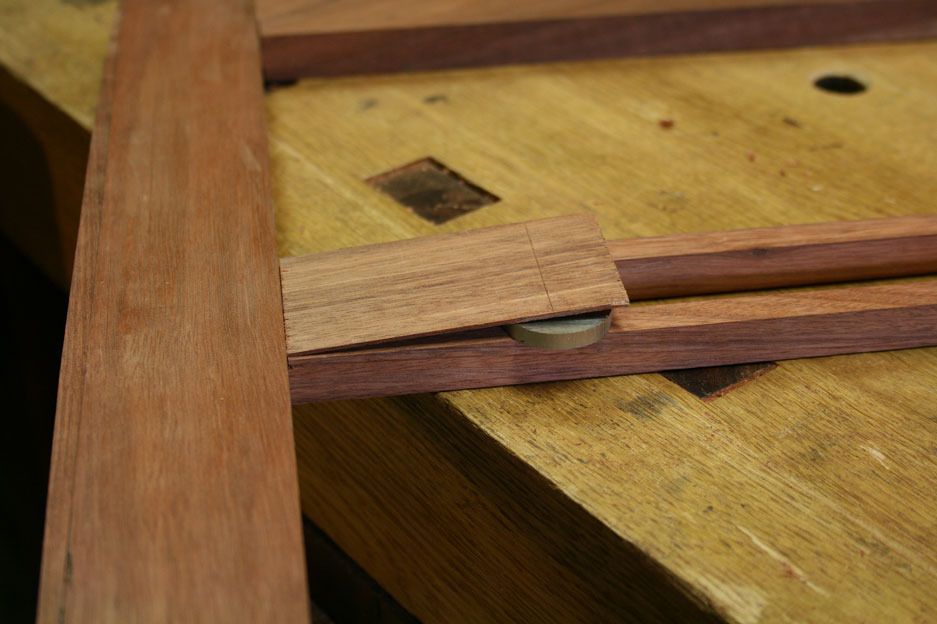
    There will be a spring (probably in mild steel) beneath the drawer that will drop down and lock into the rear of the front drawer blade ...


    A finger (through the slot - which will hide the mechanism from below) will lift the spring to permit the drawer to slide forward ..


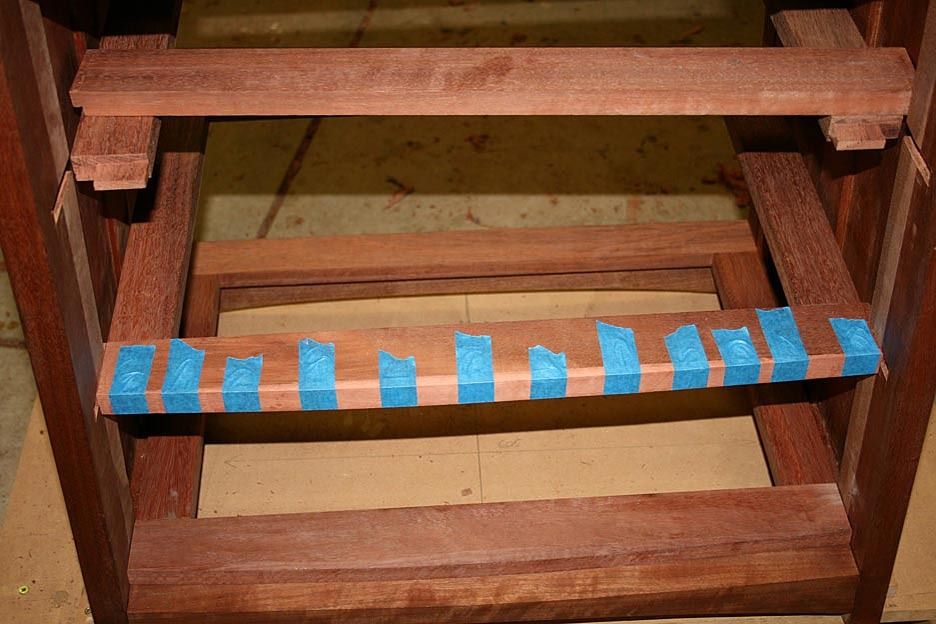
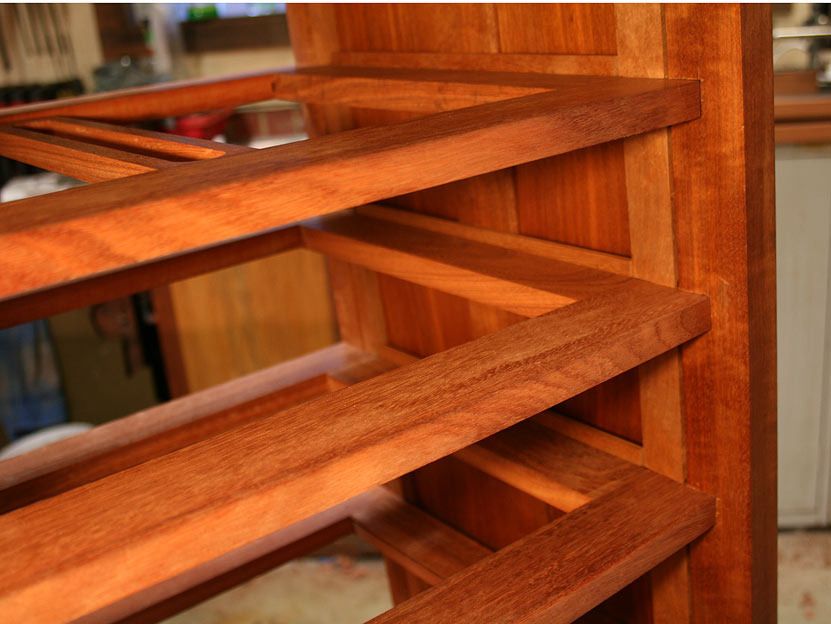
    Since the casework is a framed panel, guides are needed for the drawers ...


    Here are they installed. Perhaps you can begin to see the how the slight bow will form ..


    Now I need to figure out the drawers construction - coping it into the sides. Any thoughts?


    Regards from Perth


    Derek

  2. #92
    Join Date
    May 2004
    Location
    N Illinois
    Posts
    4,602
    Beautiful work.....Nicely done.
    Jerry

  3. #93
    Join Date
    Aug 2012
    Location
    Missouri
    Posts
    2,152
    Looking great Derek, I enjoy very much following the build. On request for suggestions I would set the drawer face up and scribe from the back. I think a low angle spoke shave would work the end grain okay. I think I would want a flat inside of the drawer front for reference so I think a reshape to wooden rabate plane or a croze plane could be used to work a rebate to fit the drawer blades. I would put the sides in square and then work the curve into them. Tommy MacDonald fashioned a wooden Jack plane with a side to side curve to work the full side of his bombe secretary, I thought that was a good idea. If you get the curve close you could just plane away to get the fit to the point where a scraper will finish up. I like the drawer lock. I'm waiting to see how you work out the push releases for the drawers. The challenges are the best part don't you think?
    Jim

  4. #94
    Join Date
    Feb 2004
    Location
    Perth, Australia
    Posts
    9,494

    Designing the Drawers

    This is the start of the second stage in this build. Now that the carcase and drawer blades/runners are completed, it is time to start on the drawers.


    The drawers are complex as they call for compound angles and dovetails. The design may be improved, and I welcome comments about this and the methodology.


    This chapter provides a pictorial on the design and construction I have come up with so far. Pine is used in this test case (where Jarrah fronts and Tasmanian Oak sides will be used in the final build). However, the construction is for real.


    The link is here (too many photos to post on the forum): http://www.inthewoodshop.com/Furnitu...heDrawers.html


    Regards from Perth


    Derek

  5. #95
    Join Date
    Aug 2010
    Location
    USA
    Posts
    5,582
    I think this work is the embodiment of master craftsmanship. Just outstanding!

  6. #96
    Join Date
    Feb 2004
    Location
    Perth, Australia
    Posts
    9,494
    Thanks Pat.

    I do wish that it would be a springboard for discussion. Come on you lazy sods

    Regards from Perth

    Derek

  7. #97
    You could make all the drawers from pine and veneer the fronts.

  8. #98
    Join Date
    Feb 2004
    Location
    Perth, Australia
    Posts
    9,494
    That should look spectacular, Kees!

    Regards from Perth

    Derek

  9. #99
    Well, you wanted a discussion!

    And it isn't such a stupid idea. Many of the great examples from the 18th century were made with veneer. Another idea is of course to only use the show wood for the front panel and pine for the rest.

  10. #100
    Join Date
    Feb 2004
    Location
    Perth, Australia
    Posts
    9,494
    Hi Kees

    I did toy with the idea of veneering, and may need to if the figure on the boards I have looks wrong.

    The wood for the drawer sides is quarter sawn Tasmanian Oak, which is a eucalyptus and not an oak The early English settlers were fond of giving names to Australian woods that resembled those at home. The great thing about Tassie Oak (as it is referred to here) is that it is freely available quarter sawn and it pretty stable. For drawer sides it is excellent. It is a light wood and will be a good contrast to the dark Jarrah I shall use for the drawer fronts.

    Regards from Perth

    Derek

  11. #101
    Join Date
    Aug 2010
    Location
    USA
    Posts
    5,582
    Quote Originally Posted by Derek Cohen View Post
    Thanks Pat.

    I do wish that it would be a springboard for discussion. Come on you lazy sods

    Regards from Perth

    Derek
    Well then, I suppose. I did see that your shooting board wasn't ramped and that you did use a skew plane. Well done!

  12. #102
    Join Date
    Feb 2004
    Location
    Perth, Australia
    Posts
    9,494
    Gee, thanks for that, Pat

    Regards from Perth

    Derek

  13. #103
    What a master class. Thanks for posting.

  14. #104
    Good luck Derek. I think the tasmanian oak will look wonderfull.

  15. #105
    Join Date
    Feb 2004
    Location
    Perth, Australia
    Posts
    9,494
    Here is the next chapter in my lingerie chest build: the drawers. Just two of eight so far. I cannot believe how long each one is taking! Hopefully I shall speed up as I now understand what is needed.


    I did promise to post once I had a few done. I shall not get back to the build for about a month as we are off to the UK for a few weeks.


    For those who just want the details, the link is: http://www.inthewoodshop.com/Furnitu...heDrawers.html


    These are compound angled drawers, with a bow front and angled sides. There are flush beaded slips, amongst the details.


    For those who just want a progress picture, this is for you ...


    (The carcase is Makore, a West African hardwood, while the drawers fronts are Jarrah)


    Regards from Perth


    Derek

Posting Permissions

  • You may not post new threads
  • You may not post replies
  • You may not post attachments
  • You may not edit your posts
  •