For those interested in a reading all four chapters of this build - more detail than here - it is now up on my website.
Go to: http://www.inthewoodshop.com/Furniture/index.html
... and scan down to "Lingerie Chest".
Regards from Perth
Derek


 [OP]
Contributor
[OP]
Contributor
For those interested in a reading all four chapters of this build - more detail than here - it is now up on my website.
Go to: http://www.inthewoodshop.com/Furniture/index.html
... and scan down to "Lingerie Chest".
Regards from Perth
Derek
[OP]
Contributor
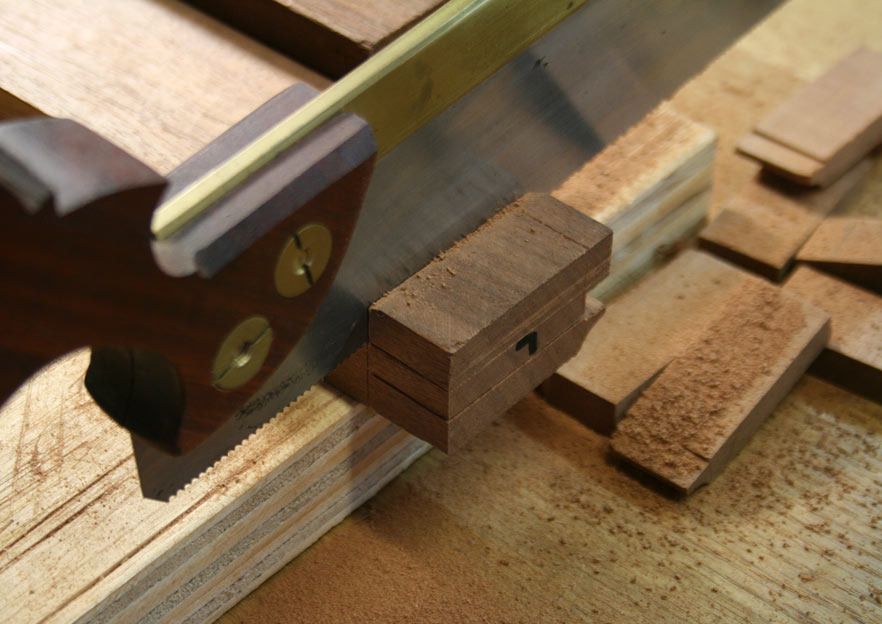
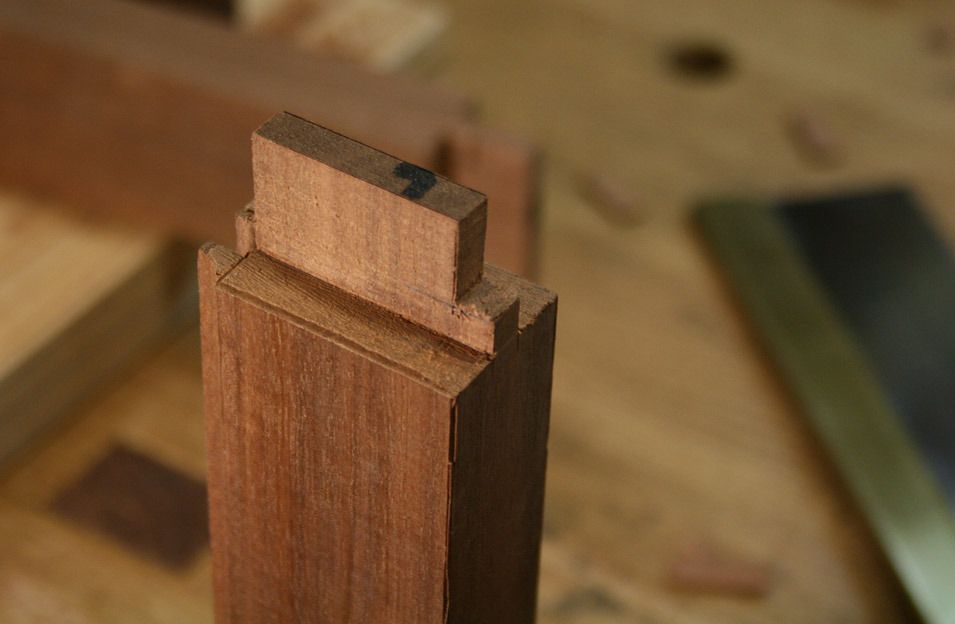
Most of us have cut a good many mortice and tenon joints over the years. It occurred to me today to ask a question about something we likely take for granted: Do you saw the cheek first, or the shoulder, and how far to the intersection do you go?
For myself I saw the cheeks (as close to the markings as possible) ...
.. and stop a smidgeon short of the shoulder line.
Having created a knife fence on the shoulder line, I saw the shoulder close to but a smidgeon short of the cheek line ...
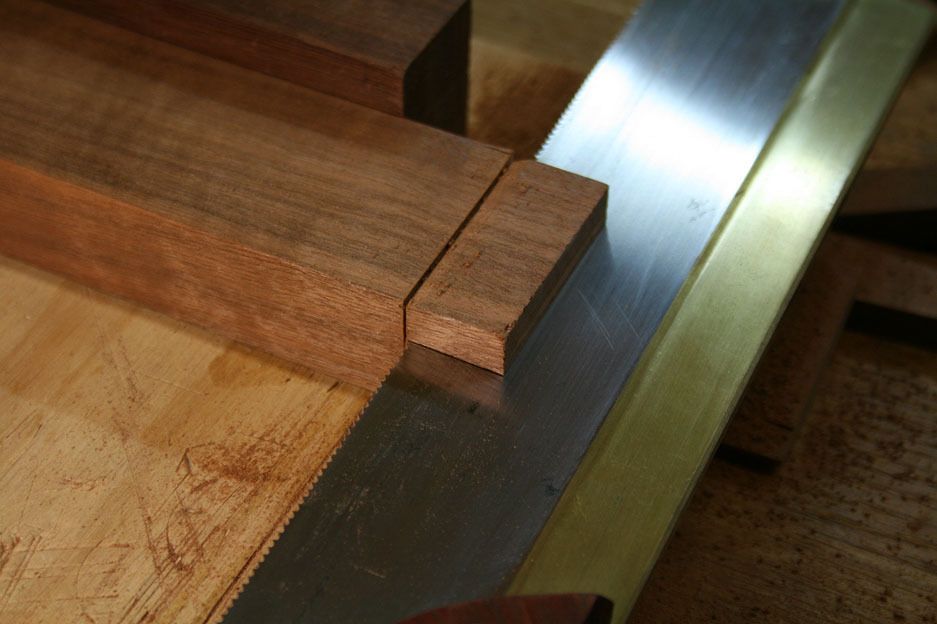
Then it is a case of back-and-forth to sever the bit between ..
It will eventually pop off nice and clean ..
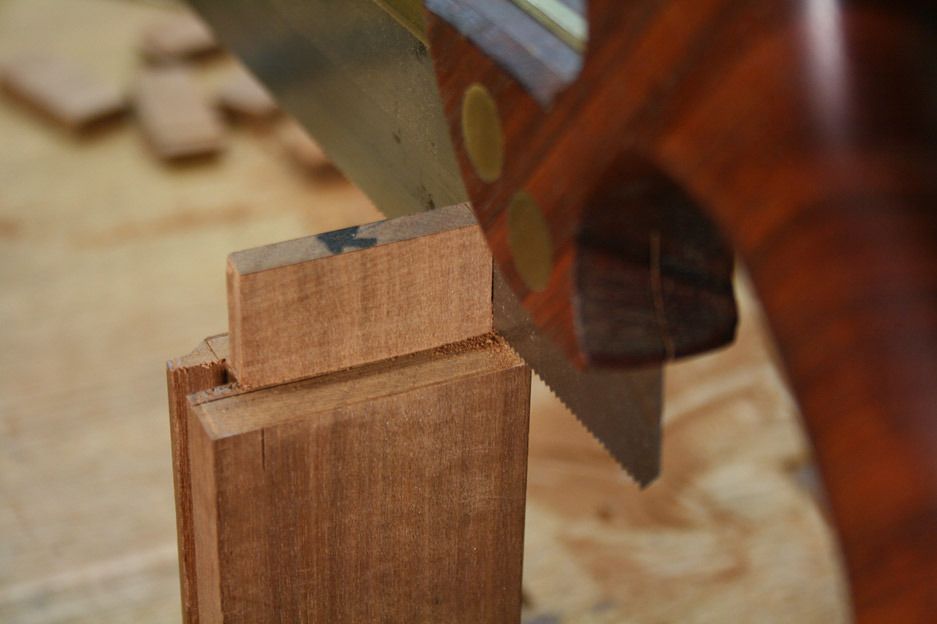
The vanity cheek may now be sawn. This is 1/8" (3mm) ...
.. or the haunch created. The haunches are for the upper side of the panels, with the blind M&T at the lower end (as they do not go all the way to the bottom) ..
I am now ready to measure and fit to mortices, and then complete the mitres for the coves, and fine tune the shoulders ...
Ready for the weekend ...
Regards from Perth
Derek
 Contributor
Coming along nicely Derek!
I know this is far ahead, but I am curious, are you going to line the drawers?
Bumbling forward into the unknown.
[OP]
Contributor
Hi Brian
It's a fair question.
I am hoping to acquire Campher Laurel for the drawer bottoms. The sides with be Tasmanian Oak, which is a light wood, but I can get quarter sawn stock. The top two drawers, however, which will be used for jewellery or similar, are planned to be divided and lined with dark blue leather.
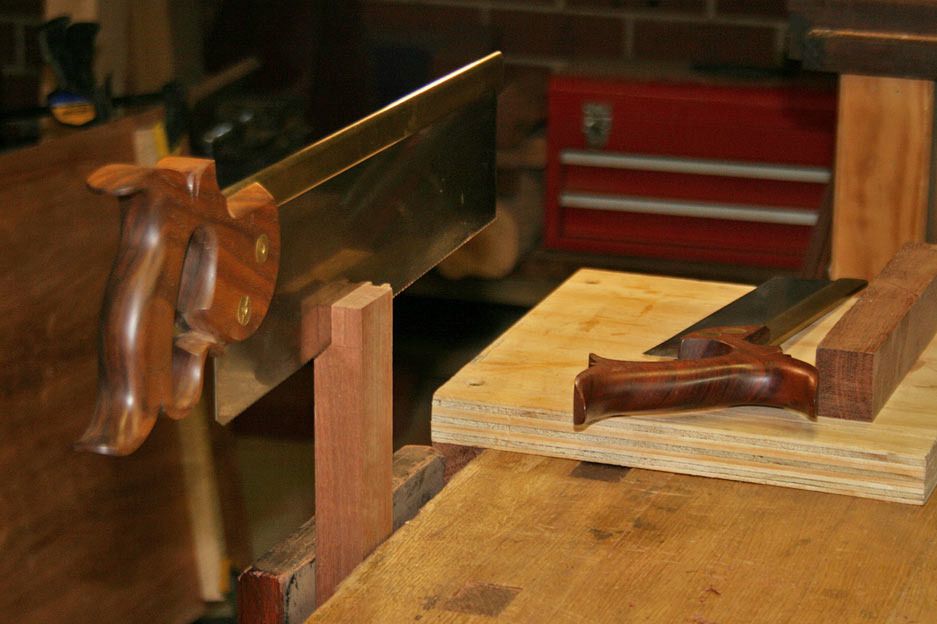
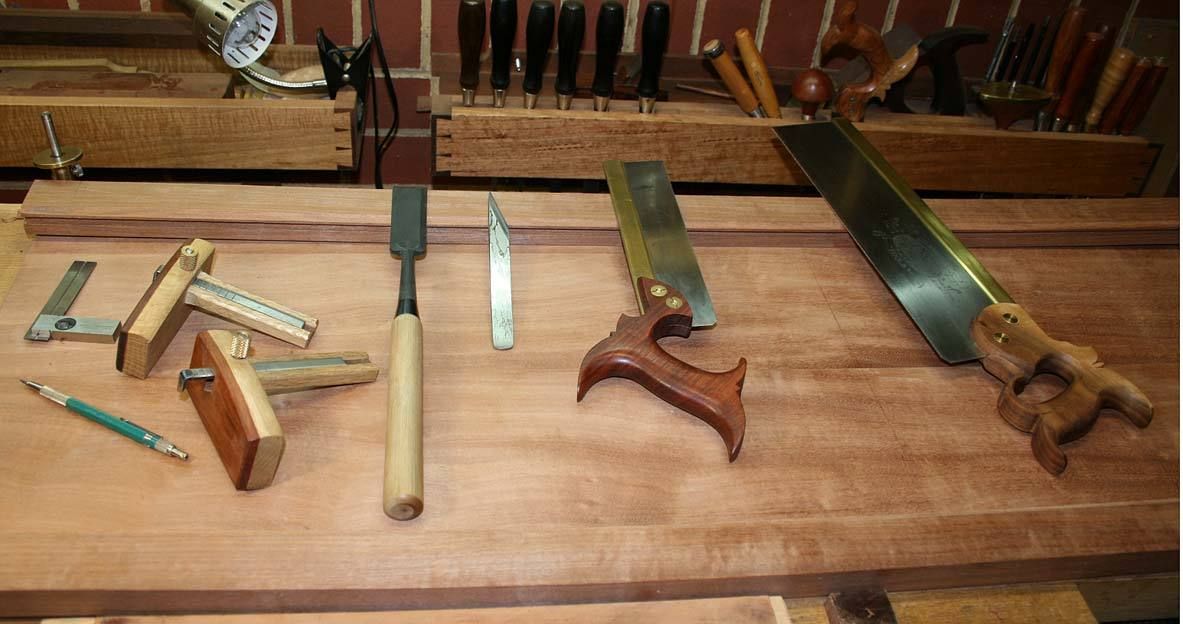
Here's a photo I took for you, of the tools used today ...
The small crosscut saw was one I made.
Regards from Perth
Derek
Contributor
Hah, thank you! Did you make those gauges as well? They look pretty sweet and I'm finding it's very hard to have too many marking gauges.
I think we're on the same page, as I'm doing the same thing for the jewelry drawers (black leather leftovers from my desk build a few years back). I've been debating this, and wondering what you're doing as well since we're working similar projects. Previously I have made box liners for the inside of the drawers, but they rarely miter as well as I would likw, and so this time I think I will make the rabbet in the drawer wide enough so that the liner can be applied directly to the drawer bottom and installed, also, into rabbet. Making a seamless image from inside the drawer.
Are you doing something to this effect or something else entirely?
I've looked at the inside of Elie Bleu's boxes and really like how they are lined (usually suede) but I'm unaware of the mechanics of their approach.
Bumbling forward into the unknown.
[OP]
Contributor
Can't have too many gauges. Those ones began life as cheapies, and I gave them a big make-over.
Thanks for Elie Bleau's name. I do not know her (him, them?). I shall Google for info.
The leather/suede should be fitted to drawers with slips, and slip inside.
Regards from Perth
Derek
Member
First I saw the shoulders, then the cheeks. No idea why really, it's just a habit. I saw pretty far to the line, don't worry too much if I nick the tenon an ini mini little bit. But nicking the shoulder line would look pretty bad of course. Usually I need to clean out the corner with a chisel, and do some undercutting of the shoulders with the same chisel. And it is rare when a door goes together without some fine tuning.
Nice work as usual Derek. Looking forward to see the result.
Contributor
Cheers!
Elie Bleu is a French boxmaker, mostly famous for humidors with marquetry.
Bumbling forward into the unknown.
Derek, as always beautiful work! Thanks for taking the time to post the pictures. I and eagerly looking forward to going to your website to see the whole build.
I really admire the precision of your joinery and the shaping of the cove – just exquisite.
Most of my big mistakes come from placing too much emphasis on speed, even when not appropriate/necessary (definitely a character flaw). Thank you for the reminder that a true craftsman knows when it pays to move along at a judicious clip, and most importantly, it also know when to slow down and get things as accurate as possible (like when sawing the junction of the cheeks and shoulders on Tennons).
I also really like your marking gauges – I could see how they would be very helpful in getting nice clean shoulders when plowing grooves (something I struggle with). Just one more Derek Cohen idea to shamelessly copy!
Derek your generosity in sharing your ideas/work is a HUGE blessing to everyone here in the Creek. Thanks again for your posts. I'm really looking forward to the rest of the build.
All the best, Mike
[OP]
Contributor
Below is a link to my ongoing build.
http://www.inthewoodshop.com/Furnitu...And-Panel.html
This focussed on taking these parts ..
.. and forming this joint ...
.. to create this curved panel ...
This is just a dry fitting at this stage. The emphasis here is the cove as a transition from frame to panel ..
Hopefully you will find parts to discuss or critique.
Too little available time this weekend for building. I am hopeful of completing the other panel next weekend.
Regards from Perth
Derek
Contributor
Coming along well!
I am curious as to why you went with a square haunch. My feeling is that a mitered haunch would help to compress the mitered cove as the draw-boring brings it together since it would force it to seat firmly on the opposing wall. Well at least that is my thinking.
Bumbling forward into the unknown.
Member
One bit of critique if you don't mind. In my eye the rails and styles have too much figure. That makes it look a bit busy.
 Contributor
Originally Posted by Brian Holcombe

Please educate me. To my eye, the cove does appear to be mitered. Or is it an optical illusion because of the cove?
Contributor
The cove is mitered. What I'm suggesting is that a mitered haunch;

Would put additional pressure on the cove miter, further ensuring a tight fitting miter as the joint is drawn together by the pin.
Just a thought/suggestion.
Last edited by Brian Holcombe; 06-01-2015 at 4:09 PM.
Bumbling forward into the unknown.
Contributor
Ahhh! A picture is worth a thousand words! Thanks.
 Posting Permissions

 Reply With Quote