Anytime! Cheers!


 Contributor
Anytime! Cheers!
Bumbling forward into the unknown.
 [OP]
Contributor
[OP]
Contributor
Hi KeesOriginally Posted by Kees Heiden

The camera flash tends to exaggerate the figure and add a shine. I mentioned that in the article. It is softer in the flesh.
Regards from Perth
Derek
[OP]
Contributor
Hi Brian
That is a good strategy, and one that did not occur to me. Have you done this? My focus was on aligning both the mitre and the shoulder. I did question my sanity on several occasions!
Regards from Perth
Derek
Contributor
Similar, I did so on the back panel on my cabinet but the goal was to maintain the baseline (no inside miter) and the alignment of a rabbeted top. But in seeing the inside miter on yours, it seemed like an equally good fit for that goal as well.
I'll post some pictures soon as I wrap up the back panel on mine.
Bumbling forward into the unknown.
Member
That's good.
And indeed, pictures can work very decieving.
 Contributor
Derek the panel looks very nice. Sorry I'm so far behind on commenting. I'm following on your page to get to see all of it. Working with curves is always a challenge you are doing it very well. The rest of it will be quite challenging also. Always interesting to see how you approach the tasks.
Jim
[OP]
Contributor
Thanks James.
Regards from Perth
Derek
[OP]
Contributor
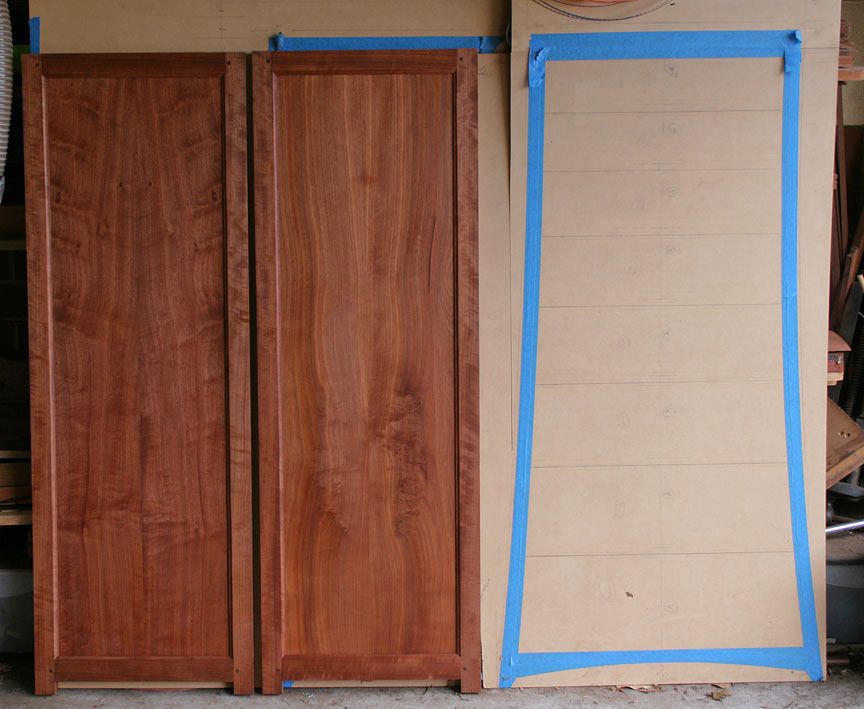
A final few pictures to complete the section on the panels, as we move to planning out the drawer dividers.
Here is the second panel (on the right) ..
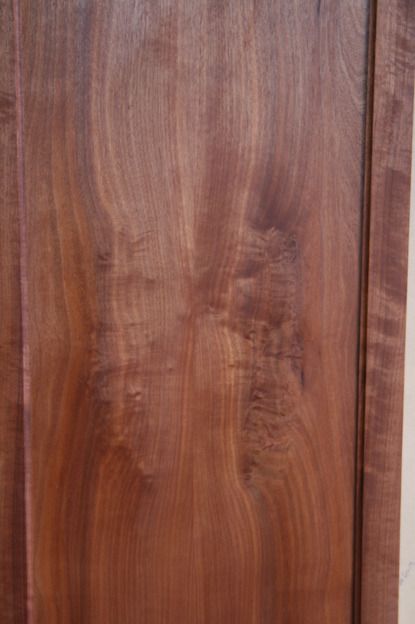
While it appears less figured than the first panel completed (on the left), it does have a special charm of its own. Here is a close up of the book matching and the central figure ...
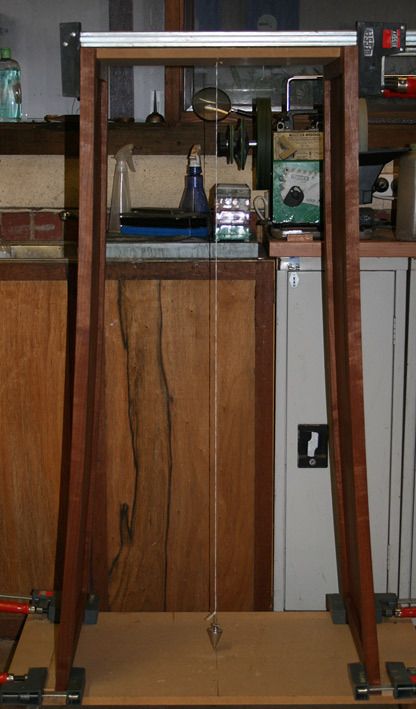
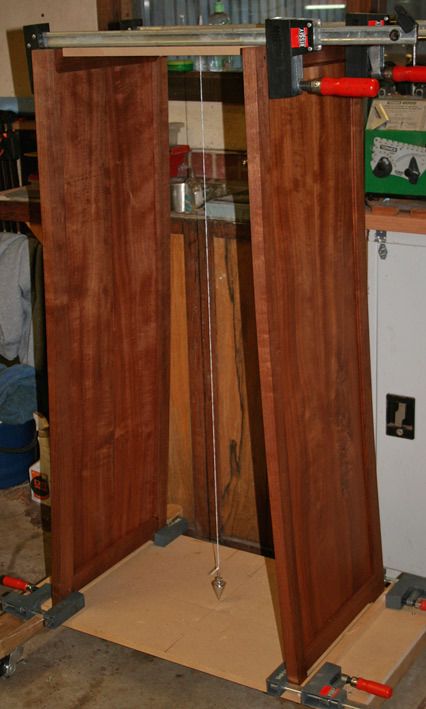
This will give you a little more of an idea of the curve in the design ...
Regards from Perth
Derek
Contributor
Nice work, Looking forward to seeing the back join in.
Bumbling forward into the unknown.
Contributor
Derek it is interesting that the curvature of the grain in your panels is a match for the curve of the panels, one in and one out on the grain, but still matching. It would be interesting if you could somehow get your drawer faces to follow that curve also. I'm not trying to mess with your design just making an observation.
Jim
Member
Hi Derek. Nice going. A question as much as anything regarding sawing tenons. The difficulty i've run into in the relatively few (and much less respectably destined) examples I've cut is that it's very tough to stop the saw cut right on the line of the shoulder without overshooting on the side that's not getting attention. Especially on the wider sides. (cheeks?)
Wonder is it an option to stop slightly short as you do on the cheek, and to saw the shoulder to the line. Then pop it off with a chisel? It depends a bit on the line of the grain, but over a very short distance it might not matter too much - the wider sides of the tenon are typically hidden anyway. There's those it seems that don't use a saw at all for the cheeks - they split them away and finish with a chisel. Seems like it'd have to be risky on difficult wood. It might not be the plan for e.g. exposed ends either.
Probably anathema, but it'd also be pretty simple to come up with a stop to clamp on the blade of the saw (a bit like a bulldog clip - except heavy duty and bolt/clamp up) to limit the depth of cut.
Perhaps in the end the game is just practice/practice/practice - using aids means the manual skill will never be learned….
Last edited by ian maybury; 06-13-2015 at 1:47 PM.
Contributor
Ian,
I build box frames for art work for a friend of mine. The backs are half-lapped and the corners are mitered and glued. I've done 100~ by now and so I've cut 800 shoulders by hand, I was really mediocre before and now I'm pretty much on the line. Practice can help tremendously, especially if you are reviewing technique during sessions.
Bumbling forward into the unknown.
Member
That sounds like the way to learn all right Brian. Guess it's a case of stick with it.
I've done a lot of handsawing to the line over the years, and by and large don't have too much trouble sawing down a line. Everything I cut as a kid was with a hand saw. Getting stopped at exactly the correct depth is something that doesn't come so easily though - it wasn't something I did much of. Dead easy to mess up, and a tendency to get a bit over focused/mentally intense about the issue which as well as being counterproductive is very tiring and not much fun...
Contributor
I am certainly guilty of the occasional over cut as well. If it's super critical sometimes I'll mark with pen just to make sure I do not overshoot the mark.
Bumbling forward into the unknown.
[OP]
Contributor
Hi Ian
It always depends on the importance of the joint, that is, will it form an aesthetic part of the piece you are building. So the mortice-and-tenons in the chest sides need to be as perfect as I can get them. Over-cutting is not ok. I'd rather play safe, as I did do, and ensure clean ends.
On the other hand, the drawer dividers will not be seen. An over cut there will just speed up the work.
Regards from Perth
Derek
 Posting Permissions

 Reply With Quote