Page 1 of 2 12 LastLast
Results 1 to 15 of 16

Thread: Making Replacement tote for Disston D – 95

  1. #1
    Join Date
    Feb 2011
    Location
    Carlsbad, CA
    Posts
    2,230
    Blog Entries
    2

    Making Replacement tote for Disston D – 95

    The Disston D – 95 “masterpiece” saw, was one of Disston’s top-of-the-line and was produced from 1935 – 1954 with a hideous plastic “Teninite” handle. Although the plastic handle is not my favorite, the saw plate is absolutely some of the best steel I’ve run across. This 12 PPI crosscutter deserves a new wooden tote. This is a little complicated because the saw plate has extra-large holes for the “saw nuts” that were used exclusively with the plastic tote.
    DSC_0062.jpg

    Here’s a picture of a Rosewood D1 15 tote of the same era. As you can see it requires a little modification to the tote profile to accommodate the existing holes in the plate.
    DSC_0063.jpg
    Two previous owners really like this saw because they both added their identifying marks to the plate. The etch is very legible once the plate is been clean/polished.
    DSC_0064.jpgDSC_0065.jpg
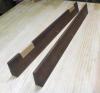
    This is the D – 115 tote I’m using as a model and a template of a Disston#7 tote that is one of my favorites when saw maker still did hand shaping, but won’t work for this saw because the modifications to the profile to accommodate the
    existing holes resulted in the ugly, Frankenstein tote at the bottom that was my initial effort many moons ago.


    DSC_0066.jpg


    Here’s the outline of the tote. The red lines show the outline of the saw plate and “saw nut” holes.
    DSC_0067.jpg


    I’m using some Claro walnut that I think is absolutely beautiful. As you can see a need some work to get a flat reference surface. Here are the three planes with gradually decreasing radius irons (scrub plane on the left) I like to use for rough surfacing.
    DSC_0070.jpgDSC_0071.jpg

  2. #2
    Join Date
    Feb 2011
    Location
    Carlsbad, CA
    Posts
    2,230
    Blog Entries
    2
    Here’s the work surface after some initial work with the scrub plane and a shop built “scrub/Jack” plane I built using Derek Collins excellent tutorial, and finally a picture of the finished reference surface.
    DSC_0074.jpgTDSC_0075.jpgDSC_0077.jpg


    To resaw the blank to the appropriate thickness (rough 1” inch, final finished thickness 7/8”, I use an 8 PPI panel saw to establish initial cuts on all four surfaces. Panel saw is great for this job as it’s easier to control than a full-size ripsaw.
    DSC_0078.jpg

    Once the initial cut is established on all four sides, it’s time for the heavy artillery – #12, 28” 4 PPI for sawing the four corners.
    DSC_0080.jpgDSC_0082.jpgDSC_0083.jpgDSC_0084.jpg

  3. #3
    Join Date
    Feb 2011
    Location
    Carlsbad, CA
    Posts
    2,230
    Blog Entries
    2
    This blank is a little damp inside and the saw plate was binding. A frame saw is great to finish this off because it lets you use a wedge to keep the kerf open, without interfering with the blade.
    DSC_0085.jpg


    Here’s the final results.

    DSC_0086.jpg


    Laying out final thickness of 7/8 of an inch working from the reference surface. This dimension is important because if it’s too thick the saw nuts will not meet in the middle and you will be able to type everything up – I hate when that happens!
    DSC_0087.jpg

    Here’s another shop made plane that is one of my favorites for rough surfacing.

    DSC_0088.jpg

    Here’s the profile of the tote with the outside surface smooth with files/rasps.
    DSC_0091.jpg

    Now the rounding over of where your handle grip the tote. To me this is one of the most important parts – your chance to customize a fit to your hand.
    To round over the interior cut out, a saw maker’s grasp from Gramercy tools works great.
    DSC_0093.jpg DSC_0096.jpgDSC_0106.jpg

  4. #4
    Join Date
    Feb 2011
    Location
    Carlsbad, CA
    Posts
    2,230
    Blog Entries
    2
    Once shaping is complete it’s time to drill the holes for the saw nuts. The tote above is an example of what you’re shooting for. I screwed this step up more times than I care to admit. I’ve done this with all types of drills/braces – for me a drill press is by far the best option.
    DSC_0107.jpg


    Small holes drilled through to establish the centers on both sides. Forstner bit for the shallow mortises for the large diameter of saw nuts. Then larger diameter bit from the non-show side halfway through equal to the diameter of the saw nuts the screwdriver goes in. Followed by smaller diameter bit equal to the threaded portion of the nut halfway through from the show side.
    DSC_0108.jpgDSC_0109.jpg

    Layout the kerf for the plate in the center of the tote. For thin plate back saws getting the plate kerf tote straight, centered, parallel etc. is a white knuckle are for me . I used to lay the plate flat on the benchtop and use a spacer equal to half the thickness to slide a saw on to start the kerf. For full-size plates like this it’s pretty easy to just eyeball and saw vertically in the vice.
    DSC_0111.jpgDSC_0115.jpgDSC_0116.jpg


    Using the actual saw plate itself to finish the kerf to the thickness of the plate.


    DSC_0117.jpg

    What do you know it fits!

    DSC_0121.jpg

  5. #5
    Join Date
    Feb 2011
    Location
    Carlsbad, CA
    Posts
    2,230
    Blog Entries
    2
    A finish plane to clean off the paper template and everything is ready to be put together.


    DSC_0124.jpg


    A little bit of some very amateurish carving for some “bling” and it’s done. Because of the unusual large holes in the plate I used some epoxy during final assembly – something only relevant for this one weird plate with the big saw nut holes.
    DSC_0125.jpgDSC_0127.jpgDSC_0129.jpgDSC_0134.jpgDSC_0136.jpg
    Thanks for looking.

    All the best, Mike

  6. #6
    Join Date
    Oct 2010
    Location
    Australia
    Posts
    2,534
    Good result with the new handle Mike. A man of many talents.

    Stewie;

  7. #7
    Join Date
    Mar 2004
    Location
    DuBois, PA
    Posts
    1,904
    Oh the blasphemy! I've made a small collection of "synthetic" stocked vintage handsaws & have all the colors Disston made for the D-95. Only one is set-up for use and the handle is actually comfortable. I also have a few other maker's, such as a transparent Atkins.

    Nice replacement handle, by the way!
    If the thunder don't get you, the lightning will.

  8. #8
    Join Date
    Jul 2009
    Location
    Spokane, WA
    Posts
    133
    Mike, Nice tutorial. Would you clarify? You wrote that you used epoxy. Did you epoxy the tote to the plate?

  9. #9
    Looks great Mike!
    Slightly OT, I always love seeing pics of your bench. Worn, stained, scraped--that's how a bench should look, not some namby pamby spotless thing. And how long is that sucker? Maybe it's just the camera angle, but it looks to be about 10 feet.
    "For me, chairs and chairmaking are a means to an end. My real goal is to spend my days in a quiet, dustless shop doing hand work on an object that is beautiful, useful and fun to make." --Peter Galbert

  10. #10
    Join Date
    Feb 2011
    Location
    Carlsbad, CA
    Posts
    2,230
    Blog Entries
    2
    Quote Originally Posted by Stewie Simpson View Post
    Good result with the new handle Mike. A man of many talents.

    Stewie;


    Thanks for your kind feedback Stewie– coming from you, I consider this to be high praise indeed! I am a huge fan of your work and love the saws that you post here on the creek. Your latest post of the extended heel back saw is a true work of usable art! I have tremendous respect for the real experts saw makers on the creek like you, Ron, Isaac, Pedder etc. What you guys do is in a class by itself – this tote isn't remotely comparable, just something that suits my hand and will make for good user.

    Thanks again for your kind comments and please continue posting your work – I love your threads.

    All the best, Mike

  11. #11
    Join Date
    Feb 2011
    Location
    Carlsbad, CA
    Posts
    2,230
    Blog Entries
    2
    Quote Originally Posted by Rich Greinert View Post
    Mike, Nice tutorial. Would you clarify? You wrote that you used epoxy. Did you epoxy the tote to the plate?
    hi Rich,

    I chose not to reuse the original saw nuts that came with the D– 95 – they are large diameter (maybe 3/4"?) to fit the corresponding holes you see in the saw plate. I prefer the smaller saw nutsfound in the traditional, wooden totes. To make those work in the existing large holes in the plate, I added some epoxy to firmly secure the plate in the tote as a smaller diameter saw nuts don't bear up against the existing holes in the plate. The platey was held pretty firmly just by the saw nuts alone, but I didn't want to come loose in use/the epoxy is an insurance policy – nothing worse than a loose saw plate that moves around in the tote when you're using it!

  12. #12
    Join Date
    Feb 2011
    Location
    Carlsbad, CA
    Posts
    2,230
    Blog Entries
    2
    Quote Originally Posted by Tony Zaffuto View Post
    Oh the blasphemy! I've made a small collection of "synthetic" stocked vintage handsaws & have all the colors Disston made for the D-95. Only one is set-up for use and the handle is actually comfortable. I also have a few other maker's, such as a transparent Atkins.

    Nice replacement handle, by the way!
    hi Tony,

    You're right, the synthetic, stock handles that came on the D-95 really are comfortable– and who doesn't like colors! My hands are fairly large and I like the thicker feeling of the wooden totes – but it's purely a matter of personal preference. Like you, I love the steel in these D – 95 saw plates – super stiff, lightweight and maneuverable (which I prefer for finer pitch crosscut saws like this 12 PPI)in the teeth taken hold a sharp, durable cutting edge. I know some Neaanders prefer the earlier generation vintage saws prior to 1928 with the more pronounced paper ground into the plate. The machine shaped coatson the 1940s – vintage 50s vintage saws are much to look at, but the steel is fantastic. I would encourage you to sharpen those up and put them to work.A

    ll the best, Mike

  13. #13
    Join Date
    Feb 2011
    Location
    Carlsbad, CA
    Posts
    2,230
    Blog Entries
    2
    Quote Originally Posted by Steve Voigt View Post
    Looks great Mike!
    Slightly OT, I always love seeing pics of your bench. Worn, stained, scraped--that's how a bench should look, not some namby pamby spotless thing. And how long is that sucker? Maybe it's just the camera angle, but it looks to be about 10 feet.
    hi Steve,

    Even though my shop is only a single car garage, because my only stationary power tools are drill press and a cheesy 14" Taiwanese bandsaw, I have the luxury of making the bench the center point of my shop. This is my third generation bench and over the years I've developed a preference what works for me.The top is soft maple and the undercarriage is 6x6" Doug Fir. The benchtop is 8 feet long and I've never wish for anything shorter. I love the twin screw front vice – for me great for sawing dovetails and with the sliding dead man easy to hold stock for joining long edges. One surprise for me is the quick release tail vise with two guide rods. I frankly uses this for a lot more of my work holding that I expected. I love the quick release – often I just slighted in place with no need to tighten the vise. I have two rows of dog holes and they work good for securing work pieces for surface planing.

    This bench is about four years old and as you mentioned it's pretty battle scarred. It's ready to have the top resurfaced. The front edge of the benchtop near the tail vise is getting pretty rough and that makes it hard to hold narrow stock for plowing rabbits, molding planes etc. Pretty quickly am going to have to sharpen up the big planes and resurfaced this bad boy. To to tell the truth,from a functional perspective benchtop does need to be resurfaced, but I'm not looking forward to erasing all the marks. They're kind of a nice "visual history" of the projects I've built on this bench.

    BTW, I look forward to more of your plane posts. I love your work! Although I have quite a few metal planes, I've increasingly move towards Woodie's in recent years. I don't have the talent like you,to make a solid body plane. I'm very happy with the laminated construction Woody's I built following Derek Collins excellent tutorial. You, David Weaver and others have inspired me, and maybe one of these these days I'll bite the bullet and give a solid body coffin smoother a try.

    All the best, Mike

  14. #14
    Join Date
    Mar 2015
    Location
    SE Michigan
    Posts
    3,225
    Nice work Mike. I have a tote project pending myself. This post has given me some great tips.
    If you don't mind me asking?...to get the holes drilled in the right place, you make a paper template and then adhere it to the blank?, and where do you source the saw nuts?
    Thanks again!

  15. #15
    Join Date
    Feb 2011
    Location
    Carlsbad, CA
    Posts
    2,230
    Blog Entries
    2
    Quote Originally Posted by Phil Mueller View Post
    Nice work Mike. I have a tote project pending myself. This post has given me some great tips.
    If you don't mind me asking?...to get the holes drilled in the right place, you make a paper template and then adhere it to the blank?, and where do you source the saw nuts?
    Thanks again!

    yup, you're right on target.

    You can get saw nuts from our very own Ron Bontz here on SMC. He has a website (sorry can't remember the name), but you could also send him a p.m.I don't know that's cool it wrong, but he's a great guy and has great saw/saw components.

    Another option is Tools for Working Wood– they offers split nuts (very old school – cool if you ask me).

    best, Mike

Posting Permissions

  • You may not post new threads
  • You may not post replies
  • You may not post attachments
  • You may not edit your posts
  •