Page 1 of 7 12345 ... LastLast
Results 1 to 15 of 103

Thread: Why does it take me so much time?

  1. #1
    Join Date
    Jan 2008
    Location
    The Netherlands
    Posts
    2,457

    Why does it take me so much time?

    In the tutorials from all the Internet wizards they always manage to prep a plane iron in 10 minutes max. And they imply that you are an idiot when it takes you any longer. So either i am an idiot or they are. At least with vintage irons it always takes me ages. I just bought 3 very nice old Stanley planes and yesterday I spend a major chunck of the evening to flatten the back of the #3.

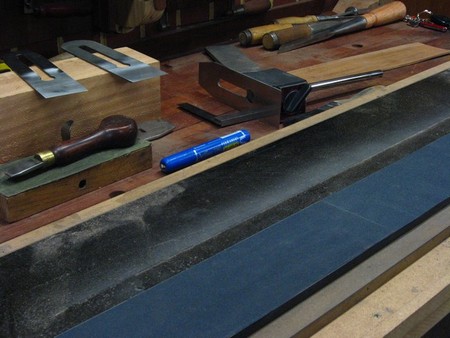
    First, it was very convex with severely drooped corners. There is some pitting but really not much. So I first get my floor tile and the 80 grit SiC loose grit. That works very fast to cut through the crap, so onto a 400 bester, a 1000 sigma and my polishing stones. Within half an hour I had a sharp edge. Next job is fitting the capiron, bending and hamering it straight again and then trying to mate it to the back of the iron. No such luck! After several fruitless attempts I checked the back of my iron with a straight edge and found a severely convex back! Somehow my stones have been hollow (despite flattening them).

    That brings me to my rant. I have some diamond plates, which have given up the gost in no time. They are really useless for this kind of work. I have oilstones which are too slow. I have waterstones which dish on a wink of the eye.

    In the end I want to have a good fit between iron and chipbreaker. Cutting corners just doesn't work to get them to fit nicely.

    Ok. I went to bed way too late and am still nowhere near finished. The weekend is coming up luckily and it looks like I will have some black fingernails when I get back to work next week.

    Thanks for ranting, feel much better now.

  2. #2
    Kees,

    Good rant. You hit on the reason I almost always replace both the iron and cap iron on old planes with either new Veritas or Hock iron. It ain't because they are "thicker" or even much better it is because time is too dear to spent it rubbing iron on stone.

    ken

  3. #3
    Join Date
    Jan 2008
    Location
    The Netherlands
    Posts
    2,457
    That's a very good reason! I like old tools, but this is the one aspect that I don't like too much.

  4. #4
    Join Date
    Feb 2003
    Location
    Twin Cities, Minnesota
    Posts
    274
    Kees -- Regarding flattening the backs of plane irons, I picked up a tip from David Weaver that makes use of an easily-built jig. I simply use a chunk of 2 x 4 planed flat on one side. I mount the plane iron with nuts and bolts back side up and begin flattening on a DMT extra coarse diamond stone. This jig enables me to apply full pressure against the stone from my shoulders and arms rather than just my hands. David showed his jig in one of his plane building videos on YouTube. Here's mine:

    From the photo you'll see the need to run the protruding bolt and nut ends off the side of the stone.

    I've only had one vintage cap iron that was too twisted to fix the mating surface between it and the plane back. For that I simply ordered one from an online seller. I will admit though that I also have a few third party irons/cap irons from Hock and Lee Valley.
    Attached Images Attached Images

  5. #5
    Join Date
    Jan 2008
    Location
    The Netherlands
    Posts
    2,457
    Yes that's what I use too. It saved a lot of finger sore.

    Capirons can easilly be bent, twisted and untwisted. they are made from low carbon steel. You need a sturdy vise, clamp the tail end in the vise and use a crescent wrench or something like that, just under the hump and give it a twist. Likewise when your capiron has lost a lot of its spring, you set it in the vice, clamping just under the hump. Then hit the hump with a block of wood and a big hammer.

    But still, I find this the most difficult bit of using the capiron. Luckilly you only need to do it once. Unless you are such an idiot like me and want to exchange your nice planes with even older ones.

  6. #6
    Kees, I would like to offer some advice, and some criticisms if you will bear with me and not take offense, OK?

    I've done this procedure many times and I think I'm fairly good at sharpening. Even still, I have spend up to and hour and a half prepping a plane iron, so I understand your frustration because I've been where you are many times. But, after some experience sharpening, looking back, I realized it wasn't my tools. It wasn't the blades (not all the time, anyway).-- it was my technique. I watched about every video out there on sharpening and I agree they make it look easy, but what ww'ing video doesn't make you feel just a bit inadequate?

    If I may, I would like to comment on a couple things in your post. First, a floor tile and sandpaper is not the best way to flatten the back of a plane iron (nor is a piece of glass). Even a piece of granite tile is not going to be flat enough for this. If you want to use sandpaper, then you need a piece of granite, or better yet, a piece of reference granite guaranteed to be absolutely flat. You can purchase them through various ww'ing suppliers.

    Second every waterstone will dish so you have to keep them flat. Use either a flattening stone, a 300 grit diamond stone, or again, adhesive sandpaper on granite. Just like lapping or flattening, the stones you use for sharpening the edge have to be absolutely flat.

    Third, I don't understand your problem with diamond stones. They should last a long time. What kind do you have? Perhaps if you could let us know what brands of stones you're using, that will be the clue as to why you're having some trouble. IMO, DMT and Trend have the best diamond plates (I have the DMT duo sharps) and most water stones are about the same (I have a 4000/8000 Norton and a couple Kings).

    Personally, I use a large 3X10 diamond plate to lap the backs of irons. When I've restored old planes, I start out with 300 grit and work from there. You didn't say what grit you started with but if it took that long, you probably didn't start low enough. Fitting the cap iron is never done with a hammer. If it is that warped, its best to get a new one. Its also a good idea to put a back bevel on it to be sure its seated well to the blade.

    I have had to give up on a couple irons and just replaced them with Lee Valley blade/cap iron upgrades (which I recommend anyway). The difference in plane performance is very noticeable with the thicker blades.

    I keep the old blade irons around for removing glue and opening boxes ;-)
    Chris Schwarz has a video on restoring an old plane its worth a watch.

  7. #7
    Kees, I feel your pain, er, . . . since I have it, too

    First. IMO, it's the dogs that get us. Frank Klaus didn't attempt to resurrect that tough ol' bird like us. No, in his video he rehabbed a nice, vintage Stanley or Record #4. So, I contend that when we work with bottom feeder planes, it does take longer to rehab them since so many issues have to be addressed. OTOH, I've learned alot and have mostly given away a ton (hyperoble) of now working old planes. And, there's quite a nice feeling of satisfaction in that.

    Second. I'm now discovering another way to address some of the more severe problems being encountered: (1) throw that bum piece away and replace it with a Hock or LV. Like the above post, these blades and cap/irons work nicely (some of the time). (2) grind past the offending low edges or pitted regions. Yep, I now do that, too. After spending some "get to know you" time with a rehab unit, I decide between surgery or amputation (so to speak). .... or the scrap pile for parts.

    Third. I've had the same experience with diamond stones as you (evidently). IMO, this results from my "heavy handed" method of (aggressive) sharpening. I've dislodged the impregnated plates from the plastic base; I've worn down sections of the diamond plate to the point that it's noticeably slower, etc. So, I'm not a big fan of the diamond stones. I've now relegated my DMT to flattening my waterstones (and oil stones; but I use separate ones).

    Fourth. I've invested (uh, kinda too much, but on with the story) in several quality low grit water stones: King deluxe 300, Cerax 320, Sigma 200 and 400, Chosera 400 & 600, and a Shapton 320. Each of these work; however, they work at varying speeds. The Shapton and Chosera (400) are the slowest; the Sigmas, the fastest (but the 220 will scar a blade back so badly that it's foolish to use on anything but a bevel); with the King and Cerax being delightfully in the middle (Cerax appears faster but not as durable (flatness). With these stones, I have truly lowered the amount of time I need to rehab a tough candidate! Oh, the metal type (A2, O1, etc.) really matters, too. The Sigma and Suehiro Cerax 320 chew threw A2 as quickly (remember, MO) as O1. I won't even get out the Cho 400 (or an oil stone) for A2 (yes, it's that slow). BUT, when reestablishing bevels, I will use grinders to do all the hard work. In the end, replacing tough, old rehab blades really is cheaper than teching up to handle them (grinders, waterstones, oil stones, diamond plates, perfect subtrates, and on and on...)

    Fifth. You're not alone. There's plenty more of us, at the same or approximate level, struggling to do the same kinds of things. My planes may not be nice and shiney like those gorgeous LN or LV or Philly planes or Infills (yes, I've got plane envy), but boy do they cut wood well. And, if they don't, someone somewhere needs a boat anchor.

  8. #8
    Join Date
    Jan 2008
    Location
    The Netherlands
    Posts
    2,457
    Certainly no offense Robert! And I know I could get some tips. The idea to start with a flatter substrate certainly is a very good one. This IS metalworking. So you need the appropriate tools.

    I started with loose silicon carbide grit (80G) on a granite floor tile. I checked the tile with a real straightedge (with certification and all). But because the process is so messy, I do it outside, and it is very possible that the tile bends under the pressure. I wouldn't want to use this loose grit on a real reference plate, it wears the plate as well as the steel. Tiles are easilly replaced. This step is very fast but it doesn't quite match with the next step very well. Flatness of the tile could very well be the reason.

    Then it is on to the Bester 400. Then a Sigma 1000. Both have been lapped beforehand with a DMT diamond plate, but that plate is loosing its strength, so I also sometimes lap them with the loose grit. Despite trying to get them as flat as possible, I still have a descrepancy between these two stones. The 1000 takes way too much time after the 400. The 400 dishes very rapidly. It is also quite thin allready.

    After that a 4000 and 8000 Nanaiwa SS, which don't give trouble after the 1000.

    I have two other diamond plates. I have now forgotten the brandname, but they are the well known poly cristaline ones. These are very dissapointing. After rubbing the 150 plate for a while, the surface is polished! With scratches of course, otherwise it could have served as a polishing stone.

    So I could indeed use some tips. I may shell out for one of these granite reference plates. They are about 80 euro overhere. Loose diamonds on plexiglass on the granite reference plate would be an idea too.

    BTW, I am bend on reusing the original irons. And I don't see a problem with bending and hammering the capiron. It's just a piece of sheet steel, and I am use to forming sheet steel.

  9. #9
    It takes me quite a long time to get an iron and cap iron in the condition I like. The reason it takes a long time is because I hardly ever do it. I haven't refined a cap iron since 1983, haven't sharpened or polished a cap iron or anything. And the only plane irons I have brought into service since that time were replacements for ones that were worn to nothing. Since an iron can be sharpened 10,000 or more times in it's life, sharpening technique is much more important.

    For me starting with a new tool is serious business. The cost is often trivial compared to the time to get it in shape, make a better handle or whatever, and learning to use it efficiently. But considering that most tools last a lifetime or at least a few decades of full time work, it is easy to amortise the initial cost. If you are preparing new tools often enough to be efficient at it, one has to wonder how many guys work in your shop.

    Here are two techniques for someone who doesn't want to buy special equipment for flattening. One thing is to make a slight hollow behind the edge. I use a large wet sandstone wheel. It doesn't need to be deep at all, just enough to reduce the area that comes in contact with the stone you are using for flattening. You can renew this very slight hollow several times as you work. The other is to flatten on a coarse bench stone with the last 3/16 or 1/4 inch of the iron hanging off the stone. That way you are also reducing the area being abraded by a finer, flatter stone, but not introducing the rounding that can come from a coarse stone.

  10. #10
    Join Date
    Feb 2004
    Location
    Perth, Australia
    Posts
    9,494
    I have also lapped a few blade backs over the years. I have come up with two methods, one for large plane blades, and the other for small blades, such as for moulding planes or chisels.

    The key to removing metal fast is to do so with the right media and the right technique in combination. One without the other will just end up being inefficient.

    As with honing a bevel, the most efficient method is to be repetitive, that is, hone on the same spot. With a bevel, this would be either using a honing guide or honing on a hollow grind. Honing the same spot simply means that you are not doing it twice or more. Along with this, the media you use must take off the steel fast, and the media that follows it must remove its scratches, and so on ..

    Do not use a diamond plate - the grits are too high (my lowest is 225 or 275, I forget which). Diamond stones may be used for small areas, but they are not efficient for large blades.

    Do not use a waterstone - the surface is unstable and will alter the surface angle. You will wind up removing metal twice or more.

    Do not use diamond paste unless the blade is small or you have no alternative - generally laps are small and a small area is inefficient.

    What is efficient are long, continuous strokes on sanding belts, with a run of at least 1 metre (3 feet). My lapping surface consists of a 1m long by 200mm (8") wide and 10mm thick (3/8") sheet of float glass. This is glued to 19mm (3/4") MDF.

    What is also efficient is to use a low grit to begin, such as around the 80 grit mark. The best (most durable) sanding belts are Zirconium Oxide (blue belts). These are available in 80 and 120 grit. I go from there to 240 silicon carbide (Norton wet-and-dry). That is enough to achieve a coplanar back, and from there you can go to your waterstones to hone the 1/2" - 1" at the rear of the bevel.


    The aim is to hold the blade flat on the media, do not allow it to shift angle (the wooden bar can rock), and slide it for as long as possible. This reduces effort and creates efficiency.

    Many years ago I introduced this idea for holding the blade, a magnet ...


    The second method I use is an inefficient one. However it is for small blades. I use an Extra Coarse diamond stone (275 grit) followed by a Fine diamond stone (600 grit), and then move to a Shapton 1000 grit, etc. The steel area is small, and I do not see the point in pulling out the big gun.

    Regards from Perth

    Derek
    Last edited by Derek Cohen; 06-05-2015 at 8:40 AM.

  11. #11
    Join Date
    Aug 2009
    Location
    'over here' - Ireland
    Posts
    2,532
    A slightly more cynical view might be that some of the 'experts' have a vested interest in making the job look very simple Kees.

    A personal/experience based view as posted about in the past year is that once you get into a requirement to flatten a largish area of steel that's not very close indeed to being flat hand methods are inevitably going to be very slow. Which is why so many (as Steve, David C, Derek Cohen - hope I have Steve right) go for methods of flattening that maximise the cutting speed - like long strips of self adhesive sandpaper stuck to a long strip of marble and means to hold the iron so that decent pressure can easily be applied, or the ruler technique. (i'd be very careful though of bolting down irons - the surface needs to be flat because if the bolt pressure bows the iron it'll spring out of flat when released. The same applies if grinding new bevel angles on thick irons - it's also painfully slow/needs a more aggressive method for the same sort of reason. (volume/area of metal to be removed)

    A side effect of slow flattening is that the long working duration and attendant frustration and loss of focus greatly ups the risk of a slip up that may need even more work to fix - such as accidentally using a dished waterstone or out of flat plate. The key I think is to make a good initial assessment of the iron and choice of flattening method before starting work - otherwise you risk ending up trying to move a mountain with a spade. There's a world of a difference in what's required depending on whether an iron is flat, or whether it needs significant work to get it there. People when they describe techniques don't always realise or make this clear.

    My feeling is that if you get an iron that's so pitted or out of flat that the ruler trick or one of the amped up flattening techniques can't quickly deal with it that it's either scrap/return to maker for a replacement time, or head for an engineer to surface grind it. (which latter may still need a fair bit of finishing)

    David Charlesworth's ruler technique (especially started on a fairly coarse diamond plate) seems to be the obvious route to quickly getting a pitted or less than flat iron back to a state where it can be used. It's recommended by many, but in keeping with the opening comment less than flat backs (or unreliable flattening techniques) are rarely overtly stated as being the primary reason why it's most useful. (in my opinion)

    +1 on Veritas/Lee Valley irons - all five or so i have done cleaned up all over in a few minutes on a 1,000 grit waterstone. They only needed enough to verify that they were in fact flat - it seems they are lapped at the factory to a very high standard of flatness, and this with the good steel is hugely valuable.

    Getting stuff to mate properly (as in a chip breaker on an iron) is ultimately about flatness and correct alignment of planes. Get the first flat, and then the second if it's flat and the facet accurately aligned will rest on it with no gaps. That's FLAT (for all the stuff that gets talked about woodworking and sharpening not being a precision activity) WITHIN MICRONS. Like it or not getting this stuff working reliably is a lot about consistently achieving toolroom tolerances and finishes in key areas by craft means. Flattening a convex (as opposed to concave) surface is extra difficult - it requires very good technique to prevent the iron rocking on the abrasive.

    Diamond plates don't seem to always be reliably flat and so they need need careful checking. (I've had two Atoma so far, both of which were very flat) I've used the top surface of the disc on a WorkSharp with an 80 grit diamond disc with success to flatten the back of a Clifton plane iron before finishing it on waterstones - it's a good bit faster than hand but it requires a very delicate touch to avoid doing harm.

    Waterstones wear so quickly that in my opinion they are not suitable for more than verifying that the iron is flat as received, and then working up the already very close to flat surface to a polish. (for refining the surface finish) The japanese traditionally use carborundum grit on a steel plate for flattening for this reason, but i don't know how quickly it cuts. Even a tough waterstone like a Shapton when honing needs very frequent flattening (every few minutes - e.g. see David Charlesworth's early writings on stroke patterns and flattening) to stay truly flat. ( most of my waterstones seem to go down the drain as sludge after flattening)
    Last edited by ian maybury; 06-05-2015 at 4:27 PM.

  12. #12
    Join Date
    Jan 2008
    Location
    The Netherlands
    Posts
    2,457
    Thanks for all the tips. Plenty to try. I have two more blades.

  13. #13
    Hi Kees. I'm substantially less experienced than the lot of the posters here, but it similarly takes me a while to flatten a back on old blades.

    If you're amenable to a powered solution, a Worksharp with Diamond lapidary wheels (*bay $12/ea) make quick work of flattening anything. I use a 150 followed by a 220, and then on to my 600 stone. It feels like cheating.

    I even have a 3000g wheel that is capable of a reasonable shine, but I prefer to finish on a stone (for no other reason than I feel good about myself for having done SOME of it manually ).

    The WS2000 is quite cheap compared to the WS3000 and because you'd probably only use it for flattening, you won't miss the port and platform that the WS3000 has.
    Last edited by Prashun Patel; 06-05-2015 at 9:10 AM.

  14. #14
    In many cases the older irons just aren't worth the trouble. Much easier to buy what is usually a better aftermarket iron and get on with fitting the cap iron. The problem using stones for the back of the an iron is they are always changing even while using the stone. A reliable substrate with 3m psa back abrasive film will yield much more consistent results and it's the same every time you use it. To get that kind of consistency from any stone you would need to be constantly flattening it thru the process.

    It's also important to use a well graded medium like the 3m micro abrasive film that has a consistent psa backing that pulls it down very tight to the substrate. Using loose abrasive paper can lead to removing too much material from the corners of the iron and the only way to repair that is to go back to the coarsest abrasive and start again.

    A couple of keys. Use a reliable substrate and don't continue to use worn out abrasive. You'll get there faster with a better result.

    The laws of physics dictate that you will always remove more material from the leading edge of anythings you're lapping. You need to swap edges and lap a different direction to get accurate results. This is the problem most run into when attempting to flatten the sole of a plane. They don't take into account the natural tendencies of being human.

    Ron

  15. #15
    Quote Originally Posted by Ron Brese View Post
    In many cases the older irons just aren't worth the trouble. Much easier to buy what is usually a better aftermarket iron and get on with fitting the cap iron. The problem using stones for the back of the an iron is they are always changing even while using the stone. A reliable substrate with 3m psa back abrasive film will yield much more consistent results and it's the same every time you use it. To get that kind of consistency from any stone you would need to be constantly flattening it thru the process.
    I use a 100 year old beech trying plane and a 100 year old Bailey smoothing plane. They are superior to today's offerings, irons, cap irons, and planes. They are worth a considerable effort to bring into service.

    Further, I have been using stones to work the back of the irons for 45 years. As have some generations before me. The idea that they might not work is (to quote Todd Hughes) "interesting".

Posting Permissions

  • You may not post new threads
  • You may not post replies
  • You may not post attachments
  • You may not edit your posts
  •