Results 1 to 8 of 8

Thread: getting ready to paint cabinets

  1. #1
    Join Date
    Sep 2011
    Location
    Pittsburgh, PA
    Posts
    290

    getting ready to paint cabinets

    I am getting ready to paint my kitchen cabinets. I actually built a scrap one off of drops and mistakes to practice on first, but I have built 2 vanities and smaller doll tables since, using my approach, but I do have one question.

    Bases on the advice in the spray finishing book by JJ, I used BIN shellac based primer on a doll table I built out of pine, then I followed it with SW Pro Classic, both were sprayed.

    What I liked about the BIN primer is that is sprayed super easy, cleanup was a mess, but with a $15 harbor freight gun and a 3M PPS fitting, it was not bad at all.

    My question is, I used the BIN primer because it was pine and that helps seal the sappy wood, based on the book. Does anyone see any harm in using the same process on my soft maple cabinets?

    I like it due to the alcohol base, it gives a nice primer coat without raising the grain hardly. A quick scuff with 320, I am ready for 2 top coats.

    My process it going to be this.....

    Sanded maple to 120
    Followed by wiping with a tack cloth
    First coat of primer - harbor freight gun, 1.4 tip, BIN primer thinned 10%
    Touch up any seams, cracks, holes with filler, followed by touch up with primer
    Light sanding with 320
    Wiped down again with tack cloth
    Followed by 2 coats of Pro Classic

    I have heard of a clear top coat, but the SW store stated that it most likely was not needed, I have pro's and con's.....if I were, it would be Kem Aqua from SW.

  2. Justin, I've successfully used your finishing schedule on several kitchen cabinet projects, both new and old work. What I love about the BIN shellac-based primer is that it doesn't raise the grain and recoat time is almost neglible. I'm not sure why you want to thin it, though, unless your gun just won't shoot it straight out of the can. Also, I'm not sure why clean up has been a mess for you. I use an Fuji 4-stage HVLP setup and shoot a full cup of denatured alcohol into a 5-gallon bucket to start the clean up process. Then I partially dismantle the gun and detail the parts with nylon brushes, clean rags, and alcohol. If I'm going to store the gun for a time, I'll repeat the process with lacquer thinner.

  3. #3
    Join Date
    Dec 2010
    Location
    WNY
    Posts
    9,737
    BIN shellac primer works really well. SW's primer works well, too. OK, which Pro Classic product are you planning to use, the waterborne one? If so, you will never spray it with a 1.4 mm gravity feed gun w/o thinning it a LOT. I had to thin it 18% to get it to spray through a 1.8 mm tip. If I have to use it again, I would use an airless, or at least a pressure assisted HVLP gun.

    IMO, there's no need to put clear coat over Pro Classic. It's acrylic based, and very durable by itself.

    John

  4. #4
    Join Date
    Sep 2011
    Location
    Pittsburgh, PA
    Posts
    290
    I use the HF gun to spray the primer, I use a Devilbiss Finishline 4 with a 2.2mm tip to spray the finish.

    The proclassic I've been using is the waterborne acrylic alkylid.

  5. #5
    Join Date
    Mar 2003
    Location
    SE PA - Central Bucks County
    Posts
    65,879
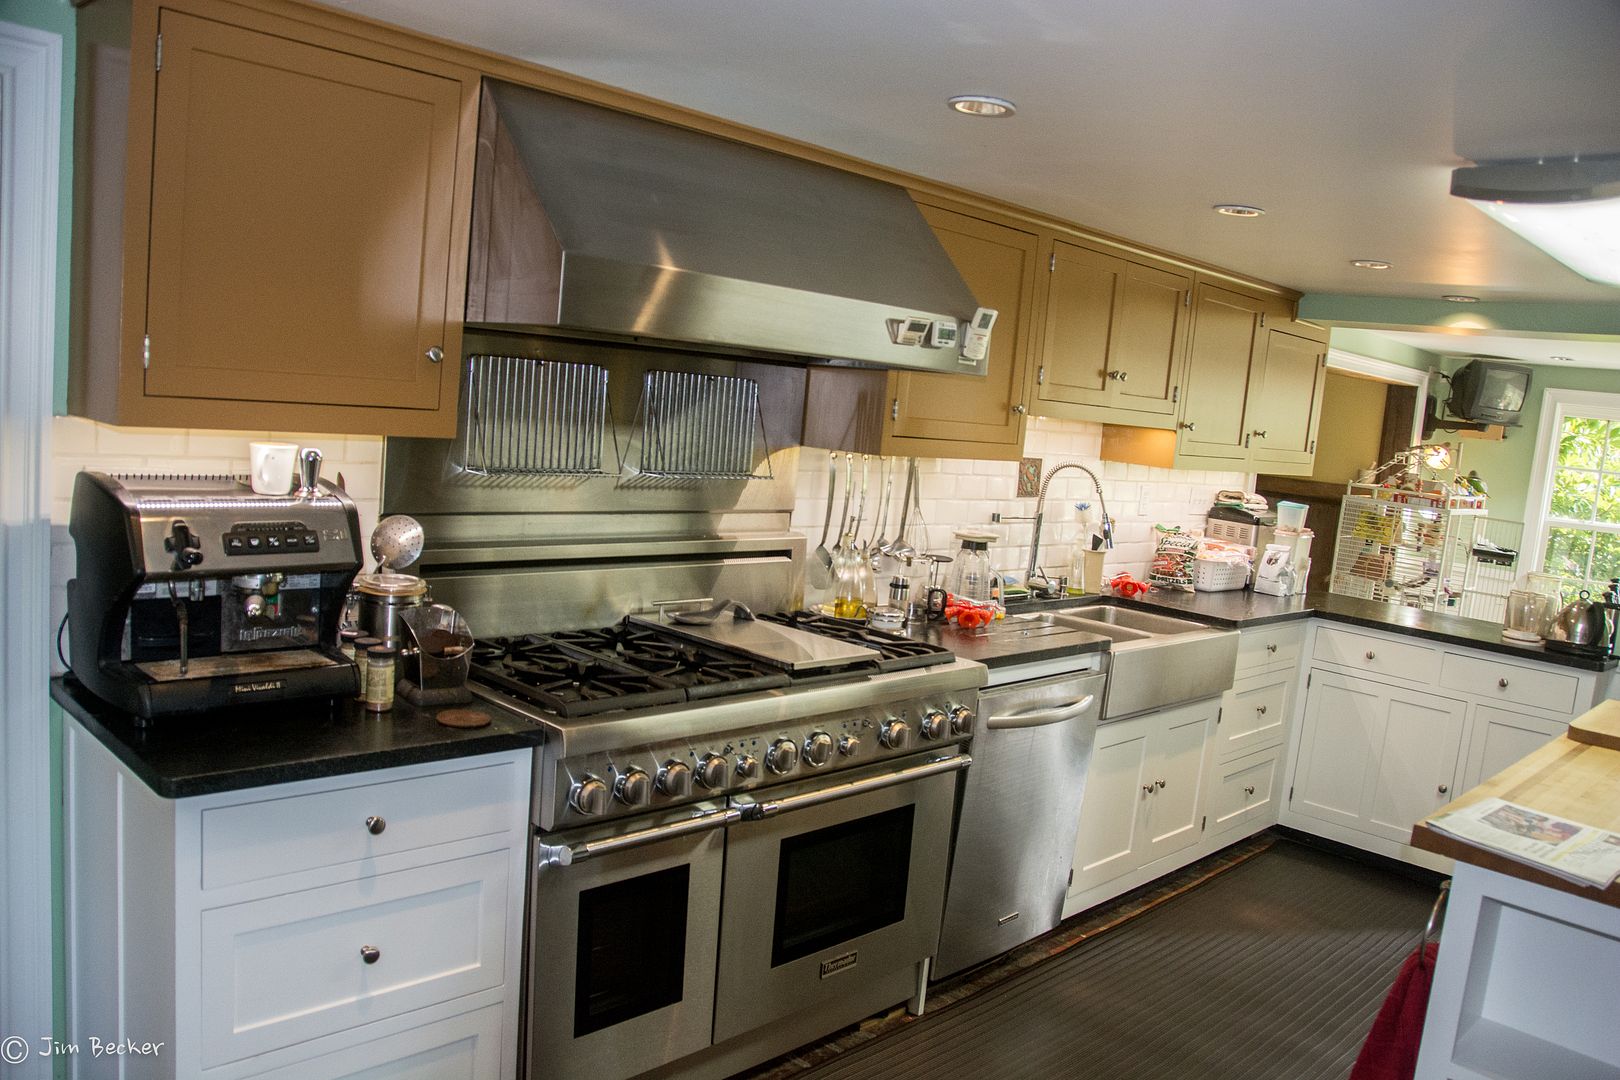
    No need for a top coat over ProClassic...it's really nice stuff and as long as your prep was sound, it's going to last a long time. I really like ProClassic... I just did a refresh of my kitchen and all the white is ProClassic over SW high adhesion primer. (the latter so I didn't have to sand off all the gloss) For my uppers, I couldn't use ProClassic due to the tint, but got great results with Benjamin Moore Advance which is a water borne alkyd product that sprayed beautifully on the doors and brushed out cleanly on the face frames and end panels.

    --

    The most expensive tool is the one you buy "cheaply" and often...

  6. #6
    Join Date
    Sep 2011
    Location
    Pittsburgh, PA
    Posts
    290
    Jim,

    Looks good.....

    How does the flow out between the spraying and brushing look, compared to each other?

    I struggle with this because I built most, but not all of my cabinets separate from the face frames so I could easily paint the frames, attached them to the box, and call it a day.

    For the cabinets that are my end panels, I built them all at once to get a better fit and finish between the face frame and the end panels and I will have a ton of masking to do, but if good results were achieved with brushing, that may be an option....

    20150611_164726.jpeg


    Quote Originally Posted by Jim Becker View Post
    No need for a top coat over ProClassic...it's really nice stuff and as long as your prep was sound, it's going to last a long time. I really like ProClassic... I just did a refresh of my kitchen and all the white is ProClassic over SW high adhesion primer. (the latter so I didn't have to sand off all the gloss) For my uppers, I couldn't use ProClassic due to the tint, but got great results with Benjamin Moore Advance which is a water borne alkyd product that sprayed beautifully on the doors and brushed out cleanly on the face frames and end panels.

  7. #7
    Join Date
    Mar 2003
    Location
    SE PA - Central Bucks County
    Posts
    65,879
    I didn't spray the ProClassic...it's way too viscous for my spray gear. But ProClassic flows out very well on it's own... The BM Advance was very sprayable...similar to other water borne products I use.
    --

    The most expensive tool is the one you buy "cheaply" and often...

  8. #8
    Join Date
    Sep 2011
    Location
    Pittsburgh, PA
    Posts
    290
    Well, two coats of primer and two coats of INSL-X Cabinet coat, and my first round of painting and assembly of the base cabinets are complete.

    I know I am going a bit out of order getting the base cabinets in first, but my countertop guy is pushing me to get them in for the template.

    I had to thin the Cabinet Coat a bit more than I liked compared to cabinet coat. At first, I was getting fisheye, but the manager at the store local to me that sells it was pretty knowledgeable, and helped me out the best he could – he wasn’t exactly familiar with thinning the paint with water/floetrol to get it through a compressor driven HVLP, but after it warmed up a bit, the fisheyes disappeared and the paint started flowing out nice.

    For my first time through this – not to bad I don’t think. I took a face frame down to the store and they seemed to think the coverage was fairly good for two coats of HVLP sprayed on application.

    Side Note – I did have to take out my patio door’s top get the lazy susan’s in the house!!

    20150726_134428.jpeg20150727_052955.jpeg20150727_053000.jpeg20150727_214448.jpeg20150727_214458.jpeg20150727_214512.jpeg

Posting Permissions

  • You may not post new threads
  • You may not post replies
  • You may not post attachments
  • You may not edit your posts
  •