Page 1 of 2 12 LastLast
Results 1 to 15 of 21

Thread: How to miter this small box?

  1. #1
    Join Date
    Sep 2007
    Location
    Atlanta, GA
    Posts
    1,356

    How to miter this small box?

    Am making a small box, 6 1/2 by 81/2 and 2 1/2" tall.

    I would like to miter the corners, put 2-3 ebony splines in.

    Is this thick enough, or is a butt joint the way to go?

    There are other embellishments, so want a plain of joinery as possible, to not detract.

    As you can see, it is roughly QS roughly 7/16" finished thickness.

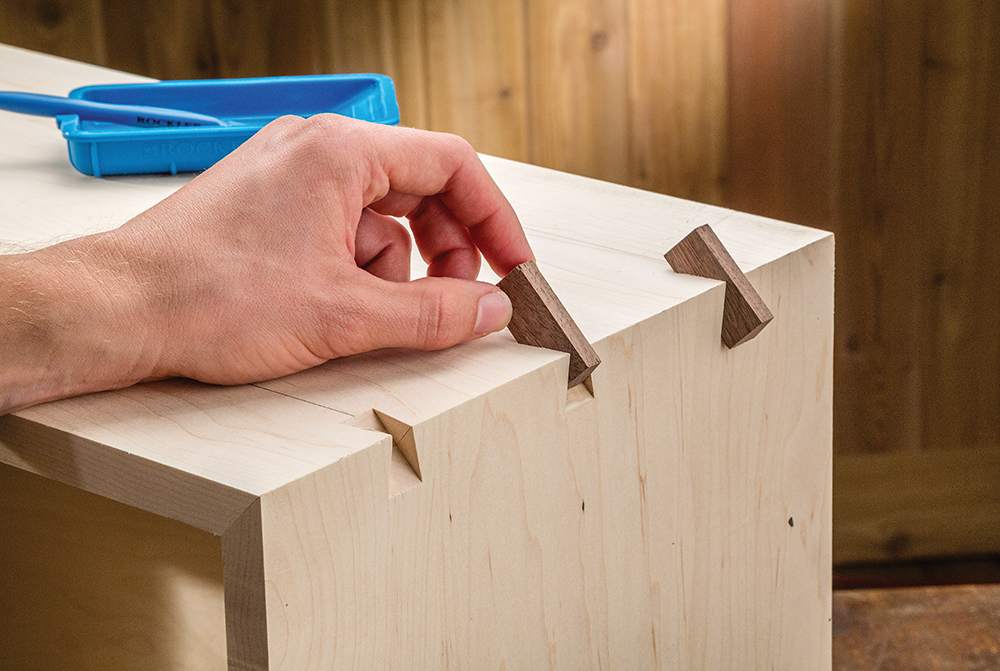
    Observe....not sure what kinda wood this is:

    DSCN0565.JPG

    Box will hold pencils, etc no real stress (famous last words)

    As always-many thanks
    David
    Confidence: That feeling you get before fully understanding a situation (Anonymous)

  2. #2
    You can miter the corners and it will hold just fine. No need for splines unless you want the decoration. You can see my tutorial on making a box with mitered corners here.

    Mike
    Go into the world and do well. But more importantly, go into the world and do good.

  3. #3
    I would do it the same as you do a regular miter. I would use a donkey ear.

  4. #4
    Join Date
    Sep 2007
    Location
    Longview WA
    Posts
    27,454
    Blog Entries
    1
    This is the video you may want to watch:

    http://video.pbs.org/video/2263884494/

    It is called the eleven groove box. It builds a box as you describe with splines.

    There are many other ways to do this without visible joinery. One would be blind dovetails.

    jtk
    "A pessimist sees the difficulty in every opportunity; an optimist sees the opportunity in every difficulty."
    - Sir Winston Churchill (1874-1965)

  5. #5
    Join Date
    Sep 2007
    Location
    Longview WA
    Posts
    27,454
    Blog Entries
    1
    Quote Originally Posted by Eric Schatz View Post
    I would do it the same as you do a regular miter. I would use a donkey ear.
    In case you are not familiar with a "donkey ear:"

    http://www.sawmillcreek.org/showthre...t-Eared-Donkey

    jtk
    "A pessimist sees the difficulty in every opportunity; an optimist sees the opportunity in every difficulty."
    - Sir Winston Churchill (1874-1965)

  6. #6
    Join Date
    Sep 2007
    Location
    Atlanta, GA
    Posts
    1,356
    Actually I was thinking about this:


    with just small plain spline keys, not DT.

    The decorative elements will be a little ebony stringing, nothing elaborate. So, I thought 2-3 ebony splines per corner would be cool-flat, simple. Will those alone hold the joint?

    I built a small knife cabinet a while back and had to make the dang swinging door frames 3-4 times cause the 45* miters just did not hold.

    Yep-have a donkey ear around here somewhere

    And blind DT? That sounds really hard, right?
    David
    Confidence: That feeling you get before fully understanding a situation (Anonymous)

  7. #7
    Join Date
    Sep 2007
    Location
    Longview WA
    Posts
    27,454
    Blog Entries
    1
    The blind dovetail isn't as difficult as it may sound.

    Finding the episode of the Woodwright's Shop where it was demonstrated is likely more challenging.

    jtk
    "A pessimist sees the difficulty in every opportunity; an optimist sees the opportunity in every difficulty."
    - Sir Winston Churchill (1874-1965)

  8. #8
    [QUOTE=Jim Koepke;2457251]The blind dovetail isn't as difficult as it may sound.

    Finding the episode of the Woodwright's Shop where it was demonstrated is likely more challenging.

    The blind dovetail is certainly possible but it doesn't show - the joint looks like a standard miter joint. My opinion is that there are several other joinery techniques that are quite strong and much easier to do. For example, putting in some ff biscuits will make a miter joint, for a box as you describe, very strong. I show how to put in ff biscuits in a tutorial I did on making a tray. If interested, I can send you a link.

    Mike
    Go into the world and do well. But more importantly, go into the world and do good.

  9. #9
    Join Date
    Feb 2003
    Location
    McKean, PA
    Posts
    15,647
    Blog Entries
    1
    What you have to remember with miters is that it is almost an end grain joint. End grain will suck up a lot of glue. When you get ready to glue it up, apply a thin layer of glue to both sides of each joint. You can even thin out your glue 50% and prime the joint before applying enough un-thinned glue for the final glue up. This prevents glue starvation which is a common cause for miter joint failure.
    Lee Schierer
    USNA '71
    Go Navy!

    My advice, comments and suggestions are free, but it costs money to run the site. If you found something of value here please give a little something back by becoming a contributor! Please Contribute

  10. #10
    I wanted to test the strength of a glued miter joint so I made a few, mostly in 1/2" material, glued them up and then tried to break them the next day. While I could break them, it wasn't easy. For small boxes, my opinion is that a glued miter joint is plenty strong.

    I would encourage others to do the same test and make your own decision.

    Mike

    [BTW, the easiest way to do this is to make a box - four sides. It's easiest to clamp with a strap clamp. The cut the two long sides in half. Use that to try to break the joint. Trying to glue a single miter joint is pretty tough.]
    Go into the world and do well. But more importantly, go into the world and do good.

  11. #11
    Join Date
    Sep 2007
    Location
    Atlanta, GA
    Posts
    1,356
    [QUOTE=Mike Henderson;2457271]
    Quote Originally Posted by Jim Koepke View Post
    For example, putting in some ff biscuits will make a miter joint, for a box as you describe, very strong. I show how to put in ff biscuits in a tutorial I did on making a tray. If interested, I can send you a link.

    Mike
    That would be great if you would please


    Quote Originally Posted by Lee Schierer View Post
    What you have to remember with miters is that it is almost an end grain joint. End grain will suck up a lot of glue. When you get ready to glue it up, apply a thin layer of glue to both sides of each joint. You can even thin out your glue 50% and prime the joint before applying enough un-thinned glue for the final glue up. This prevents glue starvation which is a common cause for miter joint failure.
    Yep it's the end grain situation that bugs me, plus this wood feels a little oily like a wipe w acetone before glue....what Mike says above about strength of joint is encouraging
    David
    Confidence: That feeling you get before fully understanding a situation (Anonymous)

  12. #12
    Join Date
    Feb 2004
    Location
    Perth, Australia
    Posts
    9,494
    Hi David

    Another option is to shoot the edges with a shooting board and donkeys ear such as this one ...


    ...making this box ...


    link: http://www.inthewoodshop.com/Furnitu...tingBoard.html

    Regards from Perth

    Derek

  13. #13
    Join Date
    Apr 2010
    Location
    Essex, MD
    Posts
    421
    David,
    I guess we think alike because I first thought you meant a vertical spline and was going to suggest what you illustrated (without dovetails, of course). As all have said, normally, such a small box would hold with glue, but with an oily wood, I'd be a little concerned about my ability to get it glued and would also want to reinforce the joint with something structural.

    One option to mitering and splining it would be to make it like a joiner would (kinda)- rabbet the end of either the long or short boards to about half or 1/3 it's thickness and the rabbet as wide as the thickness of the other board and do a "lapped butt joint" (I am sure I just made that up- joiners please chime in). You could then "secure" the joint by drilling through the side of the rabbeted piece and into the end grain of the other, then pin it with glued-in ebony or other contrasting wood square pegs. Somewhat decorative, less obtrusive than the splines, might be as good holding as a glued miter. This was done a lot on the joiner's boxes using wood or iron nails, but they also nailed the bottom on, so that may have added to the strength. the drawing on the right shows a double-rabbet, allowing pegs on both sides of the joint.

    Either way, the spacing of the splines or pegs can be altered to make a simple pattern (or morse code)

    Karl

    rabbet joints.jpg

  14. #14
    Join Date
    Jan 2009
    Location
    N.E, Ohio
    Posts
    3,029
    Quote Originally Posted by Derek Cohen View Post
    Hi David

    Another option is to shoot the edges with a shooting board and donkeys ear such as this one ...


    ...making this box ...


    link: http://www.inthewoodshop.com/Furnitu...tingBoard.html

    Regards from Perth

    Derek
    Wow nice box and nice shooting board
    George

    Making sawdust regularly, occasionally a project is completed.

  15. #15
    Join Date
    Feb 2004
    Location
    Perth, Australia
    Posts
    9,494
    Thanks George.

    The point is that a simple mitred box is very quick and easy to make with a donkey ear.

    Joint one long board. Plough the grooves. Saw 2 sides and 2 ends. Mitre all sides. Glue together.

    On a box with figure such as this (it is Tiger Myrtle), you do not want dovetails. Mitred corners make more sense. Splines are neither needed nor wanted.


    Regards from Perth

    Derek

Posting Permissions

  • You may not post new threads
  • You may not post replies
  • You may not post attachments
  • You may not edit your posts
  •