Results 1 to 13 of 13

Thread: Replacing speed control potentiometer in new G0766 lathe

  1. #1
    Join Date
    Sep 2015
    Location
    San Diego, Ca
    Posts
    1,647

    Replacing speed control potentiometer in new G0766 lathe

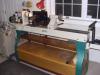
    I am posting this because it may be of interest to G0766 owners who have an erratic speed control. Also, perhaps Grizzly might like feedback from a new owner.

    My G0766 had an erratic speed control. As I would be turning up the speed, I had dead spots where the spindle speed would drop to zero. If I wiggled the speed control it would resume. I talked to tech support and they asked me if I had used a digital multimeter to confirm that the potentiometer was erratic. Well, the most likely culprit was the pot (short for potentiometer) and it is an inexpensive part ($2.50). So I told the fellow that yes, I had confirmed that the pot was bad. I didn't want to waste a half hour taking apart my lathe when I was 90 percent sure that the $2.50 part would fix it.

    Today I got the new pot. Then I tackled the disassembly process. I immediately found that there was no "service loop" inside of the headstock. (If you've ever worked in an electrical receptacle box with 2 inch long wires, you painfully learned the benefit of having a service loop). That means that when you take out the four screws holding the speed control panel, it doesn't want to come out. What's holding it in? The wiring. I found that if I loosened each of the nuts on the strain reliefs (on the back of the headstock) that I could push the cables through and get kind of a service loop. But the wire between the speed read out and the speed control panel was fixed in length so I found it helpful to loosen the speed readout and I stuck it into the rectangular hole on the top and gained a few inches of length (at the time I thought that it sure would be nice if they had spent about 20 cents and put in a connector....). I found that the speed control box and the speed readout were sealed plastic boxes. I thought that was good because it will keep the dust from getting into the electronics. At this point, I wanted to test the pot with my multimeter. I found that to be a bit challenging because all of the connections were insulated and it was hard to find any exposed electrical connections. But using some sewing needles crammed into the insulated connectors, I was able to confirm that yes, the pot was erratic. The original pot is connected with crimp-on connectors, so if you are going to replace an erratic pot, you'll have to cut out the original one and deal with wires that are pretty short. When you go to re-connect, you'll probably want to use those real small (gray) wire nuts. But, my background is electronic design engineering and I didn't find myself in a new and uncomfortable situation. (I still like connectors and wires that are long enough to make the job easier).

    I did a post mortem on the bad pot. I found that the sliding connection between the center wiper and center terminal was noisy. I found that the inside of the pot was NOT clean. I saw little pieces of dust and fibers inside the pot. It should have been 100% dust free. In my opinion, that suggests that the manufacturer of that component is not following standard industry practices resulting in some low reliability parts. I squirted the inside of the pot with contact cleaner and that cleaned up most (but not all) of the erratic performance of the pot. But the connection to the end of the wound-wire assembly was physically too high and that caused the center wiper to lift and the wiper connection to be lost. Perhaps an out-of-spec crimp. But again, in my opinion, it suggested a component manufacturer who isn't producing high quality components. But realistically - - Grizzly is trying to offer a product with high performance and low cost point. So maybe the low cost point is what is what has driven all of this. I recognize that this lathe is hundreds of dollars less than its nearest competitors.

    When I completed the replacement, and buttoned everything up, the new system is smooth as silk. It works great.

  2. #2
    Join Date
    Dec 2009
    Location
    Mount Sterling, KY
    Posts
    2,504
    Excellent and very informative post, thanks. Ran into similar space and wire length issues when adding reverse to my Griz midi lathe(see my tutorial).
    ____________________________________________
    JD at J&J WoodSmithing
    Owingsville, Kentucky

    "The best things in life are not things."

  3. Thanks for that info, Brice.......perhaps that will be the last component you will have to replace. The pot on my 0766 is doing just fine.....and most others That I have heard from are as well. Maybe this was just one that slipped through, or maybe they sourced parts from more than one supplier......who knows?

    Getting slack by losening the strain relief nuts is what I did when serviceing my former lathe. Good tip for all G0766 owners.
    Last edited by Roger Chandler; 11-10-2015 at 9:11 PM.
    Remember, in a moments time, everything can change!

    Vision - not just seeing what is, but seeing what can be!


  4. #4
    So, if I read correctly, did you say that the pot is a wirewound type? Or, did I get that confused with your discussion about the problem with the ridiculously short leads.

    I suppose that wirewound pots normally have less noise than carbon pots, but in my experience, wirewound pots aren't the best choice in an application that sees a lot of adjustment ... they are better for a "set and forget" type of use.

    My opinion is that the ideal type of pot for this application would be a conductive plastic pot. They are somewhat more expensive than carbon and probably also more expensive than wirewound pots, but are worth it in ruggedness and clean output from the wiper. I am a retired EE and it has been quite a few years since I have messed around with circuit design.

    BTW, I am with you on having service loops and connectors so that things are easier to repair. There's nothing wrong with crimp connectors ... as long as they are done well with quality components.

    When I buy something as important a a major stationary power tool like a full size lathe, price isn't my first concern although it is important. I want to see the fit, finish, quality, and functionality of the machine. Things that turn me off are rough castings, balky adjustments, low quality electronics, cheap quality motor, bad alignment of headstock and tailstock, creeping adjustments, bearing looseness or noisy bearings .........
    Bill

  5. #5
    Quote Originally Posted by James Combs View Post
    Excellent and very informative post, thanks. Ran into similar space and wire length issues when adding reverse to my Griz midi lathe(see my tutorial).
    I don't have permission to access your tutorial.
    Bill

  6. #6
    Join Date
    Sep 2015
    Location
    San Diego, Ca
    Posts
    1,647
    Yes, Bill, the pot was wirewound, 10K ohm. Because it was a wirewound it is a safe bet that it was a linear pot.

  7. #7
    Join Date
    Mar 2003
    Location
    San Francisco, CA
    Posts
    10,322

  8. #8
    Join Date
    Apr 2012
    Location
    Great Falls, VA
    Posts
    813
    Quote Originally Posted by Brice Rogers View Post
    [snip]
    Today I got the new pot. Then I tackled the disassembly process. I immediately found that there was no "service loop" inside of the headstock. (If you've ever worked in an electrical receptacle box with 2 inch long wires, you painfully learned the benefit of having a service loop). That means that when you take out the four screws holding the speed control panel, it doesn't want to come out. What's holding it in? The wiring. I found that if I loosened each of the nuts on the strain reliefs (on the back of the headstock) that I could push the cables through and get kind of a service loop. But the wire between the speed read out and the speed control panel was fixed in length so I found it helpful to loosen the speed readout and I stuck it into the rectangular hole on the top and gained a few inches of length (at the time I thought that it sure would be nice if they had spent about 20 cents and put in a connector....). I found that the speed control box and the speed readout were sealed plastic boxes. I thought that was good because it will keep the dust from getting into the electronics.[snip]
    Brice, thanks for the write-up on servicing the pot. I have both the G0766 and its "little brother", the G0733 18 x 47, and they both use the same pot. So far so good on both lathes, and my G0733 is a bit over three years old.

    Coincidentally, I was just inside the headstock control panels of both two days ago, examining the speed control and direction control components. I wanted to see if they or their wiring configurations differed on the two lathes. So, I'm familiar with the maneuvering that you describe in getting access to the rear of the switch box to unscrew it from its front panel cover. (Items 31 and 32 in the online Grizzly Parts List).

    I agree that access is tight, but I don't see how adding service loops inside the headstock casting behind the switch box would even be possible for the three main cables because they are so heavy. I just don't think there is enough room. As you note, loosening the compression nuts on the strain relief connectors allows the cables to slide further into the headstock so that the back cover of the switch box can be exposed. I actually think that is a pretty clever design. I do agree that either a connector or a service loop in the small cable between the digital speed display and the speed control would be a good, inexpensive addition. There's enough room for a small service loop there. Tucking the digital display partway back into the headstock as you describe gets a bit more access, but it's still tight.

    BTW, I was inside the switch boxes of both lathes to see if there was a quick way to change the way the "Forward/Off/Reverse" switch on my G0733 operates to match the one on the G0766. (Item 33 on the G0766 Parts List). Oddly, the G0733 switches to the right to turn forward and to the left to turn in reverse, just the opposite of the G0766, and the left position is marked with an "L" rather than an "F". I'd like to change my G0733 to match the G0766, to avoid confusion going from lathe to lathe. On inspection, the two switches appear to be wired the same, so the difference must be at the VFD terminals. In the next few days I'll pull the dust covers on the two drives and check that. It may simply be a matter of swapping two terminal connections on the G0733.

  9. #9
    Join Date
    Dec 2009
    Location
    Mount Sterling, KY
    Posts
    2,504
    Quote Originally Posted by Bill Boehme View Post
    I don't have permission to access your tutorial.
    Quote Originally Posted by Jamie Buxton View Post
    Sorry Bill, I linked to the original "author's" version instead of the published version. Thanks Jamie for the correction.
    ____________________________________________
    JD at J&J WoodSmithing
    Owingsville, Kentucky

    "The best things in life are not things."

  10. #10
    Hello Brice,

    Great info. but please tell me, how in the world did you test the pot with a digital VOM. It is really hard to see a bad spot with one. As a retired EE I always had an analog
    VOM for just those occasions.

  11. #11
    Join Date
    Sep 2013
    Location
    Connecticut
    Posts
    362
    Quote Originally Posted by David White View Post
    Hello Brice,

    Great info. but please tell me, how in the world did you test the pot with a digital VOM. It is really hard to see a bad spot with one. As a retired EE I always had an analog
    VOM for just those occasions.
    Turn it slowly and watch for an open.

    But, long live the Simpson 260.

  12. #12
    Join Date
    Sep 2015
    Location
    San Diego, Ca
    Posts
    1,647
    Quote Originally Posted by David White View Post
    Hello Brice,

    Great info. but please tell me, how in the world did you test the pot with a digital VOM. It is really hard to see a bad spot with one. As a retired EE I always had an analog
    VOM for just those occasions.
    If it was just a slightly noisy or scratchy pot, like what we sometimes encounter with a volume control, you're right, it would be easier to use an analog VOM. But I have a life time supply of the free Harbor Fright DVMs. (Sometimes when the 9V battery goes dead, I just get a new DVM from the store). The discontinuity was so bad that it would go fully open in some spots and stay fully open. If I didn't get such dramatic results, my plan B was to switch to an analog meter. (BTW, I'm a retired EE also). I'm keeping my fingers crossed that the new pot will not degrade like the original one did. Out-of-box or "brand new", the original one would occasionally have a problem and would stop dead, but as time went on it got noticeably worse. This is something that the factory probably could have spotted with a little more QC checking. Come to think of it, I don't recall seeing any QC labels plastered on the machine, like we typically do on stuff like this.

  13. #13
    Join Date
    Feb 2007
    Location
    Inver Grove Heights, MN
    Posts
    798
    As one more retired EE, my first concern would be that the open was in the Harbor Fright BVM. I had so many that were bad that I quit taking them for free. I think the problem was usually with the lead connections.

Posting Permissions

  • You may not post new threads
  • You may not post replies
  • You may not post attachments
  • You may not edit your posts
  •