Page 3 of 4 FirstFirst 1234 LastLast
Results 31 to 45 of 48

Thread: Medicine Cabinets - Build thread

  1. #31
    Join Date
    Aug 2013
    Location
    Princeton, NJ
    Posts
    7,293
    Blog Entries
    7
    I'm continuing this build on my blog, in order to simplify multiple postings


    https://brianholcombewoodworkerblog....uild-casework/


    In this post I'm doing the layout and detail work of the inner case and begin dovetailing the outer case.


    Check it out and give me feedback, if you guys don't mind the extra click it saves some work on my end, but I appreciate any feedback.
    Bumbling forward into the unknown.

  2. #32
    Join Date
    Aug 2013
    Location
    Princeton, NJ
    Posts
    7,293
    Blog Entries
    7
    Evening gents;


    Continuing my medicine cabinet build, I have a detailed version on my new blog.
    https://brianholcombewoodworkerblog....ework-part-ii/


    Bumbling forward into the unknown.

  3. #33
    Join Date
    Aug 2013
    Location
    Princeton, NJ
    Posts
    7,293
    Blog Entries
    7
    Bumbling forward into the unknown.

  4. #34
    Join Date
    Aug 2013
    Location
    Princeton, NJ
    Posts
    7,293
    Blog Entries
    7
    Not sure if you guys have taken notice, but the door on this second build is where I am making a departure from my original plan. The original door I think worked out fairly well but is just slightly out of place with the frame it's in....luckily I need two of these cabinets and that one will do fine in my spare bathroom.

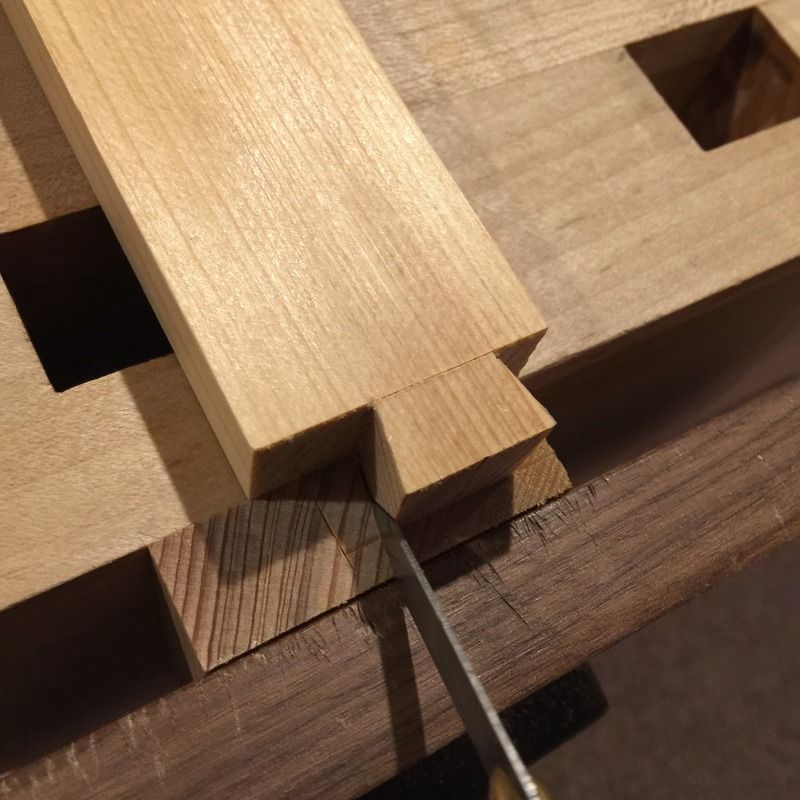
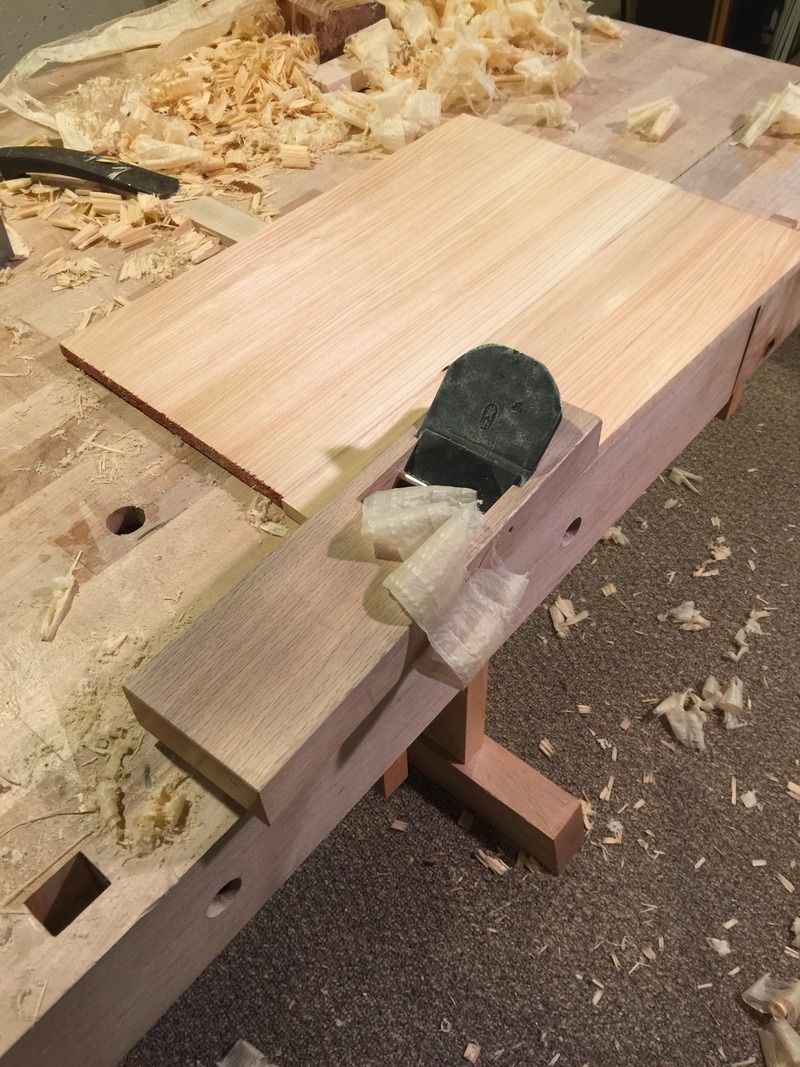
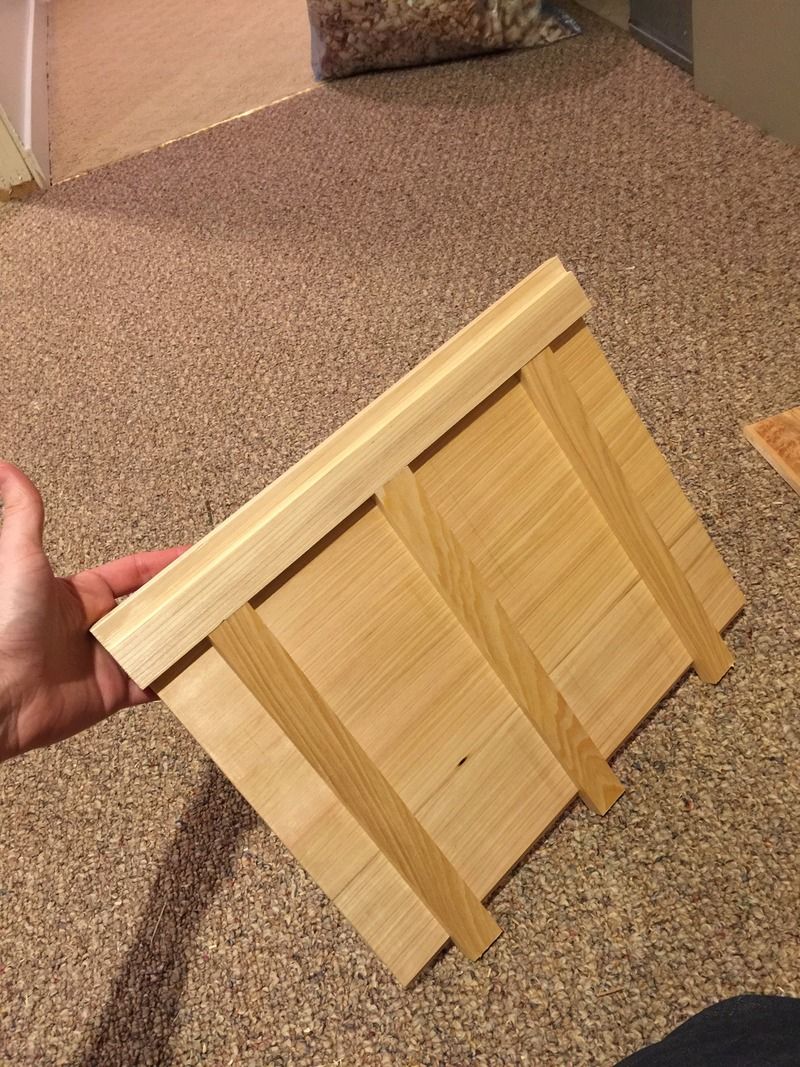
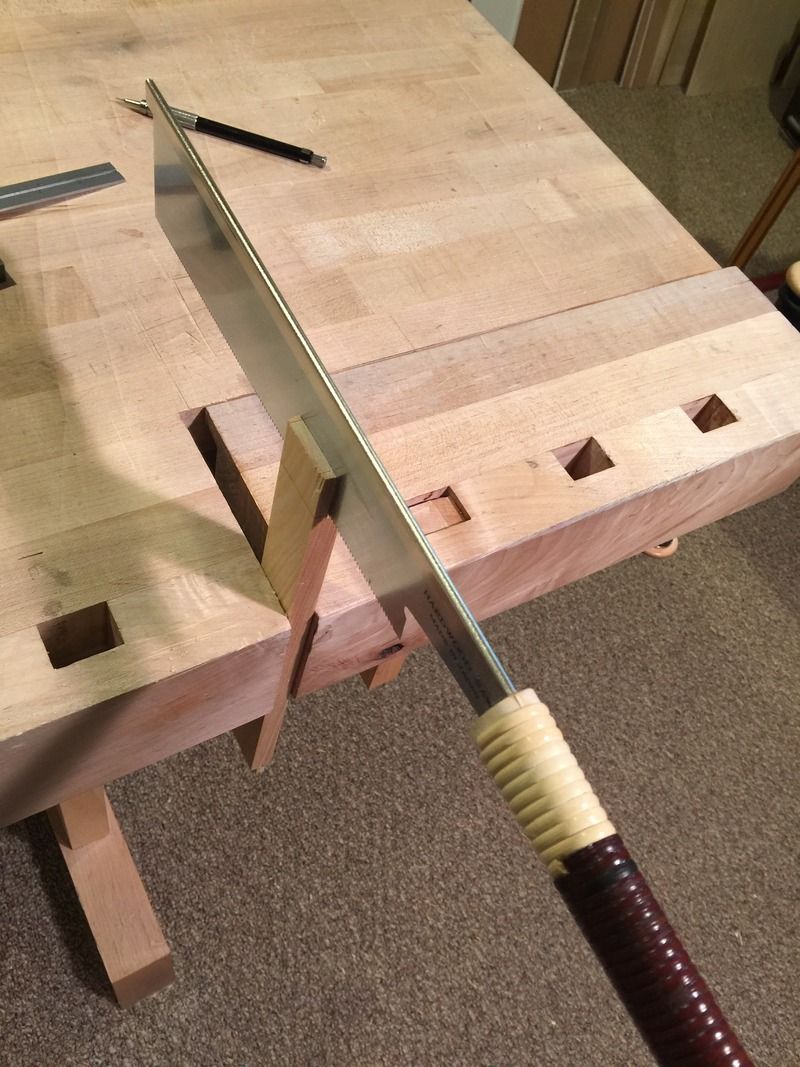
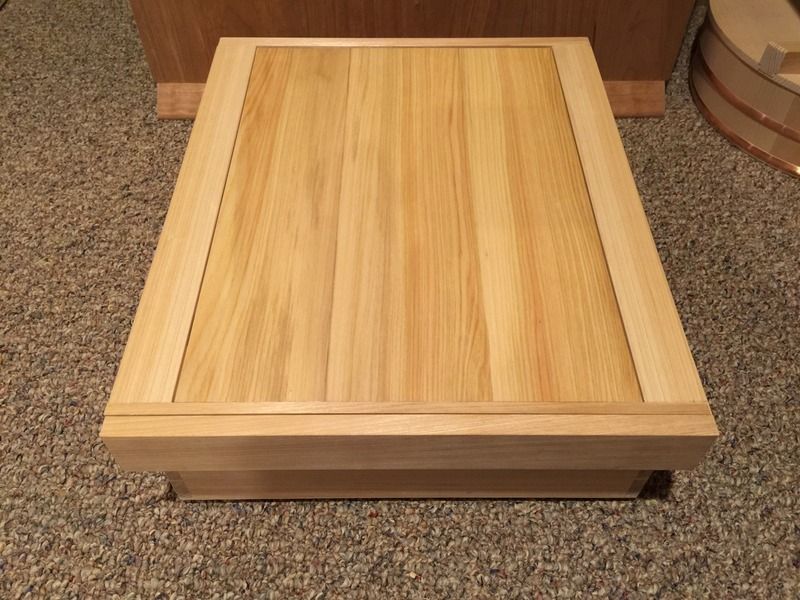
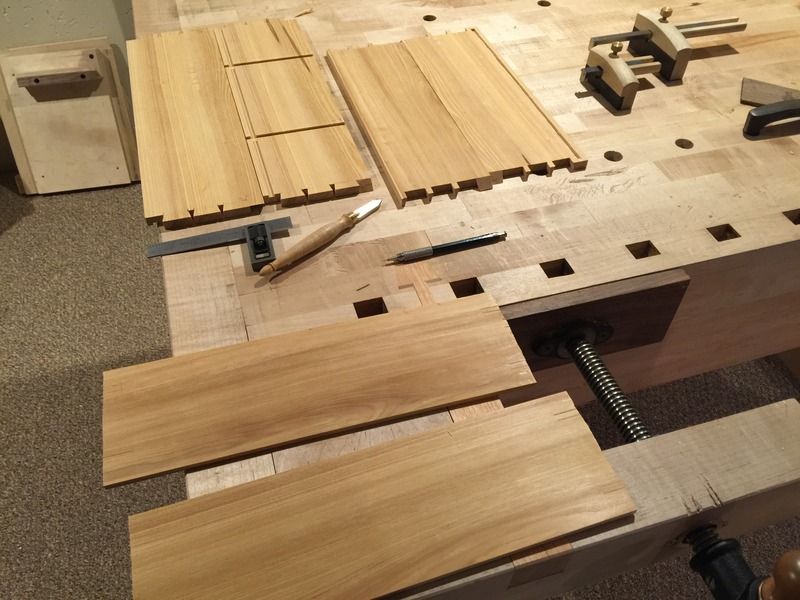
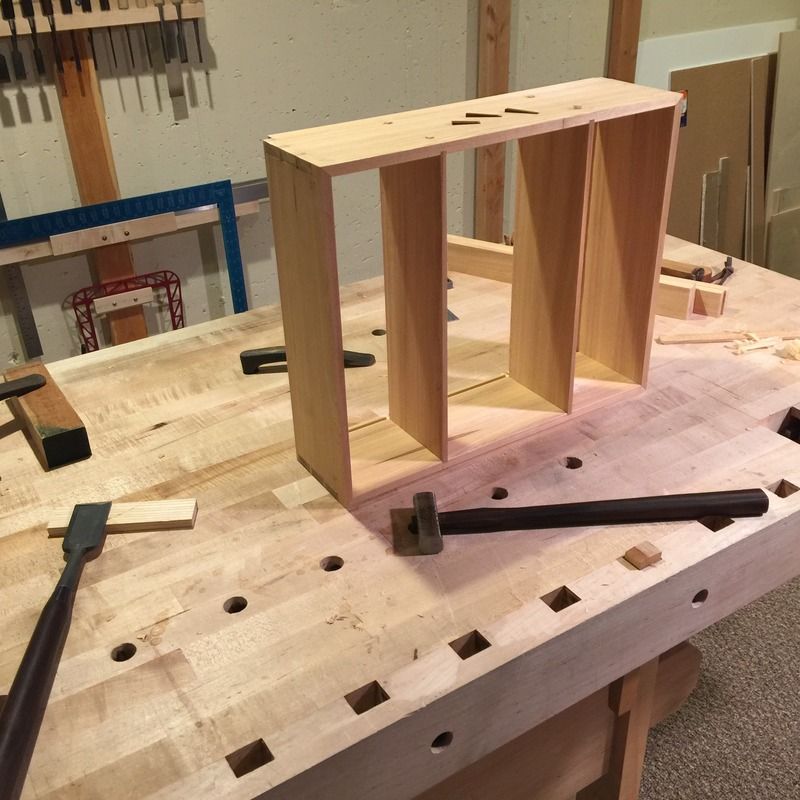
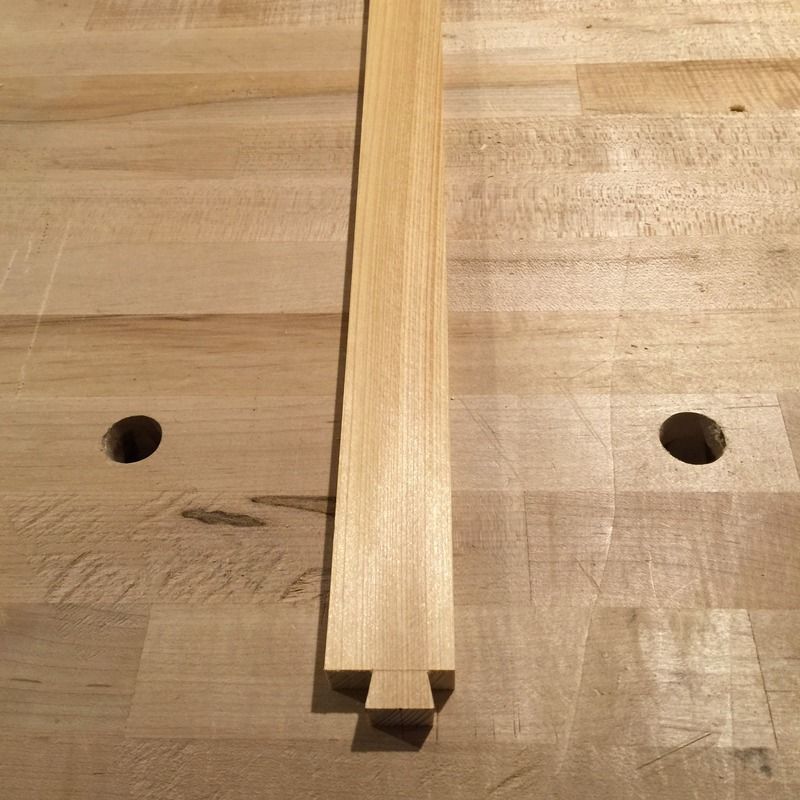
    The second door is made to stay in keeping with the cabinet a bit more but not to become a typical frame and panel type of door. The cabinet, which features scissor hinges, is not conducive to a typical frame and panel door, to my eye. And so I've been moving toward a design which minimizes the appearance of the frame work, first by putting it flush with the panel (the panel will not be recessed) and second by reducing the rails to slightly more than trim. However, now the rails may have been reduced their function must be transferred to another structural member. In this case I have replaced their function with three battens which will be mortised into the stiles.

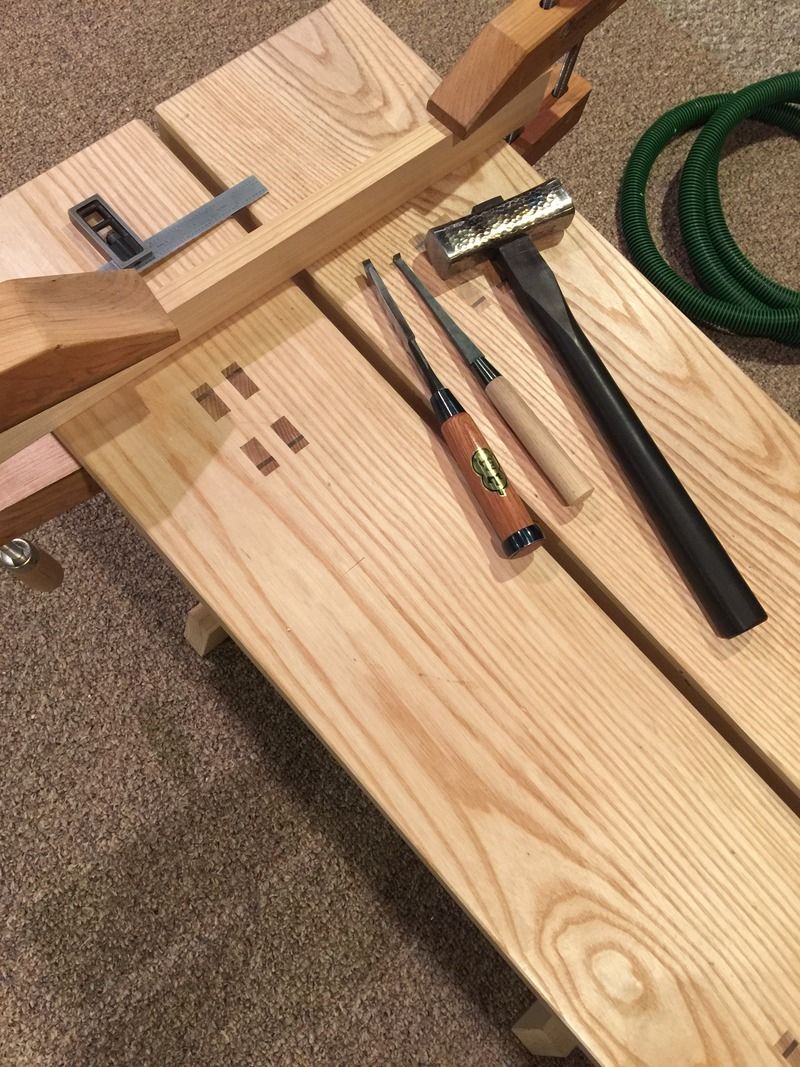
    The mortises will be blind, their shoulders will be offset from the panel to allow for expansion of the panel (it's so dry in my shop that expansion is the only likely result of moving this cabinet to the bathroom), but the expansion room should be hidden in a gap between the panel and the stiles.

    The panel thickness will total 3/4", but I have made available only 1/2" of space at the front of the cabinet. I will recess 1/4" of the door into the cabinet, this will seat the door nicely and if all goes well eliminate the need for a catch. I've used this device on boxes with success and I'm hoping for a repeat performance here. If that fails then I will use a brass catch.

    If there are any humidor builders looking in on this build they may have noticed the recessed inner case which is setback 1/4" and the reasoning behind it.
    Bumbling forward into the unknown.

  5. #35
    It is an inspiration for me to do much better. Also, loving the wooden bodies planes in action and the nice dovetail work.

  6. #36
    Join Date
    Aug 2013
    Location
    Princeton, NJ
    Posts
    7,293
    Blog Entries
    7
    Thanks Chris!

    Loving the wooden bodied planes in use too, it's actually been the major force in moving toward doing 100% of the work by hand. This cabinet is at about 99% (I have to route one edge on the machine). So I'm getting closer, but the more my tools come in-line with doing the work effectively and quickly the more it becomes a reality to do everything entirely by hand.
    Bumbling forward into the unknown.

  7. #37
    Join Date
    Aug 2013
    Location
    Princeton, NJ
    Posts
    7,293
    Blog Entries
    7
    Part II on the doors is now ready for general consumption. I hope you will check it out and comment as I a fleshing out my door idea a bit in this post.
    https://brianholcombewoodworkerblog....doors-part-ii/

    Bumbling forward into the unknown.

  8. #38
    Join Date
    Aug 2013
    Location
    Princeton, NJ
    Posts
    7,293
    Blog Entries
    7
    Moving along on the stile in part III

    https://brianholcombewoodworkerblog....oors-part-iii/


    Bumbling forward into the unknown.

  9. #39
    Join Date
    Aug 2013
    Location
    Princeton, NJ
    Posts
    7,293
    Blog Entries
    7
    Evening gents! I've got part four together. Please check it out.


    Hopefully this shows through what I had in mind for the rails, but if not I will detail the cutout on those very soon for those interested.


    https://brianholcombewoodworkerblog....doors-part-iv/


    Cheers
    Brian
    Bumbling forward into the unknown.

  10. #40
    Join Date
    Mar 2015
    Location
    SE Michigan
    Posts
    3,225
    Just when I think I've seen it all you come up with some mitered dovetail blind scissored something or another. Appreciate the time you take to provide those of us down here on earth still trying to perfect a half lap some inspiration!

  11. #41
    Join Date
    Jan 2011
    Location
    Montana
    Posts
    157
    Nice layout and joinery Brian, you inspire the ADD side of me to sloooow down and take my time getting things right (in a gestalt short of way). Thanks for posting your blog address... I didn't know.

  12. #42
    Join Date
    May 2015
    Location
    NJ
    Posts
    1,389
    The aesthetic contribution of that bottom rail is worth the extra work (IMHO). As usual, inspiring work.

  13. #43
    Join Date
    Aug 2013
    Location
    Princeton, NJ
    Posts
    7,293
    Blog Entries
    7
    Thanks Gents! Appreciate the kind words, and humor, hah.

    The rail was a hefty amount of work. I'll post of the detailed cutout on it tonight, I didn't realize how involved it was until I noticed that I took 26 photos of the process, hah.

    Cheers
    Brian
    Bumbling forward into the unknown.

  14. #44
    Join Date
    Aug 2012
    Location
    Missouri
    Posts
    2,151
    Really nice Brian. Do you stay up nights just to think up these challenges?
    Jim

  15. #45
    Join Date
    Aug 2013
    Location
    Princeton, NJ
    Posts
    7,293
    Blog Entries
    7
    LOL! Certainly seems that way that sometimes. It's terrible making a second of anything, because you start to see all the things you'd like to change. I have the first one installed in the bathroom and so I look at it....daily. I decided I would like to see end grain only on the top and bottom surround, seeing on the corner of the door was a bit odd.

    Only once I began planning did I realize how much of a challenge it would be. Not bad though, getting to see what the new chisels are capable of.

    Switched the hinges on this one as well, once they arrive I'll post up the cutout. Same style, but I sized them down so that they can be hidden with exception to the pivot.
    Bumbling forward into the unknown.

Posting Permissions

  • You may not post new threads
  • You may not post replies
  • You may not post attachments
  • You may not edit your posts
  •