Page 3 of 7 FirstFirst 1234567 LastLast
Results 31 to 45 of 104

Thread: Walnut Cabinet

  1. #31
    Join Date
    Aug 2013
    Location
    Princeton, NJ
    Posts
    7,295
    Blog Entries
    7
    I'll see what I can dig up;

    That is the inside of the case with the drawer sides being squared up to the backs. I am making certain that both are without twist, and making a final adjustment to them before cutting the joint. The reason for this is that the baseline is usually referenced to the outer edge, so any inconsistencies will transfer. If those join up tight, there is a good chance your finished joint will maintain it.


    One thing I forgot to mention, I do a similar procedure here, placing the drawer faces up to the ends of the drawer sides and check for squareness. If it is not square it will present itself as a teeter-totter. That can be twist is the drawer front or sides that are not connecting squarely with the drawer face.


    Sorry but but I don't have a photo of scribing the lines.
    Bumbling forward into the unknown.

  2. #32
    Join Date
    Feb 2004
    Location
    Perth, Australia
    Posts
    9,492
    Here is a different take on routing baselines to that of Prashun. Rather than routing out the waste, I have experimented (some years ago) with routing the baseline, also to the depth of the pin (these are half blind dovetails). Once this is done, all one has to do is split out the waste.

    The router bit used was 1/8” wide carbide. The small size enabled the groove to get closer to the adjoining boundaries and leave less waste in the corners.


    With the kerfs and the baseline both defined, the waste could be removed in a couple of chisel strokes …

    Link: http://www.inthewoodshop.com/Furnitu...tDovetail.html

    Now I drill a series of holes at the baseline ...


    This leaves a little to pare away, but the bulk of the waste comes out easily. Quick.


    Regards from Perth

    Derek

  3. #33
    Join Date
    Nov 2014
    Location
    West Granby CT
    Posts
    777
    Thank you Prashun and Derek, I have two new things to try - blue tape and router....I have been trying for a bit to do hand cut dovetails and have been getting them good enough for now. The obvious problem is speed, and getting good results on your practice board does not always equate to good results on your projects when it counts. Between speed, and material waste, I often fallback on a jig when appropriate..........but I don't want to.

  4. #34
    Join Date
    Apr 2007
    Location
    New Jersey
    Posts
    13,725
    Brian , I see. I hadn't even thought to be too worried about squareness. My cabinet is so narrow and shallow I hadn't pondered this. Thanks.

    I am very curious to see the front-side drawer joints. You've incorporated rabbets and an overhang. I'm foggy how to lay out the dovetails as I've never done dovetails where 2 sides of the joint were different widths. Does the rabbet dictate the width of the half pins?

  5. #35
    Join Date
    Aug 2013
    Location
    Princeton, NJ
    Posts
    7,295
    Blog Entries
    7
    Prashun,

    Since I used drawer slips I did not need to put the rabbet in the drawer front or sides. If you can do the same, I think it'll work out well, allowing you to make use of thin materials and minimizing the layout issues.

    I did not do it for layout reasons, but instead did so because I wanted the rabbet very low to the bottom of the drawer sides.

    Here is a photo of the front drawer joint;


    That shows the layout lines.
    Bumbling forward into the unknown.

  6. #36
    Join Date
    Feb 2004
    Location
    Perth, Australia
    Posts
    9,492
    Brian raised the issue of drawer slips. I am not sure if we should start a discussion here, or in a new thread, even though this thread appears to be moving to details of drawer making.

    Drawer slips are interesting, and a mark of quality drawer making, even more so than hand cut dovetails. I've been using them only for the past 6 years. I cannot say that they save time - quite the contrary - but they make for elegant drawers.

    I have a link here to an article on my website I wrote 6 years ago. There are a number of contributions from WoodCentral, where we discussed the details at length. One of the contributors was Richard Jones, who has written the book on drawer slips. Included are his drawings and notes on construction.

    http://www.inthewoodshop.com/Furnitu...erBottoms.html

    In a nutshell, there drawer slips are only attached at the drawer sides, and they link to a groove at the drawer back. One does not use a slip at the rear of the drawer. I did do so at that stage - got rapped over the knuckles, and never did so again.

    Here is an example from my current build ...


    The completed slips – with tenons. These fit in the groove to match/centre grooves.


    The second design feature is a choice whether one has the slip rising above the drawer bottom, or having the slip and drawer bottom flush with each other.

    The raised slip is an easier construction since all one does is groove the slip and drop in the drawer bottom. I have done them like this, but do not like it as it leaves a less clean finish. Here is an example. Not a great photo but the distinct slips are evident ...


    A more complicated approach, but one that leaves a clean finish, is to flush the slips and drawer bottom. This approach requires that the drawer bottom is rebated at the top and bottom to form a tongue. Essentially, the slip and drawer bottom form a tongue-and-groove joint. The drawer below is from my current build. The bottom is 3/8" thick solid wood. The slip edge is also beaded to blend the edges of the join ...


    Link here: http://www.inthewoodshop.com/Furnitu...heDrawers.html

    Regards from Perth

    Derek
    Last edited by Derek Cohen; 01-28-2016 at 10:38 AM.

  7. #37
    Join Date
    Aug 2013
    Location
    Princeton, NJ
    Posts
    7,295
    Blog Entries
    7
    I like the flush slips/bottom as well, I have that planned for the next set of drawers I make.
    Last edited by Brian Holcombe; 01-28-2016 at 12:24 PM.
    Bumbling forward into the unknown.

  8. #38
    Join Date
    Sep 2008
    Location
    N. Idaho
    Posts
    1,621
    Derek, thanks for the additional explanation for the slips with rabbeted bottoms, definitely fancy pants I missed that detail the first time.

    C
    "You can observe a lot just by watching."
    --Yogi Berra

  9. #39
    Join Date
    Apr 2007
    Location
    New Jersey
    Posts
    13,725

    Question about drawer slips

    I had never heard of drawer slips before. Having read Derek's site (thanks) and other web resources, I have a question for drawer slips on shallow boxes.

    My drawers will be 3" tall. The bottoms will be 1/4". I'd like to make flush slips so I don't sacrifice space in the box.

    Typical flush slip construction is as in the first picture below. But I would like to maximize space in the drawer; so I want to keep the drawer bottom as low as possible. Further, I'd like to use 1/4" bottoms, so rabbeted tongues feel like they'll be weak.

    I got to thinking: flush slips tend to be beaded in order to hide the seam between the drawer bottom and the slip. So, why bother rabbeting the bottom anyway? Why not just let it sit on top of the slip altogether? The bead will conceal imperfections. If I do it the second way, I think I would be able to make a thinner slip and avoid a thin tongue on the bottom panel.

    I had considered going a step further by making a flat slip upon which the drawer bottom can completely rest. This would make the panel butt up against the drawer side. But I wouldn't have the benefit of a beaded edge.
    What am I missing?
    Attached Images Attached Images
    Last edited by Prashun Patel; 01-29-2016 at 9:21 AM.

  10. #40
    Join Date
    Aug 2013
    Location
    Princeton, NJ
    Posts
    7,295
    Blog Entries
    7
    I think you'll want to stick with the left side image, if you are using a solid wood panel it will help it to maintain flatness over time. Otherwise if it cups it will show inside the drawer. I would use solid would in this case, ply will be a bit ragged at the rabbetted edge.
    Bumbling forward into the unknown.

  11. #41
    Join Date
    Sep 2007
    Location
    Longview WA
    Posts
    27,441
    Blog Entries
    1
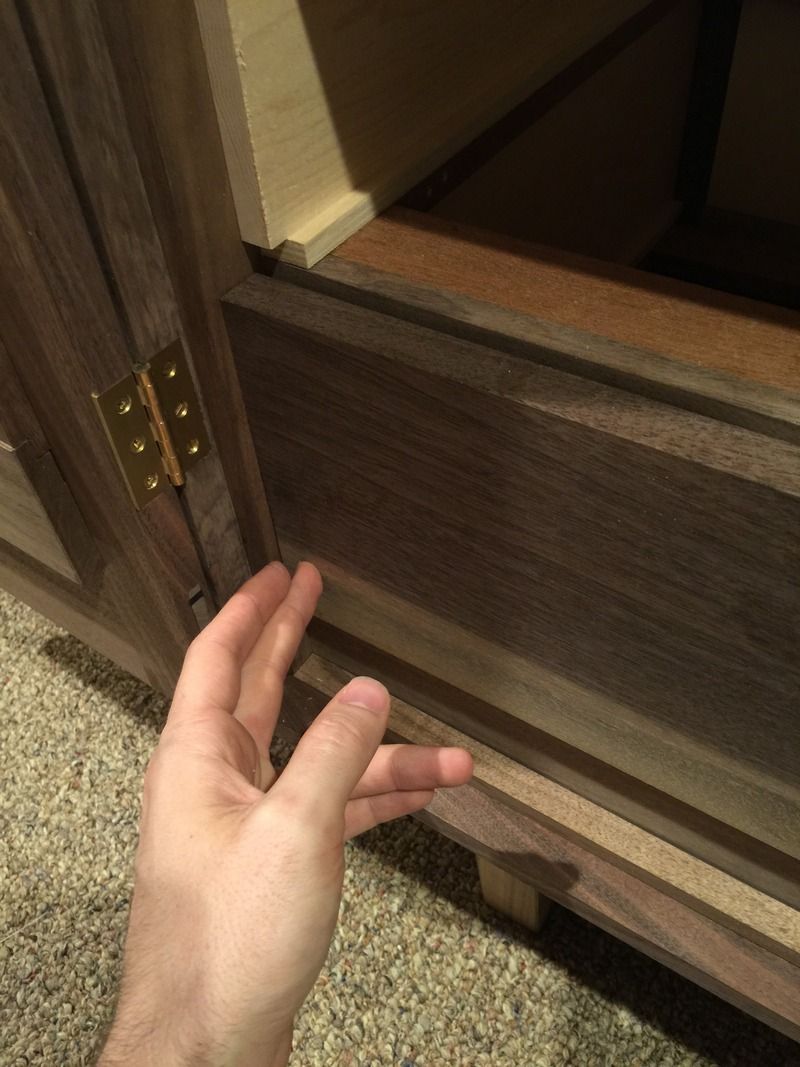
    Have you ever removed a drawer from a cabinet? It is natural to place a hand on the underside of the drawer. In the image on the right, ones hand would go through and create a mess.

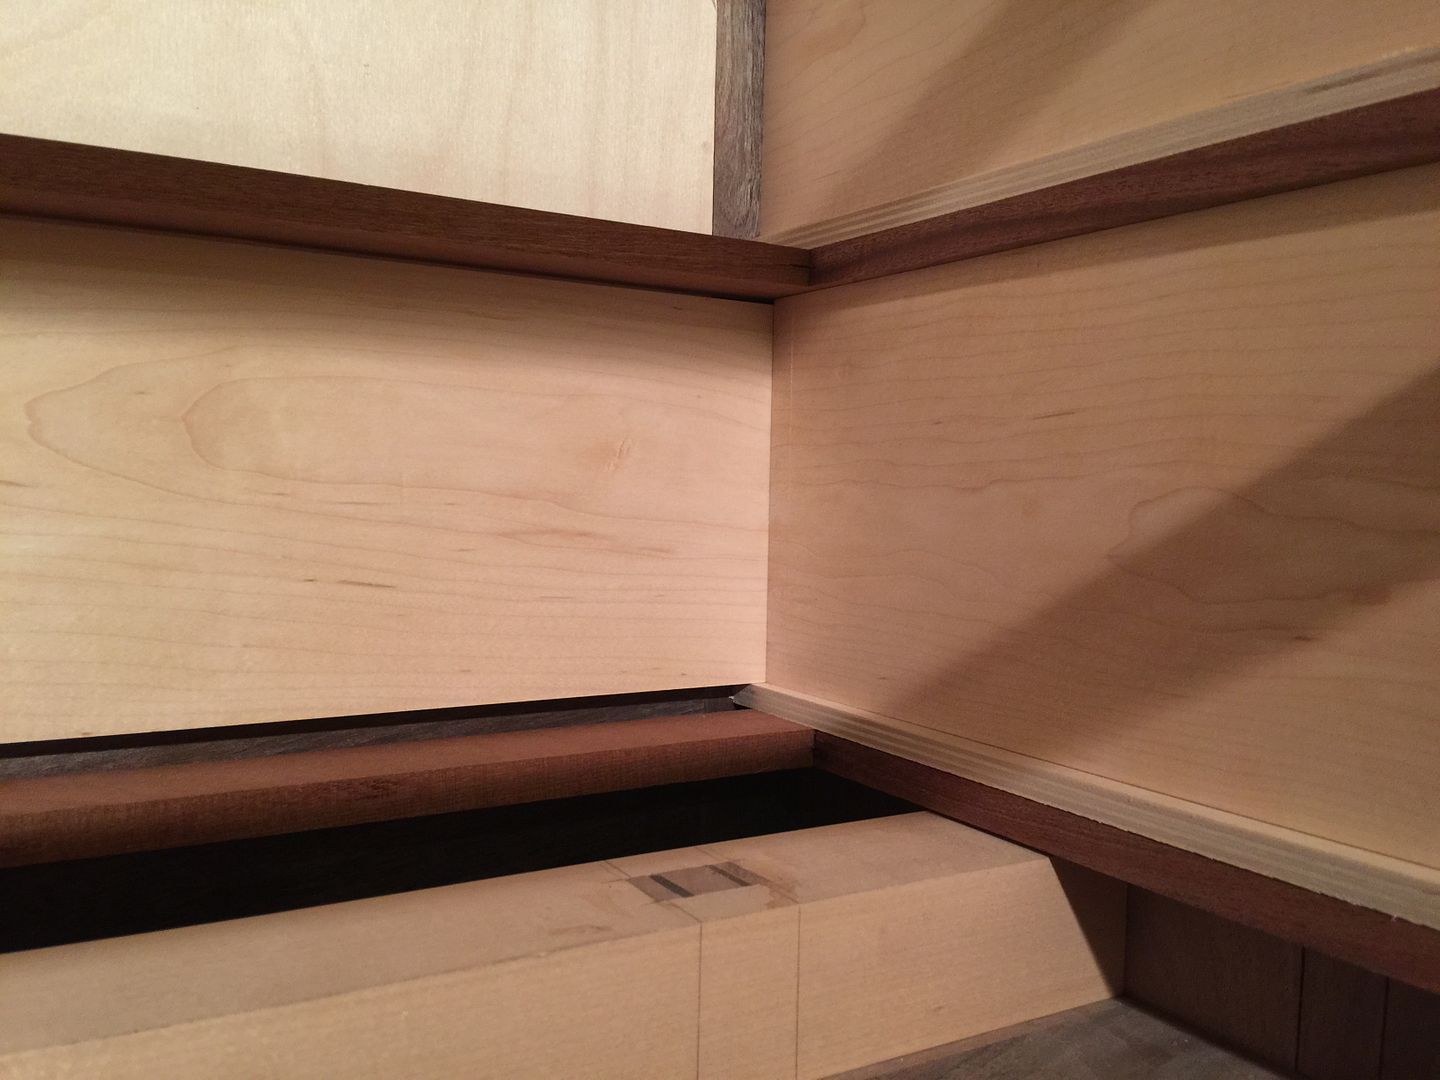
    The bottom of the drawer needs to float free to avoid problems when the wood moves. The wood will move so glue is not an option.

    Another option would be to use a non rabbeted piece in the image on the left. then a piece could be placed on top of the slip to create a small secret compartment.

    jtk
    "A pessimist sees the difficulty in every opportunity; an optimist sees the opportunity in every difficulty."
    - Sir Winston Churchill (1874-1965)

  12. #42
    Join Date
    Apr 2007
    Location
    New Jersey
    Posts
    13,725
    Thanks for the advice on the slips. I'll just make them non-flush.

    I started cutting the stopped dados in the sides to receive the runners. I'm trying this by hand.

    Blue tape to the rescue again! For cutting the dados, I find it easier to use my western dovetail saw to toe in the cut up to the stop. But once the cut is started, my Dozuki is doing a better job of getting easily down to the depth mark. I suppose because it cuts on the pull stroke, it pulls the dust out. To remove the waste, my 1/4" chisel is remarkably efficient; it takes so little effort to get the waste out. To flatten the bottom, I have only a mini-router plane, which doesn't dial in depth very well. I think I may just pin rout out the rest of the waste as with my dovetails.

    For sawing to depth I found a neat trick: Tape the saw blade, wrapping the tape over the teeth and onto both sides of the plate. Then use the marking gauge to scribe the depth on the side of the plate; the tape protects the teeth. Then peel away the tape
    Attached Images Attached Images
    Last edited by Prashun Patel; 01-29-2016 at 2:09 PM.

  13. #43
    Join Date
    Apr 2007
    Location
    New Jersey
    Posts
    13,725

    Dados done

    Finished the dados. Because this cabinet is so shallow, instead of bothering with all the joints in a web frame, I'll just use solid dividers. This will also keep all the grain in the same direction, so I can glue them into the dados.
    Attached Images Attached Images
    Last edited by Prashun Patel; 01-30-2016 at 10:54 AM.

  14. #44
    Join Date
    Aug 2013
    Location
    Princeton, NJ
    Posts
    7,295
    Blog Entries
    7
    Nice work Prashun!

    If if its not too late to do so, I would build through tenons into the center divider. This will work nicely with the grain direction and add a secondary defense against the cabinet pulling away at the sides at some point.

    Given the the height of the cabinet I would think it a nice addition and would help to prevent cupping or bowing from affecting the piece down the road. The plain dados on the remaining dividers will be fine otherwise, IMO.
    Last edited by Brian Holcombe; 01-30-2016 at 2:47 PM.
    Bumbling forward into the unknown.

  15. #45
    Join Date
    Apr 2007
    Location
    New Jersey
    Posts
    13,725
    ia there a different way to accomplish this, Brian? i don't think I like the way through mortises would look.

Posting Permissions

  • You may not post new threads
  • You may not post replies
  • You may not post attachments
  • You may not edit your posts
  •