Page 1 of 3 123 LastLast
Results 1 to 15 of 34

Thread: Finishing Bird's Eye Maple Veneer Top, and more

  1. #1

    Finishing Bird's Eye Maple Veneer Top, and more

    Hey guys.

    I'm doing a Squier Tele to Esquire conversion, and picked up two pieces of over-sized bird's eye veneer for this. Mind you, I'm only doing the face of the guitar; the sides and back will remain black. I should only need one piece. The other is insurance, or for another guitar down the road.

    I've yet to glue it on (still filling the neck cavity with wood filler in thin layers), so here are my questions:

    1) Should I glue a rough cut piece on there and router off the edges? I have a friend who can do this for me. If I attempted this myself, it would go in the comedy section.

    Or should I cut the piece exact? I guess I would use a scissor for this. (The veneer isn't super thin but thin enough for scissor, and it isn't paper-backed.)

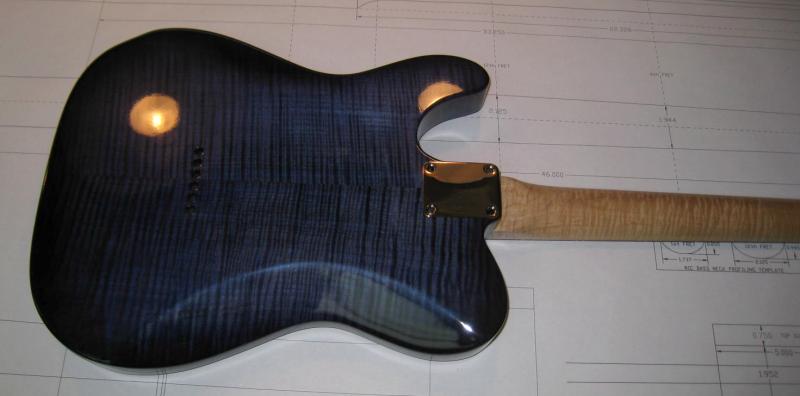
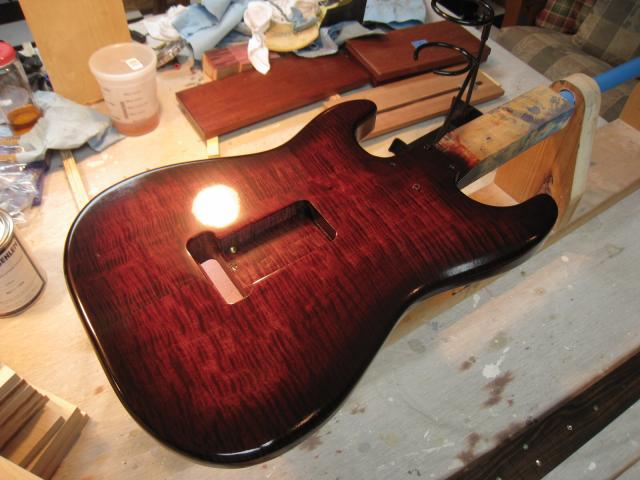
    2) I want to do a 2-tint using Transtint. Is there a gallery here of photos of what people have done, that might also include the tint #s used?

    You see, I understand the value of experimenting on scrap, but I'd like to at least have a STARTING point on which dyes to buy.

    I appreciate your help, because I'm afraid. Very afraid.

  2. #2

    This was blue Transtint dye over black Transtint that was sanded back. (LINK)


    Red Transtint over black Transtint, sanded back, with a very light black border burst. (LINK)

    There are build threads here for these two maple body guitars as well a Strat with a figured sapele body and a bass with a Hawaiian koa body.
    “Travel is fatal to prejudice, bigotry, and narrow-mindedness..." - Mark Twain

  3. #3
    Thanks for the links.

    So do people usually apply their black first, or it doesn't matter?

    I'd like more of a honey color, not too light, with the black.

  4. #4
    Rockier is only showing 17 available TransFast, but there are 34 shown here:

    http://homesteadfinishingproducts.co..._rev2-2014.pdf

  5. #5
    Quote Originally Posted by Ira Rather View Post
    Thanks for the links.

    So do people usually apply their black first, or it doesn't matter?

    I'd like more of a honey color, not too light, with the black.
    The process is to apply black dye on the raw maple. Wait for it to dry. Then sand it back so only the deepest black dye penetration remains. Then apply whatever dye color you want overall.

    I'm not sure a black sandback would be the best choice for honey maple. You might consider a very dark brown. I found this video that may fit what you're looking to do:


    I spray the burst on. I've experimented with ragging it on with limited success. Big D got much better results ragging it on than what I did.
    “Travel is fatal to prejudice, bigotry, and narrow-mindedness..." - Mark Twain

  6. #6
    Julie (and other)...

    Thanks for hanging in there with me. It is VERY appreciated!

    So couldn't I consider, for now, getting just one medium to dark brown TransFast, or TransTint, and mixing differently? And do a crapload of testing?

    It's not that I want to cheap out on this, but as it is, I'm spending quite a bit on this project. (It was a lot of fun ordering a quart of Titebond Cold Press Veneer Glue for 15 bucks with shipping, when I'm going to just need a few ounces.)

    And it's not like I'm going to need this dye for anything after this project.

    But why do you say black/ebony is no good? That it won't absorb properly for this kind of veneer?

  7. #7
    That video is awesome.

  8. #8
    Quote Originally Posted by Ira Rather View Post
    But why do you say black/ebony is no good? That it won't absorb properly for this kind of veneer?
    I think if you go with a black sandback it won't end up looking like honey maple. Dark brown, like what was used in the video, would keep you in the honey maple family.

    I did a lot of experimenting with dyes, but most of that was after I screwed up. And then, the costs in time and money make it worth it to buy a little extra wood and run some tests. The black sandback could look good but I don't think it will look like honey maple.
    “Travel is fatal to prejudice, bigotry, and narrow-mindedness..." - Mark Twain

  9. #9
    When I say honey maple, I just mean a honey color really. Don't know how to describe it, so let me look at the TransFast color samples and post the link here.

  10. #10
    Join Date
    Jun 2003
    Location
    Amador City, CA
    Posts
    22
    Great videos; thanks for posting.

  11. #11
    I ordered TransFast Honey Maple and Extra Dark Mahogany.

    The rinse and repeat confuses me:

    Should I do two coats of the Mahogany, sanding in between, to see if that's the color I want? And then go with the Honey Maple for one coat? And if I'm not satisfied with that color, sand back and do the Honey again?


    i SHOULD be satisfied with that Honey since I'll be doing testing when mixing, but the question still stands.

  12. #12
    There isn't any specific formula for what you are trying to achieve. So much depends on the characteristics of the wood you are using. Then there's how you are mixing the dyes and how wet you are applying it. This is where experimentation becomes invaluable. If you bought a rectangular piece of maple, use the cutoffs to experiment on. I know you've seen a lot of videos but watch some more if you are uncertain. Jeff Jewitt, the owner of Homestead and a wood finishing guru, might have some videos. Another finishing guru is Teri Masaschi. I think she may have some videos. But in the end it will come down to experimenting and trial & error.

    When I first dove into this a couple of years ago I knew so little I didn't want to do anything for fear of making a mistake. Now I know the fretting I did was an overreaction. You can come back from a lot of mistakes just as long as you don't apply a finish to it. I made that mistake, too. I have applied black dye to an entire guitar body, sanded it back, applied the toning color and tested it with mineral spirits only to find I didn't like it. Then I sanded the whole body back as far as I could and started all over. I learned more by making mistakes than from anything else. I wish I could help more...
    “Travel is fatal to prejudice, bigotry, and narrow-mindedness..." - Mark Twain

  13. #13
    Join Date
    Jan 2015
    Location
    Brentwood, TN
    Posts
    684
    I've used this technique, and find the video very helpful. http://www.finewoodworking.com/how-t...st-finish.aspx

    I hope this helps.
    Maker of Fine Kindling, and small metal chips on the floor.
    Embellishments to the Stars - or wannabees.

  14. #14
    Thanks, Mark. But for my first attempt, I would be afraid to try a sunburst!

  15. #15
    Join Date
    Jan 2015
    Location
    Brentwood, TN
    Posts
    684
    Ira: The French Polish technique by itself is priceless to learn and use. It requires virtually no equipment, and you can achieve amazing results. The burst technique is only a part of that video; the main thing is to dye dark, and sand back, then colorize and add finish.
    Maker of Fine Kindling, and small metal chips on the floor.
    Embellishments to the Stars - or wannabees.

Posting Permissions

  • You may not post new threads
  • You may not post replies
  • You may not post attachments
  • You may not edit your posts
  •