Page 1 of 2 12 LastLast
Results 1 to 15 of 20

Thread: Kitchen Area Hutch Build - Lots of pictures

  1. #1
    Join Date
    Feb 2003
    Location
    Lewisville, NC
    Posts
    1,359

    Kitchen Area Hutch Build - Lots of pictures

    I took a lot of pictures when I built this back in the late Fall and meant to post them earlier, but........things get in the way!
    This is a hutch that I made to go with a kitchen table I made several years ago. We recently had our kitchen redone (after 28 years) and I had an extra piece of marble left so I asked the company that made the counter tops to bullnose the edges and make it 50" long.
    The wood used is wormy chestnut( part of a large stash I bought off a former furniture make 10+ years ago). Overall dimensions of the piece are: 50" long, 42.5 " tall and 12.5" deep. I made it more like a "cabinet build" with attached legs than a traditional piece of furniture.
    Please feel free to critique.
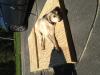
    Pictures are pretty much in sequence.
    I milled a big batch of the wormy chestnut so I could choose the pieces to get a fairly decent color match.The main box is made from 1/2" baltic birch ply and assembled with dominoes. I used 1/2" strips of Wormy Chestnut for face frames. The drawers .and doors are inset. As you see, I made sure to do my typical screw up( I try to have at least one per project. by cutting domino mortices on the wrong side of center horizontal panel. Fortunately with small drawers in that area, it doesn't show.
    20150706_200617.jpg20150708_221217.jpg20150822_201811.jpg20150823_201313.jpg20150823_204035.jpg

  2. #2
    Join Date
    Feb 2003
    Location
    Lewisville, NC
    Posts
    1,359

    More build pics

    I milled the drawer parts to dimension and use Leigh Dovetail jig to cut dovetails. Fitting inset drawers was a slow process. I put a small bead on the outer edges of the drawer and door faces to give some visual relief at the edges. Drawer
    hinges are 1.5" overtravel so we can actually get to the contents of the drawers. My pet peeve!! Installing at this stage is much easier. Also,I used the Blum drawer face adjusters. They make inset drawer faces much, much easier.
    Attached Images Attached Images

  3. #3
    Join Date
    Feb 2003
    Location
    Lewisville, NC
    Posts
    1,359

    More build pics

    With Drawer and door faces faces. Had to look long and hard to find the hinges needed for the doors. Had to swing completely out and away so inner drawers can pull out.
    Marked and cut leg tapers on bandsaw , then smoothed out with block plane and sanding.
    Next, milled and glued up panels for bottom section of hutch.
    Attached Images Attached Images

  4. #4
    Join Date
    Feb 2003
    Location
    Lewisville, NC
    Posts
    1,359

    More build pics

    Lower part of hutch was assembled using dominoes. Lower area was sized to accommodate baskets that we had bought prior to build.
    Last picture is of thin panels for back of hutch. I wanted to make the backside finished so if the piece was ever used in a different setting, the back could be somewhat exposed.
    Attached Images Attached Images

  5. #5
    Join Date
    Feb 2003
    Location
    Lewisville, NC
    Posts
    1,359

    More build pics

    Glued up back panels. Also one of the end panels( they are solid Wormy Chestnut), no frame. The fit into grooves/dadoes in inside edge of legs.
    Picture of one of the back panels mounted. I am putting plug strips inside of the top 2 drawers for handheld devices so in order to make it easier to get to, I am using rare earth magnets to attach the back panels. You can simply pop them off and on.
    Latly, a couple of pics of the marble slab(Rainforest green).
    Attached Images Attached Images

  6. #6
    Join Date
    Feb 2003
    Location
    Lewisville, NC
    Posts
    1,359

    More build pics

    Lower case assembled. Picture of wiring in back and also magnet attachment points.
    Next is details for drawers. The wedges are to angle the insert pieces(wormy maple) for the top drawers(handheld devices). The next picture is of the inserts with slots cut to accept charger cords. The wedges are held in place with hot glue in case we ever want the drawers to serve another purpose. As of now, the top left drawer is all Apple(my wife) and the right hand top drawer is all Android(mine).
    Next picture is an insert made from a 1/2 inch piece of walnut burl. It has flutes cut into it to hold different sizes of batteries.
    Lasst picture is of a middle "foot" to give extra support to the hutch. The baskets loaded with file folder, etc. can get heavy.
    Attached Images Attached Images

  7. #7
    Join Date
    Feb 2003
    Location
    Lewisville, NC
    Posts
    1,359

    More build pics

    For posts for handles/pulls, I cut pieces of wenge to size, then put a rough profile on the blocks at the router table. The sliced off strips that would result in 2 posts. Then drilled holes in them and finished shaping them at oscillating drum sander and with foredom and pneumatic sanding drum. Applied finish, let dry for a day and buffed. Cut pieces of copper rod to length , then assembled on drawers and doors. Left copper raw and will let it age as it wants.
    Attached Images Attached Images

  8. #8
    Join Date
    Feb 2003
    Location
    Lewisville, NC
    Posts
    1,359

    More build pics

    Picture with pulls attached to drawers and doors.
    Close ups of battery drawer and drawers for handheld devices. Frontal picture in shop and back picture.
    Attached Images Attached Images

  9. #9
    Join Date
    Feb 2003
    Location
    Lewisville, NC
    Posts
    1,359

    More build pics

    Moved to it's spot. Finish on entire piece is multiple coats (3) of Watco Danish Oil. Let it dry for a week then buffed it with High grit(1000, 2000, 3000) Mirlon pads, then a buffing wheel on a drill. Buffed drawer and door fronts before installing.
    We have enjoyed using it so far. LOML likes it.....so there's that!!
    Attached Images Attached Images

  10. #10
    Join Date
    Jul 2003
    Location
    Winterville, NC (eastern NC)
    Posts
    2,365
    Beautiful case work. Love that wormy wood also. Looks like that furry white four-legged guy just ignored your work. Oh well. Time for a belly rub.

  11. #11
    Join Date
    Feb 2003
    Location
    Lewisville, NC
    Posts
    1,359
    Thanks Mike...... yeah the white , furry four legged friend is my best bud(Harley). He's headed to the kitchen to see if anyone has dropped or spilled anything edible. He has no interest in anything else!!

  12. #12
    Join Date
    Dec 2004
    Location
    Cincinnati, OH
    Posts
    924
    That is a handsome piece of furniture. Thanks for all the pics.
    Rustic? Well, no. That was not my intention!

  13. #13
    Join Date
    Mar 2006
    Location
    SoCal
    Posts
    22,510
    Blog Entries
    1
    Beautiful, just beautiful.
    "A hen is only an egg's way of making another egg".


    – Samuel Butler

  14. #14
    Join Date
    Jan 2009
    Location
    N.E, Ohio
    Posts
    3,029
    Beautiful piece. Thanks for sharing.
    George

    Making sawdust regularly, occasionally a project is completed.

  15. #15
    Join Date
    Nov 2014
    Location
    West Granby CT
    Posts
    777
    Real nice, thanks for posting. I love the battery organizer.

Posting Permissions

  • You may not post new threads
  • You may not post replies
  • You may not post attachments
  • You may not edit your posts
  •